
Previously, it was possible to run TensorFlow within a Windows environment by using a Docker container. There were many downsides to this method—the most significant of which was lack of GPU support. With GPUs often resulting in more than a 10x performance increase over CPUs, it's no wonder that people were interested in running TensorFlow natively with full GPU support. As of December 2016, this is now possible. And the best part is, it only takes about 5 minutes to setup:
Prerequisites:
GPU+ Machine
TensorFlow relies on a technology called CUDA which is developed by NVIDIA. The GPU+ machine includes a CUDA enabled GPU and is a great fit for TensorFlow and Machine Learning in general. It is possible to run TensorFlow without a GPU (using the CPU) but you'll see the performance benefit of using the GPU below.
CUDA
Download Link
Recommended version: Cuda Toolkit 8.0
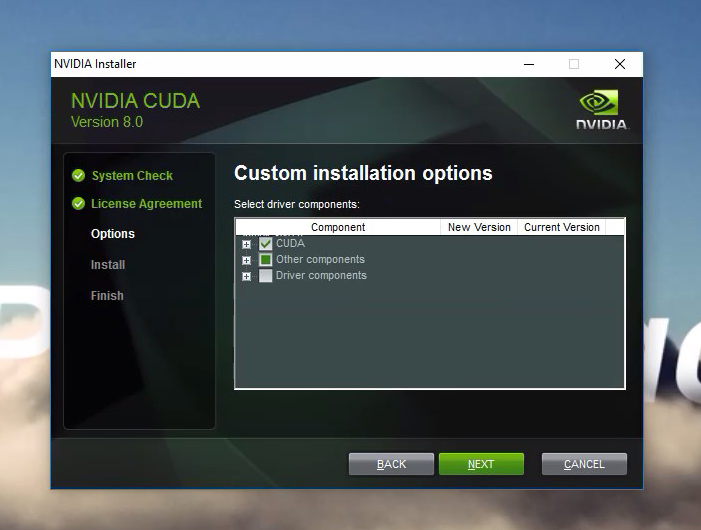
The installation will offer to install the NVIDIA driver. This is already installed so uncheck this box to skip this step.
A restart is required to complete the installation.
cuDNN
Download Link
Recommended version: cuDNN v5.1
On Windows, cuDNN is distributed as a zip archive. Extract it and add the Windows path. I'll extract it to C:\tools\cuda\bin and run:
set PATH=%PATH%;C:\tools\cuda\bin
Python
If you don't yet have Python installed, Python 3.5 from Anaconda is easy to setup. This is a pretty large installation so it will take a few minutes. TensorFlow currently requires Python 2.7, 3.4 or 3.5.
Installing TensorFlow
First, we'll create a virtual environment for our project:
conda create --name tensorflow-gpu python=3.5
Then activate or switch into this virtual environment:
activate tensorflow-gpu
And finally, install TensorFlow with GPU support:
pip install tensorflow-gpu
Test the TensorFlow installation
python
...
>>> import tensorflow as tf
>>> hello = tf.constant('Hello, TensorFlow!')
>>> sess = tf.Session()
>>> print(sess.run(hello))
Hello, TensorFlow!
>>> a = tf.constant(10)
>>> b = tf.constant(32)
>>> print(sess.run(a + b))
42
>>>
The installation is complete and we're ready to run our first model.
Let's run a model!
Run a TensorFlow demo model
Now for the fun part. TensorFlow ships with a few demo models. We'll navigate to the directory where they're located and run a simple model for classifying handwritten digits from the MNIST dataset:
cd C:\Users\Paperspace\Anaconda3\envs\tensorflow-gpu\Lib\site-packages\tensorflow\models\image\mnist
python convolutional.py
If everything is configured correctly, you should see something similar in your window:
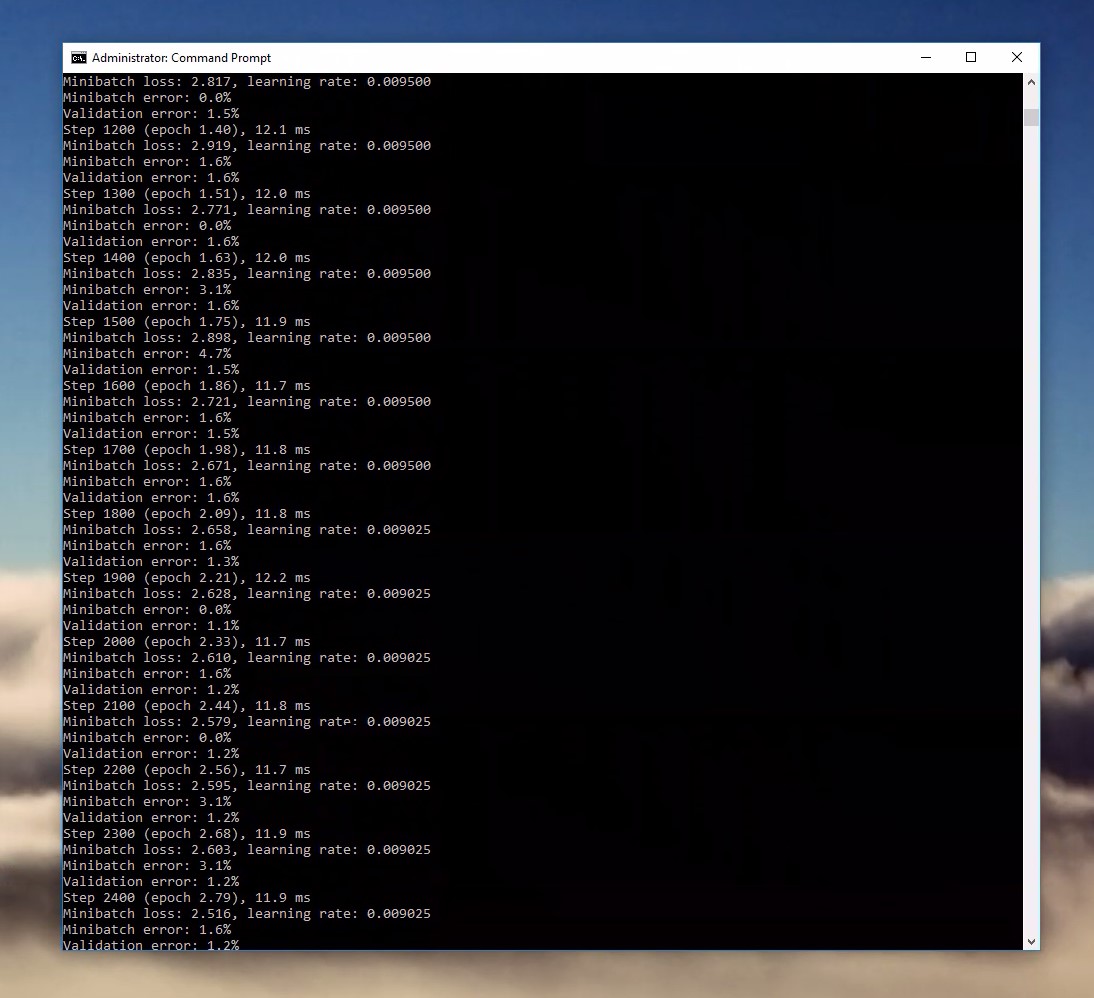
You can see that each line is taking roughly 11-12 ms to run. That's pretty impressive. To see what a huge difference the GPU makes, I'll deactivate it and run the same model.
conda create --name tensorflow python=3.5
activate tensorflow
pip install tensorflow

As you can see, each line is taking roughly 190 ms. Leveraging the GPU results in a 17x performance increase!
It's worth mentioning that we're running this is on a powerful 8 core Intel Xeon processor—the GPU speedup will often exceed these results.
Wrapping up:
Monitoring GPU utilization
Finally, here are two ways I can monitor my GPU usage:
NVIDIA-SMI
NVIDIA-SMI is a tool built-into the NVIDIA driver that will expose the GPU usage directly in Command Prompt. Navigate to its location and run it.
cd C:\Program Files\NVIDIA Corporation\NVSMI
nvidia-smi.exe
GPU-Z
TechPowerUp makes a pretty popular GPU monitoring tool called GPU-Z which is a bit more friendly to use. Download it here.
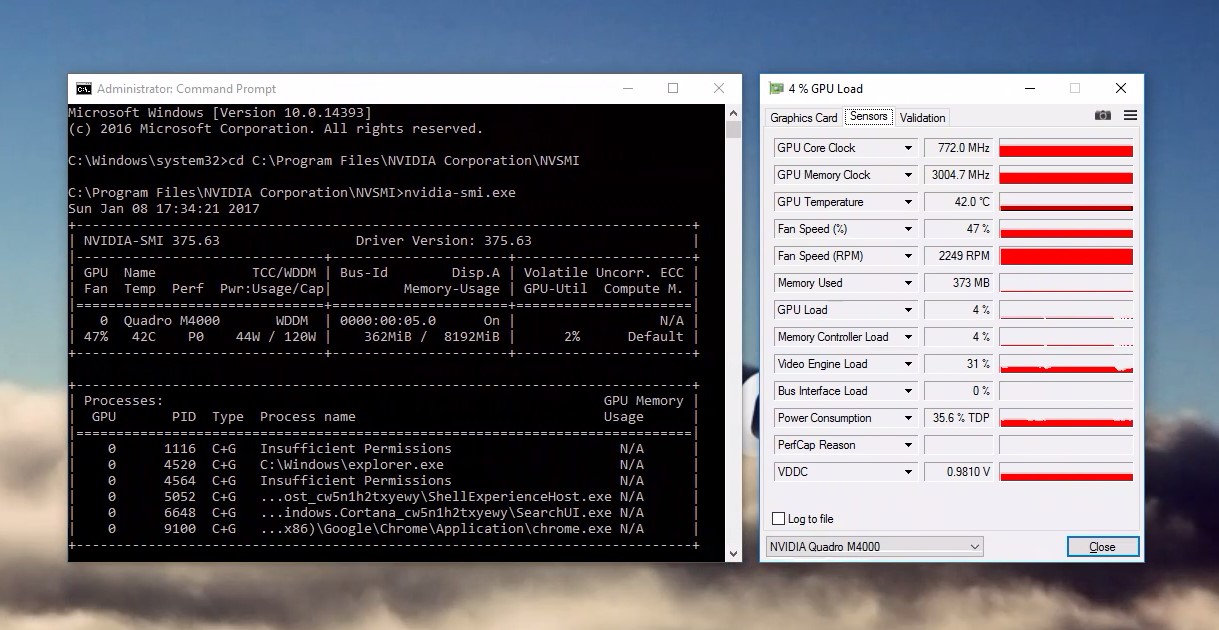
NVIDIA-SMI and GPU-Z running side-by-side
That's it. Let us know what you think!


