[12/2/2021 Update: This article contains information about Gradient Experiments. Experiments are now deprecated, and Gradient Workflows has replaced its functionality. Please see the Workflows docs for more information.]
Gradient Community Notebooks allow users to create, run, and share Jupyter notebooks on free GPUs. In this post Gradient Community Notebooks will be introduced and the steps to get started will be closely discussed, so you can easily create a free Jupyter notebook on a GPU or CPU and share it with the public.
We'll cover:
- Getting started with Gradient
- Gradient Community Notebooks
- Choosing a container
- Choosing a machine
- Notebook options
- Managing notebooks
- Opening your notebook for the first time
- The left-side toolbar
- File explorer
- Sharing files and folders
- Sharing notebooks
- Uploading and downloading files
- Reading and writing files
- Exporting notebooks
Let's get started.
Bring this project to life
Getting Started with Gradient
Gradient is Paperspace's platform for building machine learning (ML) and deep learning (DL) projects. It helps you through the entire pipeline of building and deploying ML/DL models. Notebooks come with a pre-configured environment to eliminate any tooling headaches. In a few clicks you can get up and running with popular libraries like Keras, TensorFlow, PyTorch, and Scikit-Learn.
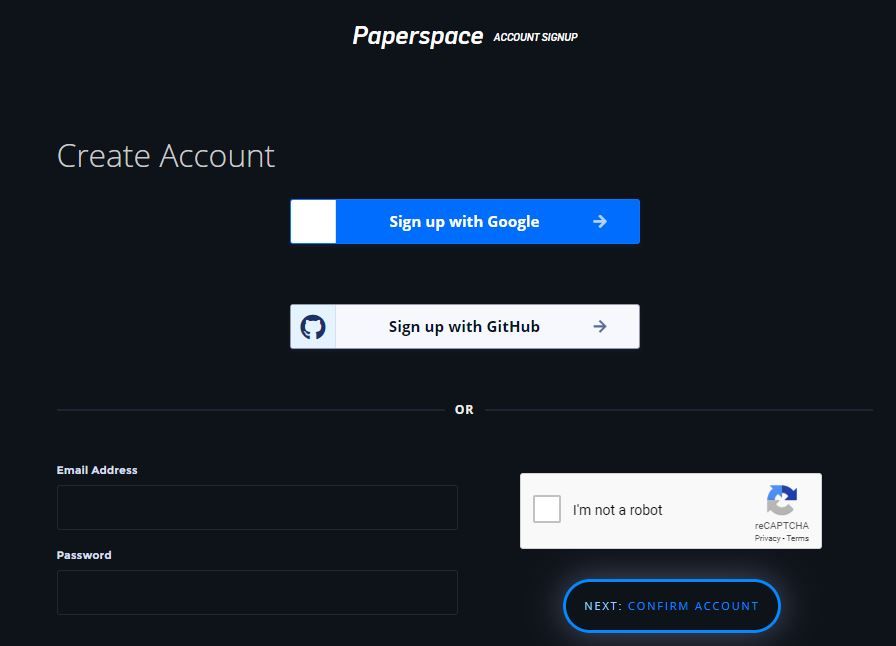
It's so simple to get started with Gradient. All you need to do is create a Paperspace account (you can do so here). You have three different options to sign up with:
- Your Google account
- Your GitHub account
- Regular e-mail registration
After logging in you'll come to the Console page. There are two main products to get started with: Gradient and Core. In this post we're focusing on Gradient. This product offers tools for building ML/DL projects, from exploration to model deployment.
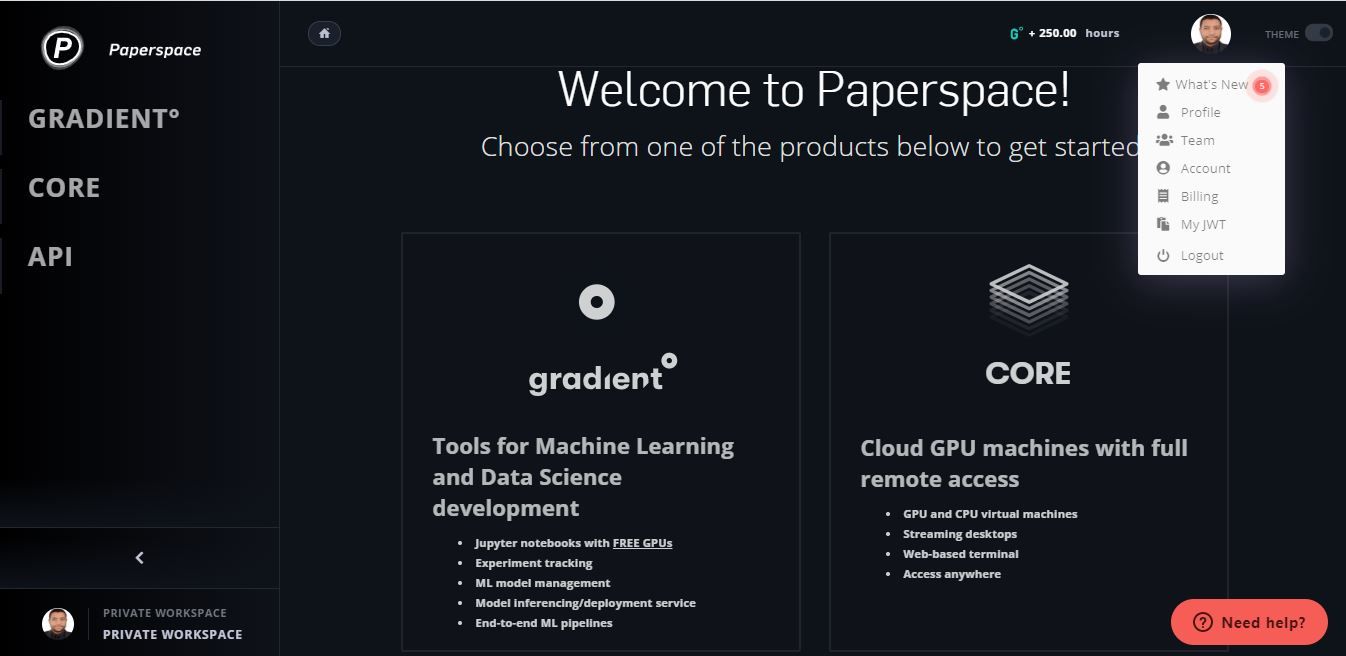
Before getting started with Gradient and its free services, let's check out your profile. At the top-right of the console page you can find your profile logo (which is initially set to a default icon). Just hover over the icon and click the Profile option. There you can see basic information about your account. The next figure shows my profile page.
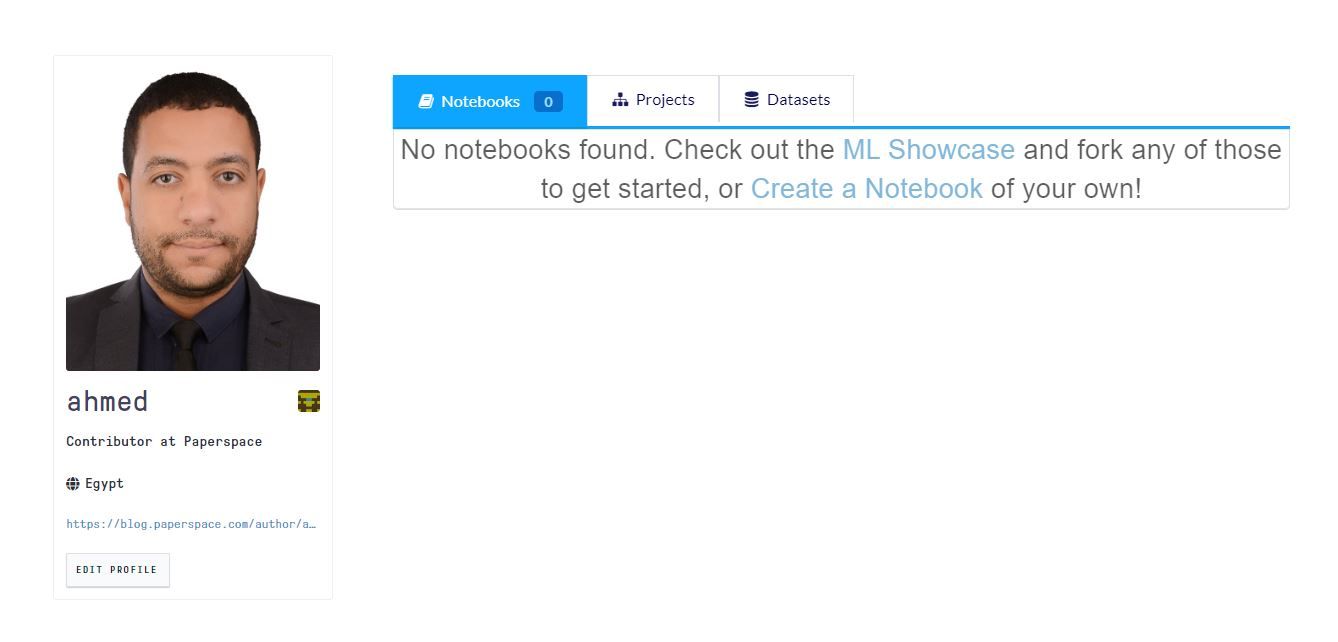
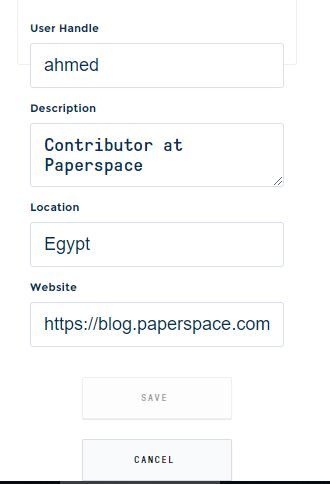
At the bottom-left of the page there is an EDIT PROFILE button, which you can click to enter your details. You can also click the profile photo to change it. Your User Handle will be used in your account page URL. I used ahmed, and thus my Paperspace profile URL is https://www.paperspace.com/ahmed. Finally, click the SAVE button to save your details.
Now let's go back to the console page. There's a link at the top-right corner of the page to forward you to the console. You can always find the console page at https://www.paperspace.com/console.
This post will closely discuss using Gradient Community Notebooks, which are introduced in the next section.
Gradient Community Notebooks
In October 2019 Paperspace introduced the beta version of Gradient Community Notebooks. These allow you to create Jupyter notebooks that run on free CPU and GPU instances. After you created an account (according to the instructions in the previous section), you can log in and start creating notebooks for free.
From the Paperspace console page click on Gradient on the navigation bar to the left. You will then be directed to the Gradient console. The recommended first steps are to:
- Run: Create and run a
Jupyter Notebook. - Train: Create a
Gradient Projectto train your model. - Deploy: Push a model to production using
Gradient Deployments.
According to the documentation, a Gradient Project is defined as follows:
A Gradient Project is a workspace for you or your team to run Experiments and Jobs, store Artifacts such as Models, and manage Deployments (deployed models).
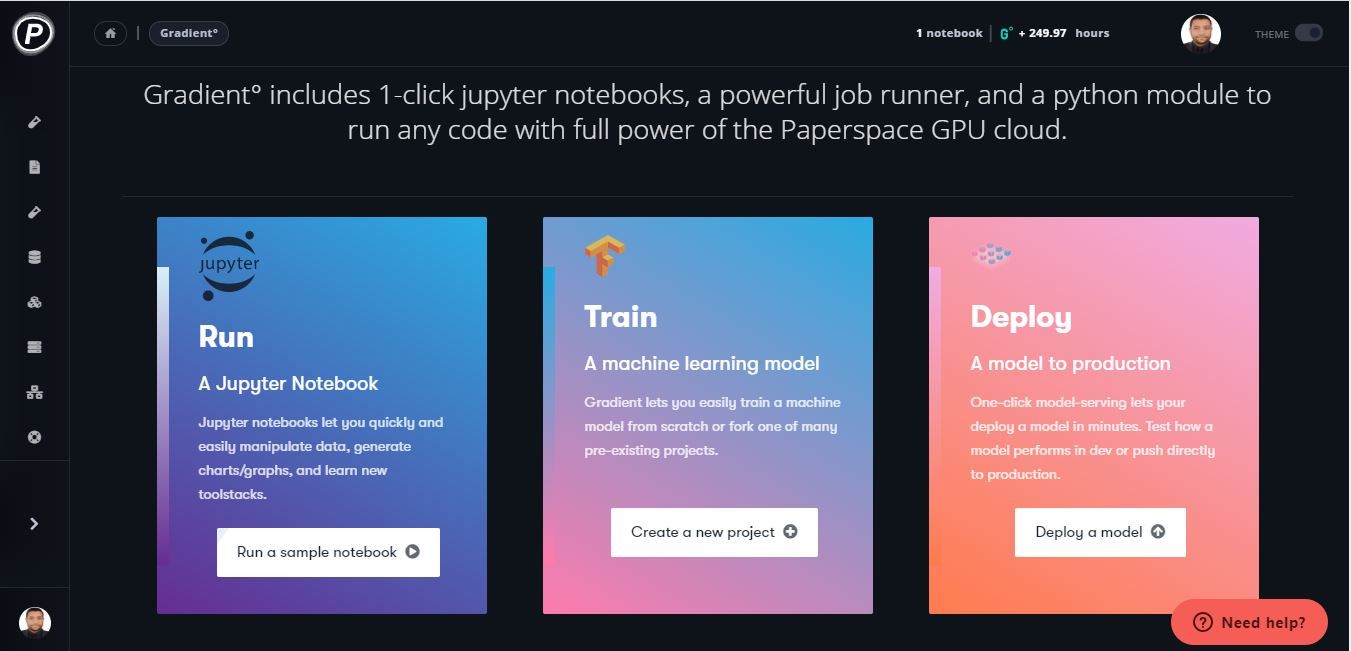
Because we are interested in creating a Jupyter notebook, we'll click on the Run A Jupyter Notebook option which will redirect you to this page. You could also just click on Notebooks when you hover over Gradient on the toolbar on the left.
On the notebook page we find three steps for creating a Jupyter Notebook:
- Choose Container
- Choose Machine
- Notebook Options
We are going to discuss each of these 3 steps in the next 3 sections.
Choose Container
Paperspace Gradient runs Jupyter notebooks inside a "container", which is an environment prepared with all of the required dependencies for running the notebook. There are a total of 18 pre-configured containers available, and you can also use a custom one. Visit this page for more information about the supported containers.
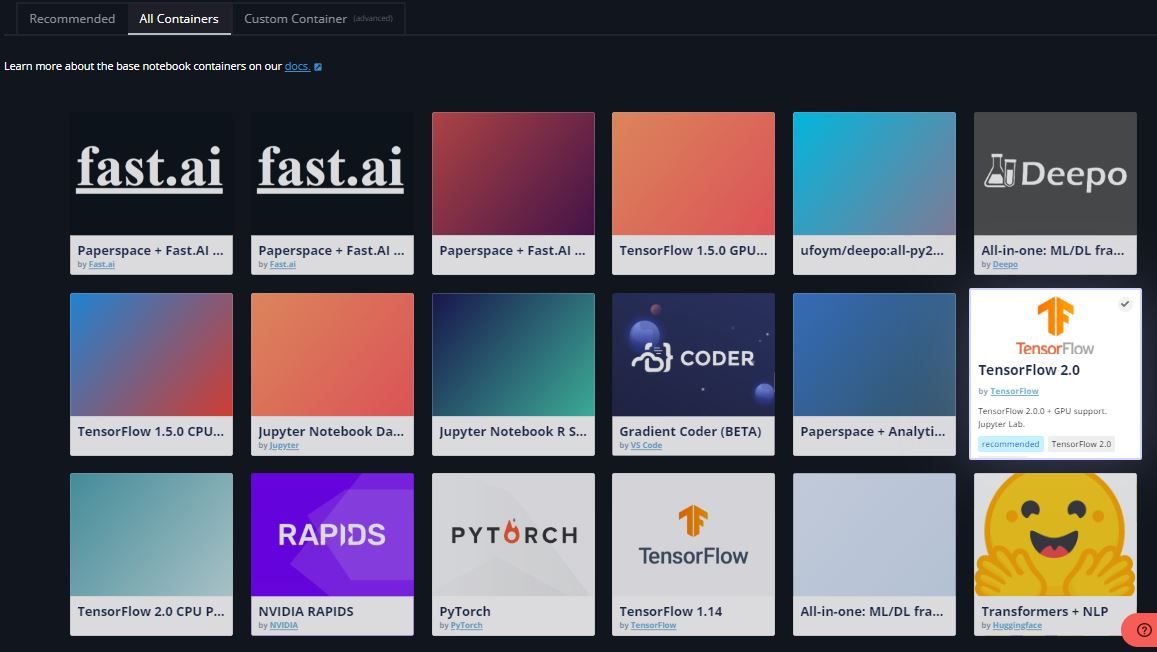
Out of these 18 containers there are 7 recommended due to their popularity. These are:
If you're interesting in using or building a custom container, check out this guide for more information.
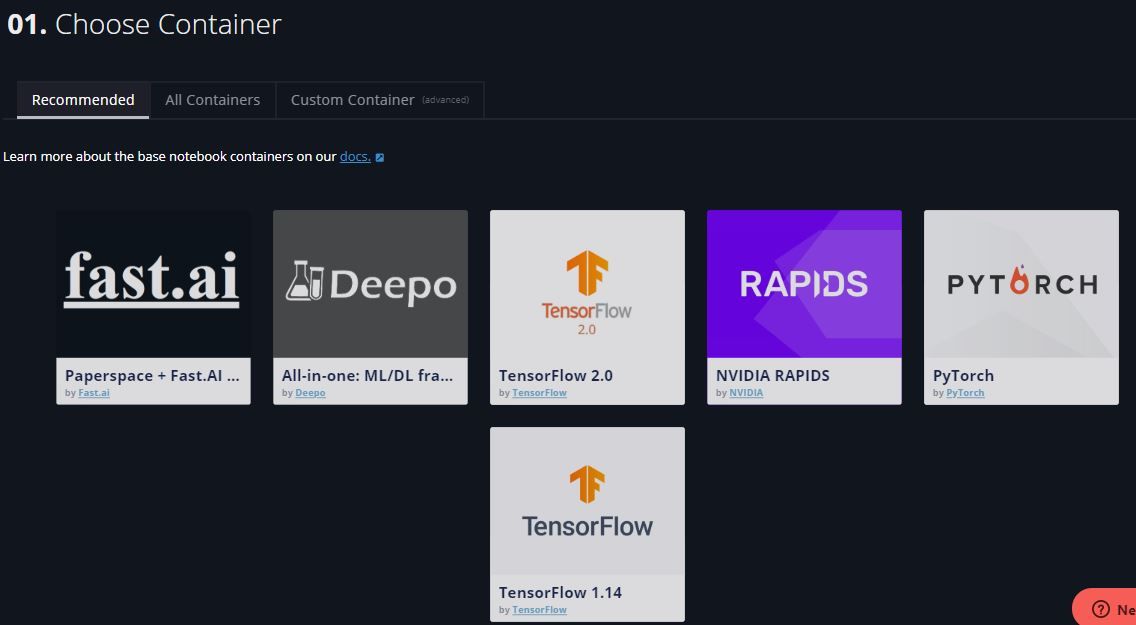
The "All-in-one" is a good container to start with since it has all of the dependencies pre-installed for all major machine learning/deep learning frameworks. After you select the container, we'll need to choose a machine.
Choose Machine
The next figure shows the list from which you can choose a machine for running your notebook. There are a total of 16 instances to choose from that vary in power and cost. For more information about the available instances, check out this page.
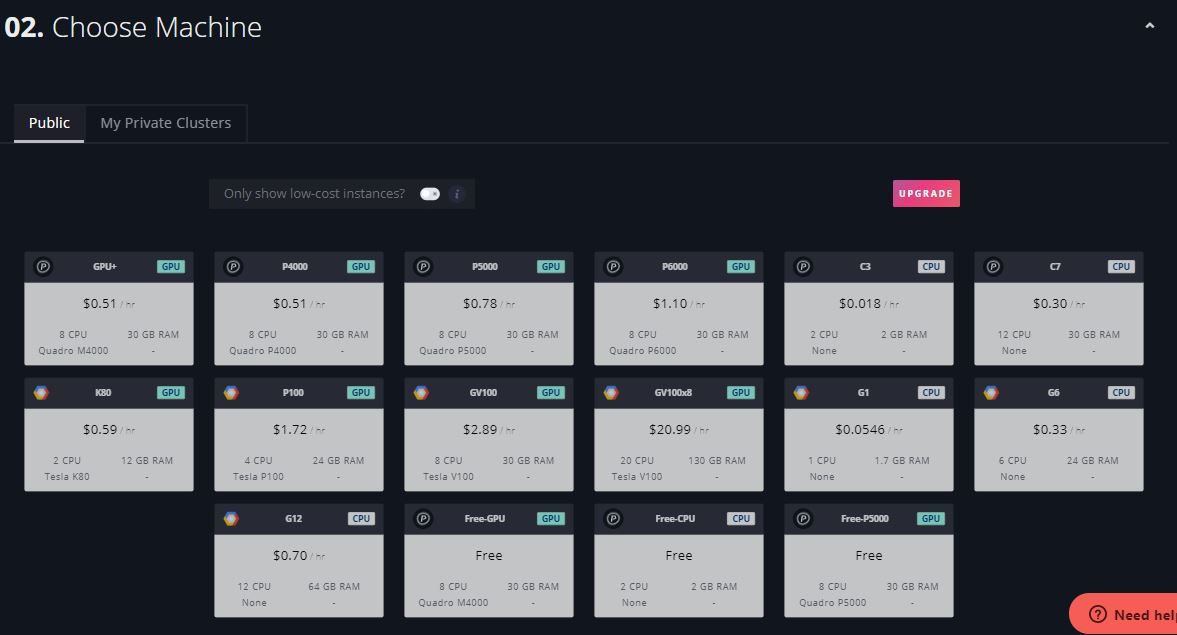
Out of these 16 machines, there are 3 FREE instances available. These are:
- Free-CPU, offering 2 vCPU with 2 GB of RAM
- Free-GPU+, offering an NVIDIA M4000 GPU with 8 vCPUs and 30 GB of RAM
- Free-P5000, offering an NVIDIA P5000 GPU with 8 vCPUs and 30 GB of RAM
The free instances also include 5 GB of persistent storage. Free instances share three limitations:
- Notebooks will automatically shut down after 6 hours per session
- Only 1 notebook can run at a time
- The notebook will be set to public
Despite the fact that the notebook will shut down after 6 hours, there is no limit to the number of sessions you can start. You can simply start a new session after the 6 hours expire. To prevent losing progress made from processes that are running when the 6 hour limit is reached, you can split processes (if possible) across different sessions. You might also save your progress to the persistent storage before the 6 hours session ends, and then load it again in the next session to continue where you left off.
If your process must be executed for more than 6 hours without interruption, then you should probably upgrade your subscription.
For now, select whichever free instance appeals to you (for more information about the free instances, check this page). Now we'll look at the third and last step to creating a Gradient Community Notebook: setting the notebook options.
Notebook Options
The last step to creating a notebook is to specify some options about it according to the next figure. The two options are:
- Auto-shutdown limit
- Whether the notebook is public or private
These two options are not editable for the free instances, as you can see in the next figure. A notebook running on a free instance will always be set to public, and will shut down automatically after 6 hours. For a paid instance, you can freely change both.
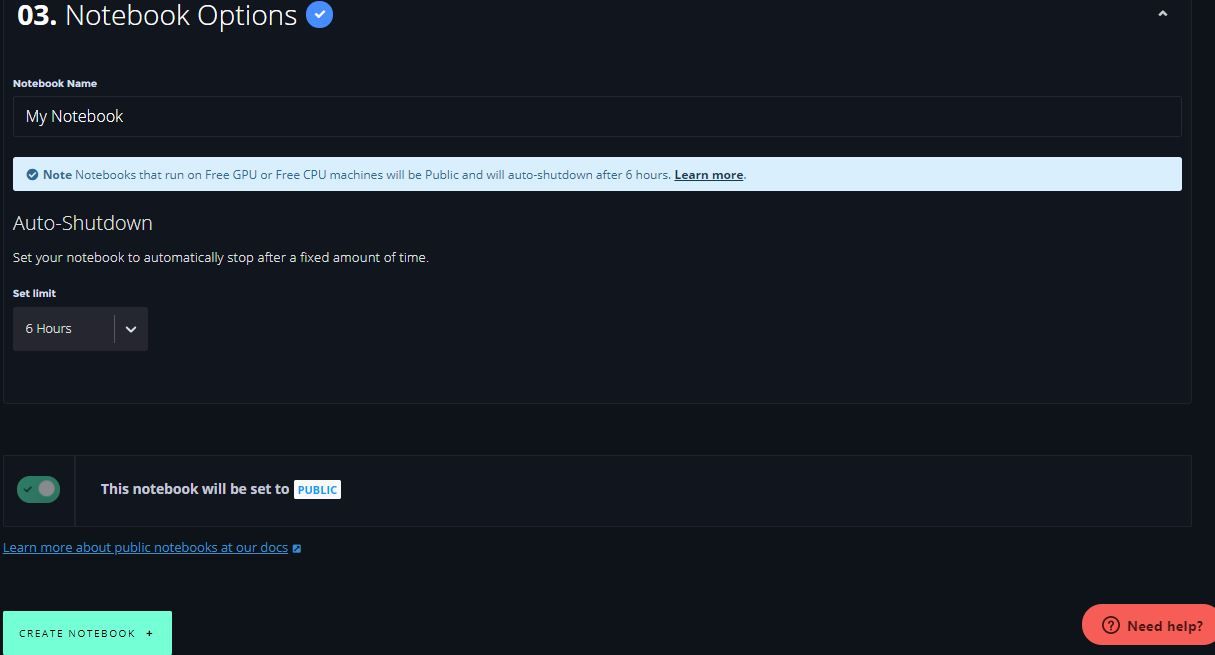
Now just click on the CREATE NOTEBOOK button at the bottom-left corner of the page to create your notebook. The next section discusses how you can use it.
Managing Notebooks
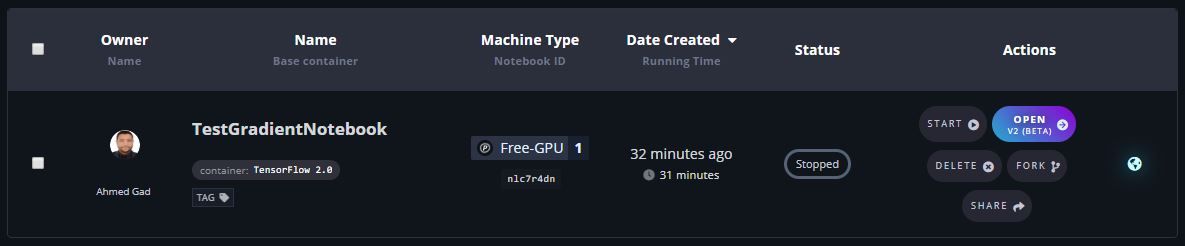
After clicking the CREATE NOTEBOOK button, you will be directed to the notebook page where you can manage your notebooks. The notebook will be in a Pending state for a few seconds while it gets set up. This will then change to the Running stage shown below, which indicates that you can access your notebook. From this page you can also see the following details about your notebook:
- Notebook owner name.
- Notebook name. A default name is assigned to the notebook, which is
My Notebook, but you can click on it and change it to another name. - Container name. In this case, the selected container is the
TensorFlow 2.0one. - The machine type selected in the
Choose Machinestep. In this case, I selected the Free-GPU+ machine that offers an NVIDIA M4000 GPU. - Notebook ID which is available directly behind the machine type. In this case, the ID is nlc7r4dn.
- Creation date of the notebook and the running time.
- Status. At the moment this should be
Running. Other potential statues areShutting downorStopped. - A number of actions:
OPEN,SHARE,STOP, etc.
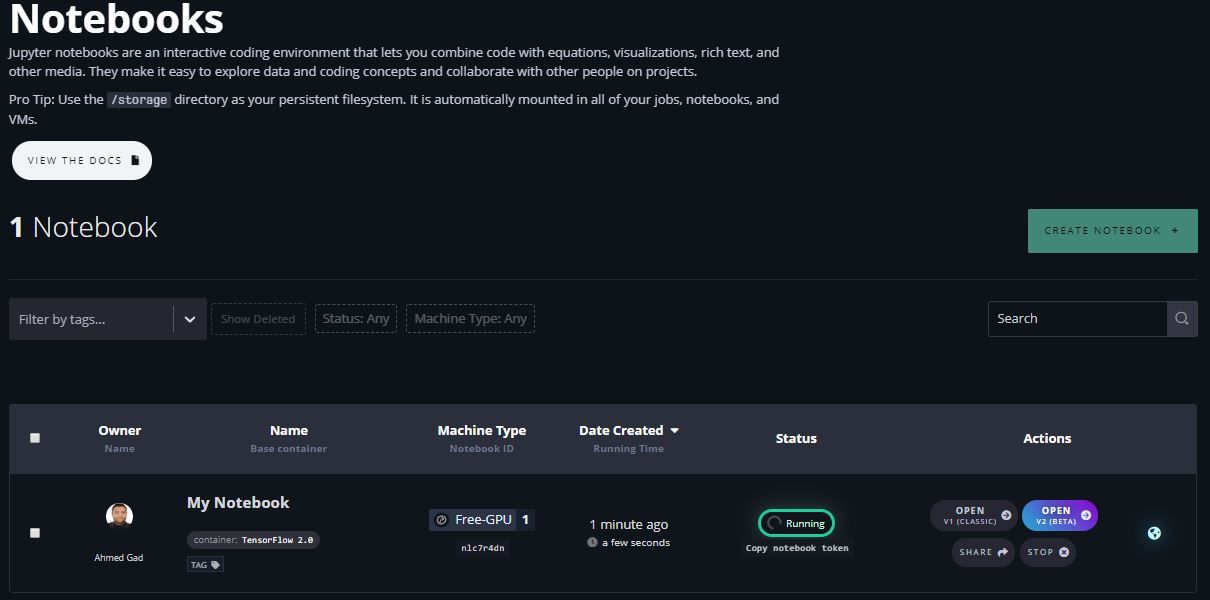
When the Status of the notebook is Running, you can find the link copy notebook token right below it. Clicking it copies a token associated with the notebook. Here is an example of a token: 2ac47522e520429189b9ba572cbd5e1582b4b3942e138c02. This token is used to get a shareable link of the files and folders of the associated storage to the notebook. So, it is important to not make it publicly available.
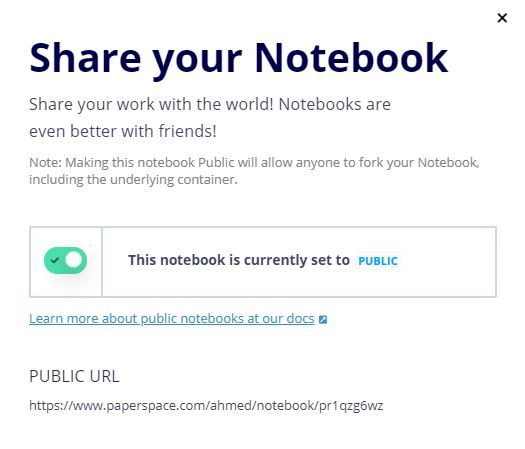
Within the actions, you can click the SHARE button to share your notebook. This will bring up a window, shown below. At the bottom of the window you can click the link to copy the public URL of the notebook, which in this case is https://www.paperspace.com/ahmed/notebook/pr1qzg6wz. Being public, anyone with the link can view the notebook without even creating a Paperspace account. Just visit its link and enjoy it! For more information about viewing a notebook, visit this page.
From the Actions, you can also click the STOP button to stop the notebook. The notebook state will be changed from Running to Stopped according to the next figure. After being stopped, some additional actions will appear: START, FORK, and DELETE. Thus, you cannot fork or delete a notebook while its state is Running.
You can click the START button to run the notebook. After clicking this button a new window will appear, where you can select or change the following:
- Notebook Name
- Instance Type
- Auto-Shutdown Limit (which you cannot change while selecting a free instance)
At the bottom of the window, just click the START NOTEBOOK button to start the notebook. After the notebook's state changes to Running, you can open it either in the classic or the beta versions. Now that your Jupyter notebook is up and running, the next sections explore what you can do from this environment, as well as some additional features.
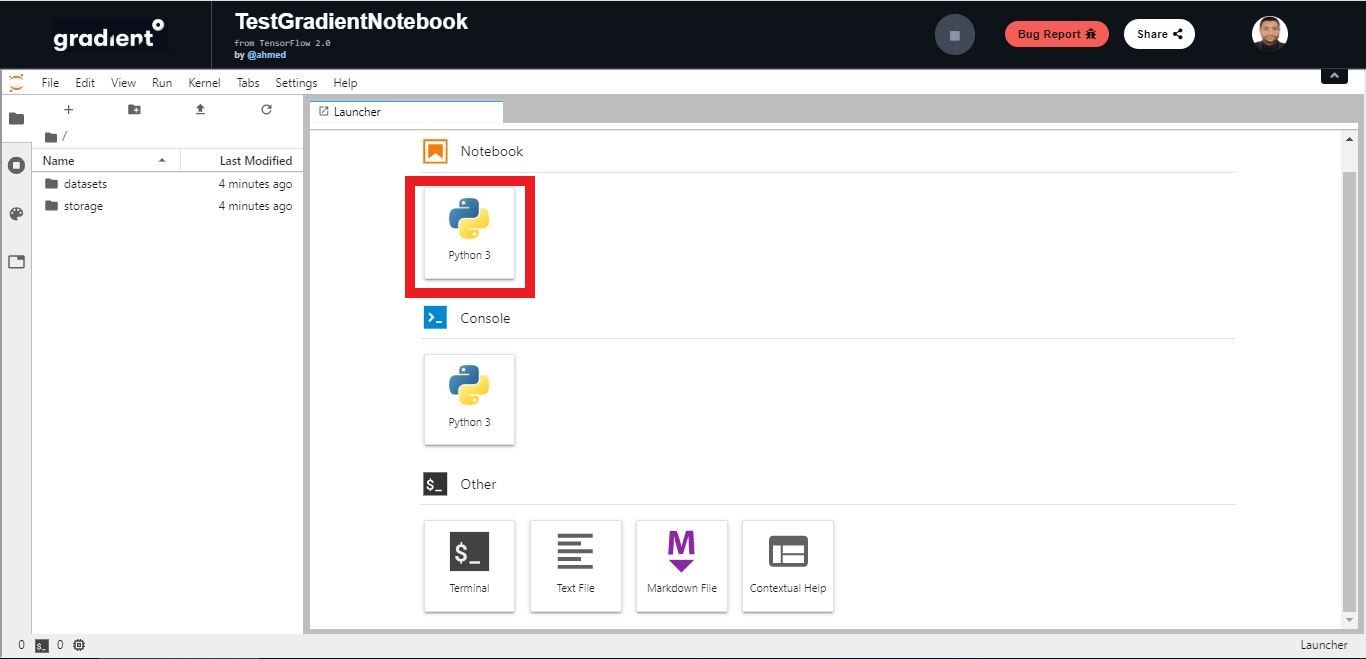
Opening the Notebook for the First Time
The next figure shows the result after opening the notebook in the beta version for the first time. Because this is the first time you've opened your notebook, a launcher will be open asking you whether you want to open a notebook, console, terminal, and so on. In this case, we are interested in creating a Python notebook and thus the first option is selected. Note that only Python 3 is supported.
The next figure shows the result after the notebook is created. It is given the name Untitled.ipynb by default.

In the next section we'll discuss the toolbar which you can see on the left side of the image above.
The Toolbar
On the very left side of the main window pictured above, you can find 5 icons which signify the following (from top to bottom):
- File Explorer: View the storage files and folders.
- Running Terminals & Kernels: View and shutdown the Python notebooks and terminals.
- Commands: A list of commands for creating and managing notebooks. For example, exporting the notebook as a PDF or markdown, shutting down the notebook, changing font size, clearing outputs, and more.
- Notebook Tools: This icon appears when a notebook is opened.
- Open Tabs: View a list of currently open notebooks.
You can easily hover over an icon to see its name.
By clicking on any of these icons, its associated window will change state from hidden to unhidden, and vice versa. The next section discusses the File Explorer.
File Explorer
The File Browser can be used to navigate through the storage associated with the notebook. In addition to your Jupyter notebook (.ipynb) file, there are two others folders. The first is called datasets, and it contains a number of pre-loaded ML/DL datasets which you can see below. This saves you from the time and effort of having to download these yourself, and this storage is included in your free environment. You can navigate through each of the subfolders easily to see their contents.
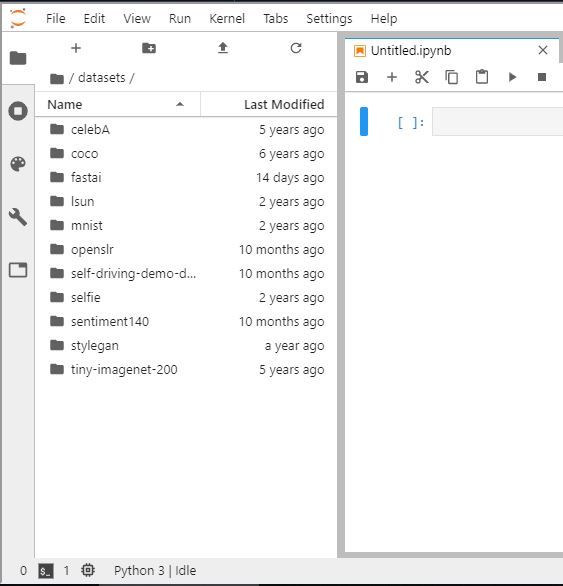
The second folder is your persistent storage. Saving anything here which you want to persist (remain) after shutting down your notebook.
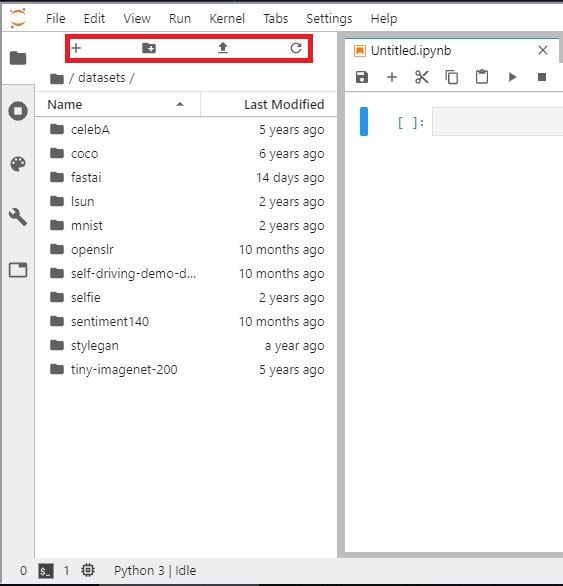
At the top of the File Explorer there are four icons, highlighted below. These are (from left to right):
- New Launcher: Opens the launcher that we saw previously when we first opened the notebook. Can be used to create new documents.
- New Folder: Create a new folder in the current directory.
- Upload Files: Upload files to the current directory.
- Refresh File List: Refresh the file list to see the latest changes.
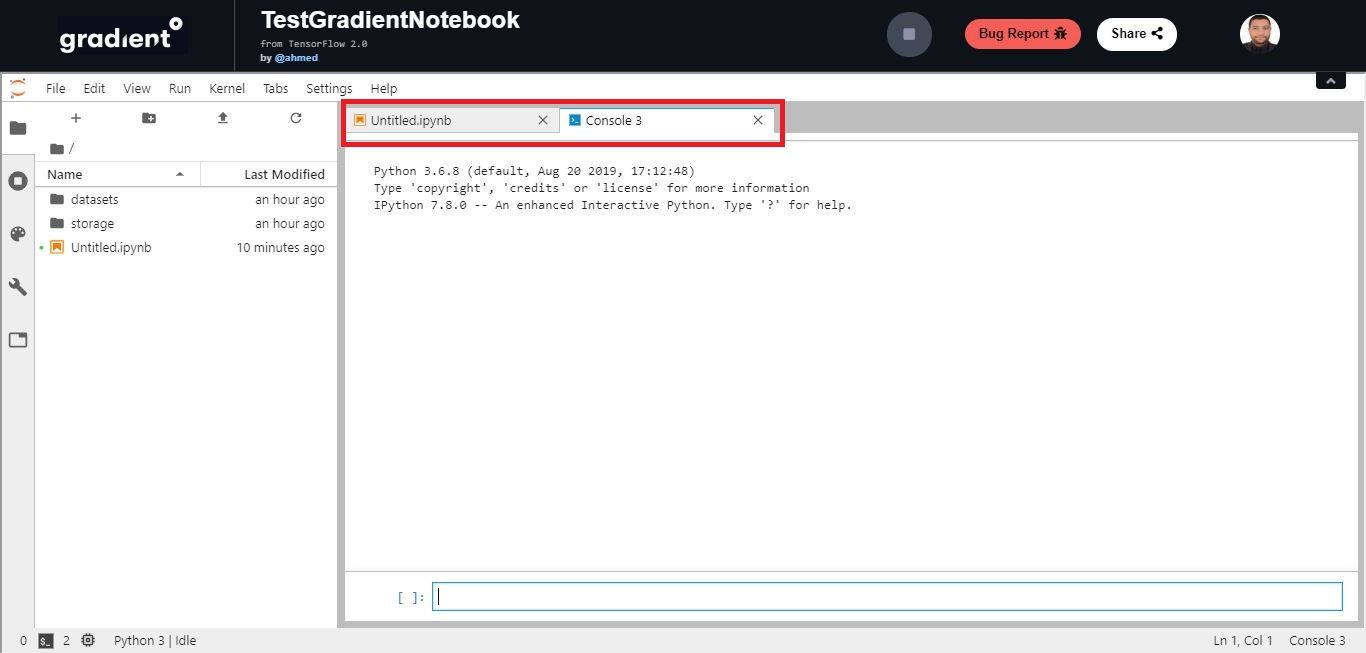
Now let's open the launcher again, and open a console. The next figure shows that we now have two active tabs: the first one for our notebook, and the second one for the console.
You can also right-click a file to open a list of additional options. The next figure shows the result after right-clicking the notebook file. You can find options including open, delete, copy, cut, download, and rename. You can also right-click a folder for more options like these.
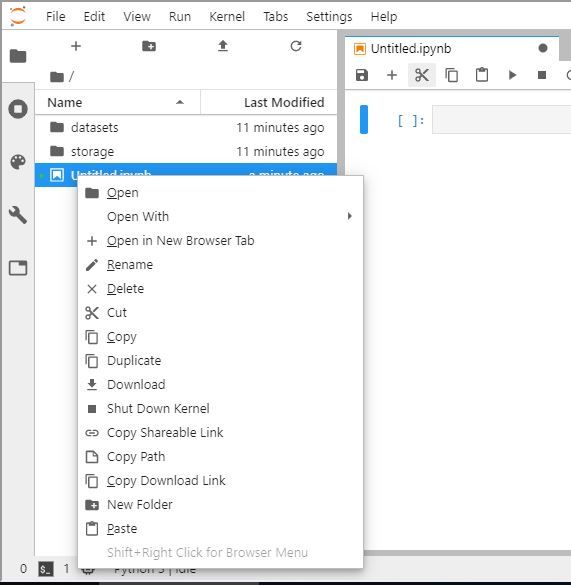
Notice that in this list there is the option to Copy Shareable Link. We'll discuss that now.
Sharing Files and Folders
It's possible to get a shareable link for a file by clicking the Copy Shareable Link option. Note that the file name appears in the link, and thus the link changes according to the current name.
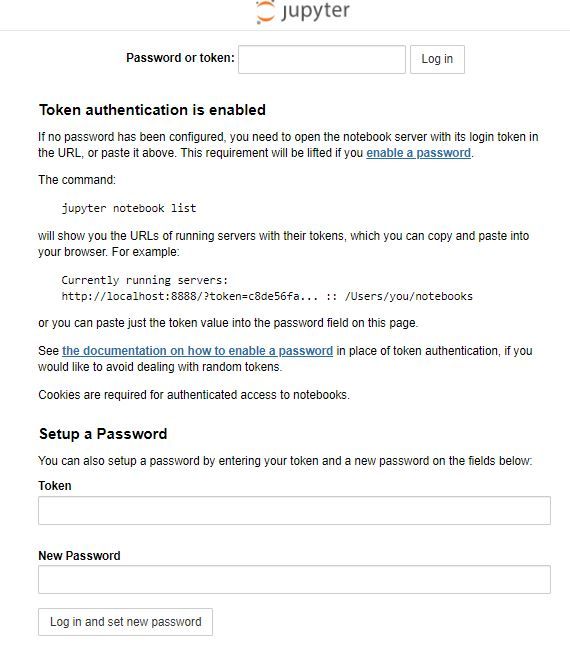
The next figure shows the result if someone with the link opens it. if you already have the token, just paste it and click the Log in button. After that, you can view the file or the folder associated with that link. This is super cool as it makes sending files to others very easy!
The next section discusses sharing notebooks with their public URL.
Sharing Notebooks
Sharing the public URL of a notebook with others will allow them to see the last stopped version of the notebook as an HTML page. The next figure shows the result after this notebook URL is visited publicly.
According to Paperspace documentation, here is how things work for viewing a notebook that is currently running.
When you visit a Community Notebook, you'll always see the last Stopped version of that notebook. So if the notebook owner is currently running it, you'll see a message that says:
Note: You are viewing the static version of this notebook. Run the notebook to see the interactive live version.The next section discusses uploading files to the notebook /storage directory.
Uploading and Downloading Files
Clicking the Upload Files icon in the File Explorer window allows the user to select files from their local storage and upload them to the notebook storage. The next figure shows that an image is uploaded to the current directory and opened in a new tab.
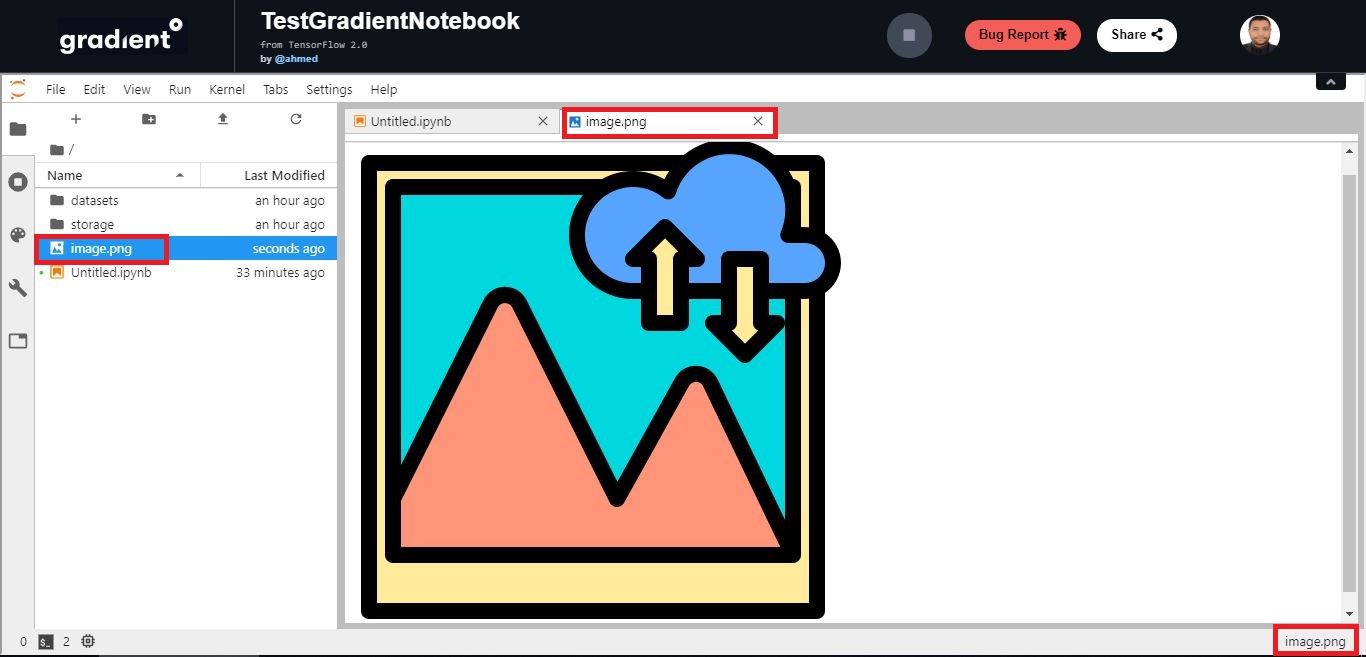
Note that the file is uploaded to the root directory of the notebook storage. According to Paperspace documentation, here is a note about the /storage directory:
Anything you store in the /storage directory will be accessible across multiple runs of Experiments, Jobs, and Notebooks in a given storage region.Thus, we can move the files to this directory to also take advantage of the ability to share it across different notebooks. You can simply move a file to the /storage directory by either cutting the file and pasting it there, or by simply dragging and dropping the file within the /storage directory.
You can also download files easily. Just right-click the file and click the Download option as explained in the next figure.

In the next section we will discuss reading and writing files.
Reading and Writing Files
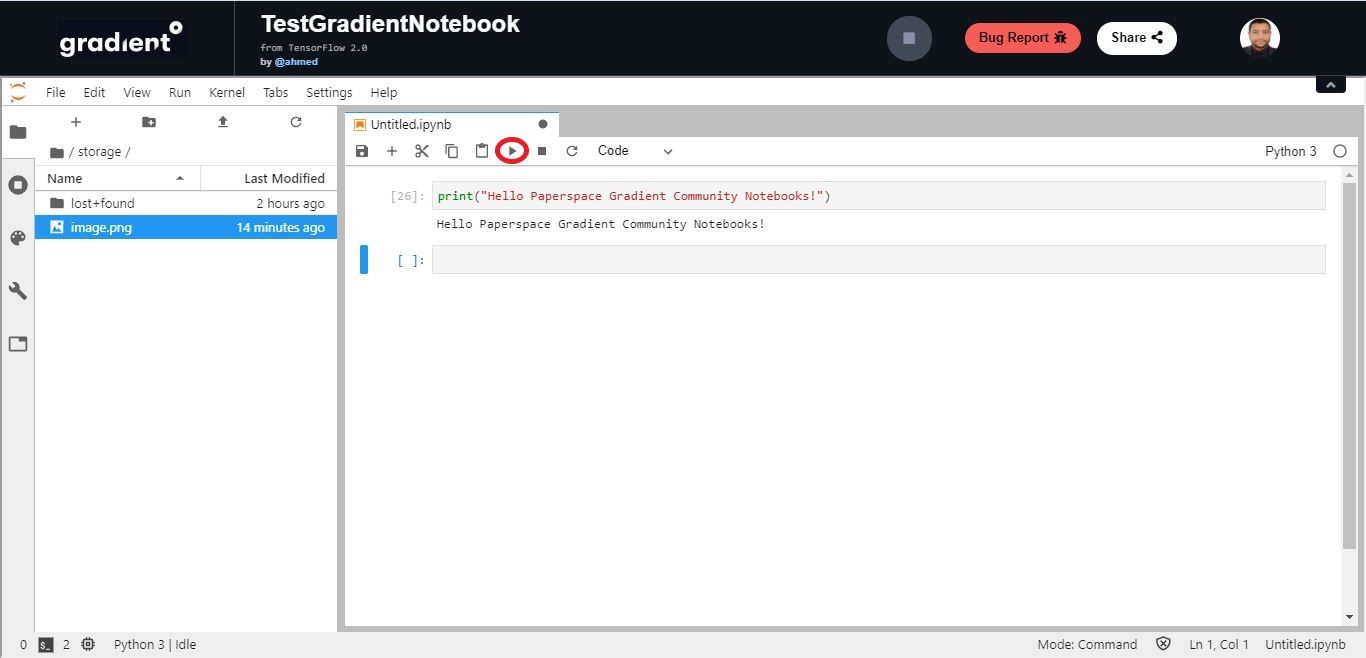
In this section, we are going to write code into a notebook cell and see how to run it. Simply open the notebook file and write Python code. In the next figure, a print statement is entered into a cell. To run it, just click the Run button icon marked with a red circle, or press shift + enter on your keyboard.
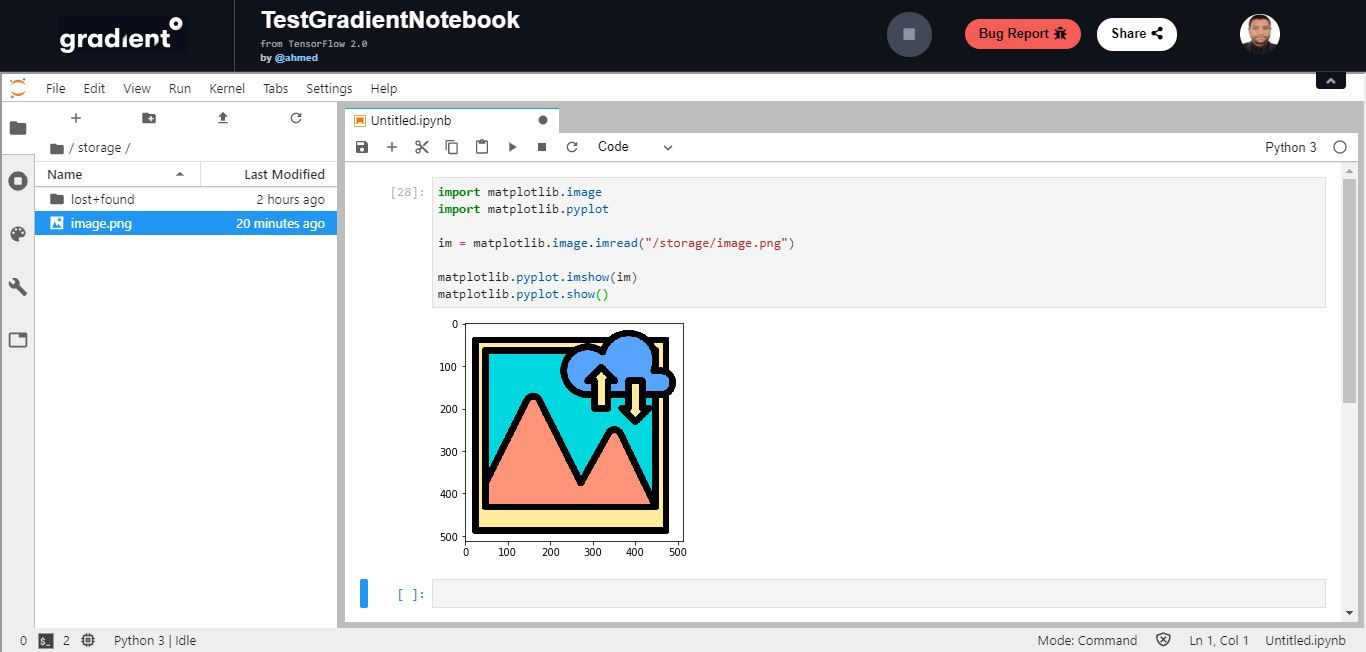
To access a file from within your code, firstly you need to get its path. To do so, just right-click the file and click on the Copy Path option. For the previously uploaded image file named image.png, after being moved into the /storage directory, its path is /storage/image.png. Using this path, we can read and display the image according to the next block of code.
import matplotlib.image
import matplotlib.pyplot

im = matplotlib.image.imread("/storage/image.png")

matplotlib.pyplot.imshow(im)
matplotlib.pyplot.show()
The next figure shows the result of executing the previous code.
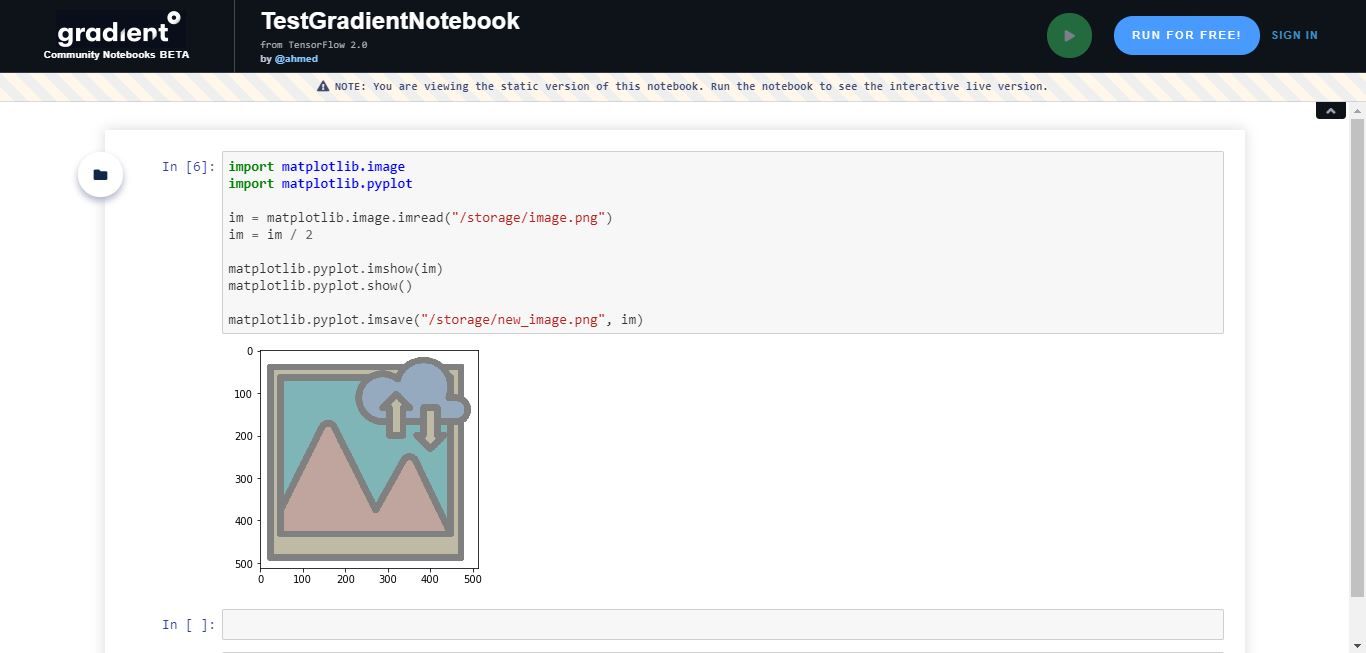
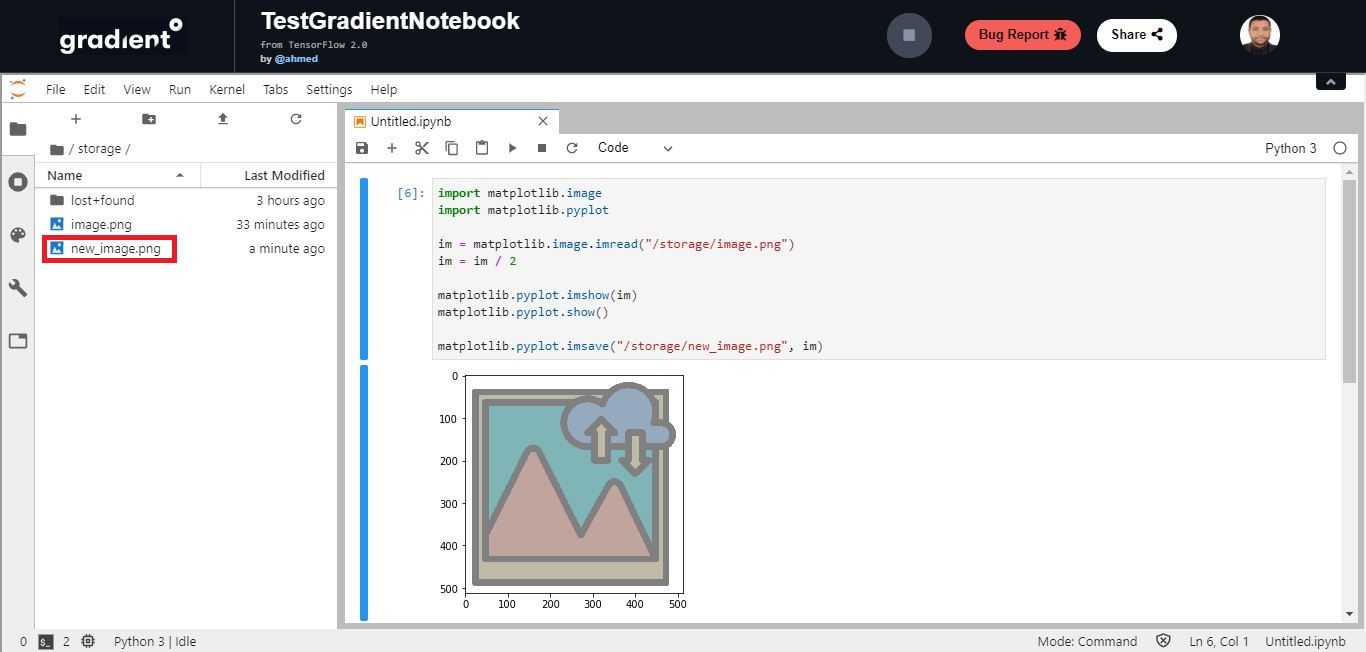
Similarly to reading files, you can also write files by specifying a path. The next code block divides the image we just read by 2, and writes it to the /storage directory as image.png.
import matplotlib.image
import matplotlib.pyplot

im = matplotlib.image.imread("/storage/image.png")
im = im / 2

matplotlib.pyplot.imshow(im)
matplotlib.pyplot.show()

matplotlib.pyplot.imsave("/storage/new_image.png", im)
The next figure shows that the image is successfully saved to the /storage directory.
The next section discusses exporting the notebook as a document.
Exporting Notebooks
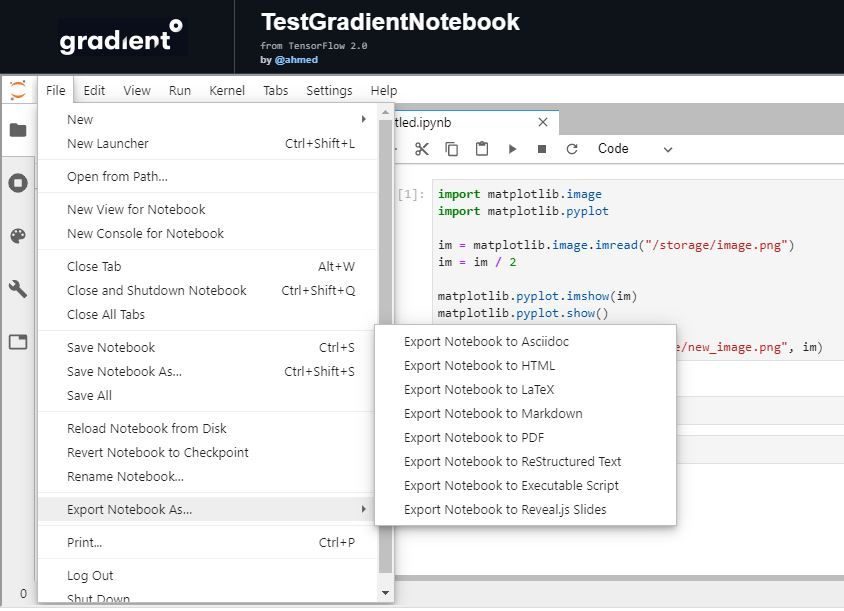
After you finish working, you might be interested in saving a static version of the notebook. You can do that easily with Gradient notebooks. According to the next figure, go to the File menu and click on the Export Notebook As. You can find different options to export the notebook including Markdown, PDF, LaTex, and HTML.
Conclusion
This post discussed how to get started with Paperspace's free Gradient Community Notebooks. We started by introducing Gradient, which is Paperspace's platform for building effortless machine learning and deep learning products and pipelines. It offers different instances and containers packaged with a variety of tools so that users don't get bogged down battling dependencies or tooling issues.
In October 2019, Paperspace added free GPU and CPU instances for launching and sharing Jupyter notebooks for free. This post covered the steps for creating, running, and sharing a free notebook. Some additional features are also discussed, such as sharing files and folders, uploading and downloading files, and reading and writing files to the /storage directory.
By the end of this post, you can easily get started with a free Jupyter notebook running on a GPU or CPU.