Object detection technology recently took a step forward with the publication of Scaled-YOLOv4 – a new state-of-the-art machine learning model for object detection.
In this blogpost we'll look at the breakthroughs involved in the creation of the Scaled-YOLOv4 model and then we'll work through an example of how to generalize and train the model on a custom dataset to detect custom objects.
We've included the following resources in this tutorial:
- Scaled YOLOv4 Breakdown
- Scaled YOLOv4 Repo
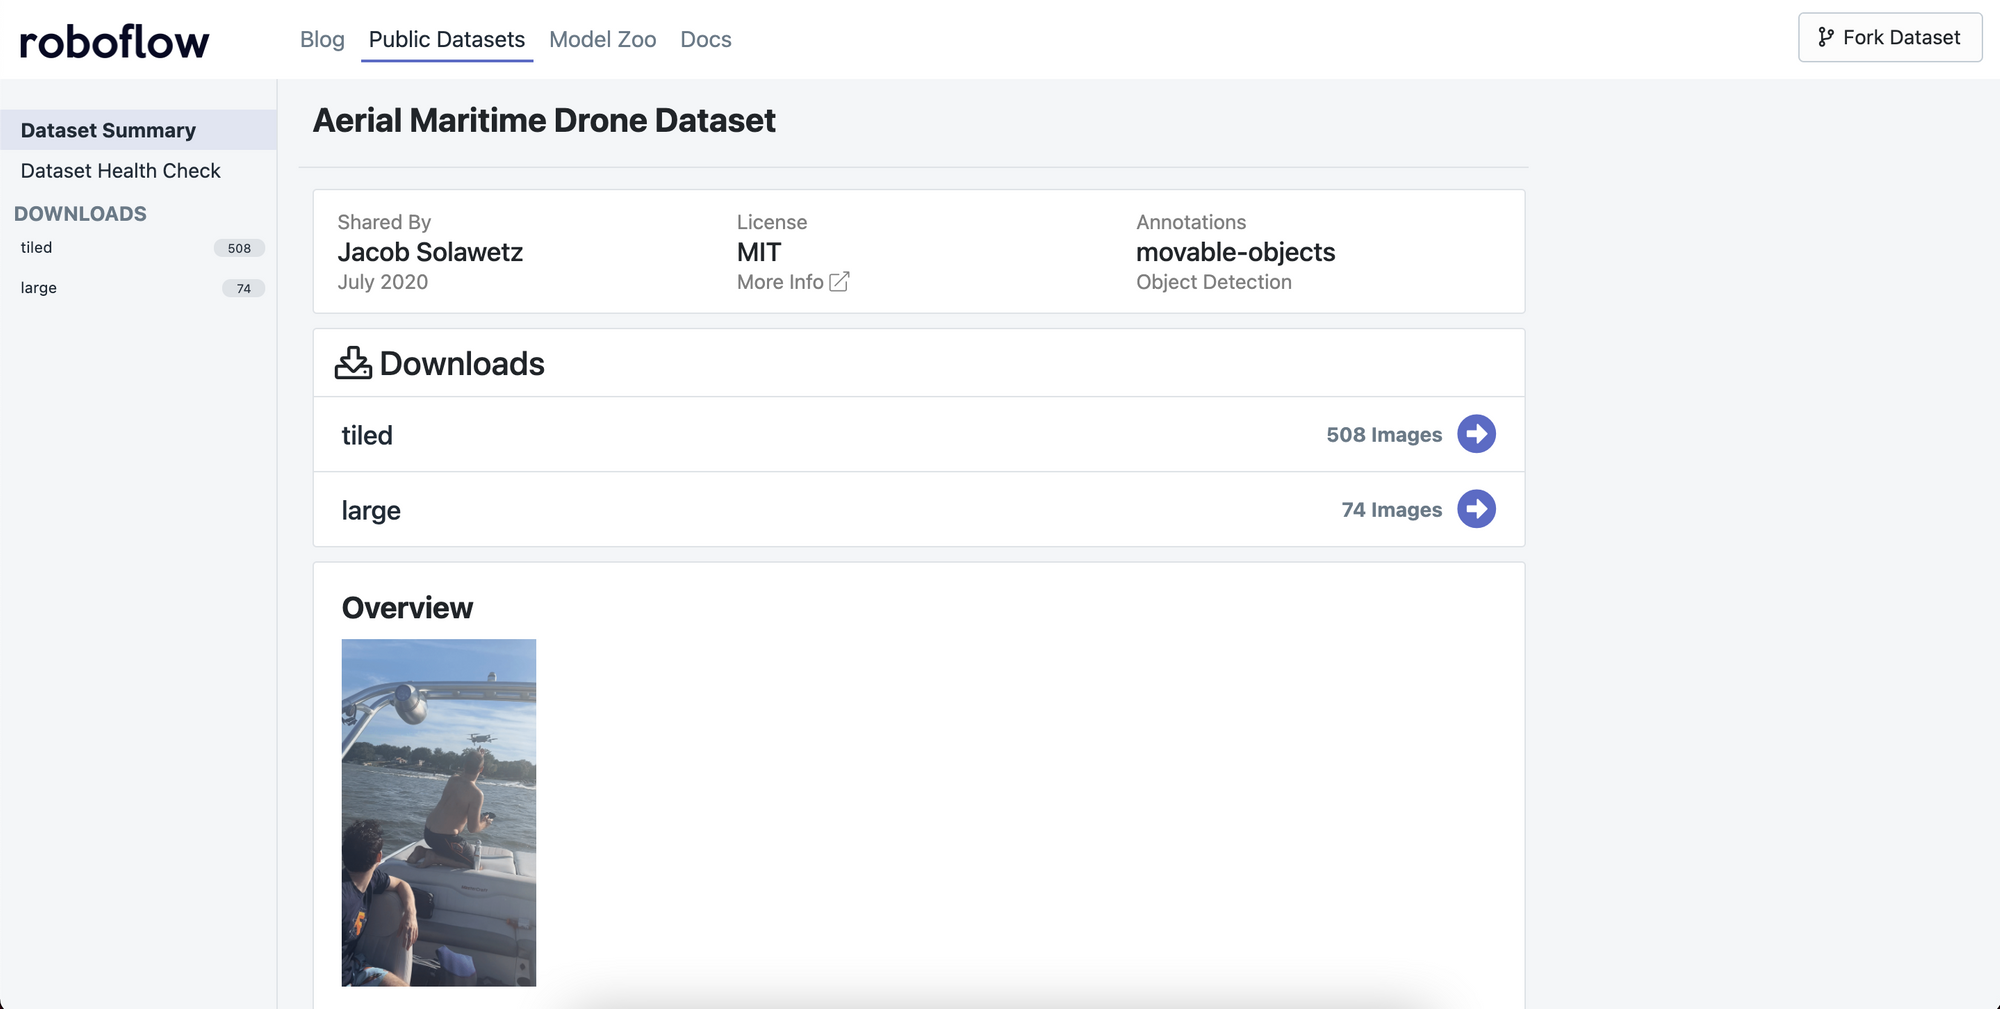
- Public Aerial Maritime Dataset
- Scaled YOLOv4 custom training code (below)
In this tutorial we'll be leveraging Roboflow for computer vision data management and Paperspace for GPU compute resources.
Why Scaled-YOLOv4?
Scaled-YOLOv4 is now the best model for object detection based on the Microsoft COCO benchmark.
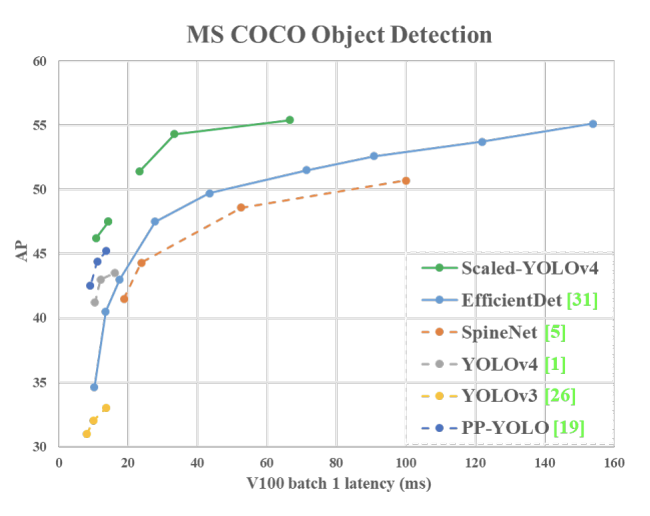
At Roboflow we've found that the Scaled-YOLOv4 family of models tops EfficientDet and all other existing object detection networks (as measured by mean average precision) across the tradeoff continuum of inference speed to network accuracy.
If you'd like to learn more about why Scaled-YOLOv4 is so good, check out the Scaled-YOLOv4 breakdown we wrote over on the Roboflow blog. We also recommend checking out the Scaled-YOLOv4 paper to explore the benchmarks as presented by the original authors.
Once you've read up on the enabling technology, let's get to training!
Assembling Custom Object Detection Data
In order to supervise our custom Scaled-YOLOv4 object detector, we will need to gather object detection training data. If you would like to follow along directly with this tutorial, you can fork the public aerial maritime dataset using the Fork button in the upper right of the dataset page:
Collecting Your Own Images
Alternatively, if you'd like to use your own images, we recommend gathering images that are representative of the conditions that your model will face in deployment. You can get started with a small batch of images to gauge feasibility and then scale-up later – but in general the more diverse the images the better the end result.
Labeling Your Data
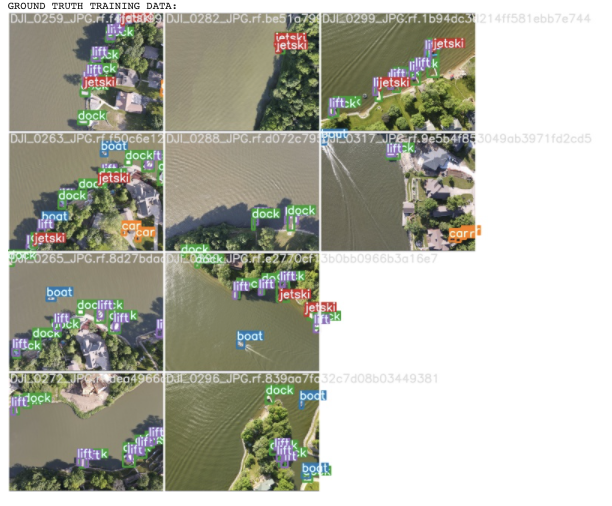
In this tutorial, we'll be using images from the public aerial maritime dataset. Once you have the images that you'd like to use to train your model, it's time to label them.
You can now label your data directly in Roboflow as seen below:

To label images, you will be drawing bounding boxes around objects that you want to detect. Here are some tips on labeling images for this kind of computer vision application:
- Label every object of interest in every image
- Label the entirety of an object
- Label occluded objects
- Create tight bounding boxes
- Create specific label names
- Maintain clear labeling instructions
- Use labeling tools like CVAT, LabelImg, RectLabel, and Roboflow
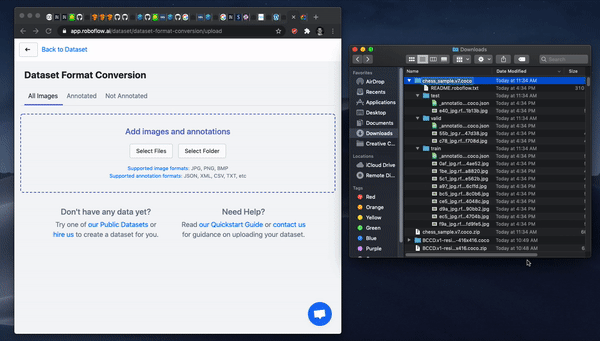
To label data in manually in Roboflow, you will first upload your raw images and create a new dataset. In the new dataset page, all you need to do to start labeling is click on an image and draw bounding boxes. For more details on annotation, check out the labeling docs.
Exporting Data to Paperspace
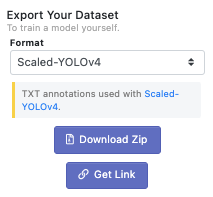
Once you are satisfied with your labeled dataset you can go ahead and generate a dataset version in Roboflow. To do this select Download from the dataset view in Roboflow. You can also choose any preprocessing and augmentation options you like.
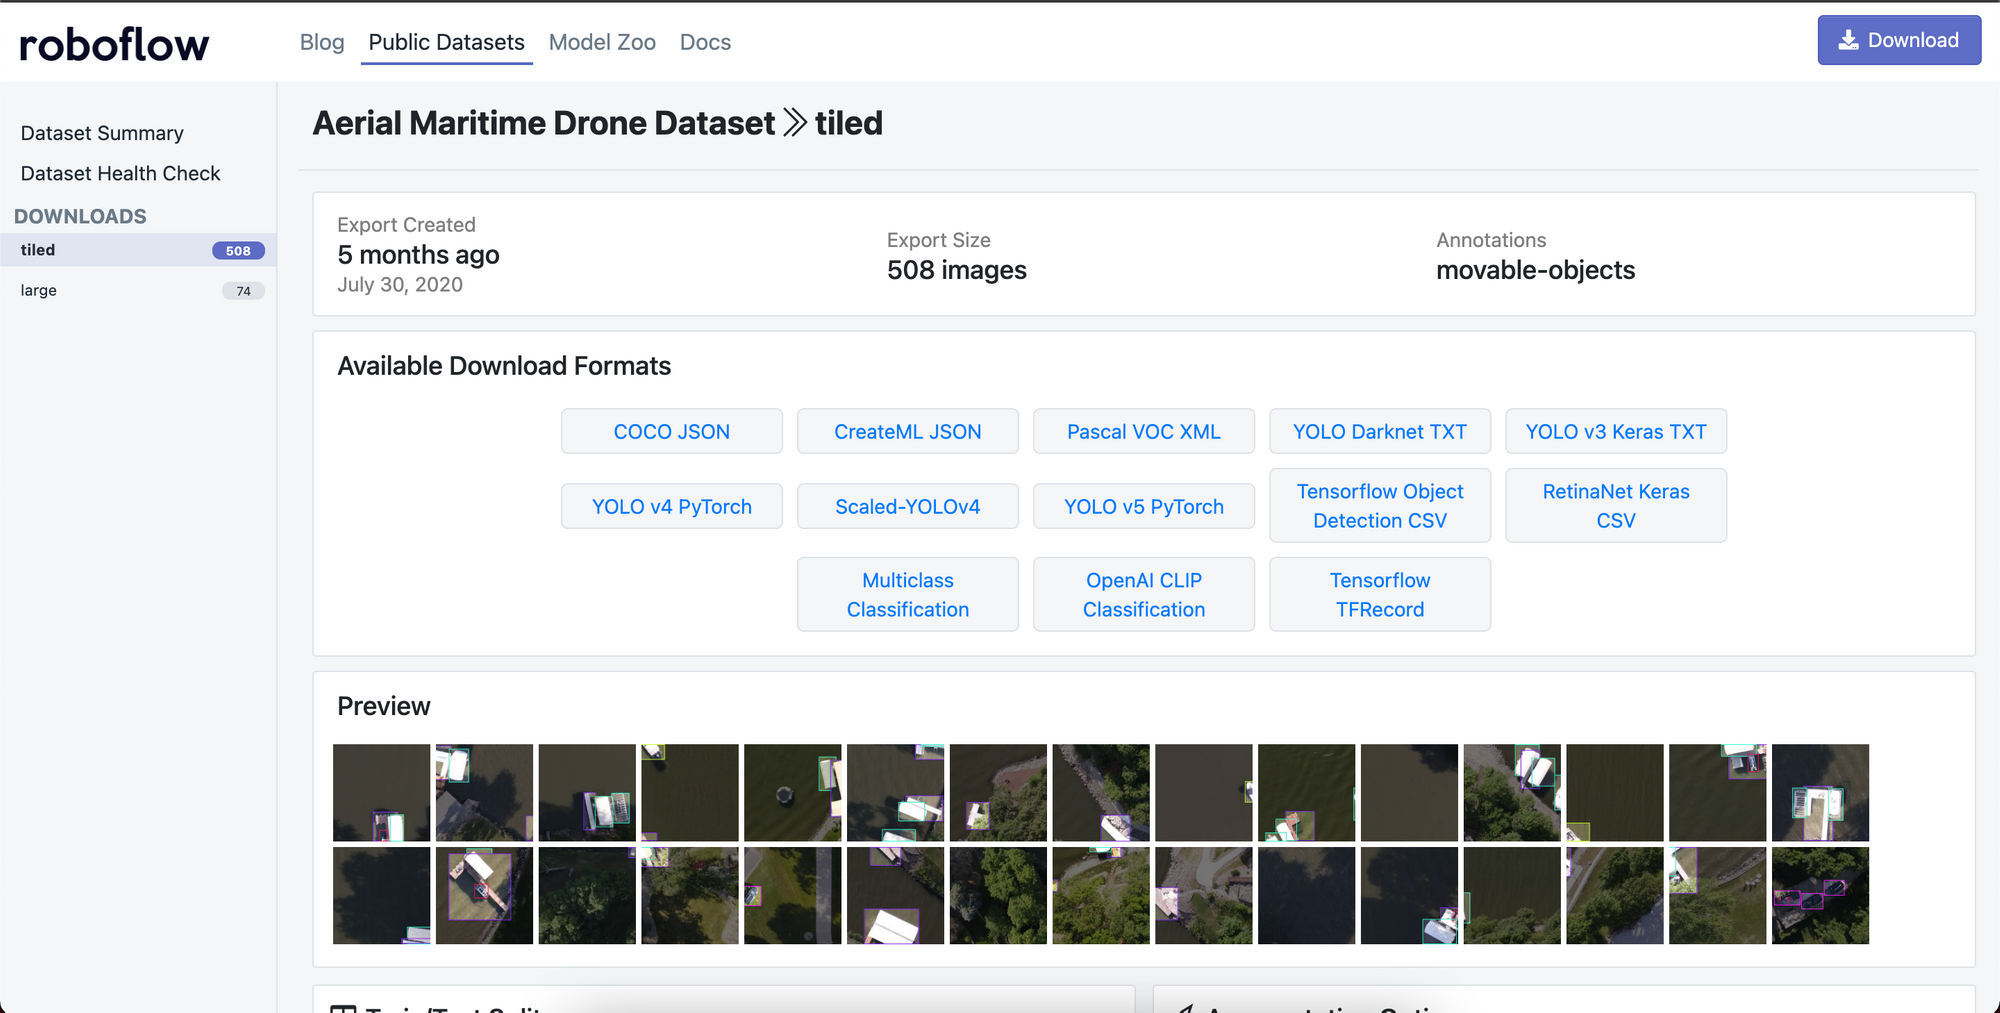

After selecting Download, select TXT > Scaled-YOLOv4 as the output format and then select Get Link to obtain a curl link to you data.
Hold onto this link since you will use it to bring your dataset into your Paperspace notebook in just a minute.
Setting up our training Environment on Paperspace
To train our Scaled-YOLOv4 model, we will first need to provision GPU resources to run our training job.
Because Scaled-YOLOv4 training requirements scale-up substantially when using larger networks in the family, Paperspace is a natural place to get started given the variety of on-demand GPU-backed instances available.
You can of course use any GPU resources you have available and still follow along with this tutorial, however.
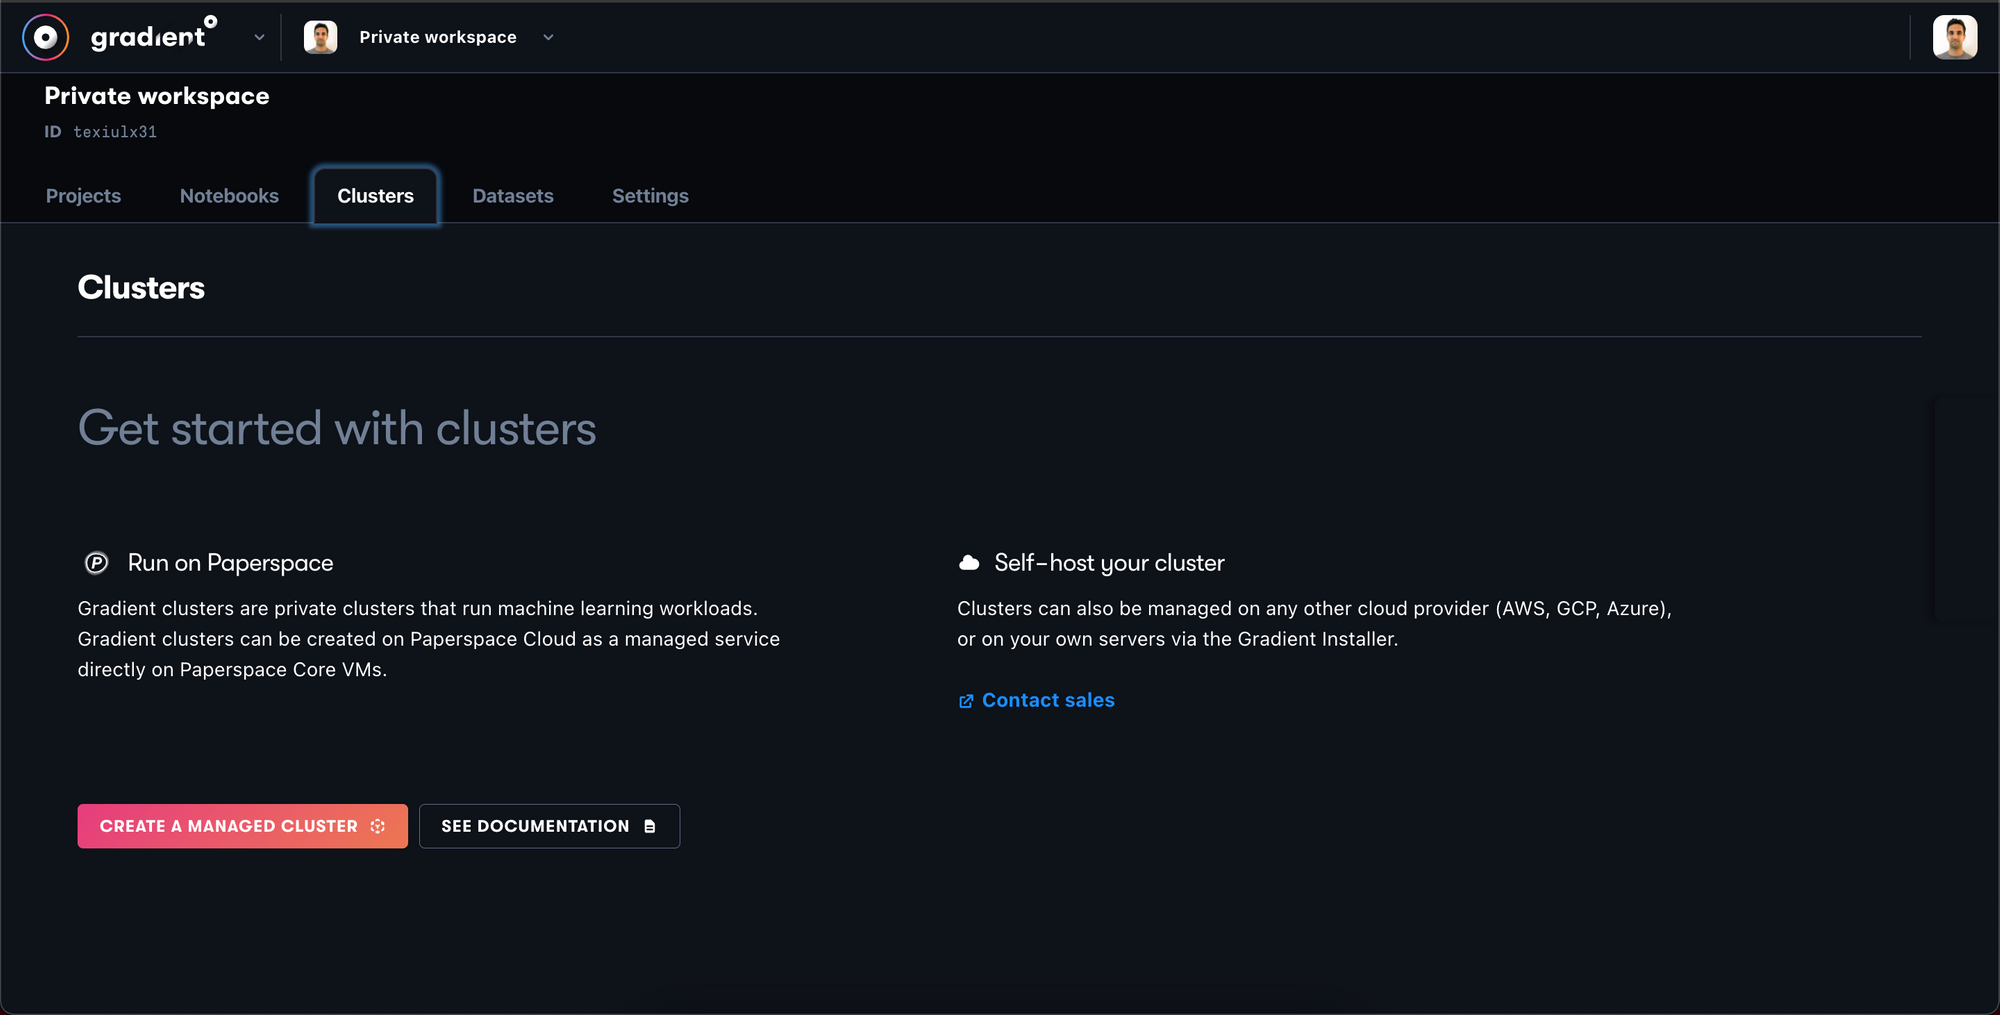
Create Managed Cluster
To get started you'll first need to create a Paperspace account.
Once you're logged in to Paperspace, navigate to Gradient and then Clusters, and then select Create a Managed Cluster.
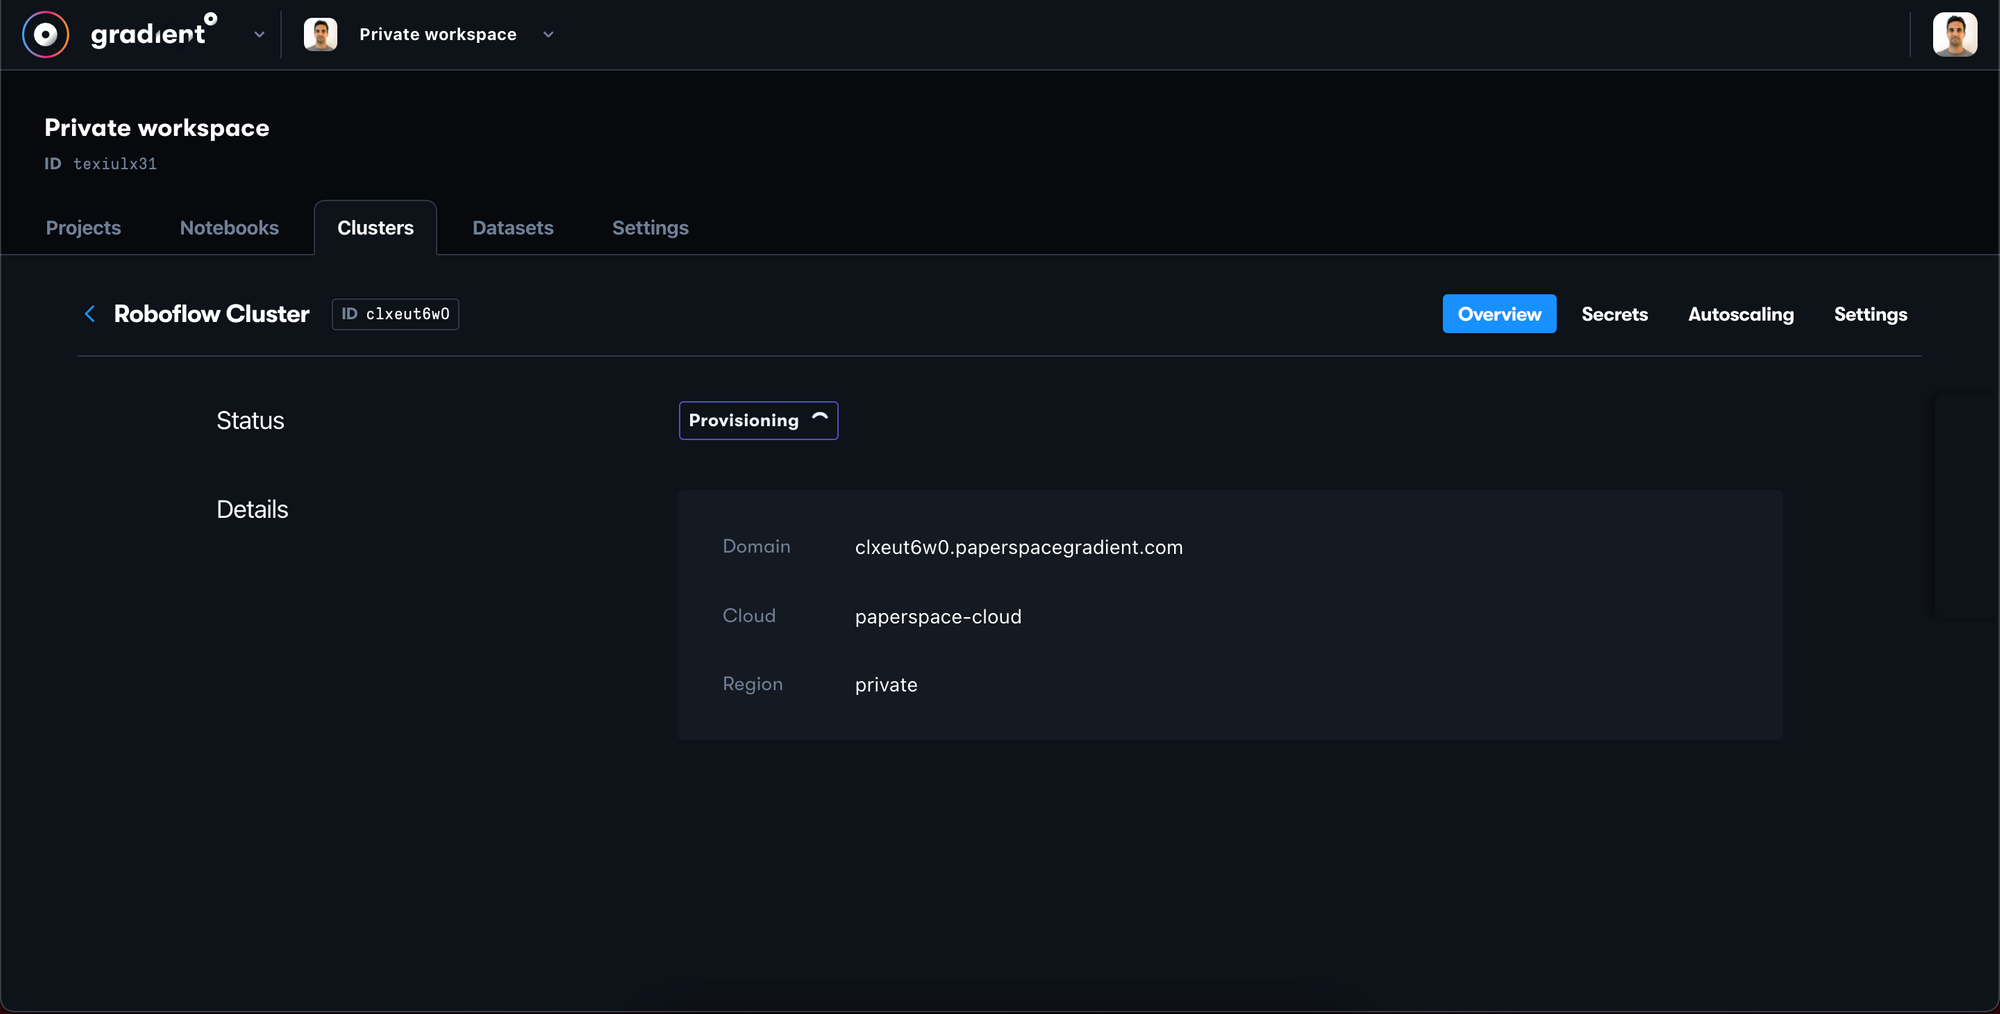
You will see your new private cluster in the Provisioning state – the cluster will take a few minutes to provision so please be patient.
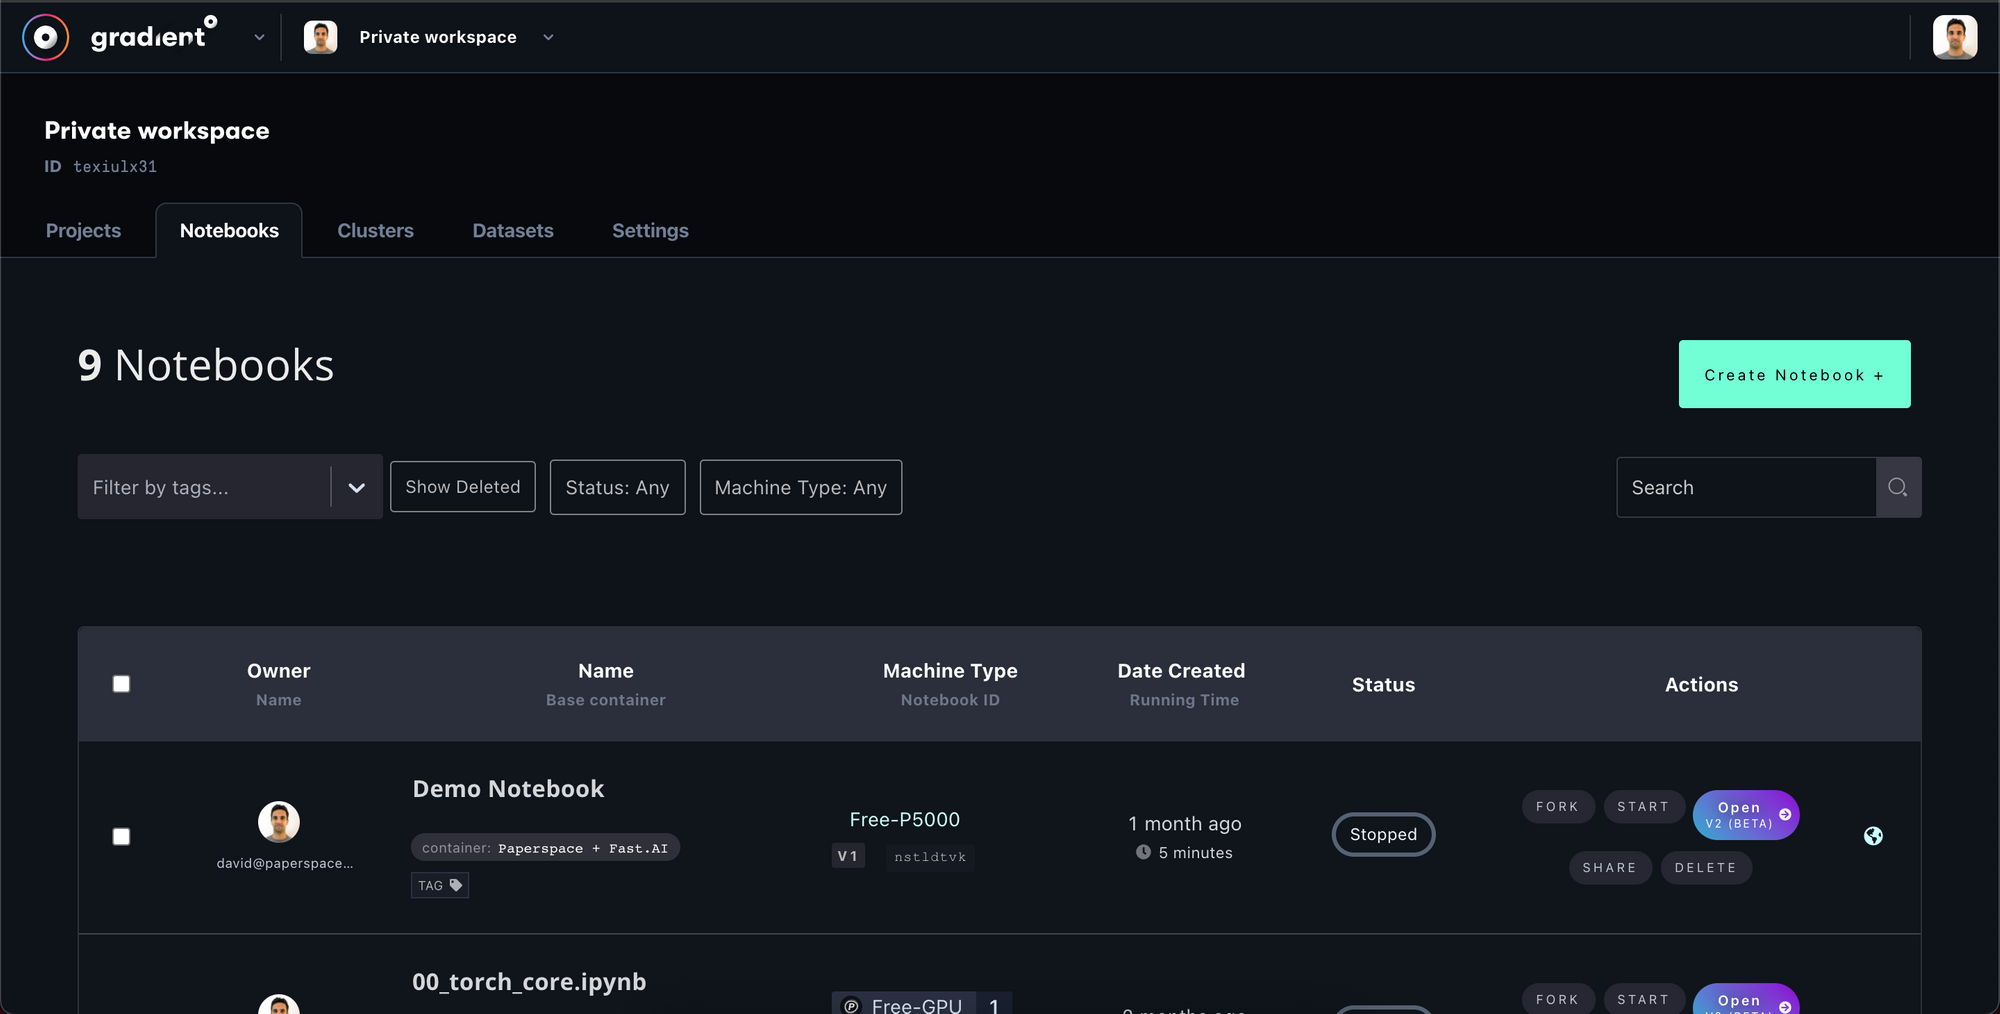
Create Notebook
Once your cluster has been provisioned, you can launch a notebook for training in the Notebooks tab.
In the notebook setup prompt in Paperspace:
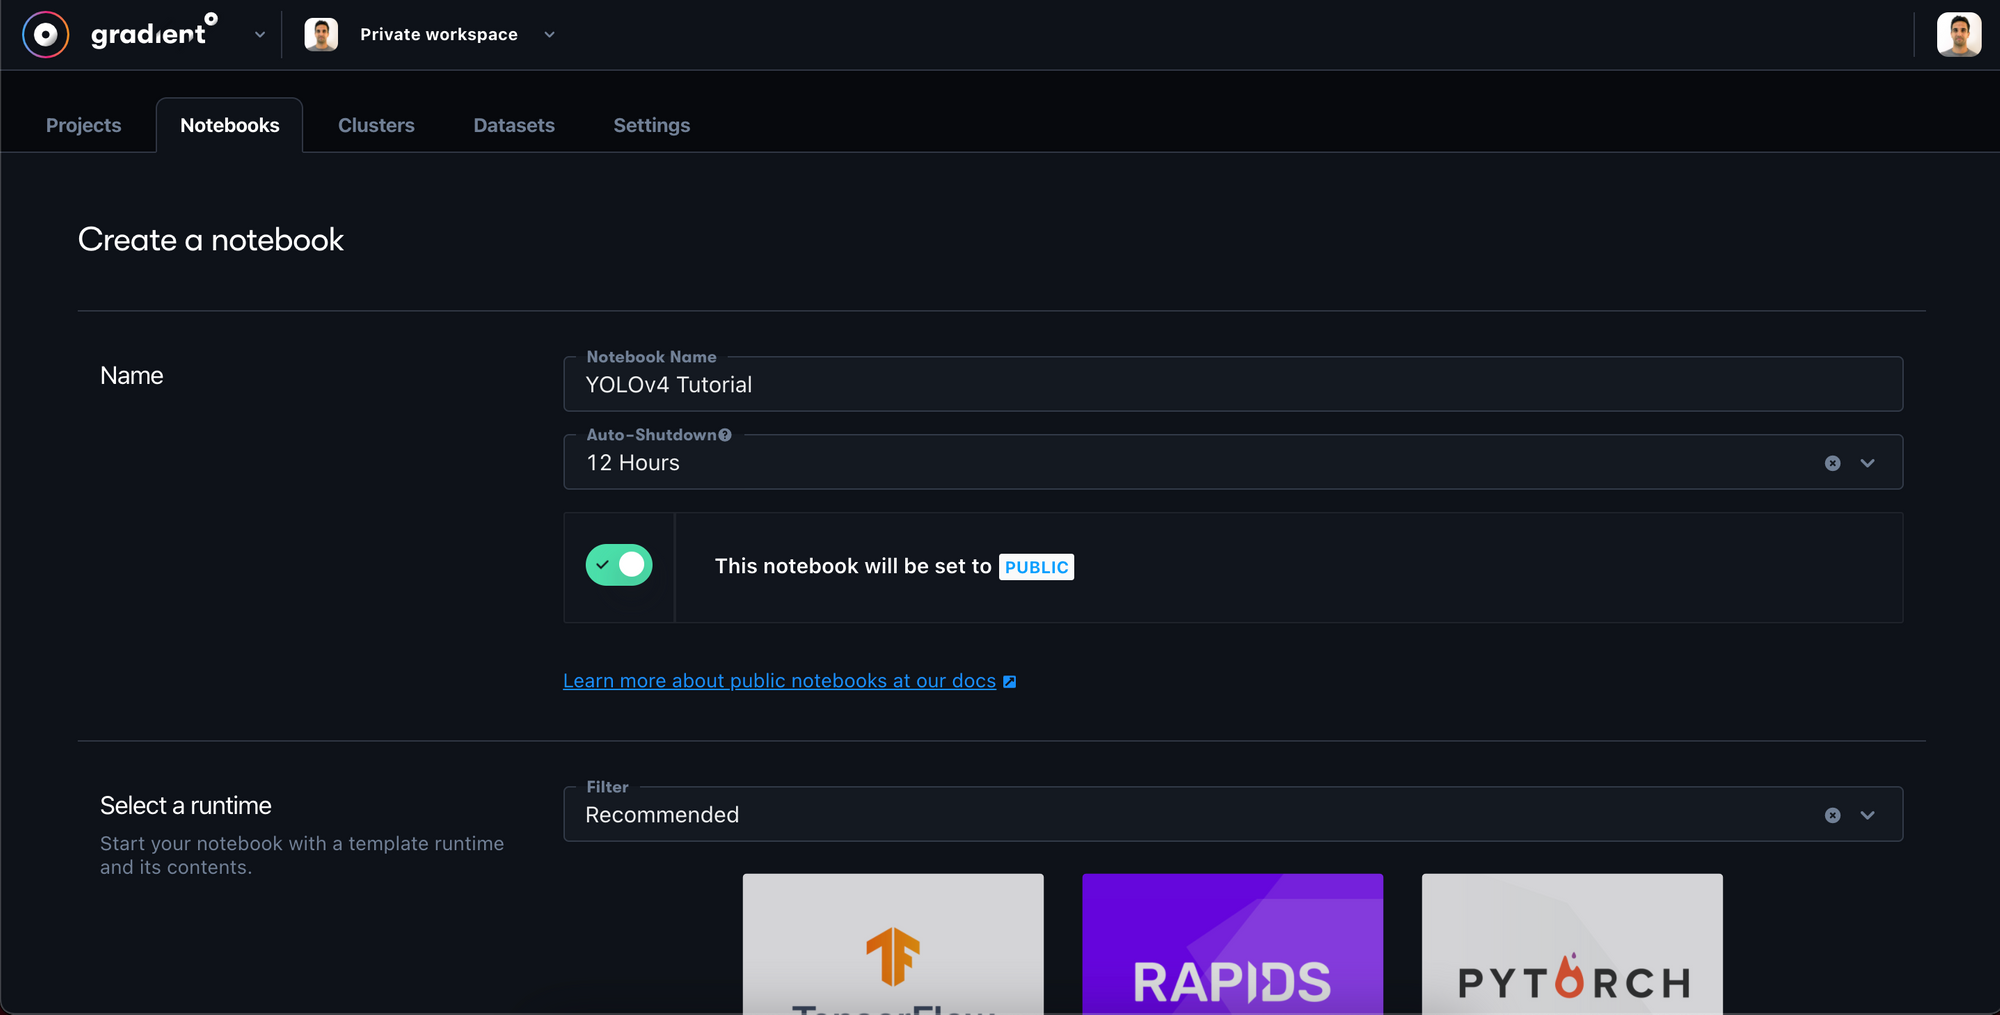
- In Step 1, give your notebook a name e.g. YOLOv4 Tutorial. You might also want to set
auto-shutdownto 1-hour to prevent overcharging in the event that you forget to turn your machine off later. - In Step 2, we can leave the container selection blank. We will specify a custom container in Step 4.
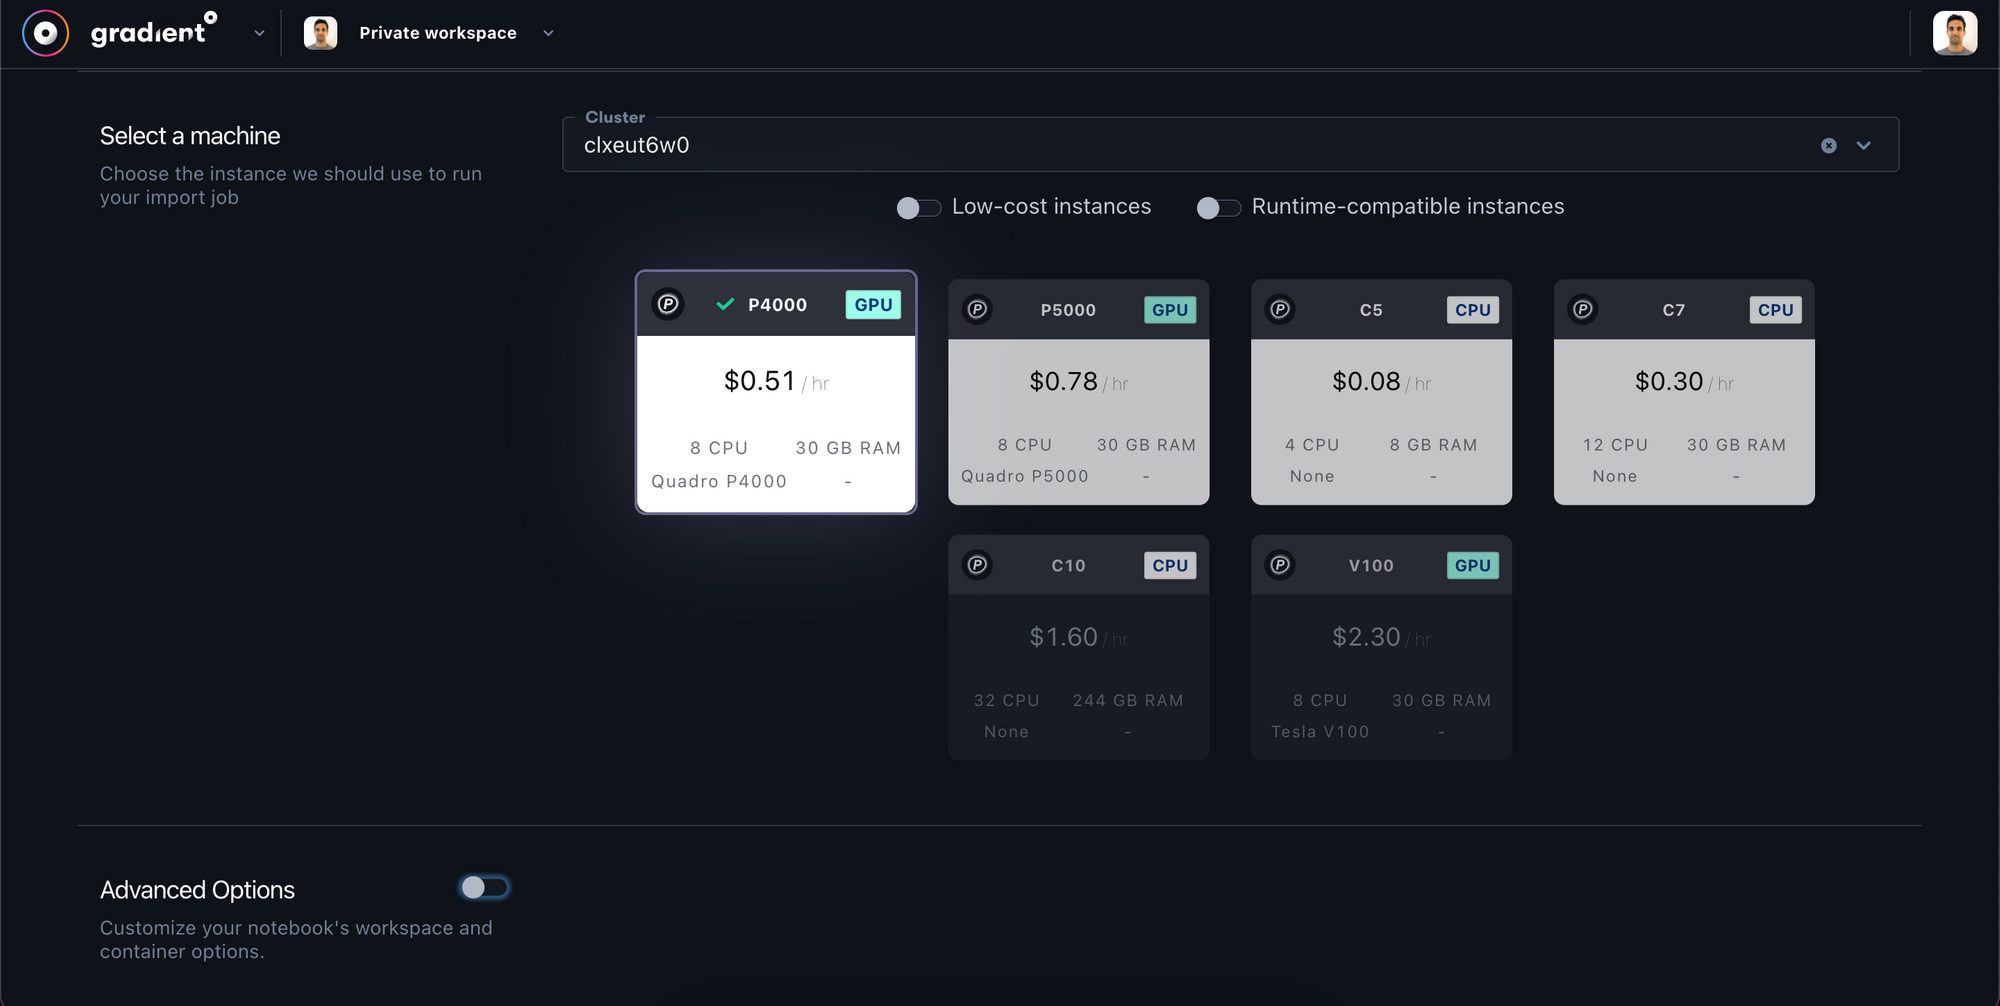
- In Step 3, choose
My Private Clustersand then select your private cluster with the GPU that you'd like to train on. Larger GPUs will train your model faster – we used a P4000 for this tutorial. - In Step 4, open the
Advanced Optionsand copy the following NVIDIA PyTorch container into theContainer Namefield:
nvcr.io/nvidia/pytorch:20.06-py3Container Name field under Advanced OptionsAdvanced options should look like this:
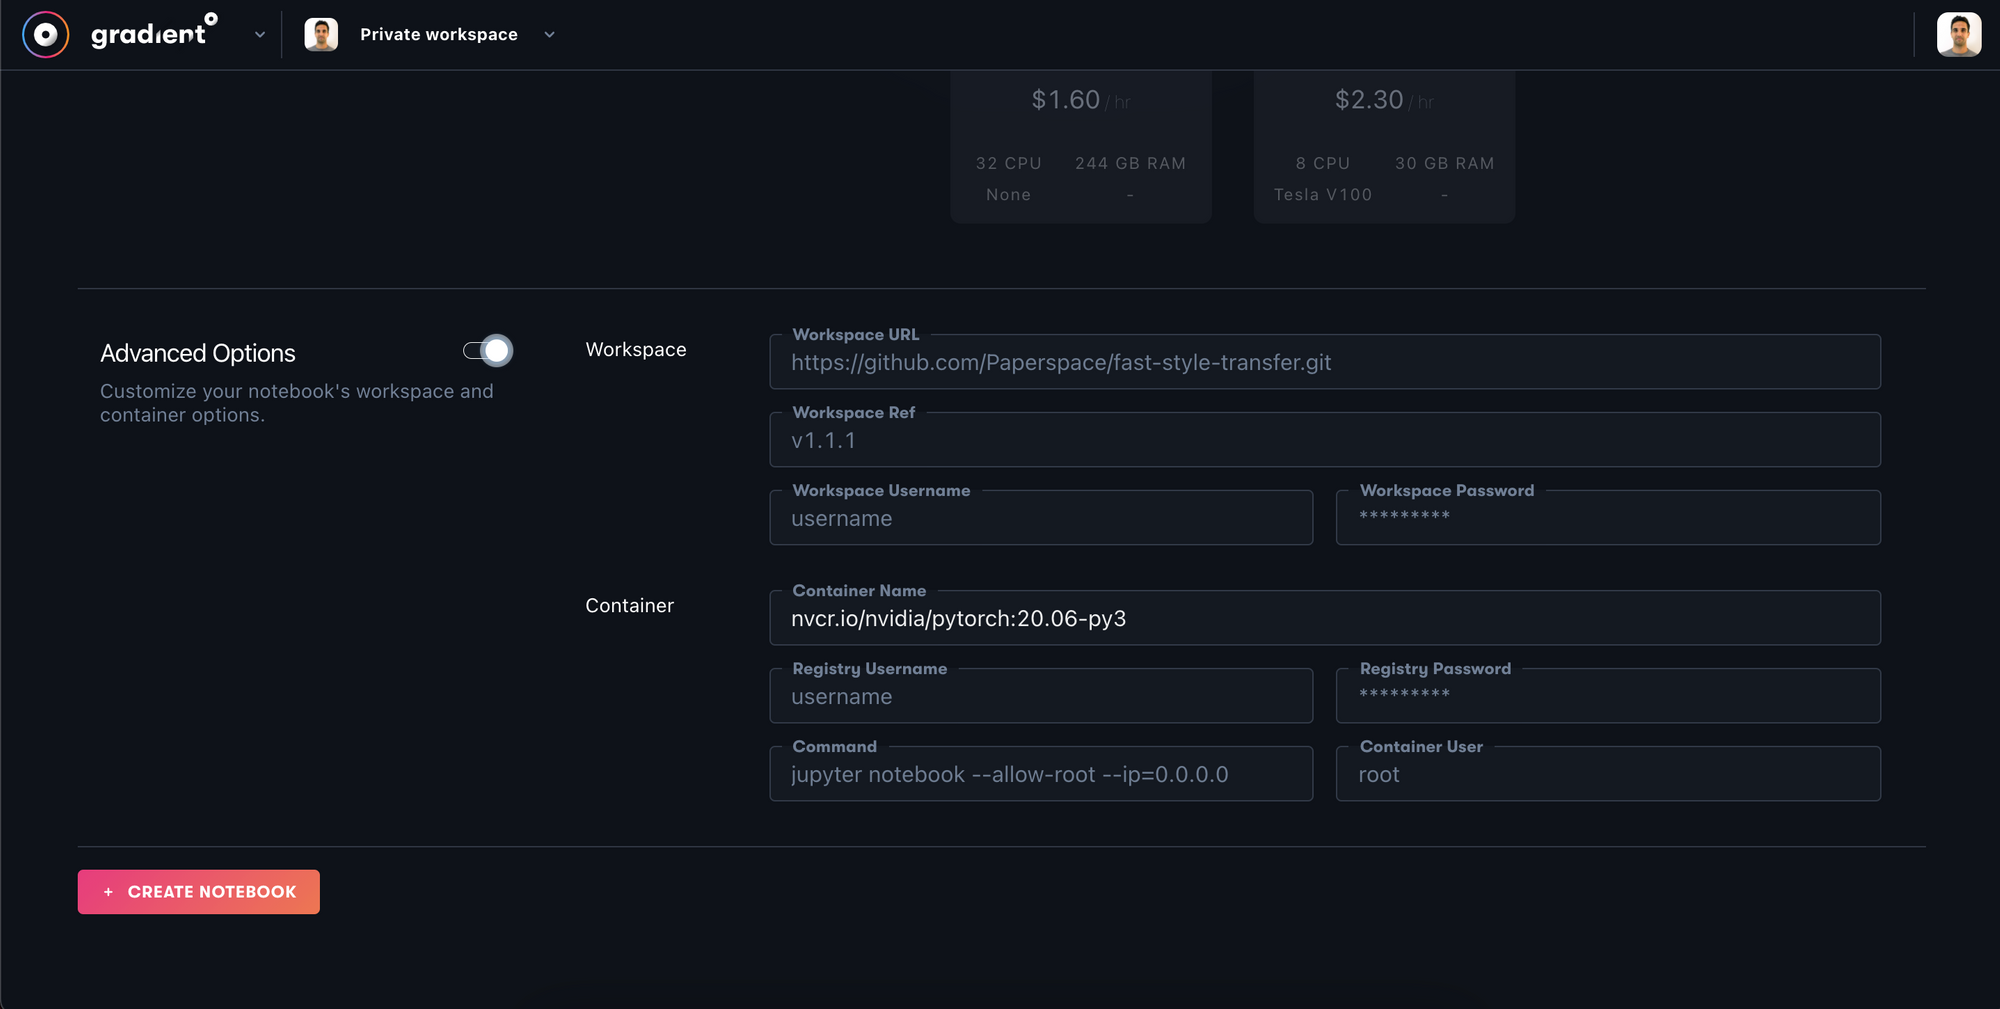
Hit Create Notebook and Paperspace will spin-up your training environment on your new Private Cluster. This process may also take a couple minutes.
Installing Scaled YOLOv4 Dependencies
Now it's time to open the Jupyter notebook.
Once we're in the notebook we need to make a few installs before we are ready for training.
Installing Dependencies
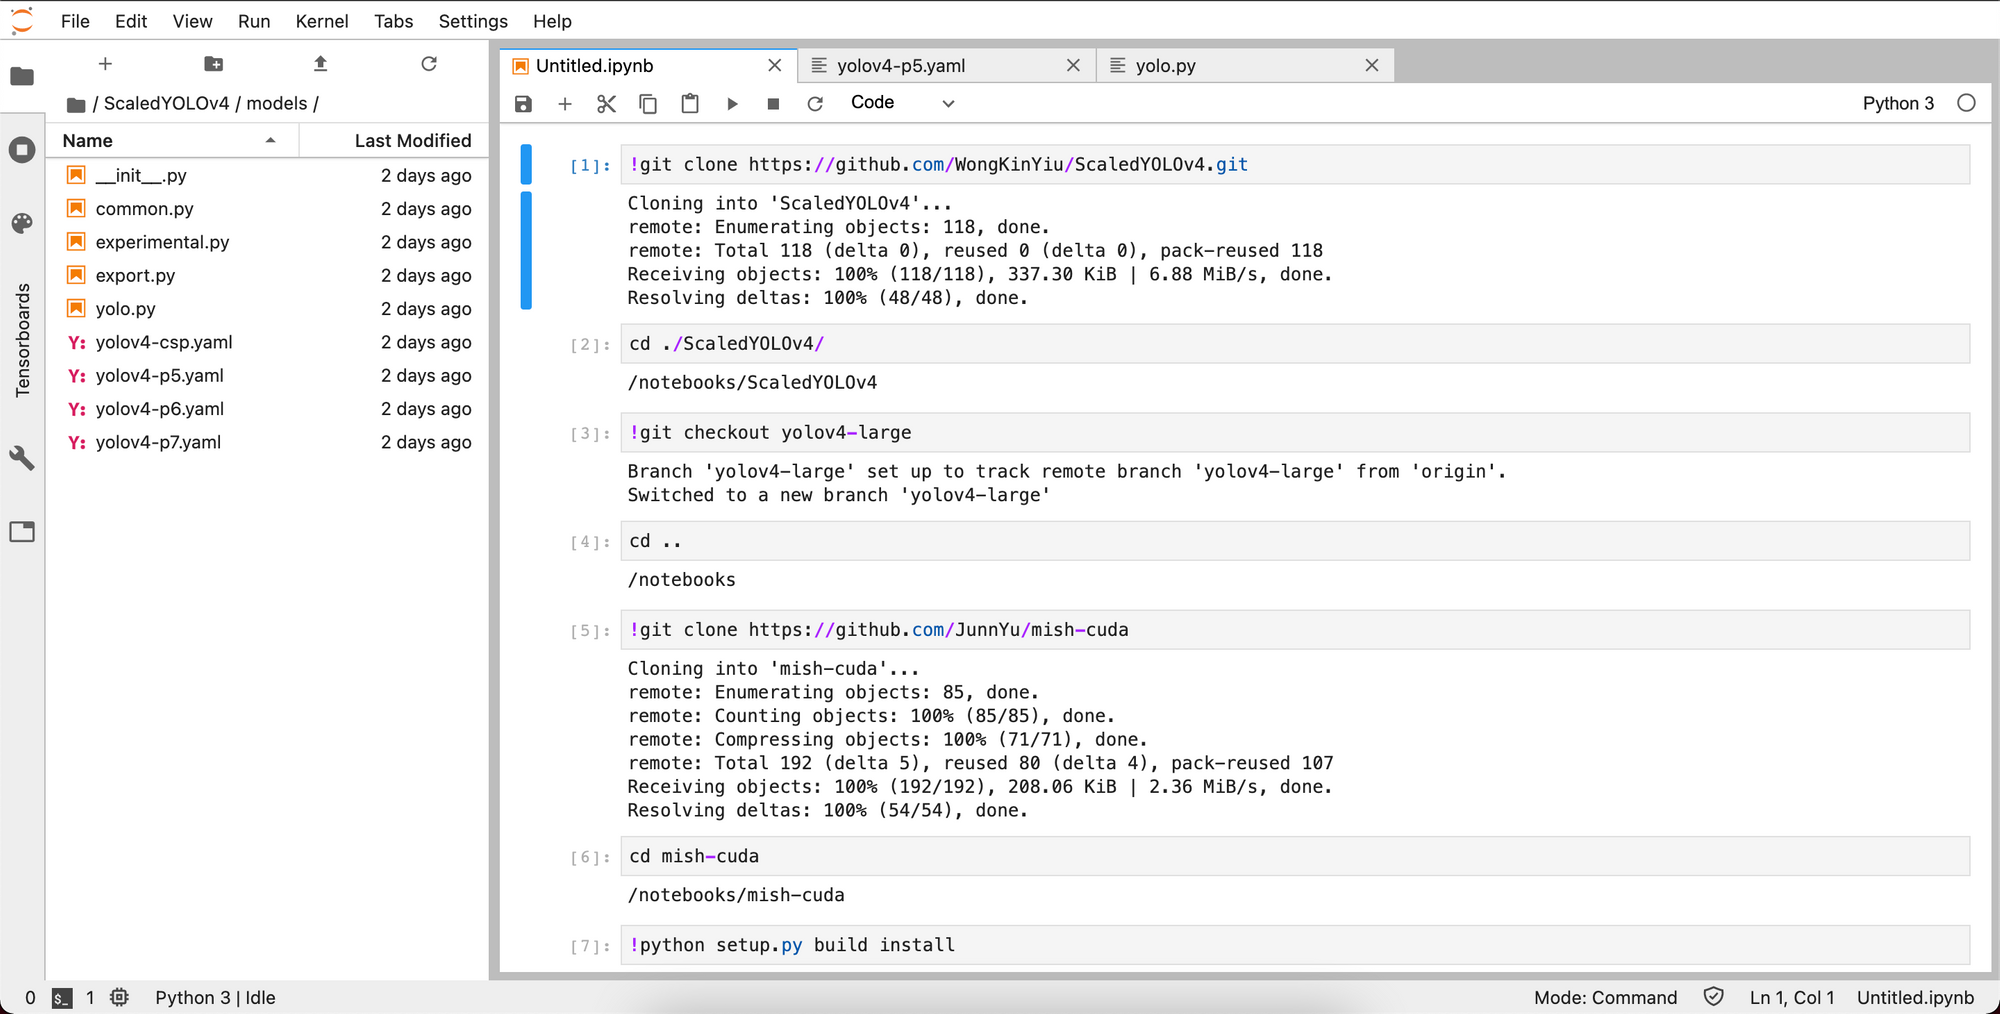
We clone the Scaled-YOLOv4 repo and switch over to the yolov4-large branch.
#clone Scaled_YOLOv4
!git clone https://github.com/WongKinYiu/ScaledYOLOv4.git  # clone repo
%cd ./ScaledYOLOv4/
#checkout the yolov4-large branch
!git checkout yolov4-large
%cd ..
Next we'll install mish-cuda for our GPU so we can run the mish activation functions quickly on our notebook's GPU.
!git clone https://github.com/JunnYu/mish-cuda
%cd mish-cuda
!python setup.py build install
%cd ..
Downloading Data
Finally, import your curl link from Roboflow to bring in your data in the right format. This should be executed one directory up from the ScaledYOLOv4 repo folder.
!curl -L "https://app.roboflow.com/ds/h91wwIw5An?key=[YOUR KEY HERE]" > roboflow.zip; unzip roboflow.zip; rm roboflow.zip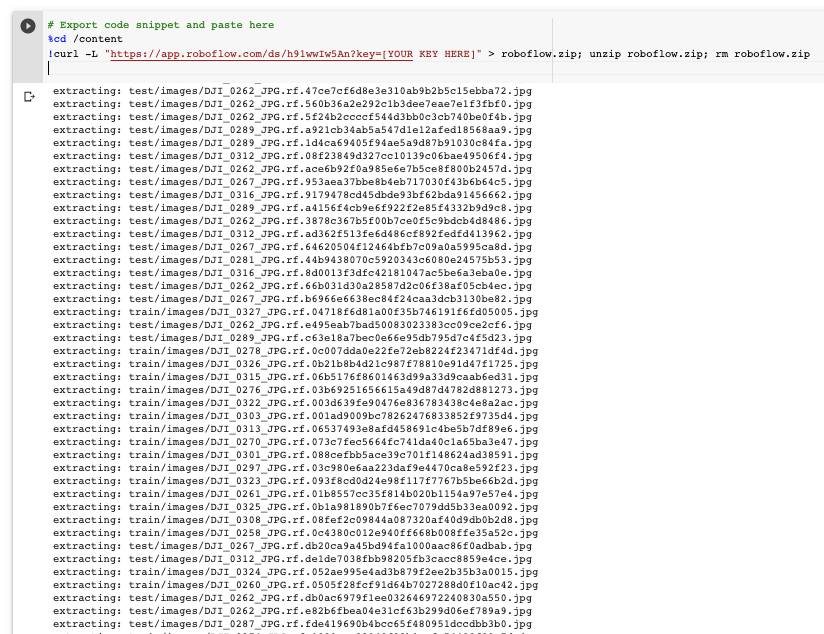
Kicking Off Scaled YOLOv4 Training
Now that we have everything set up, we need to only invoke one command to kick off training on our custom data.
cd ./ScaledYOLOv4/
!python train.py --img 416 --batch 16 --epochs 50 --data '../data.yaml' --cfg ./models/yolov4-csp.yaml --weights '' --name yolov4-csp-results  --cache
The following options are possible:
- img: define input image size
- batch: determine batch size
- epochs: define the number of training epochs. (Note: often, 3000+ are common here!)
- data: set the path to our yaml file
- cfg: specify our model configuration
- weights: specify a custom path to weights.
- name: result names
- nosave: only save the final checkpoint
- cache: cache images for faster training
Once training has kicked off, you want to watch the mAP (mean average precision) metric rise, if it levels off you can stop the script.
After training, you can take a look at your Tensorboard metrics, again focusing on the mAP:
# Start tensorboard
# Launch after you have started training
# logs save in the folder "runs"
%load_ext tensorboard
%tensorboard --logdir runs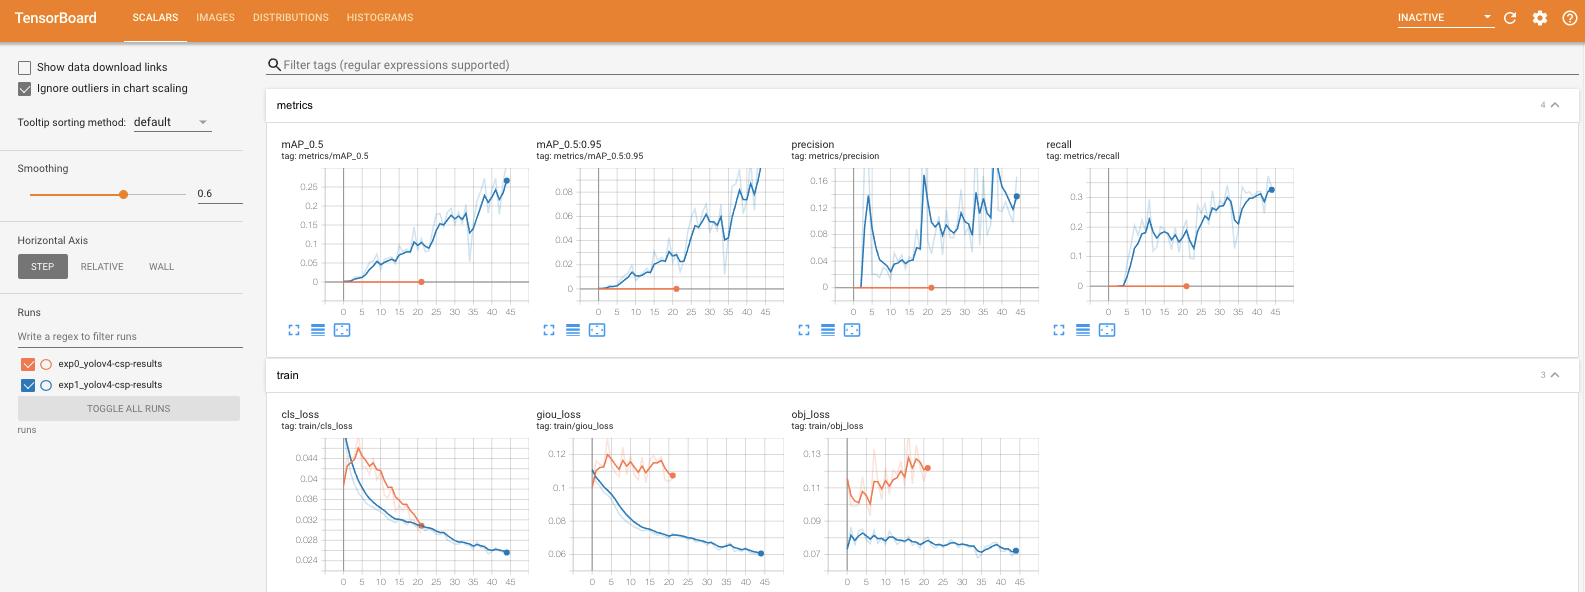
Scaling up
If you want to use larger version of the network, switch the cfg parameter in training. In the models folder you'll see a variety of options of model configuration including yolov4-p5, yolov4-p6, and the famed yolov4-p7. To train these larger models, the single GPU may not suit you and you may need to spin up a multi-GPU server and train on multi-GPU with a distributed launch:
python -m torch.distributed.launch --nproc_per_node 4 train.py --batch-size 64 --img 896 896 --data coco.yaml --cfg yolov4-p5.yaml --weights '' --sync-bn --device 0,1,2,3 --name yolov4-p5
Using Scaled YOLOv4 Models for Inference
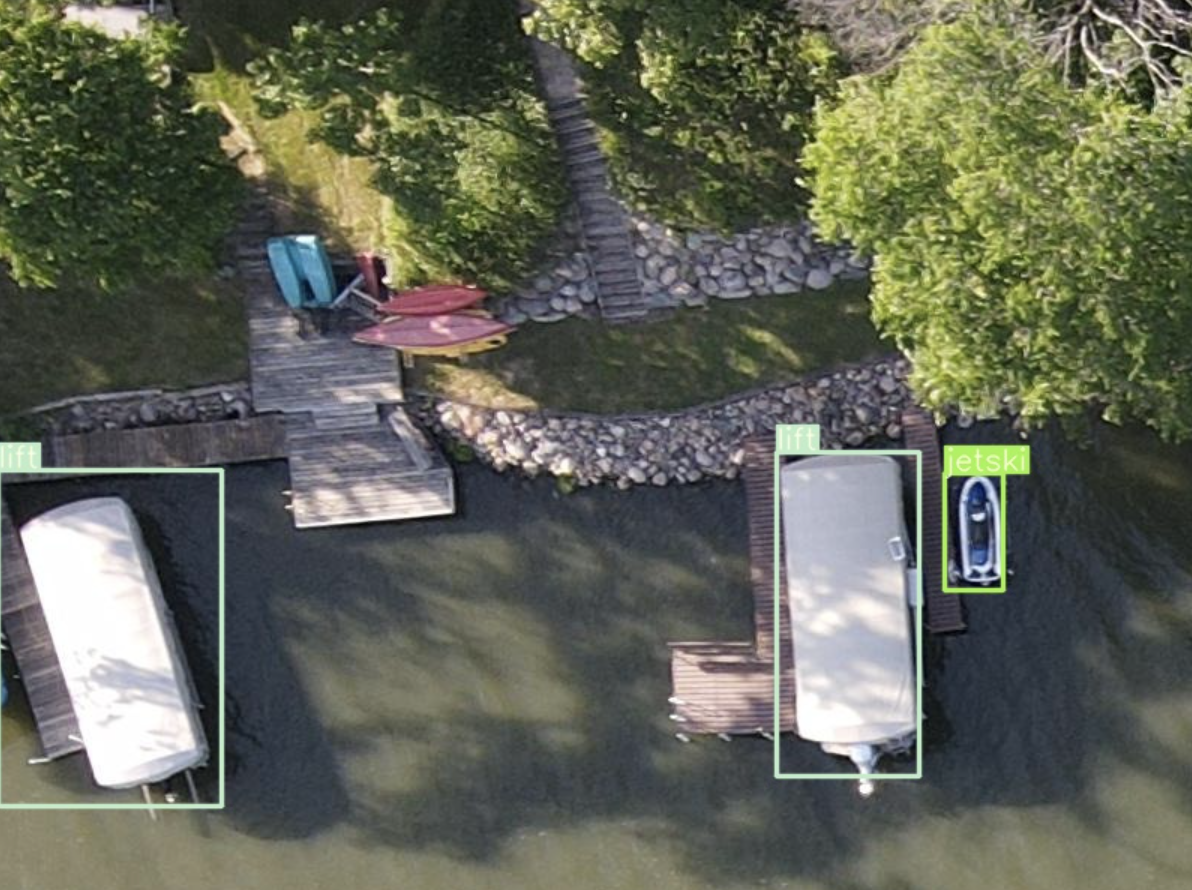
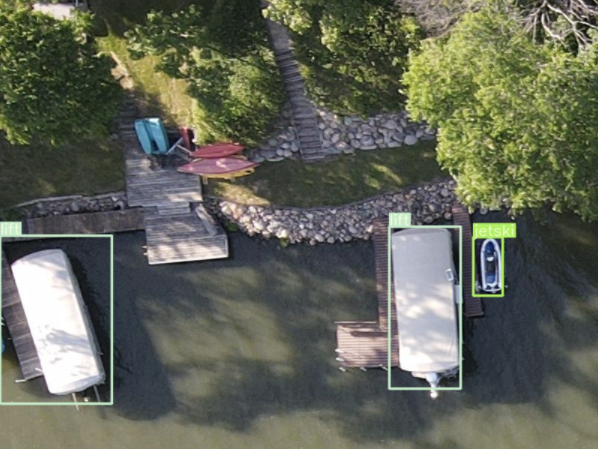
Now that you've trained your Scaled YOLOv4 model, you can leverage your model to make inference on new images. To do so, we point the model at our dataset's test set, and point the detection script to our custom weights (you can also specify video here):
!python detect.py --weights ./runs/exp0_yolov4-csp-results/weights/best.pt --img 416 --conf 0.4 --source ../test/imagesAnd inference occurs quickly (especially on GPU)
/content/ScaledYOLOv4
Namespace(agnostic_nms=False, augment=False, classes=None, conf_thres=0.4, device='', img_size=416, iou_thres=0.5, output='inference/output', save_txt=False, source='../test/images', update=False, view_img=False, weights=['./runs/exp1_yolov4-csp-results/weights/best.pt'])
Using CUDA device0 _CudaDeviceProperties(name='Tesla V100-SXM2-16GB', total_memory=16130MB)

Fusing layers... Model Summary: 235 layers, 5.24921e+07 parameters, 5.04494e+07 gradients
image 1/32 /content/test/images/DJI_0262_JPG.rf.3878c367b5f00b7ce0f5c9bdcb4d8486.jpg: 416x416 Done. (0.020s)
image 2/32 /content/test/images/DJI_0262_JPG.rf.47ce7cf6d8e3e310ab9b2b5c15ebba72.jpg: 416x416 Done. (0.020s)
image 3/32 /content/test/images/DJI_0262_JPG.rf.560b36a2e292c1b3dee7eae7e1f3fbf0.jpg: 416x416 1 docks, Done. (0.021s)
image 4/32 /content/test/images/DJI_0262_JPG.rf.5f24b2ccccf544d3bb0c3cb740be0f4b.jpg: 416x416 1 lifts, Done. (0.021s)
image 5/32 /content/test/images/DJI_0262_JPG.rf.66b031d30a28587d2c06f38af05cb4ec.jpg: 416x416 1 docks, Done. (0.021s)
image 6/32 /content/test/images/DJI_0262_JPG.rf.8c378a23b8822f63a44ad24c8787fab3.jpg: 416x416 1 lifts, Done. (0.025s)Then, we can visualize our networks test inference.
Exporting Weights and Deployment
Finally, at the end of the notebook we can download our custom model weights. These are currently in PyTorch framework and you can invoke them with the same software we used for training. You can also convert these weights to other frameworks such as Tensor RT, ONNX, TorchScript, TensorFlow Saved Graph, TFLite.
The implementation of these other formats will be new software with new dependencies. The journey has begun!
Next Steps
Once you have gotten a feel for training your network in the notebook, you can consider formalizing your training and inference flow in a repository and utilizing Paperspace's autoscaling capabilities to deploy your network for inference.
Conclusion
Congratulations! You've learned how to train the state of the art on your custom objects with Scaled-YOLOv4.
At Paperspace and Roboflow, we are always excited for what you might build next.
As always, happy training!