
Hello, today we're going to show how to set up single and multi-GPU H100 instances with Paperspace. For more information about the launch, check out our official release post on the Digital Ocean main website.
Follow along using the attached video as we go over the setup procedure, launch settings, and accessing the machine with as little overhead as possible.
If you wish to access the machines using SSH from your local, be sure to setup SSH before launching the Machine -> Video Tutorial on setting SSH
Navigating the Paperspace Website
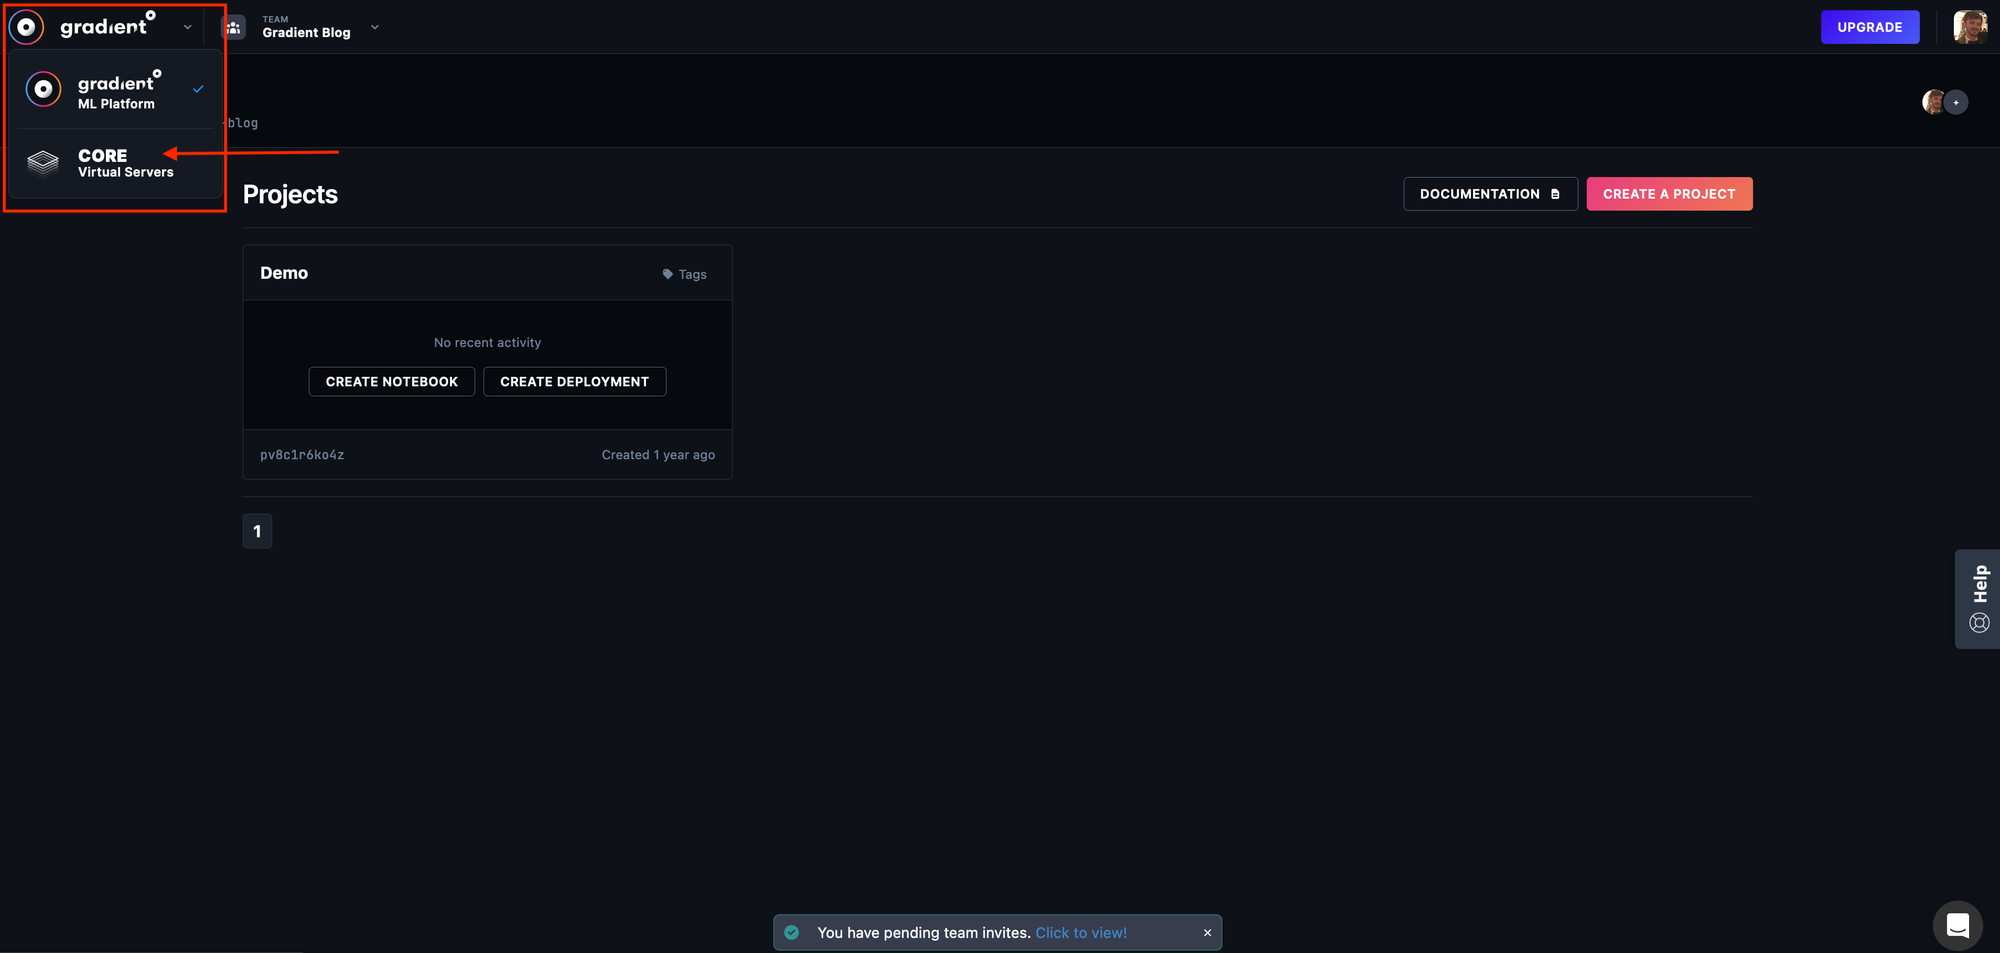
The first we'll do is sign into the console. If we do not already have an account on Paperspace, then we need to make one. Next, make sure we're in the Core product. We can switch between Core and Gradient using the dropdown menu in the top left of the screen.

We can confirm that we are in the right section if we see "Machines" and "Templates" in the tabs. Next, click the red "Create a Machine" button to begin machine creation.

Within the Machine creation page, we have a lot of different choices. First, we will need to select our template. These templates provide ready installations of Linux and Windows operating systems with relevant packages for our users. In this example, we will use the ML-in-a-box template. This template has been optimized for Deep Learning and AI development, is regularly updated to maintain parity with popular package releases, and is our recommended template for any user in who wishes to work on DL or AI.
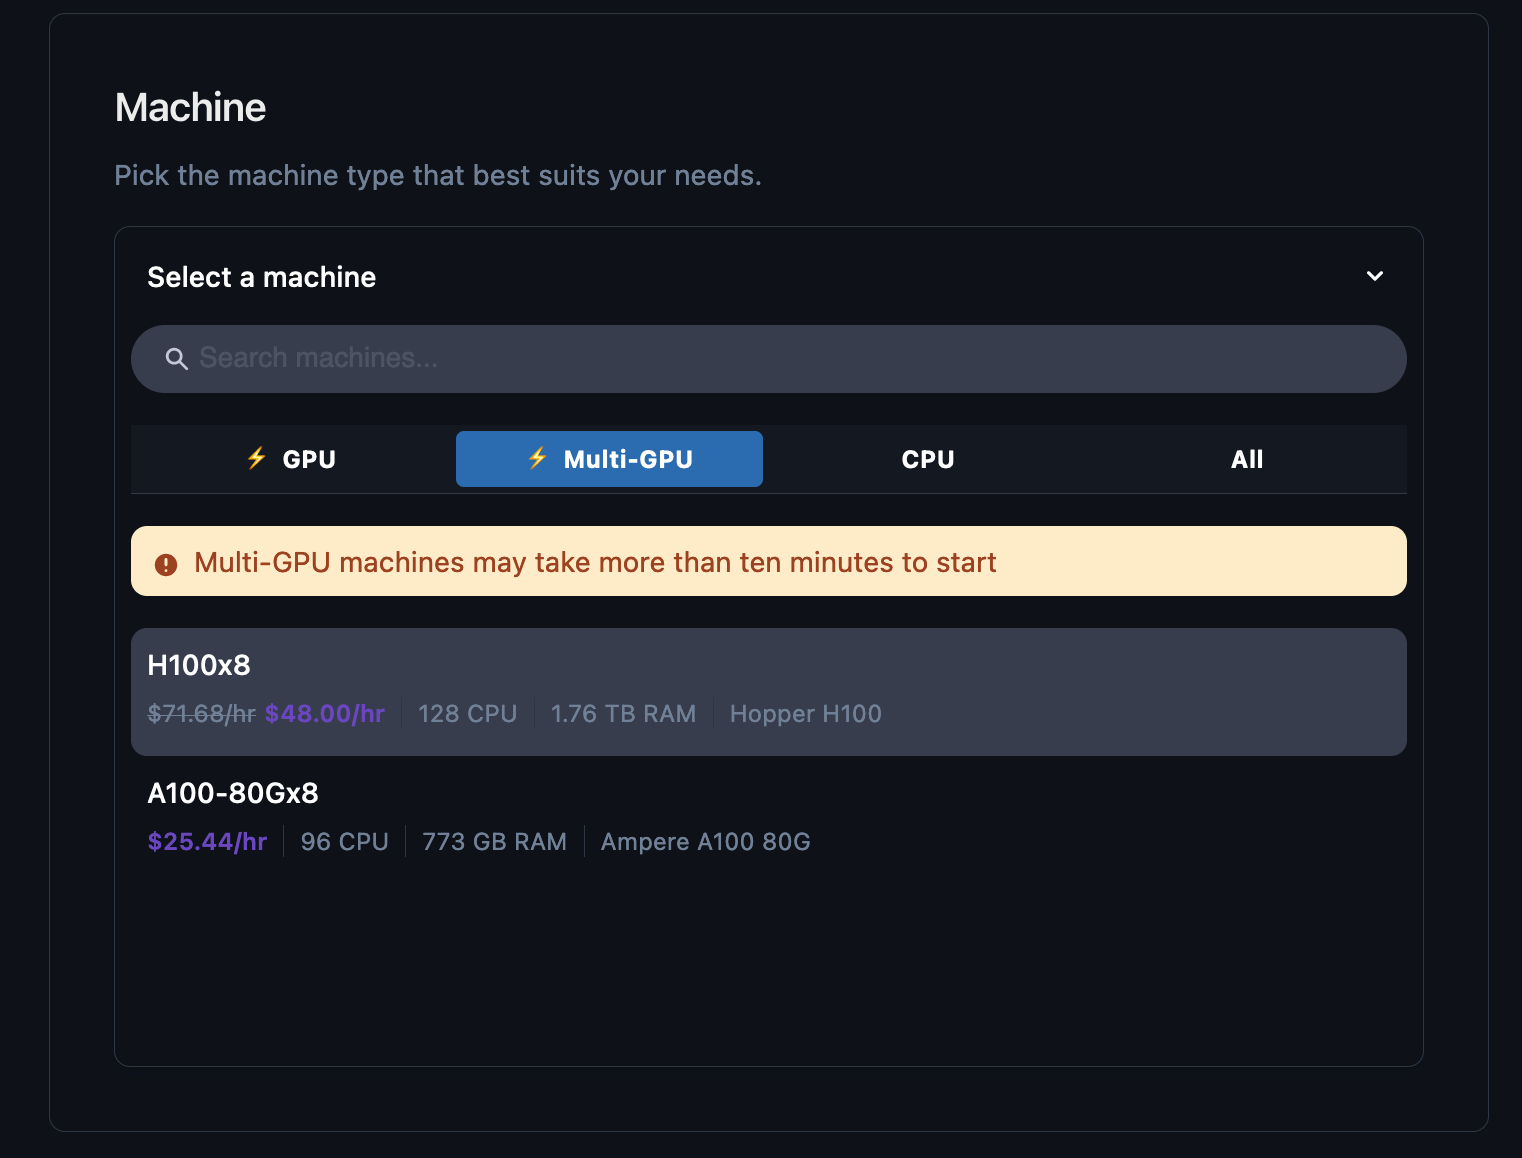
Next, we have the machine selection. Notably, at the time of this article's writing, there is a major discount on both H100 and A100 machines. Regardless, for the video example, we chose to use the 8-way H100.
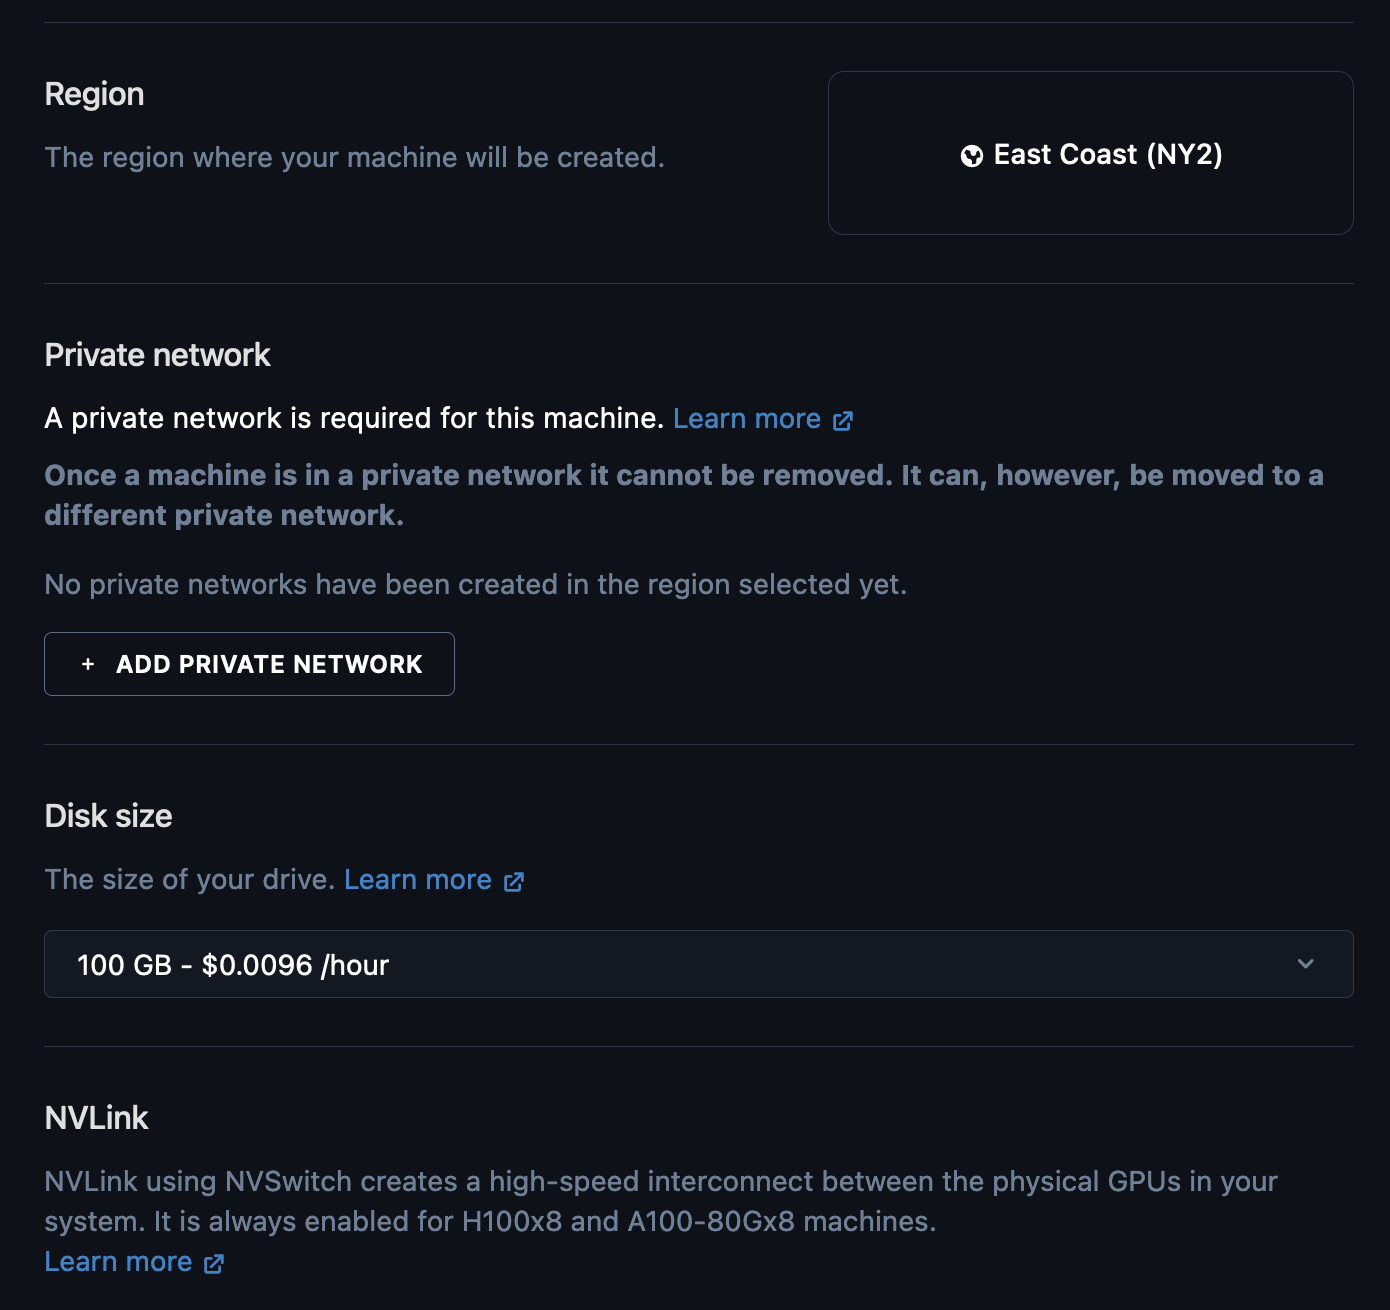
After the machine selection, we have some common settings for users to adjust, namely the region, private network. available disk size, and NVLink. The region and NVLink are immutable, required settings so we can ignore them. It is worth noting, however, that these machines are currently all running at our east coast, USA (NY2) data center. This may affect us if we are operating somewhere far away from the US, so please keep that in mind when testing.
Next, to select an H100 it will require a private network, so go ahead and instantiate a private network with your name of choice. We called ours "testnet". Make sure to set this up, or the machine will not launch.
Last, we can choose our disk size. If we're working on any sort of AI program you may want 500 gigabytes or a terabyte. The maximum storage is 2 TB, but contacting our sales team can give access to more storage space, as needed.
To round out this machine creation process, we also have a plethora of advanced settings we can adjust. We recommend toggling this section to make a few changes to make sure everything runs smoothly.
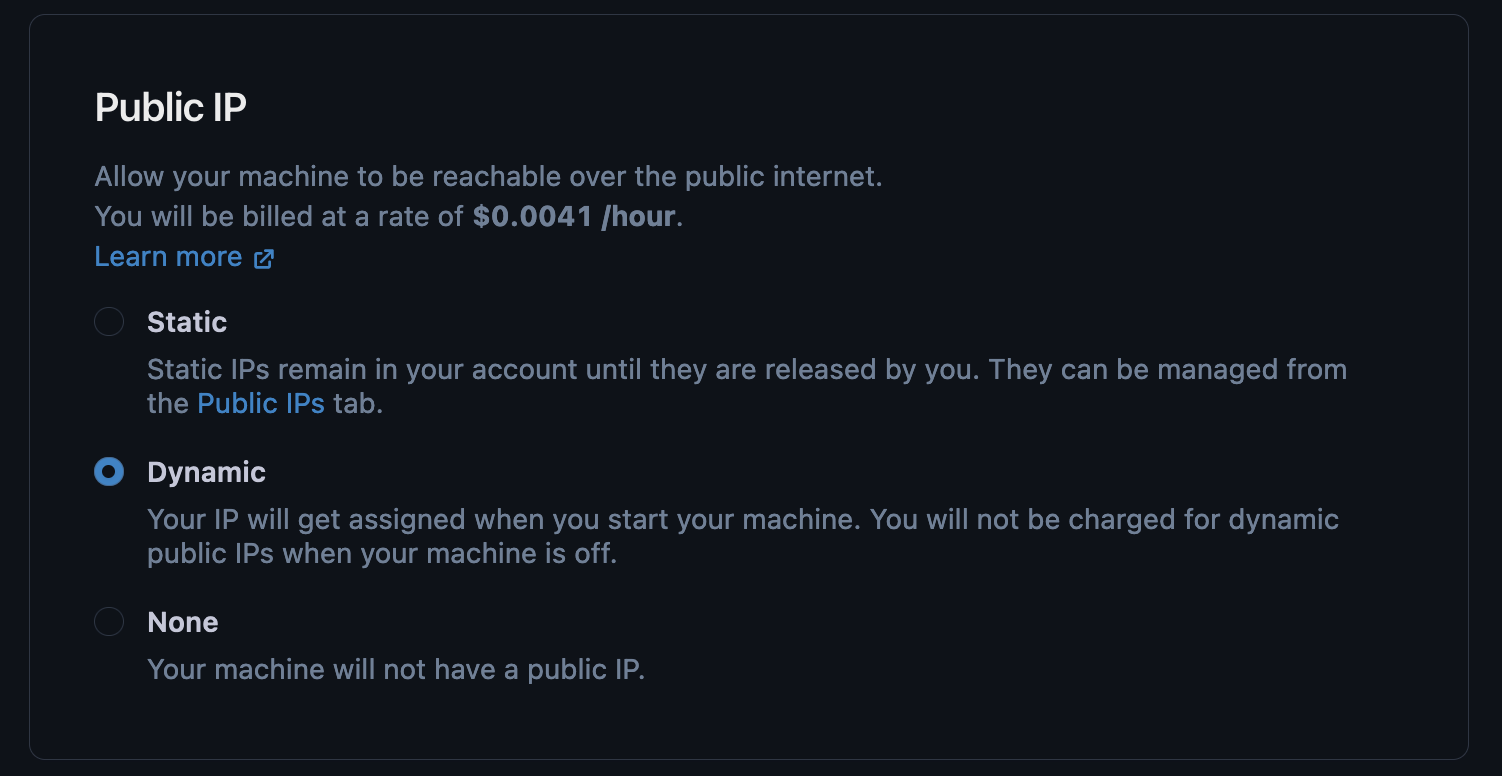
First, set a Machine name. This is just best practice. Next, ensure the Public IP is set to "Dynamic" if you wish to have SSH access to the machine from your local environment. Next, we can adjust the cadence of taking snapshots. These snapshots will act as backups for our work, and can be used to regress the machine back to a previous state.
Finally, we get to take a look at the price summary. This gives an accurate measure of each of the associated costs the machine will incur, offline and online, once you requisition the Machine. Storage, public IPs, and automatic snapshotting all comes with a charge less than 1 US cent per hour.
Once that's all done, we can hit start!
If you wish to access the machines using SSH from your local, be sure to setup SSH before launching the Machine -> Video Tutorial on setting SSH
The Machine details page
Once the Machine launches, we are redirected to the new Machines Details page. The Machine details page contains everything needed to access, maintain, and manage our Machine, as well as our list of Snapshots and other useful information.
Using the tabs in top right of the details window above, we can look at a variety of useful integrations to our machine:
- We can generate a snapshot and adjust snapshot settings
- We can generate a template of our computer at a moments notice
- We can look at the logs of all the work our machine's done
- We can attach shared drives and setup storage across different Machines
- We can also do more minor or general settings adjustment if we need to make them. We can also deactivate our machine from here if we need to and set an auto shutdown time.
Using our machine
Back in the details page we can click on the "open desktop" button to stream our desktop within our browser. As we can see in the video walkthrough, this is a Linux Ubuntu desktop just in a browser window, and should be very familiar to most computer users. Within the desktop we can do things like open up a web browser, open up a terminal, etc. like any local machine. For our example, we ran nvidia-smi to show the GPUs in the system. Now this is just one of the ways you can access your core machine.
Additionally, you can also SSH in. As we mentioned at the start, be sure to set up SSH before starting your Machine to avoid any connectivity issues. As we can see in the video, next to the button to stream the desktop, there's an "Access Your Machine" button. We can also get it from the main machines page by hovering over the running machine and clicking "Connect". Doing so will give us our SSH passcode, and if we've already set up our terminal beforehand to accept SSH keys from Paperspace, then you should be good to go. Just simply enter in your SSH passcode into your local terminal, and you can get started. In the video, we again ran nvidia-smi. just to show that we are indeed on the same machine here with our eight connected H100s with NVLink.
We can now begin doing whatever work we need to do on the H100x8 instance! Thank you for reading, and enjoy using Paperspace.