The deep learning models created using TensorFlow require high processing capabilities to perform inference. Fortunately, there is a lite version of TensorFlow called TensorFlow Lite (TFLite for short) which allows such models to run on devices with limited capabilities. Inference is performed in less than a second.
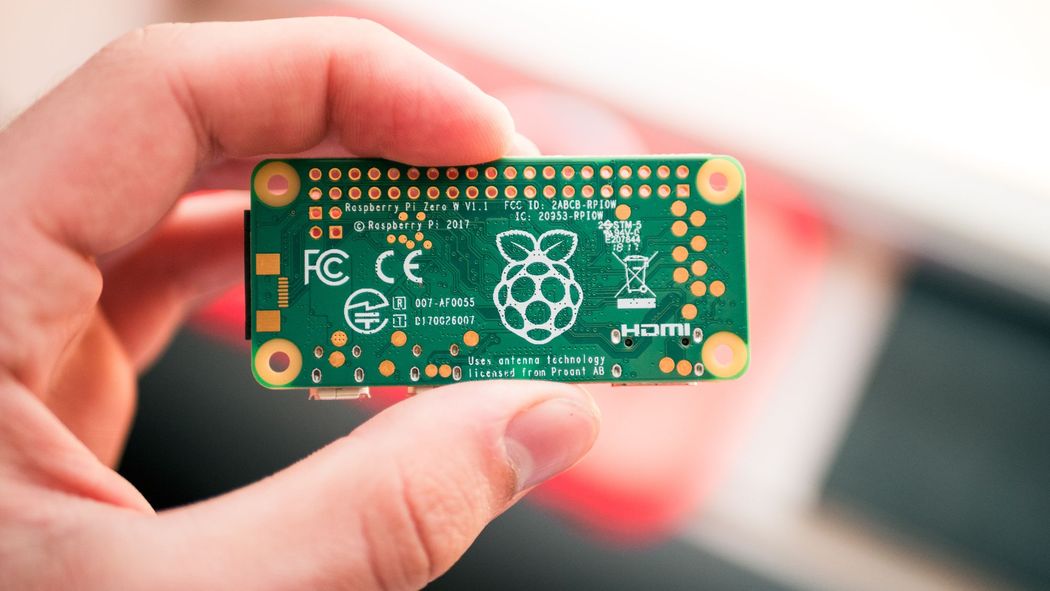
In this tutorial we'll prepare Raspberry Pi (RPi) to run a TFLite model for classifying images. After that, the TFLite version of the MobileNet model will be downloaded and used for making predictions on-device.
The sections covered in this tutorial are as follows:
- Accessing Raspberry Pi from PC
- Preparing TFLite in RPi
- Downloading MobileNet
- Classifying a Single Image
Let's get started.
Bring this project to life
Accessing Raspberry Pi from PC
You have multiple ways by which you can access Raspberry Pi. Whichever way you use, the target of this section is to be able to access the terminal of the RPi in order to enter commands that help prepare it for TFLite. Let's discuss some of these methods.
One way is to use the RPi as a regular PC by connecting it to a monitor using its HDMI port, and plugging in a mouse and keyboard. After the RPi starts successfully you can access its GUI and open its terminal to enter commands, such as for installing or downloading something. Unfortunately, this method might not work when you buy a new RPi, because some settings need to be changed to allow the use of the HDMI port.
Accessing the RPi using a dedicated monitor and peripherals is costly unless you have your own PC/Laptop to use for this. When using your own PC to control the RPi you first need to connect the Ethernet port of the RPi to a port in a switch. The switch must support the DHCP (Dynamic Host Configuration Protocol) to give the RPi an IP address automatically. After the IP address is assigned to the RPi, you can find the IP address of the RPi Ethernet interface from a PC that is also connected to the same switch by using an IP scanner tool. After getting the IP address of the RPi, you can then open an SSH session from your PC in which you can access the RPi terminal. You can find more details about this process in this tutorial.
Using the method described above, the RPi must be connected to the switch each time you need to access it. To make things easier we can use the wireless interface. After connecting the RPi to a switch port, you can make future access of the RPi easier by configuring its wireless interface on a wireless network. This network can be a hotspot created using a smartphone, for instance. After the network is configured, you may not need to use the switch later. All you need to do is to get your PC connected to the same wireless network. An IP scanner tool can tell you the IP address of the wireless interface in the RPi. After that, you can open an SSH session in which the RPi terminal can be accessed.
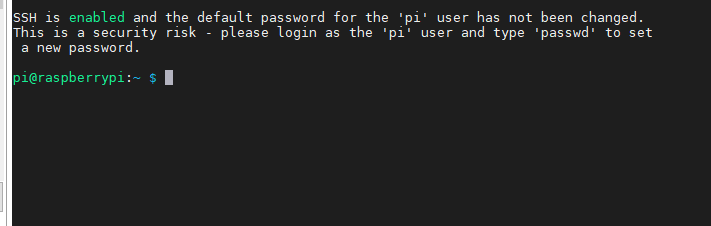
Regardless of the way you used to access the RPi, you should be able to access the terminal according to the next figure. At this point, you can issue commands in the terminal to prepare TFLite. We'll discuss this in the next section.
Preparing TFLite in RPi
This tutorial assumes that you already have a TensorFlow model converted into a TensorFlow Lite model. If not, there are plenty of TensorFlow Lite models available for download. We'll be using the Lite version of MobileNet.
TensorFlow Lite is part of TensorFlow. By installing the TensorFlow library, you will install the Lite version too. Before installing TensorFlow just think about the required modules you need for your project. In this tutorial, we just need to run a TFLite model for classifying images and nothing more. Based on this, we do not need to install everything in TensorFlow; just the parts relevant to our task.
For making predictions using a TFLite mode, the only class needed from TensorFlow is the Interpreter class which is accessed by tensorflow.lite.python.interpreter.Interpreter. So, rather than installing everything in TensorFlow, we can just install this class. This saves our storage from holding unused files. So, how do we get just this class from TensorFlow?
There is a package named tflite_runtime that only contains the Interpreter class. It can be accessed by tflite_runtime.interpreter.Interpreter. To install the tflite_runtime package, just download the Python wheel that is suitable for the Python version running on your RPi. Here are the download links for the wheel files based on the Python version (e.g. Python 3.5 or Python 3.7).
In my RPi, the .whl file is downloaded to this path: /home/pi/Downloads/tflite_runtime-1.14.0-cp35-cp35m-linux_armv7l.whl. I then used pip3 install, as shown below, to install it. Note that you need to use pip3, as just pip will refer to Python 2.
pip3 install /home/pi/Downloads/tflite_runtime-1.14.0-cp35-cp35m-linux_armv7l.whlThe next figure shows that the package is installed successfully.

After the tflite_runtime is installed successfully, you can check that everything is working properly by importing the Interpreter class according to the next line:
from tflite_runtime.interpreter import InterpreterThe next figure shows that everything is running correctly.

It is essential to know that installing tflite_runtime does not mean everything in TFLite is installed. Just the Interpreter class is available, which makes predictions based on an existing TFLite model. If you need more features from TFLite, then you need to install the complete TensorFlow package.
After installing tflite_runtime and making your RPi ready for making predictions, the next step is to make the TFLite model available in the RPi storage (that is to say, by downloading it). The next section discusses downloading the TFLite version of MobileNet.
Download MobileNet
MobileNet has already been converted into a TFLite version and is available for download here. It is a compressed file that not only contains the TFLite model, but also the class labels that the model predictions. After decompressing this file, its contents are as follows:
- mobilenet_v1_1.0_224_quant.tflite
- labels_mobilenet_quant_v1_224.txt
There are two versions of MobileNet, and each version supports input images of different shapes. Here we'll use Version 1, which accepts images of shape (224, 224). Finally the model is quantized, which is a step for reducing the model size and reducing the latency of predictions.
I created a new folder called TFLite_MobileNet in RPi to hold these two items, as shown below.
/home/pi/TFLite_MobileNet
	mobilenet_v1_1.0_224_quant.tflite
	labels_mobilenet_quant_v1_224.txt
	test.jpg
I also included a sample image, test.jpg (shown below), for being fed to the model for classification.

Now that we've prepared all the required files, in the next section we'll see how to feed this image to the model to predict its class label.
Classifying a Single Image
The code required for loading the TFLite model and classifying an image is listed below. We start by loading the required libraries. Then the paths of the model and the class labels are prepared in the model_path and labels variables. The model path is then fed to the Interpreter class constructor for loading it. The loaded model is returned in the interpreter variable.
from tflite_runtime.interpreter import Interpreter
from PIL import Image
import numpy as np
import time

data_folder = "/home/pi/TFLite_MobileNet/"

model_path = data_folder + "mobilenet_v1_1.0_224_quant.tflite"
label_path = data_folder + "labels_mobilenet_quant_v1_224.txt"

interpreter = Interpreter(model_path)
print("Model Loaded Successfully.")

interpreter.allocate_tensors()
_, height, width, _ = interpreter.get_input_details()[0]['shape']
print("Image Shape (", width, ",", height, ")")

# Load an image to be classified.
image = Image.open(data_folder + "test.jpg").convert('RGB').resize((width, height))

# Classify the image.
time1 = time.time()
label_id, prob = classify_image(interpreter, image)
time2 = time.time()
classification_time = np.round(time2-time1, 3)
print("Classificaiton Time =", classification_time, "seconds.")

# Read class labels.
labels = load_labels(label_path)

# Return the classification label of the image.
classification_label = labels[label_id]
print("Image Label is :", classification_label, ", with Accuracy :", np.round(prob*100, 2), "%.")
After the model is loaded, the allocate_tensors() method is called for allocating memory for the input and output tensors. After memory allocation, the get_input_details() method is called to return some information about the input tensor. This includes the width and height of the input image. Why do we return this information? Remember that the loaded model accepts images of shape (224, 224). If an image of a different size is fed to the model then we'll get an error. By knowing the width and height of the image accepted by the model, we can resize the input accordingly so that everything will work correctly.
After the width and height of the input tensor are returned, the test image is read using PIL, and the returned image size is set equal to the image size that the model accepts.
Now we have both the model and image prepared. Next, we'll classify the image using the classify_image() function which is implemented below. Within it, the input tensor of the model is set equal to the test image according to the set_input_tensor() function. Next is to use the invoke() function to run the model and propagate the input to get the outputs. The outputs returned are the class index, in addition to its probability.
def classify_image(interpreter, image, top_k=1):
  tensor_index = interpreter.get_input_details()[0]['index']
  input_tensor = interpreter.tensor(tensor_index)()[0]
  input_tensor[:, :] = image

  interpreter.invoke()
  output_details = interpreter.get_output_details()[0]
  output = np.squeeze(interpreter.get_tensor(output_details['index']))

  scale, zero_point = output_details['quantization']
  output = scale * (output - zero_point)

  ordered = np.argpartition(-output, top_k)
  return [(i, output[i]) for i in ordered[:top_k]][0]
After returning the classification probability, the class labels are loaded from the text file using the load_labels() function which is implemented below. It accepts the text file path and returns a list with the class labels. The index of the class to which the image is classified is used to return the associated class label. Finally, this label is printed.
def load_labels(path): # Read the labels from the text file as a Python list.
  with open(path, 'r') as f:
    return [line.strip() for i, line in enumerate(f.readlines())]
The complete code is listed below.
from tflite_runtime.interpreter import Interpreter
from PIL import Image
import numpy as np
import time

def load_labels(path): # Read the labels from the text file as a Python list.
  with open(path, 'r') as f:
    return [line.strip() for i, line in enumerate(f.readlines())]

def set_input_tensor(interpreter, image):
  tensor_index = interpreter.get_input_details()[0]['index']
  input_tensor = interpreter.tensor(tensor_index)()[0]
  input_tensor[:, :] = image

def classify_image(interpreter, image, top_k=1):
  set_input_tensor(interpreter, image)

  interpreter.invoke()
  output_details = interpreter.get_output_details()[0]
  output = np.squeeze(interpreter.get_tensor(output_details['index']))

  scale, zero_point = output_details['quantization']
  output = scale * (output - zero_point)

  ordered = np.argpartition(-output, 1)
  return [(i, output[i]) for i in ordered[:top_k]][0]

data_folder = "/home/pi/TFLite_MobileNet/"

model_path = data_folder + "mobilenet_v1_1.0_224_quant.tflite"
label_path = data_folder + "labels_mobilenet_quant_v1_224.txt"

interpreter = Interpreter(model_path)
print("Model Loaded Successfully.")

interpreter.allocate_tensors()
_, height, width, _ = interpreter.get_input_details()[0]['shape']
print("Image Shape (", width, ",", height, ")")

# Load an image to be classified.
image = Image.open(data_folder + "test.jpg").convert('RGB').resize((width, height))

# Classify the image.
time1 = time.time()
label_id, prob = classify_image(interpreter, image)
time2 = time.time()
classification_time = np.round(time2-time1, 3)
print("Classificaiton Time =", classification_time, "seconds.")

# Read class labels.
labels = load_labels(label_path)

# Return the classification label of the image.
classification_label = labels[label_id]
print("Image Label is :", classification_label, ", with Accuracy :", np.round(prob*100, 2), "%.")
The outputs of the print messages are shown below.
Model Loaded Successfully.
Image Shape ( 224 , 224 )
Classificaiton Time = 0.345 seconds.
Image Label is : Egyptian cat , with Accuracy : 53.12 %.
This is everything you need to know for classifying an image using TFLite on RPi.
Conclusion
This tutorial showed how to use TensorFlow Lite on Raspberry Pi. We looked at the sample use case of classifying a single image. There's no need to install the complete TensorFlow package; just tflite_runtime is used, which supports the Interpreter class. The MobileNet model, which is pre-trained and already converted to a TFLite model, is used for making predictions.