Bring this project to life
Since the release of the Stable Diffusion model, users have been clamoring for ways to implement the powerful technology into video creation. There have been many attempts to extend Stable Diffusion as such, though most have fallen flat of the objective of creating a fully uncontrolled video generator. Modelscope released an amusing attempt that we covered earlier this year, and ControlVideo showed a lot of interesting promise as well. Where these models typically fall short is on there versatility, ability to deal with subjects in both the fore and background, and the relatively short time spans they can reliably generate videos within before turning to noise.
In this article, we will be discussing one of the latest models to take on the challenge of video generation: StableVideo. Albeit it is not a zero-shot model, StableVideo is one of the first models frameworks that reliably captures the capabilities of Stable Diffusion to edit images without disrupting the optical flow of the subjects. By using a pre-made set of video frames as the baseline noise for generation, the model can create extreme variations with minimal loss to the directional movement of the subject and noising of the background.
In this article. we will begin with a short overview of how the model works under the hood. Afterwards, we will show how to set up and run StableVideo in a Paperspace Notebook. This will be run using the provided Gradio demo created by the authors. Click the Run on Paperspace link at the top of the article to open the repo in a Paperspace Notebook to follow along!
StableVideo Model Breakdown
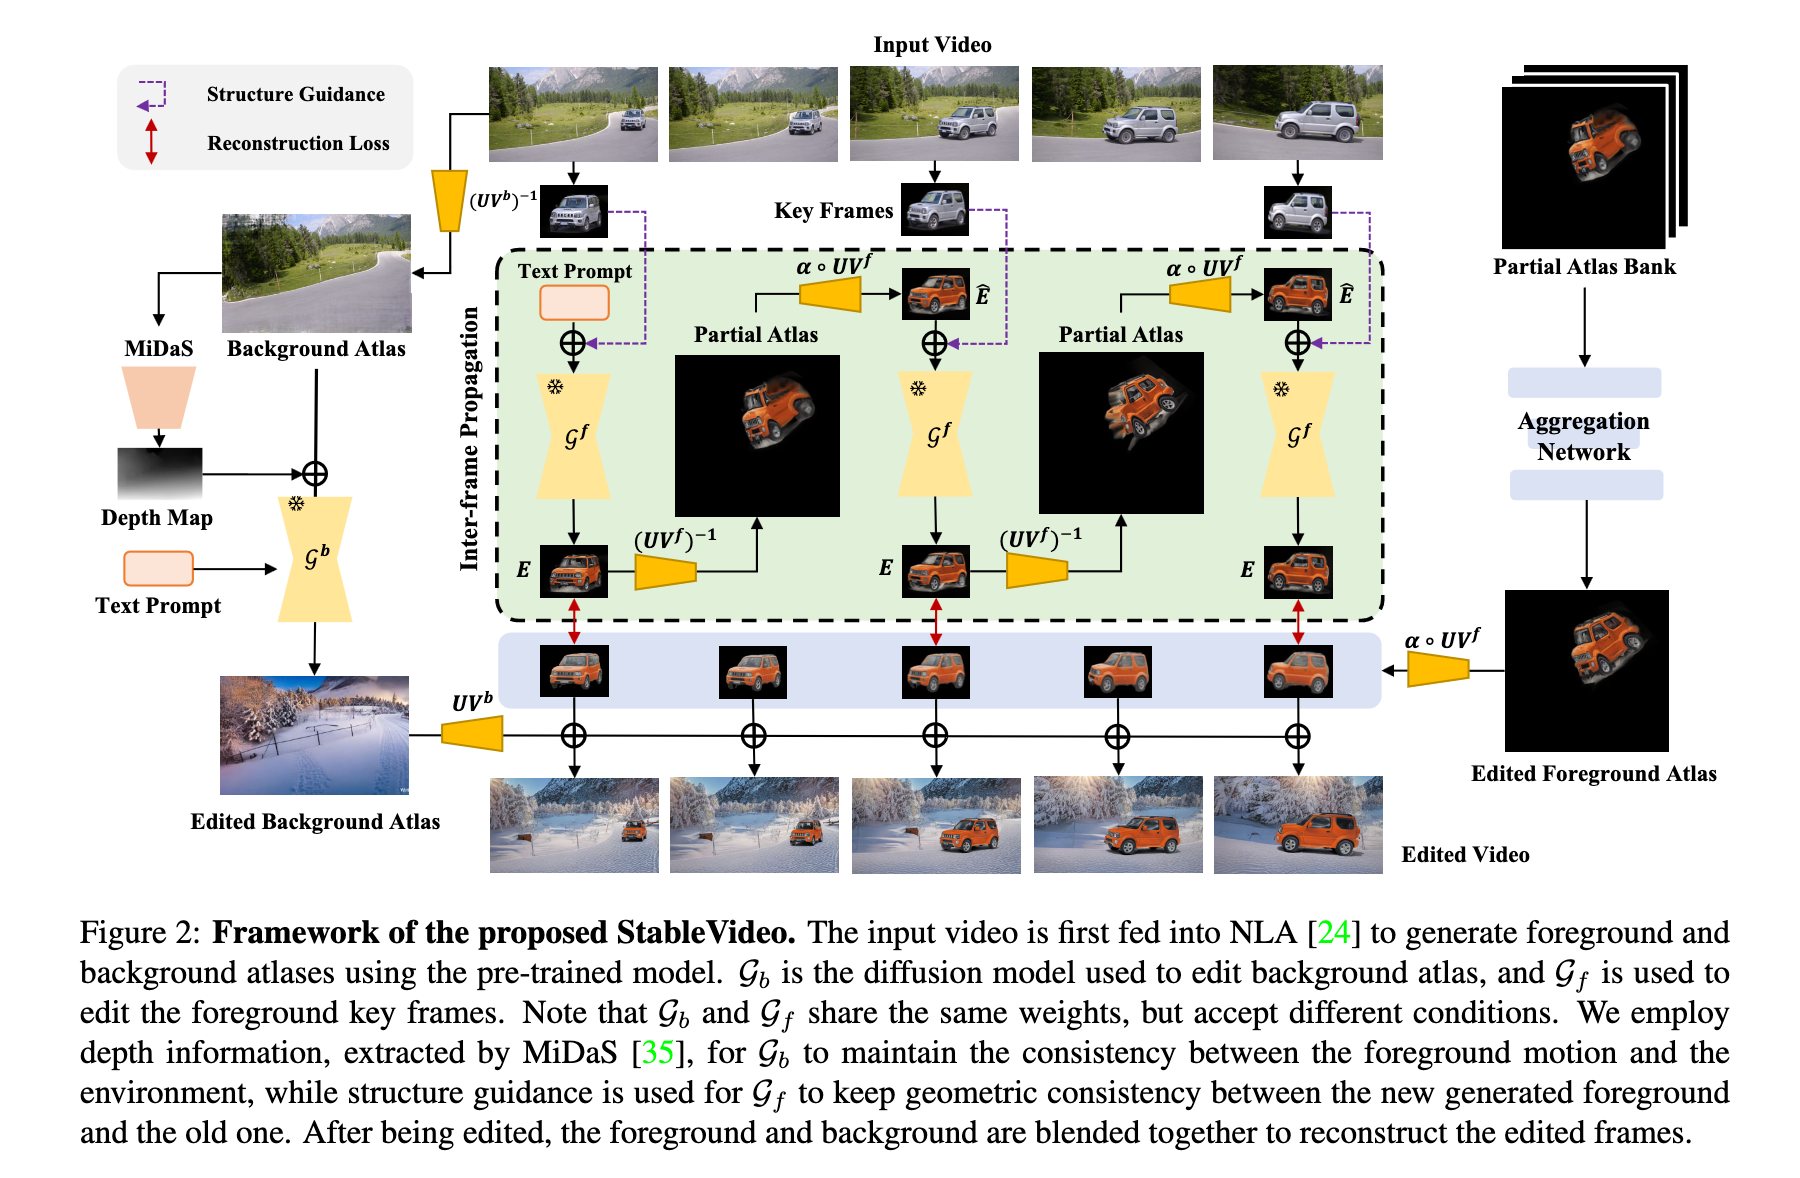
For StableVideo to work, we initially need to start out with a dataset that has been created specifically for this task. To do this, we need to use Neurally Layered Atlases. These allows us to create separate single object representations of the background and foreground subject in separately stored atlases. MiDaS depth extraction is used to maintain the consistent subject motion across the background environment, making use of the ControlNet depth model to map. They then leverage the Canny model to maintain the consistency of the background across the movement path of the video. These effects are then merged together to create the effect of the edited video.
StableVideo Code Demo
Fortunately, StableVideo's original authors have provided a nifty demo that we can take advantage of using Paperspace's wide variety of powerful GPUs. We highly recommend using a more powerful GPU, such as any of the Ampere GPUs. We did our testing using an 80 GB A100. Otherwise, click the Run on Paperspace link below to spin this up on a completely Free GPU!
Bring this project to life
Consider joining or Pro or Growth plans to access more powerful GPUs for the cost of only a single monthly payment. These will radically speed up get up our results.
Setup
Once we have clicked the link and started up our Notebook, we will know its ready when we see the red Start Machine button replaced with the "Ready" status and a green kernel dot. These can all be found in the top left of the console.
Open up the StableVideo Notebook to begin the demo itself! The first bit of markdown explains what we are installing and downloading using the first call. Read the cell, and then scroll to the first code cell below it.
This code cell is used to perform all the downloads and setup we need to make this project work. To begin the demo, first run this code cell.
!pip install einops omegaconf gradio timm open_clip_torch basicsr imageio[ffmpeg] imageio[pyav]
!pip install pytorch_lightning==1.5.0
!wget -O ckpt/control_sd15_depth.pth https://huggingface.co/lllyasviel/ControlNet/resolve/main/models/control_sd15_depth.pth
!wget -O ckpt/control_sd15_canny.pth https://huggingface.co/lllyasviel/ControlNet/resolve/main/models/control_sd15_canny.pth
!mkdir data
%cd data
!wget https://www.dropbox.com/s/oiyhbiqdws2p6r1/nla_share.zip
!unzip nla_share.zip
%cd /notebooks/
Specifically, we need to install einops, omegaconf, gradio, timm, open_clip_torch, basicsr, imageio[ffmpeg], imageio[pyav],
and pytorch_lightning==1.5.0. After installing the requirements, we will download the canny and depth ControlNet models from their original release repository. The application uses these specifically to make the scripts function properly, in addition to Stable Diffusion v1-5.
Finally, we will get the demo data from the provided dropbox link.
After setup is complete, we can navigate to the next section to spin the demo up itself.
Launching the demo
Launching the demo application is fortunately, simple. Just navigate to the next and final code cell, and run it. This will download the Stable Diffusion checkpoint model to the cache on the first run, and will then give us a shared Gradio link we can use to access from any web accessible browser, including mobile devices!
!python app.py Running the demo
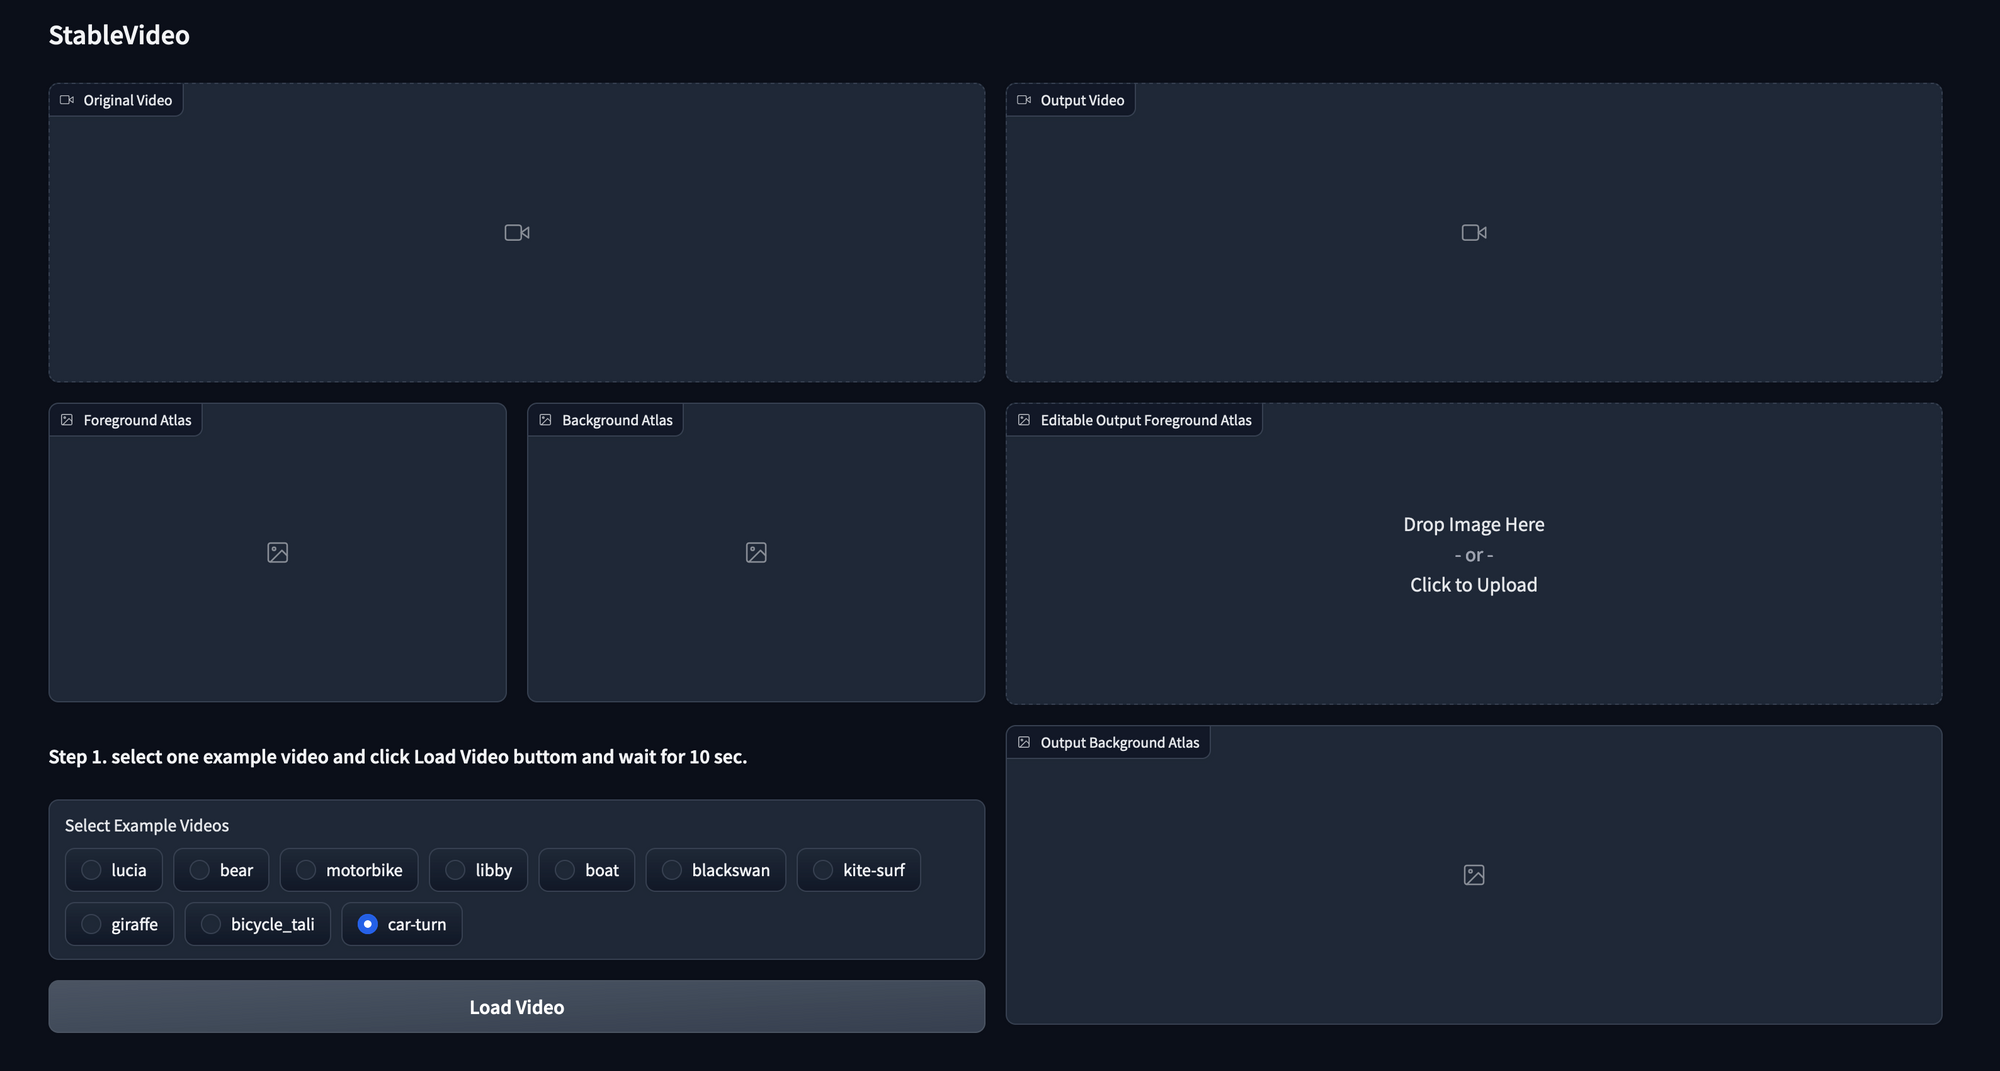
Once we have opened up our demo link, we will be greeted with a sleek Gradio GUI to interact with our models. To get started, lets scroll down to "Step 1" and select the "bear" option from the example videos. These are a selection of prepared data for us to manipulate using Stable Diffusion and ControlNet's Canny and Depth models. The data model for each example is created using a series of masked and unmasked images from a motion video using Neural Layered Atlases to create distinct editable backgrounds and subjects that can be made to interact with one another in the sequence. In the follow up to this post, we will show to use StableVideo on your own trained models. For now, let's look at our bear example.
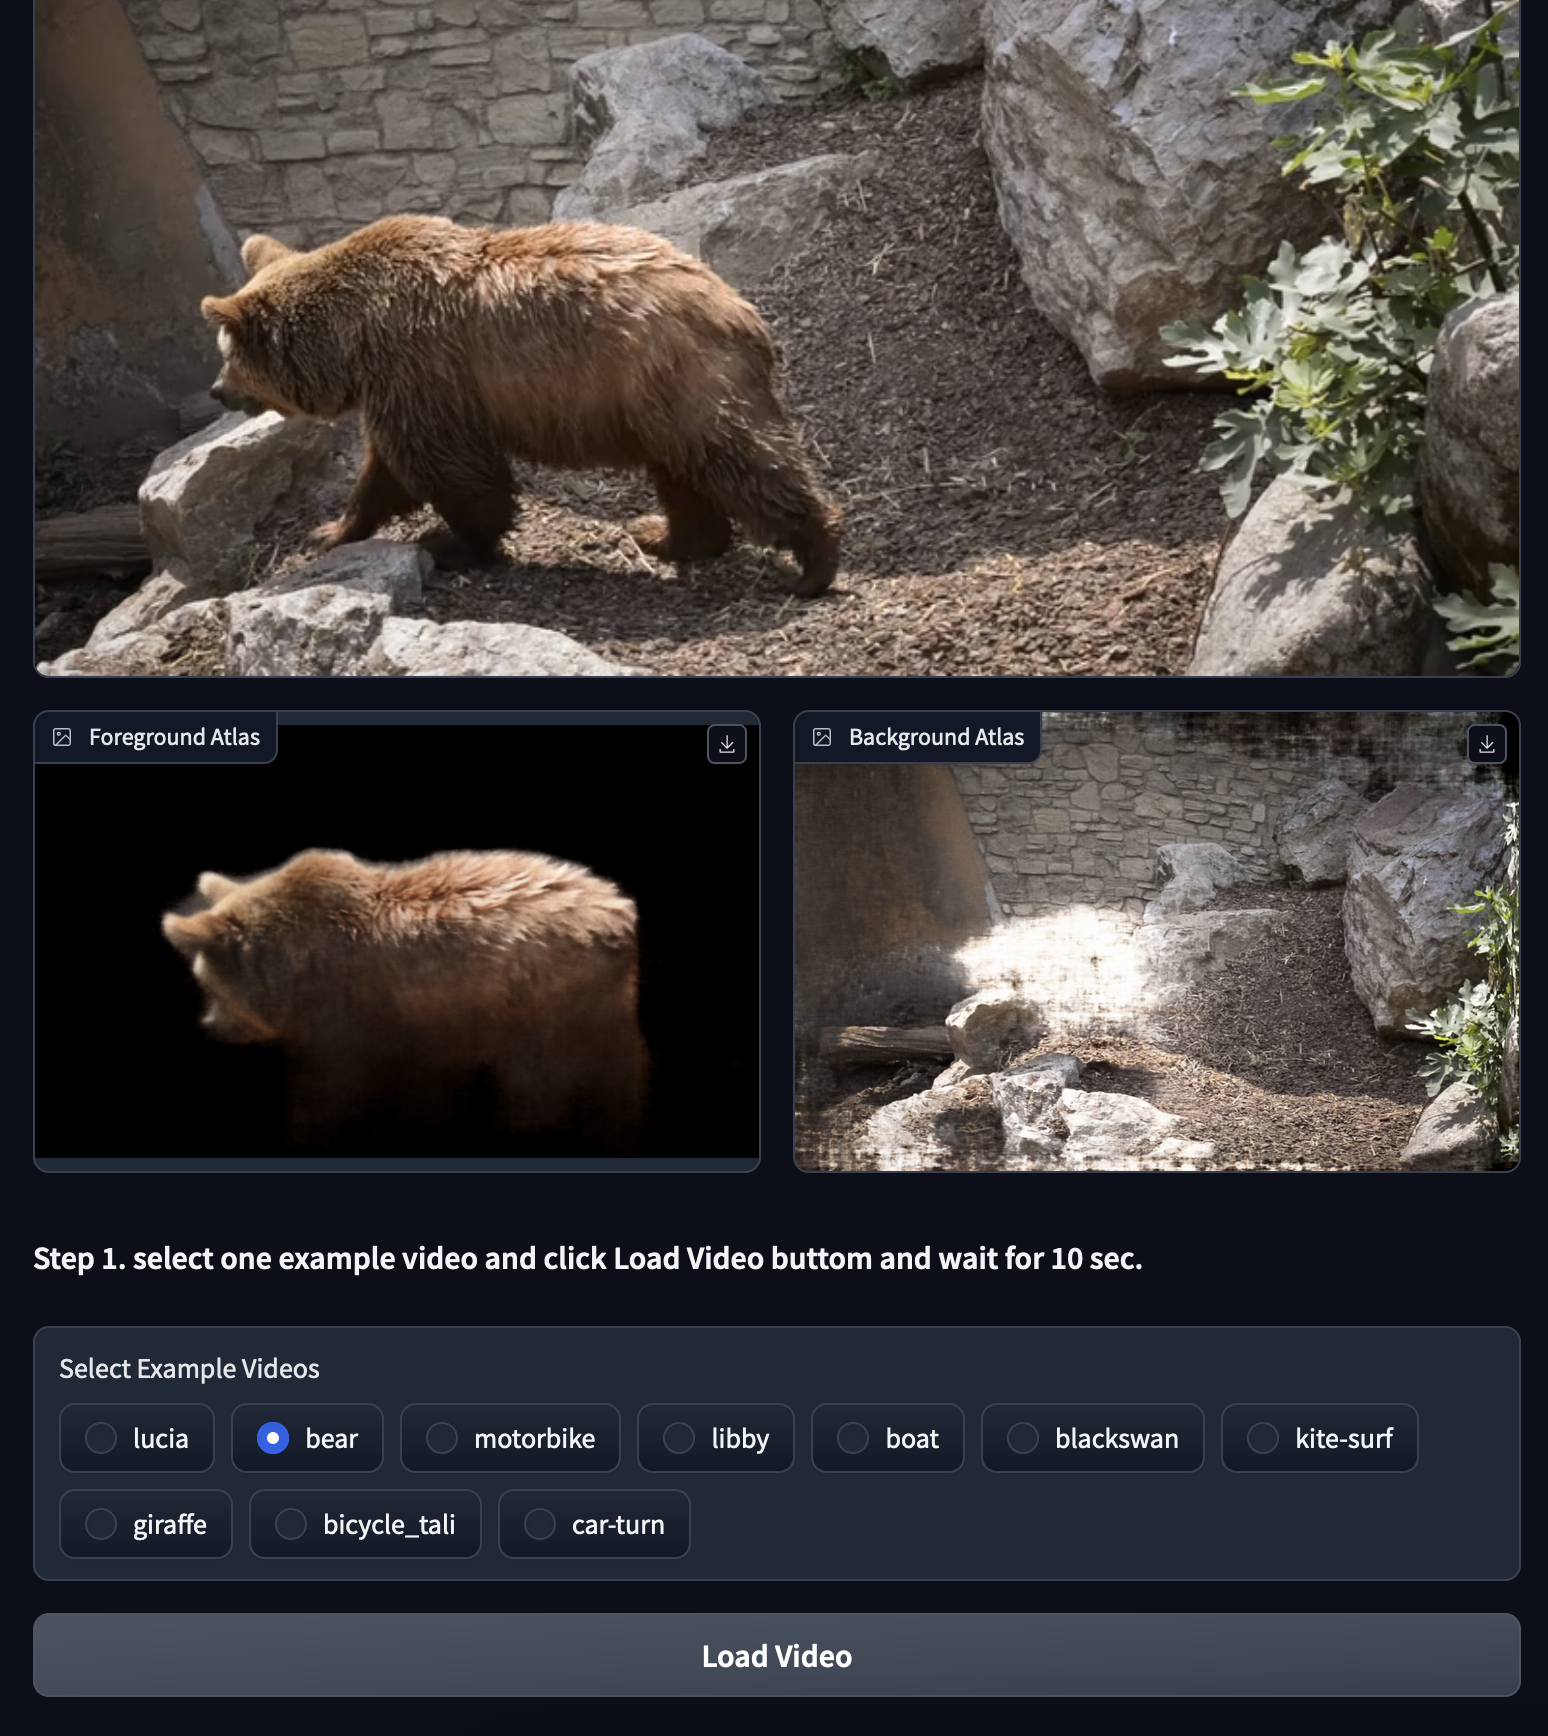
The original video is as it is described, the foreground atlas contains the subject of our original video, and the background access contains everything that was not in the original video's masked regions. Each atlas can be edited independently, so we may use the StableVideo GUI to edit just the subject of the foreground, all of the background details and objects, or both!
Now for the AI editing. StableVideo works through a process that is not too dissimilar to the img2img Stable Diffusion generation process. It uses each frame of the foreground and background objects to create the initial noise for the diffusion and ControlNet models to use as guidance. Thus, we want to input prompts that are not too dissimilar from our original inputs. Putting in something like a celebrity's name with the "bear" category would likely yield horrific results, for example.
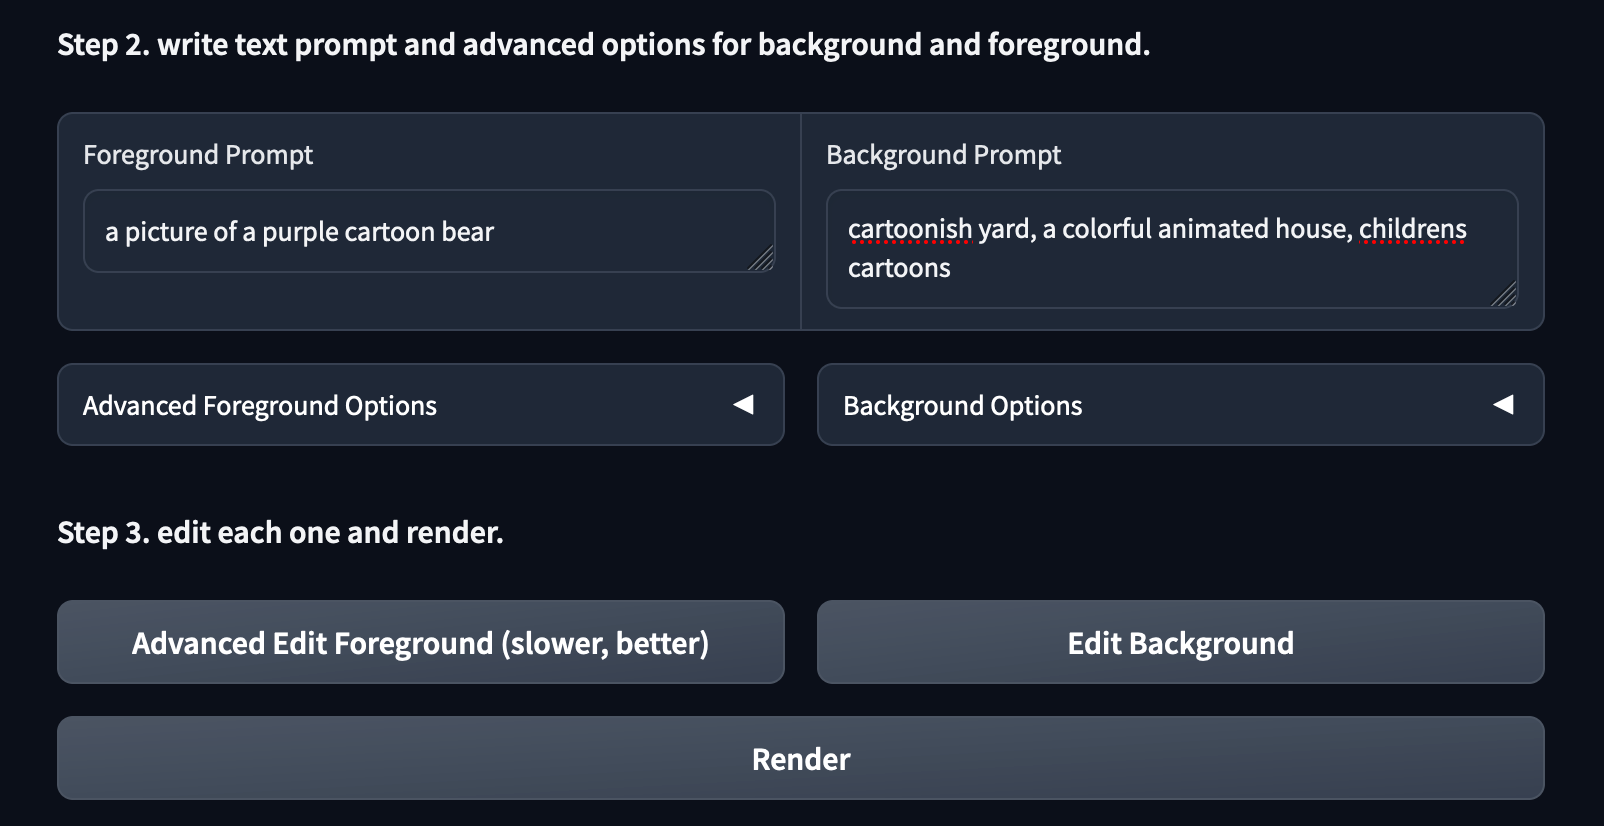
To edit your prompt for the foreground atlas, edit the field in the foreground prompt. For our example, we are going to use "a picture of a purple cartoon bear". Next, we can input our edits for the background prompt. For this one, let's use "cartoonish yard, a colorful animated house, childrens cartoons".
Now that we have added our prompts, we can now use the buttons in Step 3 to generate our edited videos. It is critical that these be pressed in the correct order in order to get the final result. We need to first click the Advanced Edit Foreground button, then the Edit Background button, and finally the Render button.
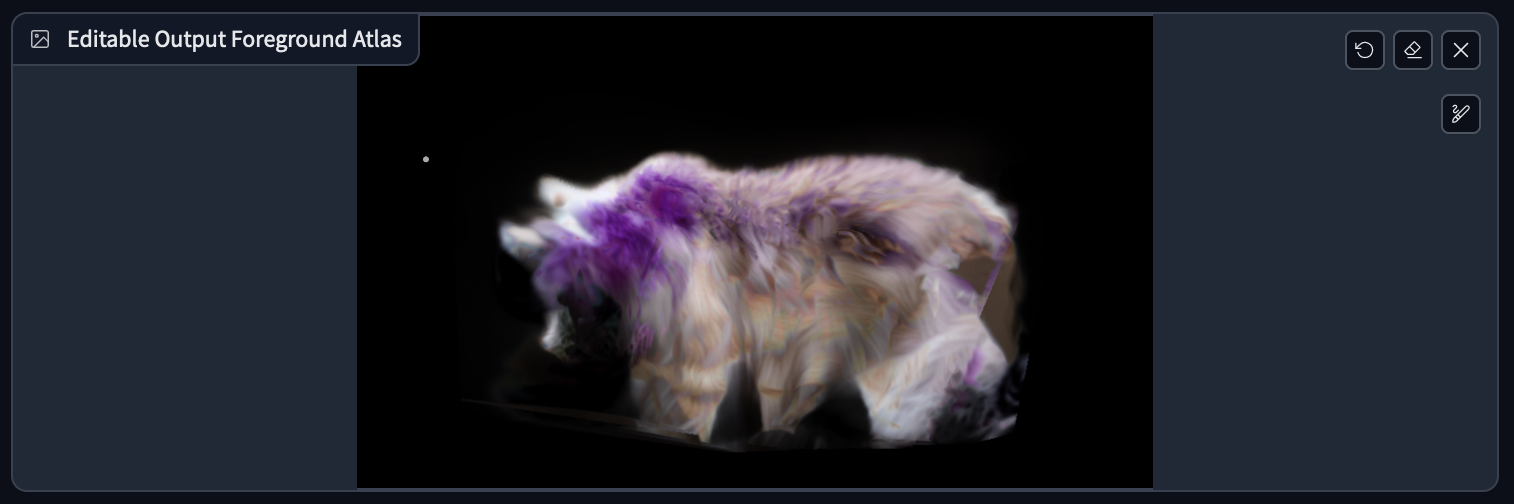
Our first result is the foreground object. This uses 3 key frames by default to create a mesh representation of the foreground subject. This mesh can then be applied to the masked area by stable video across the background to edit the foreground subject in practice. For the purposes of this experiment, this result is sufficiently cartoonish. If we do desire to be more in control of our edits, we can use the Advanced Foreground Options dropdown to modify our results. We suggest raising the guidance scale and noise scale values up if your results are not approaching the desired outcome.
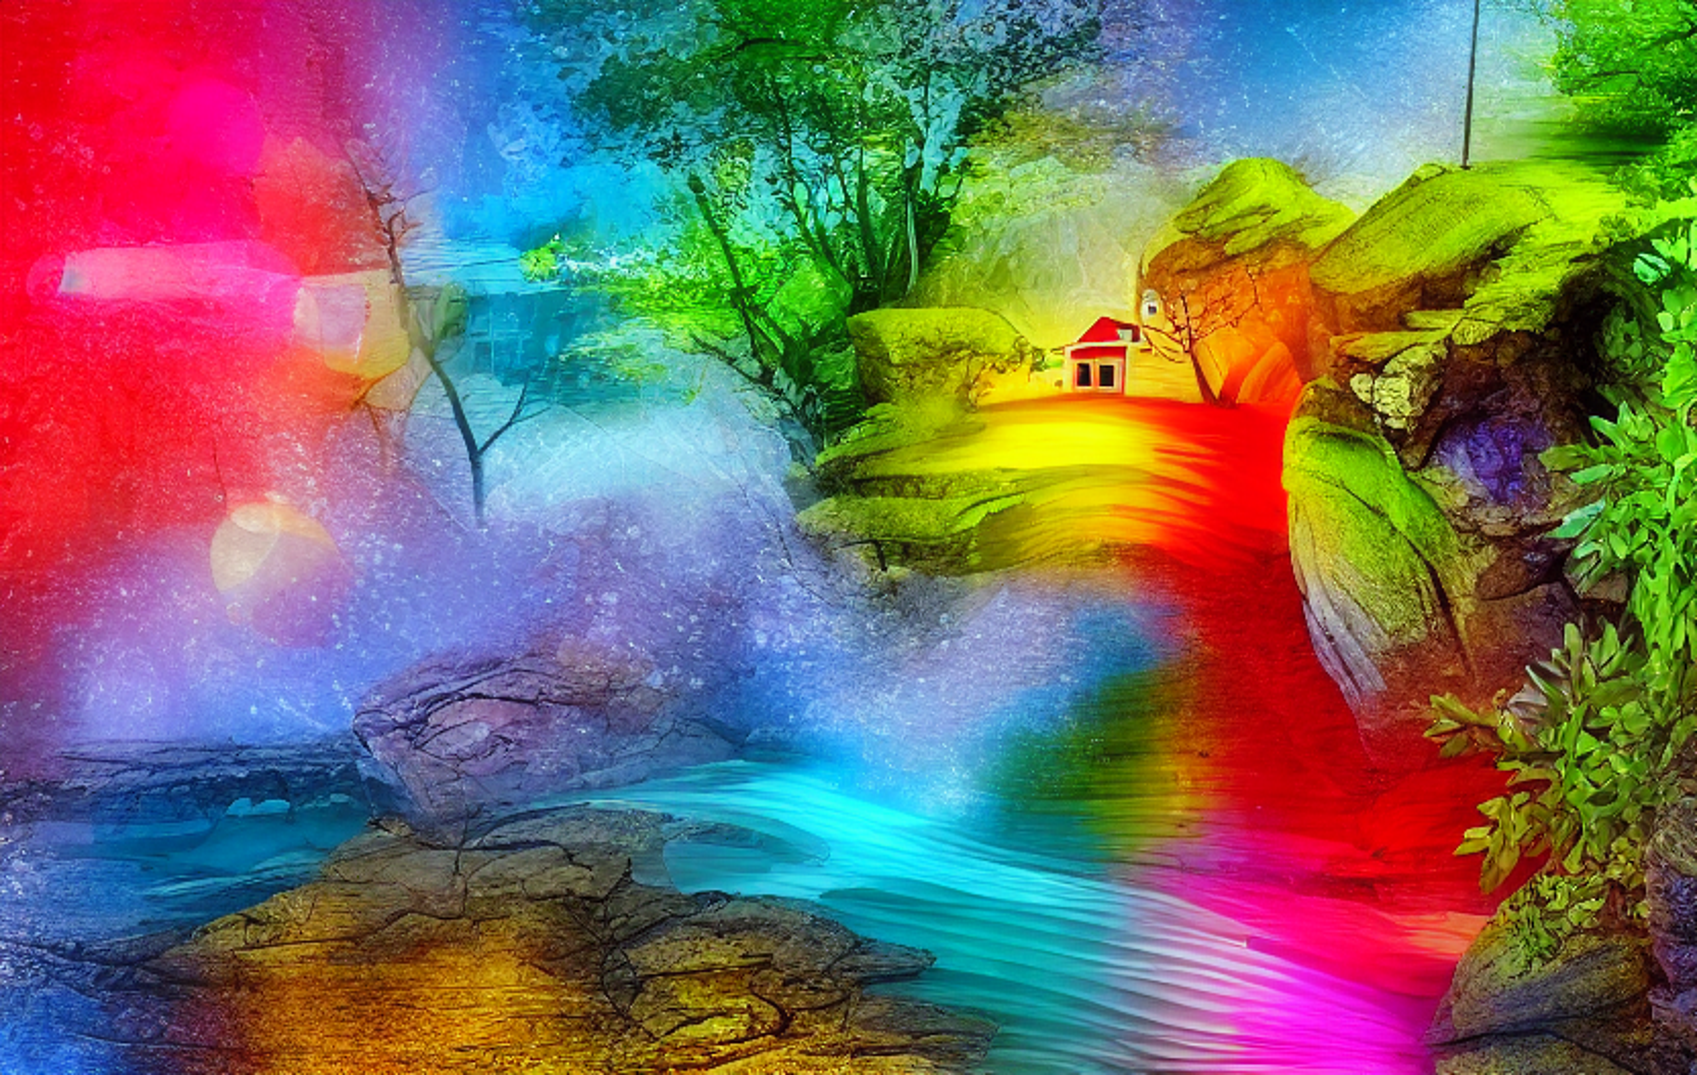
Next, we have our background atlas. Much like the foreground atlas, it will use specific key-frames from the loaded video to generate a sort of giant background that our foreground object will then appear to move through. Once this has completed generating, we can then hit the final Render button to output the final video example.
As we can see from the final output, though the result is not perfect in terms of suspension of disbelief and editing perfection, we have achieved a relatively low skill video editing of a subject in motion. Furthermore, because the bear has four moving legs, we found that this was actually one of the more difficult examples to get regularly working. We encourage readers to test out the other examples such as the boat to see the extent of this models flexibility and versatility.
Closing thoughts
StableVideo represents another great step forward for Generative AI's approach to video editing and generation. Projects like this one or CoDeF have enormous progress going forward, and we are extremely excited to see how open source projects like these will enable creators going forward.
Look out for our follow up article on StableVideo showing how to train our own Layered Neural Atlas model to use with StableVideo!