In last week's tutorial, we covered using the awesome GFP-GAN neural network on Gradient notebooks to radically upscale the quality of damaged or low quality photographs. The use cases for such a model are much more apparent than you typically see in cutting edge ML projects; the desire to recover the quality of these images that could range from family heirlooms to low-quality meme fodder is rapidly growing. This can be seen in a lot of social media communities in particular.
In today's tutorial, we are going to take the lessons from last week's tutorial, and apply them to constructing a rudimentary Flask application, and then using Gradient Deployments to access the API in our browser. This will let us access a simple interface where we can quickly upload a photo to be processed and restored by GFP-GAN in a two step process.
By the end of this tutorial you will know how to write a Flask app for deploying the PyTorch model GFP-GAN, how to write and create the necessary Docker file and upload it to Dockerhub for access to Gradient, and how to use Deployments to turn your Flask app into a cloud GPU supercharged proto-web page.
Be sure to read the previous blog and paper by Xintao et al.
The workflow to do this will be as follows:
- Set up the local environment
- Create the flask app in a Docker container
- Test it locally and push to Dockerhub
- Use the image to Deploy on Gradient
- Restore photos!
Set Up
First, we need to make some installs. These are all the libraries required to run GFP-GAN:
torch>=1.7
numpy<1.21  # numba requires numpy<1.21,>=1.17
opencv-python
torchvision
scipy
tqdm
lmdb
pyyaml
tb-nightly
yapf
Flask

#These four have to be installed directly for reasons I haven't been able to figure out (see Dockerfile section)
opencv-python-headless
realesrgan==0.2.2.4
pip install basicsr
facexlib
Most of these will be installed using a requirements.txt script, and they are necessary to run the model on the Flask application as well as to test it on your local machine. Once the installations are complete, open up your preferred code editor.
At this time, go ahead and clone the GFP-GAN repo to your local machine. Open a workspace for the GFP-GAN repo in your editor, and navigate to the file app.py. This is where the structure of the Flask application lies.
Bring this project to life
The Flask app
import sys
import io
import json
import argparse
import cv2
import glob
import numpy as np
import os
from basicsr.utils import imwrite
from os import listdir
from os.path import isfile, join
from werkzeug.utils import secure_filename

import torch
import torchvision.transforms as transforms
from PIL import Image

from flask import Flask, request, render_template, redirect, url_for

from gfpgan import GFPGANer
These are all the imports needed to make this sample application run. GFP-GAN is written in PyTorch, so torch and torchvision are also required for the container to run. The rest serve to ensure the Flask application functions properly.
UPLOAD_FOLDER = 'inputs/whole_imgs'
ALLOWED_EXTENSIONS = {'png', 'jpg', 'jpeg', 'gif'}

app = Flask(__name__,static_folder='results')
app.config['UPLOAD_FOLDER'] = UPLOAD_FOLDER
This next block of code is used to instantiate our Flask app. In the process, we assign the whole_imgs directory as the destination for uploaded files and the results directory to hold the static images for the HTML to display. These images are restricted to the more common typings to ensure there isn't any issues in training.
@app.route("/", methods = ['GET', 'POST'])
def index():
return render_template("index.html")
def allowed_file(filename):
return '.' in filename and \
filename.rsplit('.', 1)[1].lower() in ALLOWED_EXTENSIONS
@app.route("/upload", methods = ['GET', 'POST'])
def upload_file():
# Clear the input and source folders, and dump previous images to saved. You can build another app route to take advantage of these saved images as needed.
source = 'inputs/whole_imgs/'
destination = 'inputs/saved/'
out = 'results/restored_imgs'
for f in os.listdir(source):
os.remove(os.path.join(source, f))
for f in os.listdir(destination):
os.remove(os.path.join(destination, f))
for f in os.listdir(out):
os.remove(os.path.join(out, f))
# Get the file upload
if request.method == 'POST':
# check if the post request has the file part
if 'file' not in request.files:
print('No file part')
return redirect(request.url)
file = request.files['file']
# If the user does not select a file, the browser submits an
# empty file without a filename.
if file.filename == '':
print('No selected file')
return redirect(request.url)
if file and allowed_file(file.filename):
filename = secure_filename(file.filename)
file.save(os.path.join(app.config['UPLOAD_FOLDER'], filename))
return redirect(url_for('main', name=filename))
#HTML form for uploading the file to the app
return '''
<!doctype html>
<title>Upload new File</title>
<h1>Upload new File</h1>
<form method=post enctype=multipart/form-data>
<input type=file name=file>
<input type=submit value=Upload>
</form>
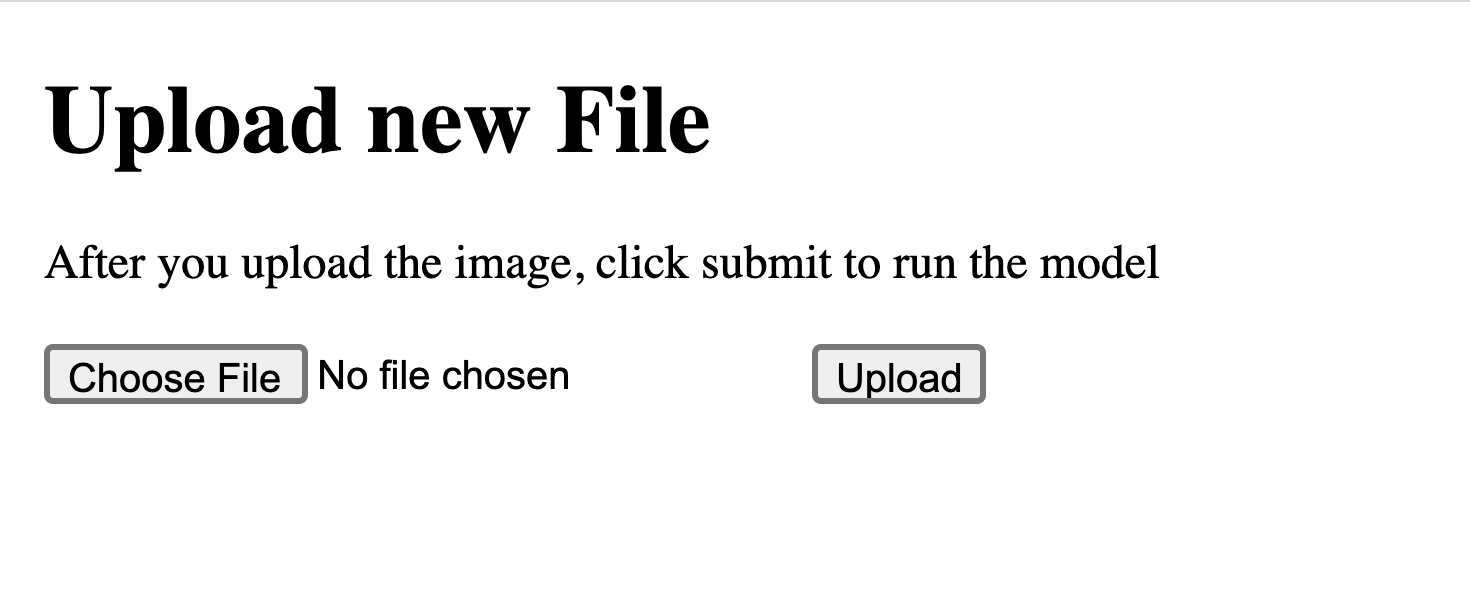
'''The /upload API endpoint of the new site is where users are able to directly upload a file of their choice to be enhanced and restored by GFP-GAN. These scripts take the file, ensure its compatibility with the model, and upload it to the directory the application is pulling from for restoration. This all takes the form of a conventional 'Choose File' button with an 'Upload' button following.
@app.route('/main', methods=['POST','GET'])
def main():
    """Inference demo for GFPGAN.
    All credit to Xintao et al. at https://github.com/TencentARC/GFPGAN for writing this script i've adapted here for Flask.
    """

    # Normally, this repo was designed to be executed from the command line with a series of optional and required args.
    # Instead, you will need to change the arguments you need to change using the sys.argv command (see line 29)
    parser = argparse.ArgumentParser()
    parser.add_argument('--upscale', type=int, default=2, help='The final upsampling scale of the image')
    parser.add_argument('--arch', type=str, default='clean', help='The GFPGAN architecture. Option: clean | original')
    parser.add_argument('--channel', type=int, default=2, help='Channel multiplier for large networks of StyleGAN2')
    parser.add_argument('--model_path', type=str, default='GFPGANCleanv1-NoCE-C2.pth')
    parser.add_argument('--bg_upsampler', type=str, default='realesrgan', help='background upsampler')
    parser.add_argument(
        '--bg_tile', type=int, default=400, help='Tile size for background sampler, 0 for no tile during testing')
    parser.add_argument('--test_path', type=str, default='upload/', help='Input folder')
    parser.add_argument('--suffix', type=str, default=None, help='Suffix of the restored faces')
    parser.add_argument('--only_center_face', action='store_true', help='Only restore the center face')
    parser.add_argument('--aligned', action='store_true', help='Input are aligned faces')
    parser.add_argument('--paste_back', action='store_false', help='Paste the restored faces back to images')
    parser.add_argument('--save_root', type=str, default='results', help='Path to save root')
    parser.add_argument(
        '--ext',
        type=str,
        default='auto',
        help='Image extension. Options: auto | jpg | png, auto means using the same extension as inputs')

# directly input the args you want to run inference_gfpgan using sys.argv. you can change these as needed, but i have used the defaults for simplicity.

    sys.argv = ['--model_path GFPGANCleanv1-NoCE-C2.pth --upscale 2 --test_path inputs/whole_imgs --save_root results --bg_upsampler realesrgan']

    args = parser.parse_args()
    if args.test_path.endswith('/'):
        args.test_path = args.test_path[:-1]
    os.makedirs(args.save_root, exist_ok=True)

    # background upsampler
    if args.bg_upsampler == 'realesrgan':
        if not torch.cuda.is_available():  # CPU
            import warnings
            warnings.warn('The unoptimized RealESRGAN is very slow on CPU. We do not use it. '
                          'If you really want to use it, please modify the corresponding codes.')
            bg_upsampler = None
        else:
            from realesrgan import RealESRGANer
            bg_upsampler = RealESRGANer(
                scale=2,
                model_path='https://github.com/xinntao/Real-ESRGAN/releases/download/v0.2.1/RealESRGAN_x2plus.pth',
                tile=args.bg_tile,
                tile_pad=10,
                pre_pad=0,
                half=True)  # need to set False in CPU mode
    else:
        bg_upsampler = None
    args.test_path = 'inputs/whole_imgs'
    # set up GFPGAN restorer
    restorer = GFPGANer(
        model_path=args.model_path,
        upscale=args.upscale,
        arch=args.arch,
        channel_multiplier=args.channel,
        bg_upsampler=bg_upsampler)
    img_list = sorted(glob.glob(os.path.join(args.test_path, '*')))
    print(img_list, '**')
    count = 4
    for img_path in img_list:
        count -= 1
        if count == 0:
            break
        # read image
        print('yes')
        img_name = os.path.basename(img_path)
        print(f'Processing {img_name} ...')
        basename, ext = os.path.splitext(img_name)
        input_img = cv2.imread(img_path, cv2.IMREAD_COLOR)

        # restore faces and background if necessary
        cropped_faces, restored_faces, restored_img = restorer.enhance(
            input_img, has_aligned=args.aligned, only_center_face=args.only_center_face, paste_back=args.paste_back)

        # save faces
        for idx, (cropped_face, restored_face) in enumerate(zip(cropped_faces, restored_faces)):
            print('1')
            # save cropped face
            save_crop_path = os.path.join(args.save_root, 'cropped_faces', f'{basename}_{idx:02d}.png')
            imwrite(cropped_face, save_crop_path)
            # save restored face
            if args.suffix is not None:
                save_face_name = f'{basename}_{idx:02d}_{args.suffix}.png'
            else:
                save_face_name = f'{basename}_{idx:02d}.png'
            save_restore_path = os.path.join(args.save_root, 'restored_faces', save_face_name)
            imwrite(restored_face, save_restore_path)
            # save comparison image
            cmp_img = np.concatenate((cropped_face, restored_face), axis=1)
            imwrite(cmp_img, os.path.join(args.save_root, 'cmp', f'{basename}_{idx:02d}.png'))

        # save restored img
        if restored_img is not None:
            if args.ext == 'auto':
                extension = ext[1:]
            else:
                extension = args.ext

            if args.suffix is not None:
                save_restore_path = os.path.join(args.save_root, 'restored_imgs',
                                                 f'{basename}_{args.suffix}.{extension}')
            else:
                save_restore_path = os.path.join(args.save_root, 'restored_imgs', f'{basename}.{extension}')
            imwrite(restored_img, save_restore_path)

    onlyfiles = [f for f in listdir('results/restored_imgs') if isfile(join('results/restored_imgs', f))]
    onlyfiles.remove('.DS_Store')
    return render_template("index2.html", variable = onlyfiles[0])


if __name__ == '__main__':
    app.run(#host="0.0.0.0")
Above, is the code for the inference_gfpgan.py script from the repo that has been adapted into our application. This script parses the inputted arguments we write using the sys.argv call. These are set to the defaults outlined in the function, but this poses a small problem. The Docker image's sheer size makes it important to consider these parameters before pushing the image to be used in your deployment to Dockerhub. In the future, to productionize the app on Gradient we will need to consider more dynamic methods to alter the parameters for the restoration process.
This GFP-GAN function within the app follows the args to make some adjustments, but it then takes each of the inputted images, enhances their facial image and backgrounds, and then saves the new versions to the predetermined or defaulted results directory.
Docker
Within the GFP-GAN repo is a sample Dockerfile to be used to create a docker image that can later be deployed to a Gradient GPU. Let's look at this one and see how to write a very basic Dockerfile for PyTorch deployments with Flask:
# syntax=docker/dockerfile:1

FROM python:3.8-slim-buster
RUN pip install flask
RUN apt-get update \
  && apt-get install -y wget \
  && rm -rf /var/lib/apt/lists/*
RUN apt-get update && apt-get install -y git
RUN git clone https://github.com/gradient-ai/GFPGAN.git
WORKDIR /GFPGAN
COPY requirements.txt requirements.txt
RUN pip3 install -r requirements.txt
RUN pip3 install opencv-python-headless
RUN pip install realesrgan==0.2.2.4
RUN pip install basicsr
RUN pip install facexlib
RUN python setup.py develop
RUN wget https://github.com/TencentARC/GFPGAN/releases/download/v0.2.0/GFPGANCleanv1-NoCE-C2.pth

EXPOSE 5000

COPY . .

ENTRYPOINT [ "python" ]

CMD [ "app.py" ]
This Dockerfile, when ran, will download all the necessary packages and build an image that can be used to run as a container. This page mostly comprised of installs, but also includes 2 other important jobs: RUN wget to grab the model weights, and the execution of setup.py to finish configuring the container environment.
Once we've gotten your files in place, we can build our Docker image by running:
docker build gfpgan . Once we've built your image locally, run the container using this following command:
docker run -d -p 5000:5000 gfpgan-flask-demo-gradient:latest
Then we can localhost:5000 and following the two steps needed to run GFP-GAN through the app.
Our application is now running on the localhost:5000 port and you can access it through your browser. Follow the prompts to upload the photo you want to see restored. Check the terminal for the progress during the upload and restoration process to get logs for the Flask app.
When upload_photo() is run, the main() script will be executed and the result saved to the results directory. Once the touched up photo has generated and saved, the app will then display it using HTML in the webpage. From here you can download it directly.
Within the Docker application or the Docker CLI, you can now push your new image to Dockerhub to be shared, versioned, and improved upon as needed. If you don't want to set up your own Dockerfile, you can access mine at this url.
Deploy
image: jameshskelton/paperspace:gfpgan-flask-demo-gradient
port: 5000
resources:
  replicas: 1
  instanceType: P4000
The ease of deploying on Gradient from a Dockerfile cannot be understated. First, create a new Project, and navigate to its Deployments tab in the Gradient GUI. Within the GUI to set up the Deployment, we can see step by step instructions for setting up. At the top of the page, select the link that says 'upload a deployment spec'. This will allow you to directly upload your spec. The sample deployment spec above can be used to deploy your new Dockerized Flask app to Gradient deployments. Simply replace the variables in the text editor that popped up when you clicked the link and paste your spec. You can also create a Deployment using the Gradient CLI command
gradient deployments create --name [deployment name] --projectId [your project id] --spec [path to your deployment spec file]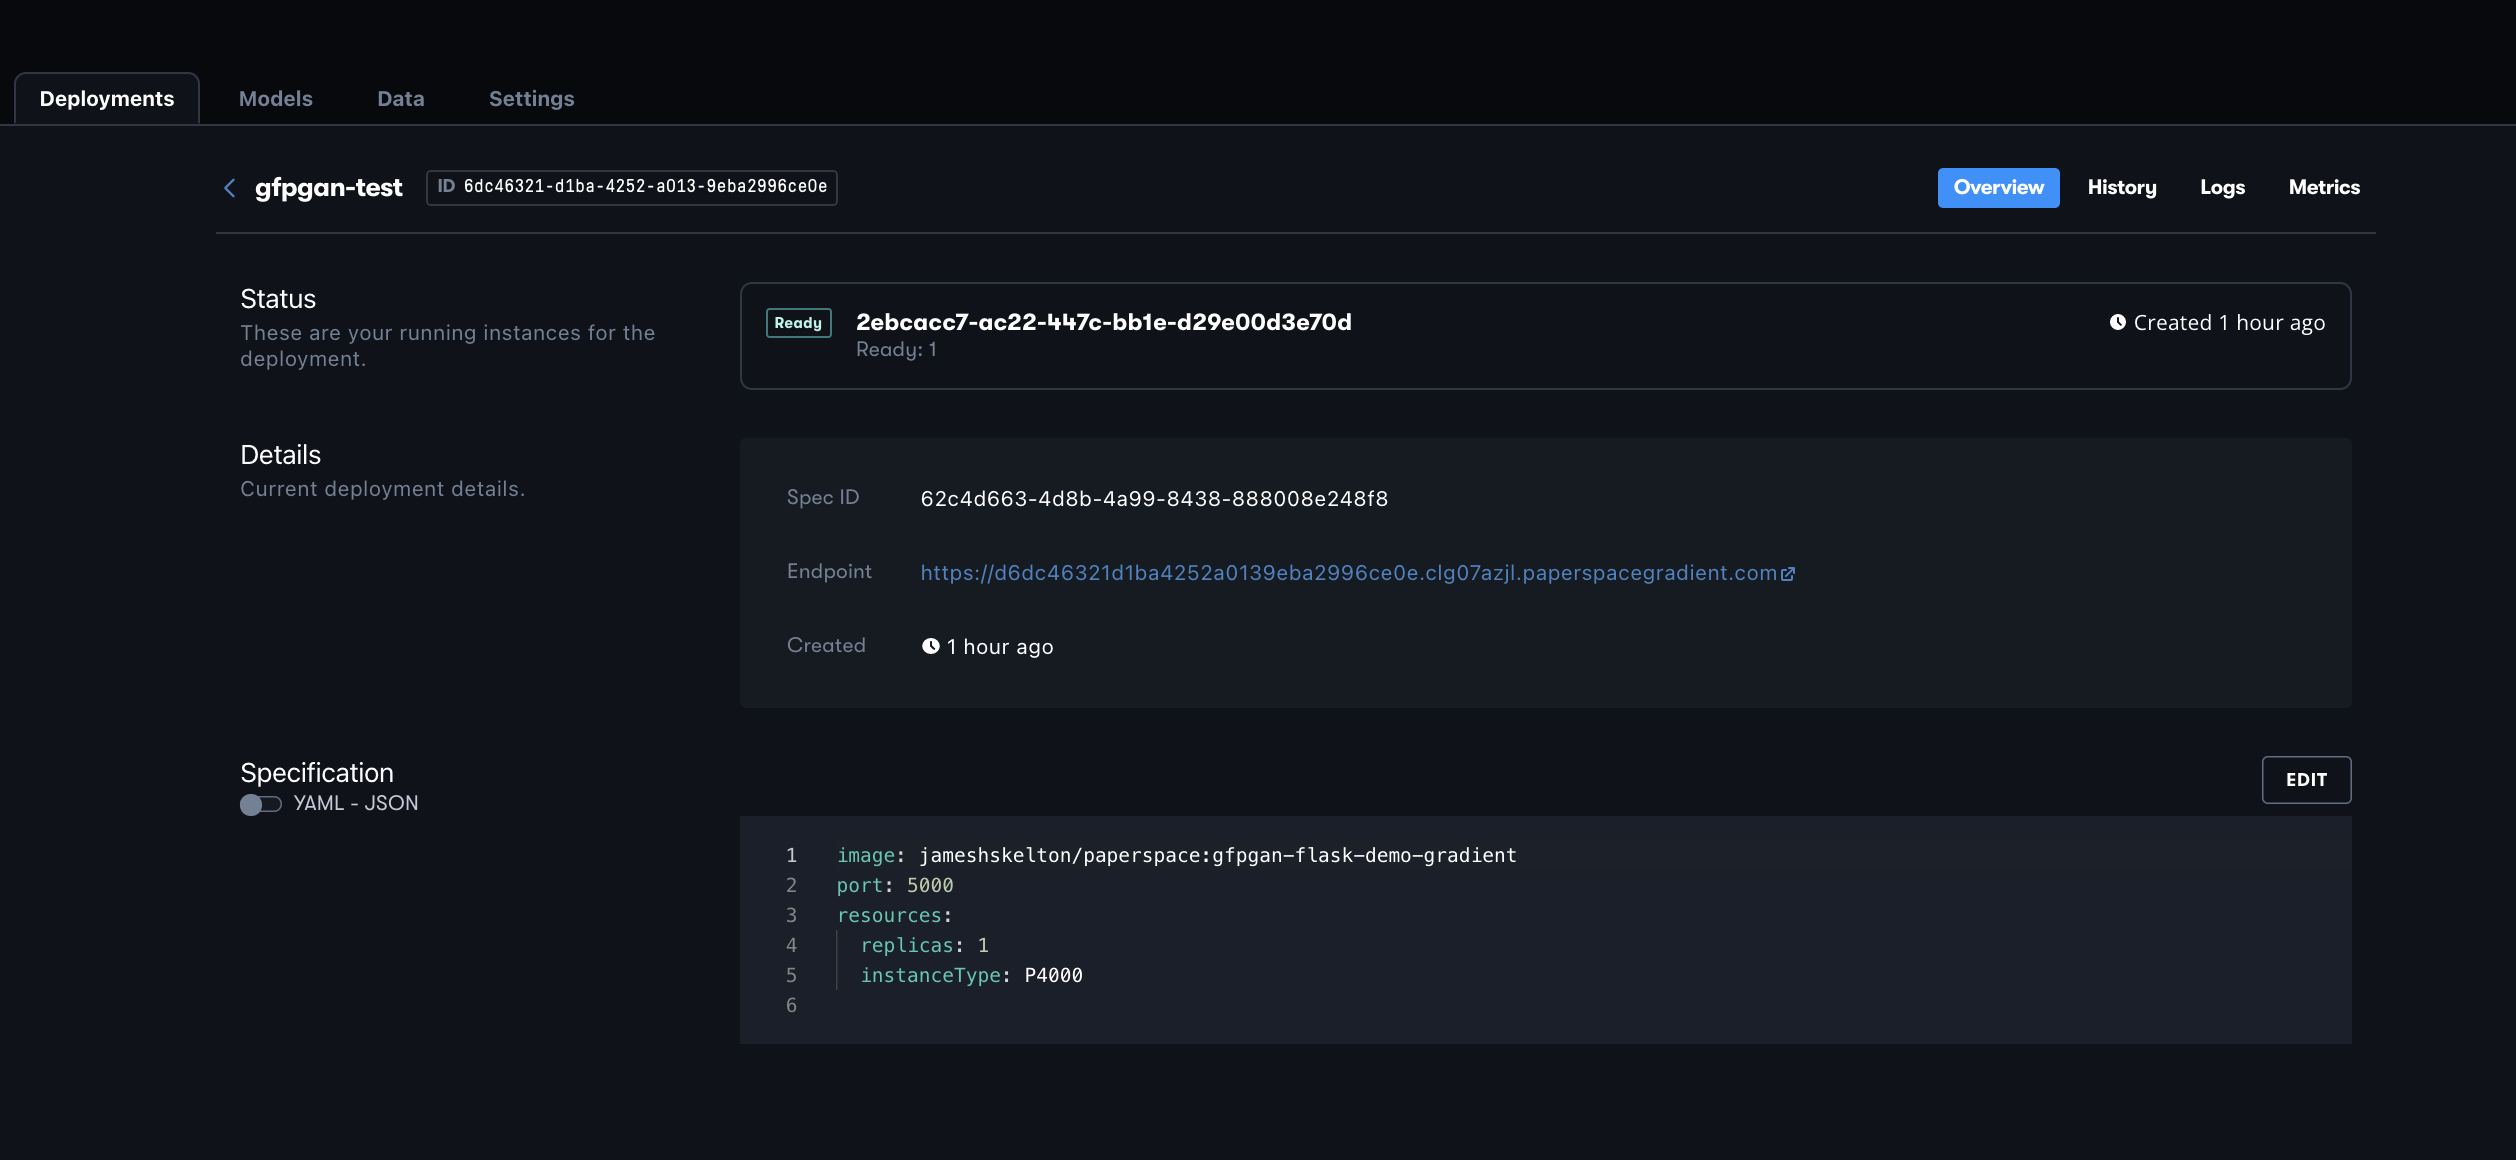
Once you've uploaded your spec, navigate to the Deployments tab in your project if it doesn't redirect you, and click on your new Deployment. In the details section, you can grab the url for our newly deployed Flask API. If you click on that link, it will take you to the HTML interface for the application on the /upload page
Following the prompts in the GUI, upload the image you want to be restored. When you select the "Upload" button, it will automatically load your image into the inputs directory and initialize the GAN to run through the main() function of the app. Once it is complete, the webpage will be automatically redirected to display the new image within the HTML. From here, you can run the model again by returning to the original url and uploading a new photo.
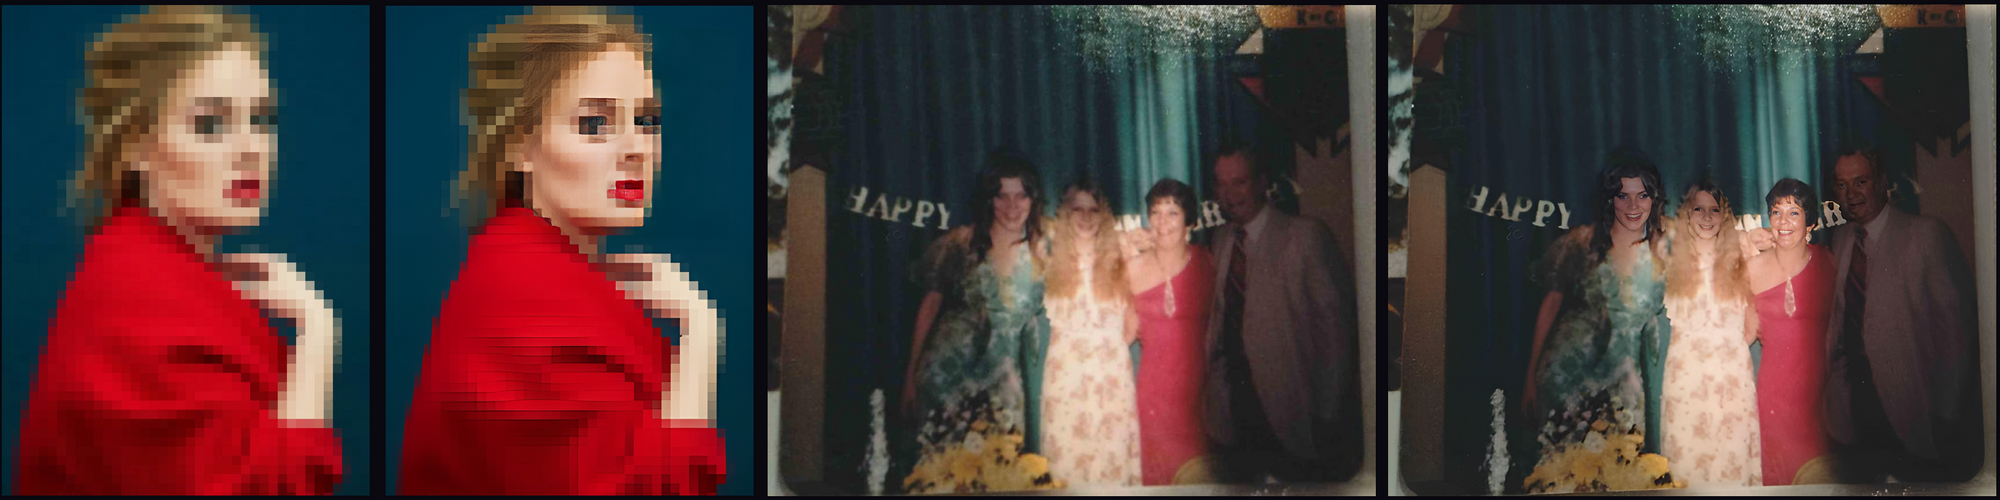
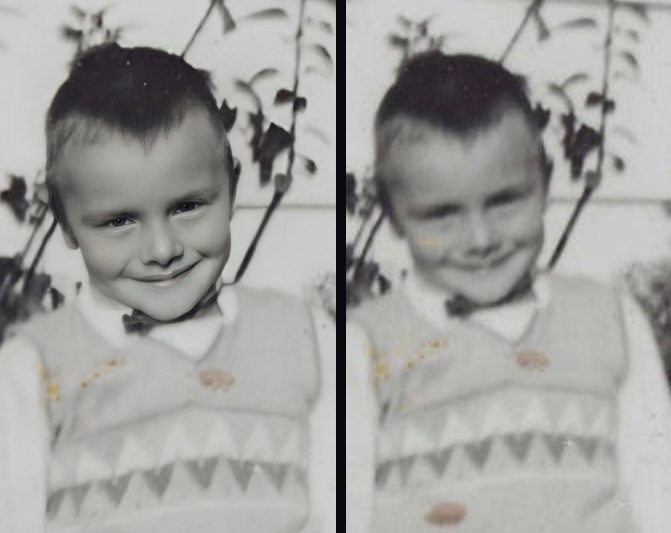
It's worth mentioning that this program works best with higher quality images that have been damaged in some way. Above are two sets of sample images, with the right photo being more ideal for the model and the other being an example of misapplication. If your photo is particularly blurry or pixelated, you may end up with some strange effects on your subjects in the photo that vary from the uncanny valley to outright body horror.
Conclusion
In this tutorial, we saw how to construct a Flask app to serve a PyTorch GFP-GAN implementation, to deploy it as a web accessible API endpoint with a simple HTML GUI, and to use this newly deployed application to restore damaged photos. This is a very simplistic Flask app, so feel free to modify it to better suit your needs. One possibility would be connecting the app to Reddit PRAW application and using it to automatically parse and respond to posts in some of the more popular image restoration subreddits, like R/estoration.
Be sure to tweet at us if you want to showcase any of your work building on Gradient with GFP-GAN! Be sure to check out the GitHub repo for today's project as well!