Jul. 7, 2022: This blog post and its associated Notebook and repo have been updated to work with GFPGAN 1.3.
In the near 200 years since the invention of photography, we have been posed with the same problem: how do we prevent damage from accruing and ruining the quality of the image. Photos printed onto film and its precursor media can be damaged by exposure to the elements and age, not to mention the fragility of the materials themselves and their sensitivity to acute damage.
While digital photographs have removed much of the potential problems including storage and protection, there remains a quality of blurriness inherent in digital photography that isn't in film. This is largely because a 35 mm piece of film is capable of capturing several times as much information as even 4k digital image capture devices.
Thus, the individual failings of these two mediums for photography share a similar problem: how to restore or upscale the resolution and quality of those images.
GFP-GAN
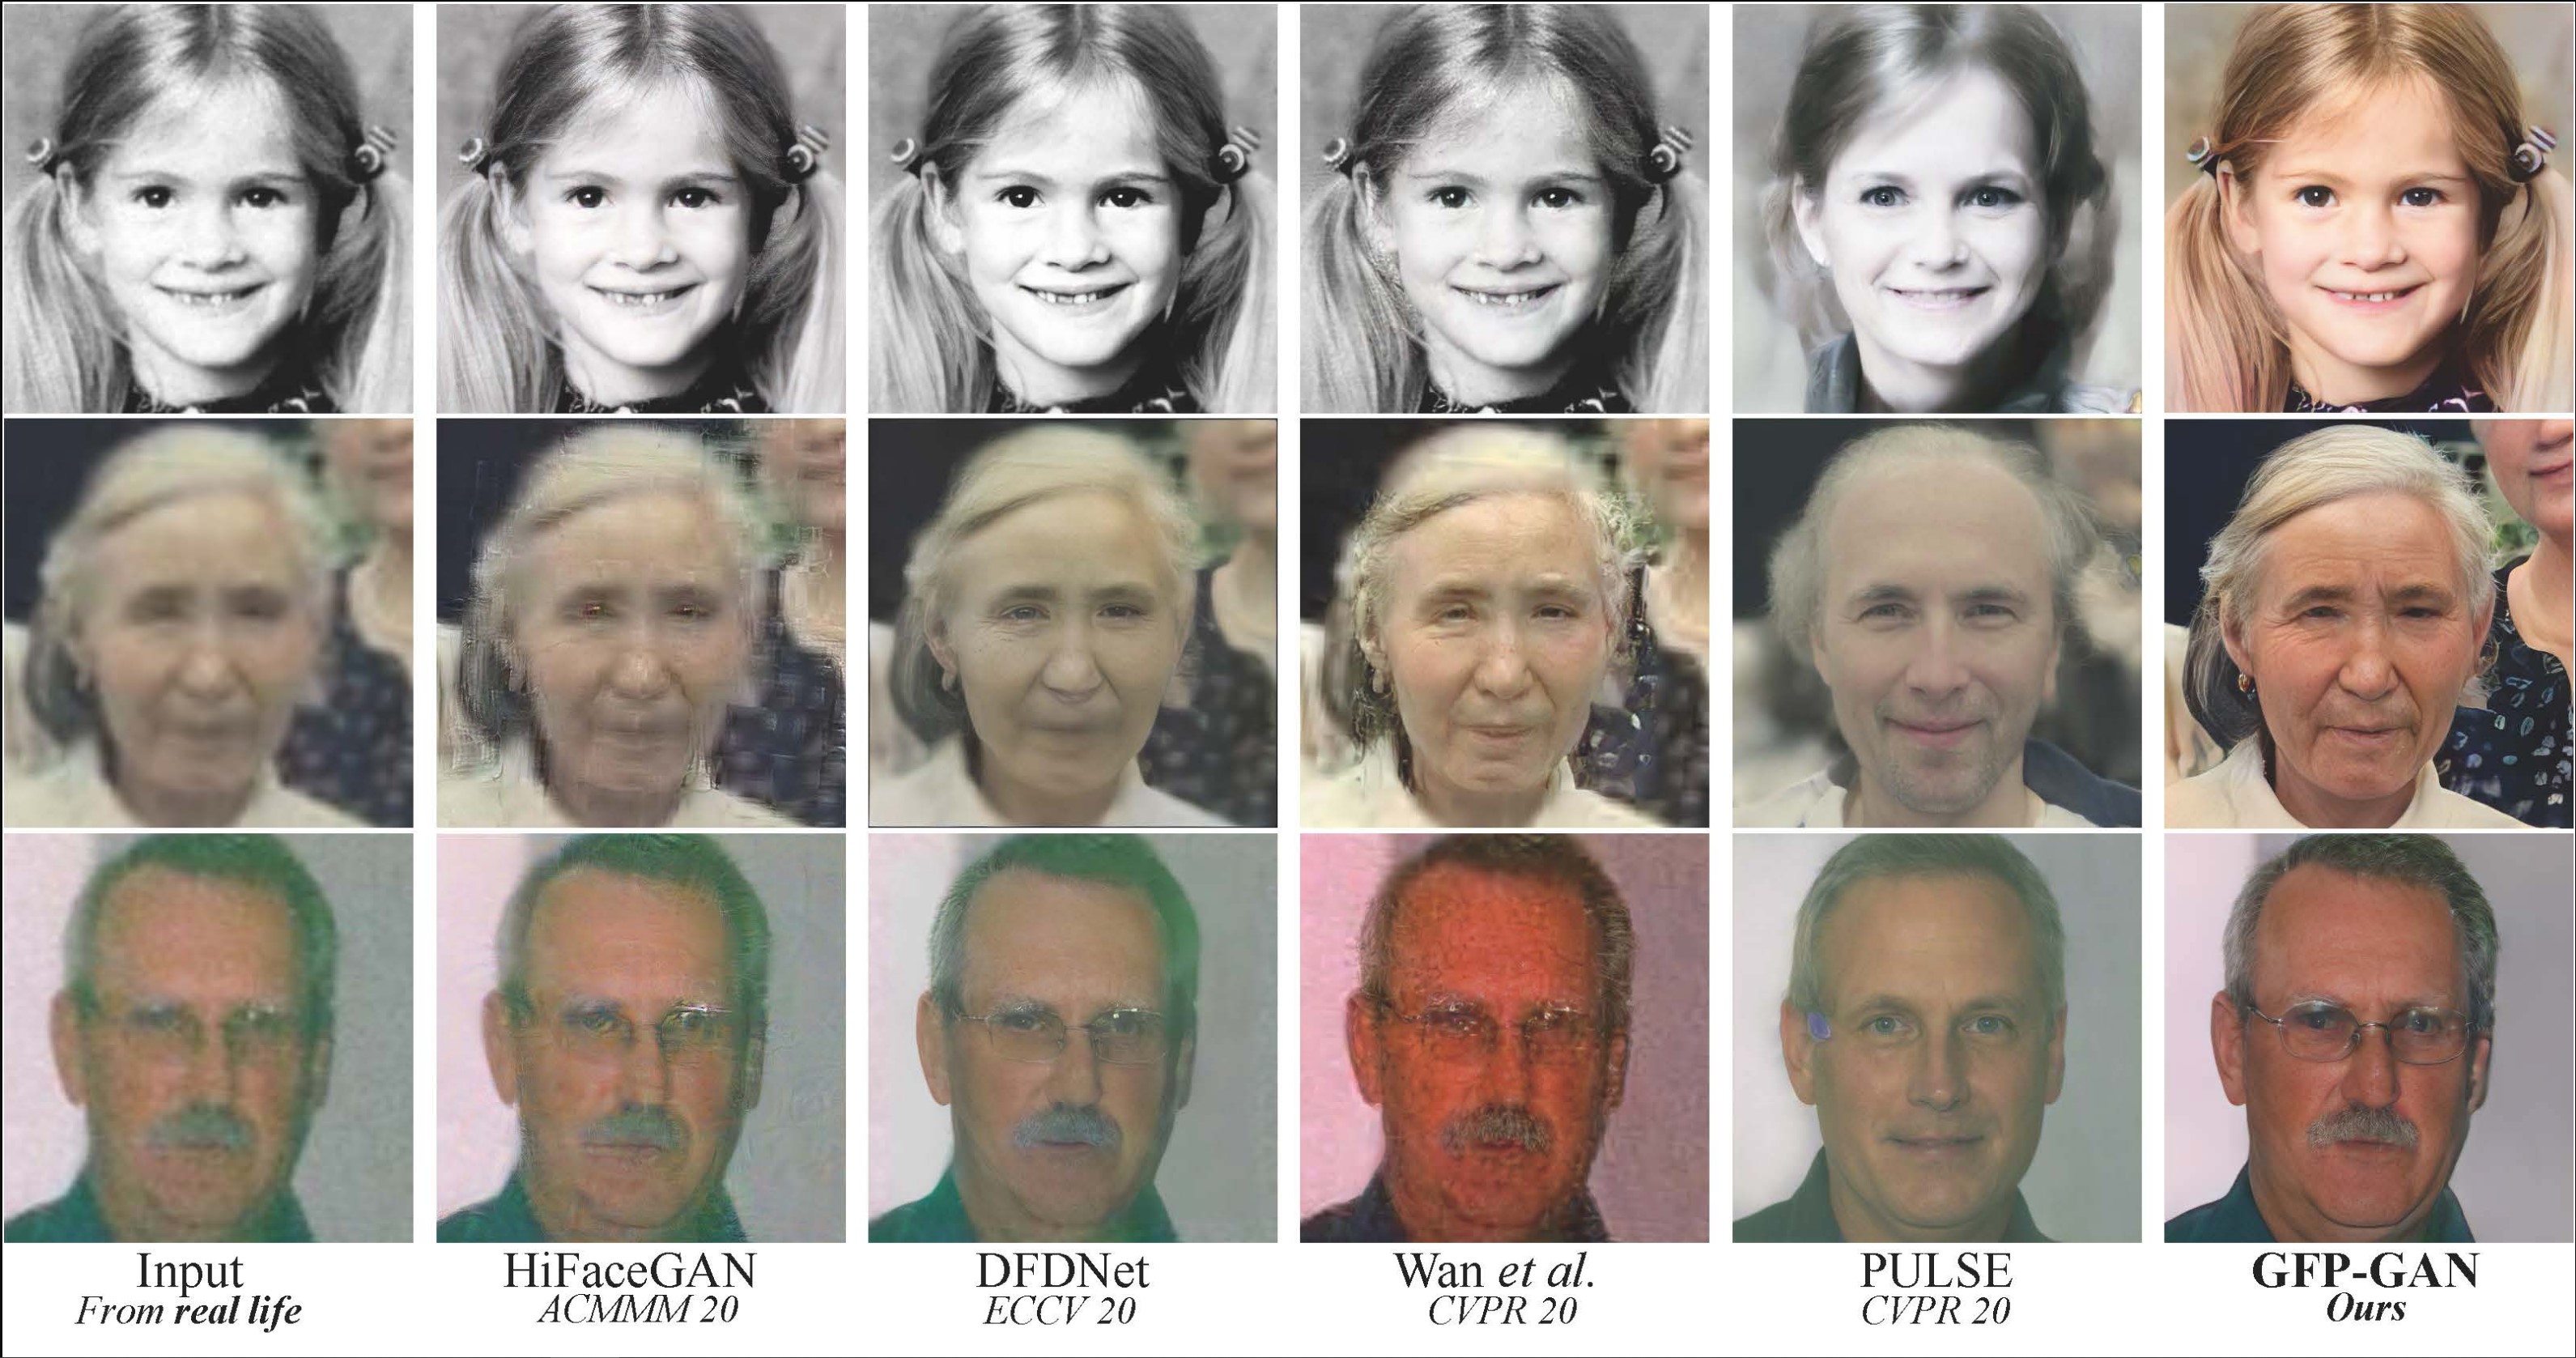
Introduced by the author researchers for their paper "Towards Real-World Blind Face Restoration with Generative Facial Prior" by Xintao Wang, Yu Li, Honglun Zhang, and Ying Shan, GFP-GAN is a new GAN architecture designed to upscale the quality of human faces in damaged, aged, and otherwise low resolution photos. In practice, this has a restorative and upscaling affect on the quality of the images, and can be used in conjunction with other models to dramatically raise the quality of images.
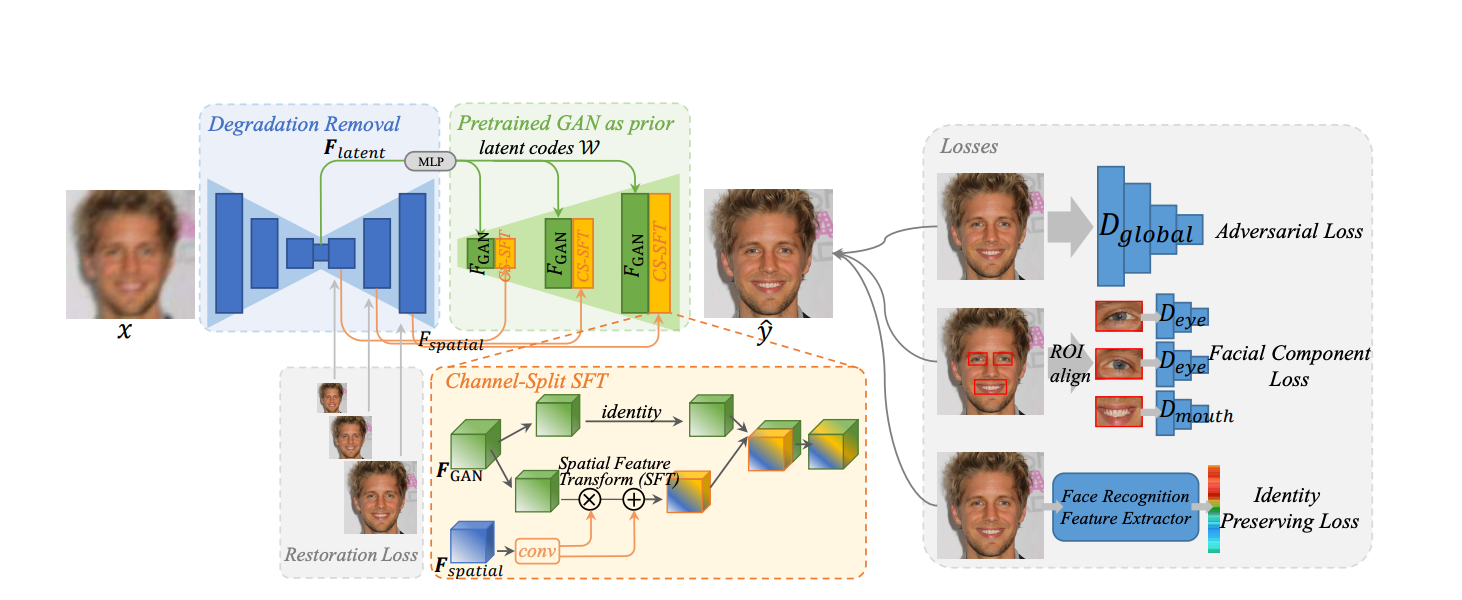
The make up of GFP-GAN is as follows:
First, a degradation removal module (in this case, a vanilla U-Net) takes the damaged photo and removes degradations while extracting latent features. This module notably extracts 2 types of features: the latent features to map the input image to the closest latent StyleGAN2 code, and multi-resolution spatial features for modulating the StyleGAN2 features¹.
Next, a pretrained StyleGAN2 model acts as the generative facial prior. Between the GAN and DRM, the latent features are transformed by several multi layer perceptrons into style vectors. These vectors are then used to produce intermediate convolutional features with the intent of using the spatial features to further modulate the final output.
The Channel-Split Feature Transform allows the spatial features to be used to predict the transform parameters that can be used to scale and displace the features in the feature maps in the generator. This only occurs in some channels, so some features are allowed to pass through unchanged if the model doesn't see a need to change them.
Finally, the generator perceptual reconstruction loss, adversarial loss, ID loss, and face component loss of the generated images are used to further refine the generated images until training is complete.
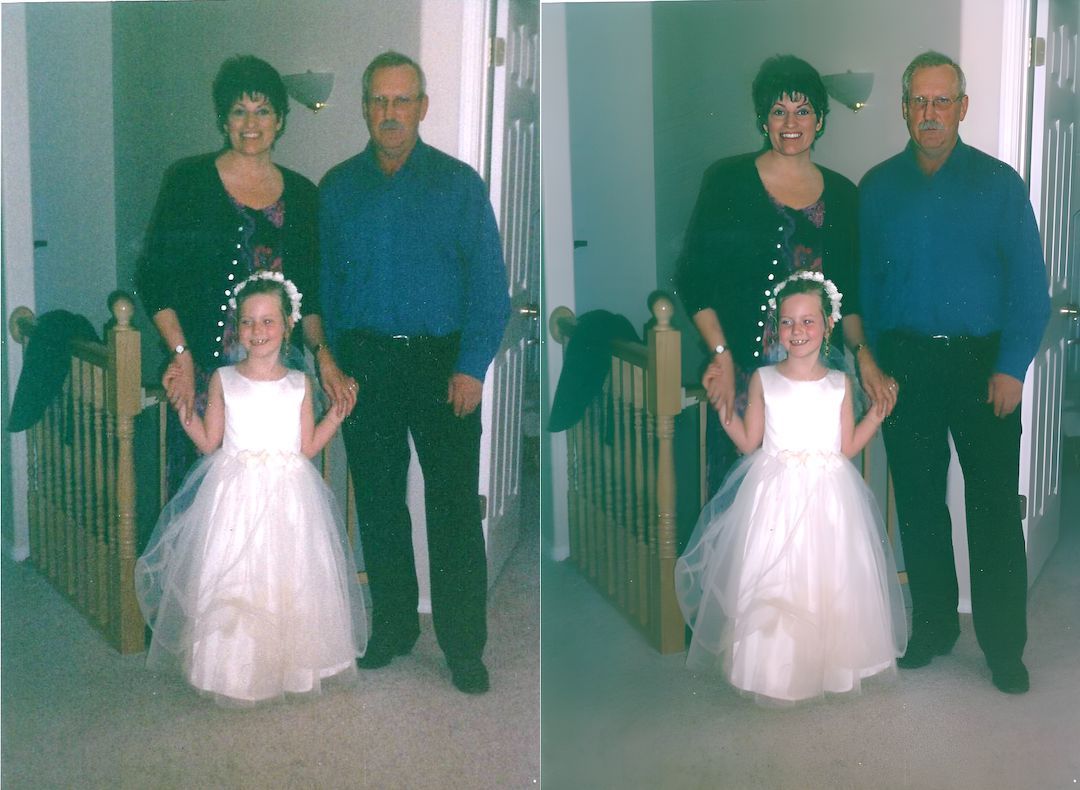
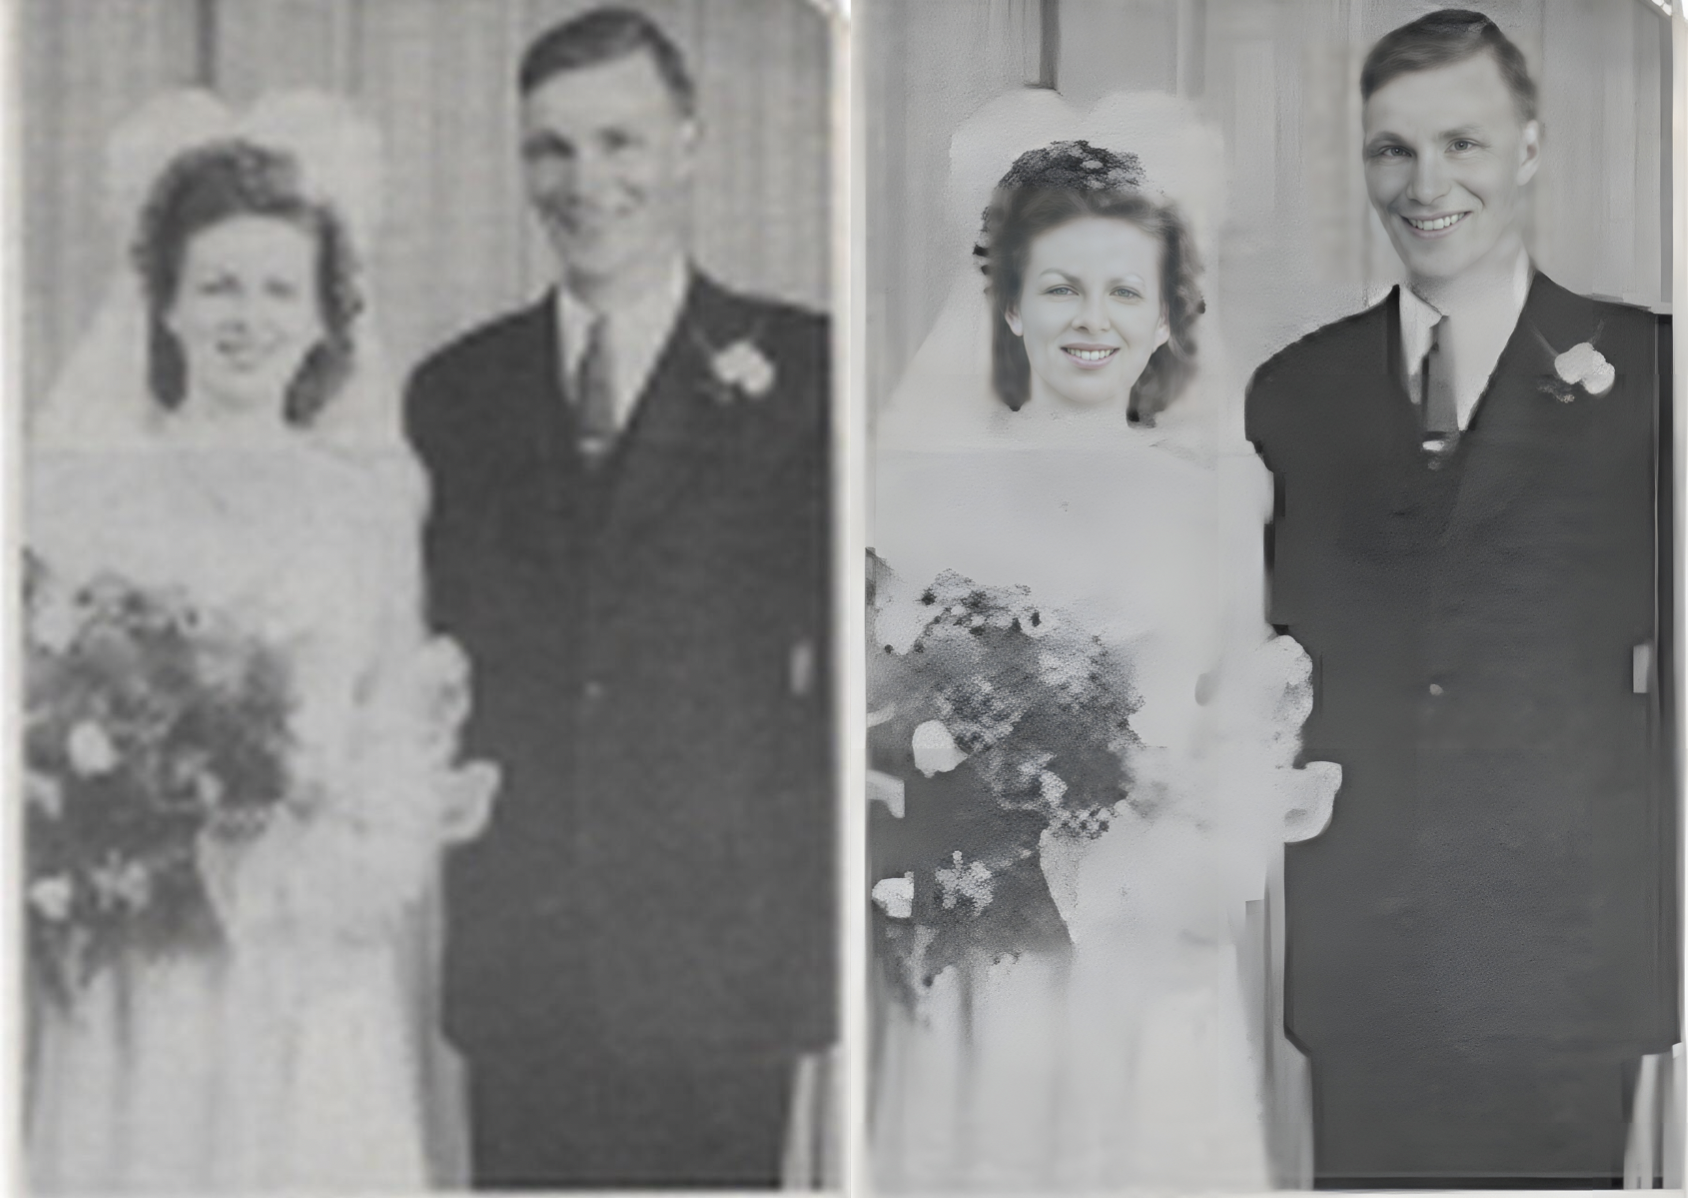
In practice, this allows the GFP-GAN to radically restore and upscale the quality of the faces of damaged images. When combined with the author's previous work, REAL-ESRGAN, we can use these models to enhance photos far beyond the level of past attempts at the same challenge.
Running on Gradient
Set up
Due to the expensive nature of image generation, it's recommended that you use this package with a GPU on your local or remote machine. We will now go through a quick tutorial for using the Gradient pre-made fork of the GFP-GAN repo to run the package on a remote instance.
Bring this project to life
Log in to Gradient, and navigate to a project space in Gradient you would like to work in. Then, create a new notebook using the button on the top right.
Because this package is written in PyTorch, select the PyTorch runtime and suitable GPU for your purposes. This should run fine on the Free GPUs we have available to all users, depending on supply.
The final step is to toggle the advanced options at the bottom of the page. Be sure to paste the url for the pre-made fork of the GFP-GAN repo here in the 'Workspace URL' box. Now you can start the notebook.
Running GFP-GAN in Gradient
Once your Notebook is ready, open up the notebook "Run-GFPGAN.ipynb."
You can use this notebook to run a simple demo using a pretrained GFP-GAN model instance provided by the creators of the repo. You can run all now to see the demo work on the provided sample images, but if you would like to use your own images: they need to be uploaded directly to Gradient.
# Install basicsr - https://github.com/xinntao/BasicSR
# We use BasicSR for both training and inference
!pip install basicsr

# Install facexlib - https://github.com/xinntao/facexlib
# We use face detection and face restoration helper in the facexlib package
!pip install facexlib


# If you want to enhance the background (non-face) regions with Real-ESRGAN,
# you also need to install the realesrgan package
!pip install realesrgan
When you hit run all, it will first install the needed library dependencies. Those in this first cell are all from the same team of researchers, and they facilitate one another. BasicSR is an open source tool kit for image and video restoration, facexlib packages a collection of ready made algorithms for working with facial features, and Real-ESRGAN works to enhance the backgrounds of damaged images much like GFP-GAN restores faces.
!pip install -r requirements.txt
!pip install opencv-python==4.5.5.64
You may also need to enter the following command into the terminal. This is required to run in the terminal itself because it requires an affirmative yes to do the install to be entered into the terminal during the installation.
apt-get update && apt-get install libgl1The next code cell contains the remaining packages needed to ensure that our environment can run GFP-GAN.
!python setup.py develop
!wget https://github.com/TencentARC/GFPGAN/releases/download/v1.3.0/GFPGANv1.3.pth -P experiments/pretrained_models
Finally, we can run the setup.py script to finish setting up our environment to run the generator. We also use a wget to get the pretrained GFP-GAN model provided by the authors for use.
!python inference_gfpgan.py -i inputs/whole_imgs -o results -v 1.3 -s 2To actually run the generator, run the final cell in the notebook containing this command. It will output your newly restored images directly into the newly made results directory.
Conclusion
This tutorial broke down the basic architecture of GFP-GAN, and demonstrated how to use GFP-GAN and its cousin package REAL-esrGAN to dramatically restore aged and damaged photos. While many people do photo restoration as a hobby, this may soon make such efforts much more sophisticated and less time consuming.
Thank you for reading!
Sources and references: