Bring this project to life
In the past few weeks, we have seen in an explosion in popularity for the latest Stable Diffusion application Fooocus. Fooocus is a Gradio based image generating software that has been designed by the notable open-source developer Illyasviel, who also brought us ControlNet. It offers a novel approach to the image synthesis pipeline as an alternative to popular pipelines like AUTOMATIC1111's Stable Diffusion Web UI or MidJourney.
In this article, we will start with a brief expose on the features and capabilities of this new platform. We intend to highlight the differences and advancements it offers in comparison to some of the other tools we have showcased in the past on this blog, and present an argument for why this tool should be added to your image synthesis toolset. Afterwards, we will start our demo, wherein we will walk through the steps needed to set the application up in a Paperspace Notebook to begin generating images. Readers can expect to finish this blog with a full understanding of the intricacies of the Fooocus applications variety of useful settings and built-in features.
What does the Fooocus application offer to Stable Diffusion users?
To start, the first thing to know about Fooocus is its commitment to abstracting away many of the complicated settings required to make high quality generated images. They outline this in their tech list on the github page, but let's go through each of these improvements here.
- Style - the Fooocus V2 style system allows for MidJourney style prompt expansion to alter and improve the text representation using GPT-2 at low cost. This prompt expansion allows for simplified inputs to generate far more varied and complex outputs, and the motifs can be mixed and matched to the users preference
- Native refiner swapping inside one single k-sampler - this allows for seamless carry over of the base model's parameters to the refiner by maintaining the sampler. This is also used in the AUTOMATIC1111 Web UI
- Negative image aspect ratio (ADM) guidance - the highest resolutions of Stable Diffusion XL reportedly do not come with cross-attention, so the Fooocus implementation modifies the positive and negative signals to compensate for the resultant lack of classifier-free guidance contrast for the highest resolution outputs
- Self-Attention Guidance - following the research shown here, the Fooocus development team has implemented a form of Self-Attention Guidance at a low setting. Along with the negative ADM guidance, this helps mitigate a smoothing effect that is commonly reported in image outputs with SD XL
- Automatic implementation of the "sd_xl_offset_example-lora_1.0.safetensors" LoRA model at a strength of .1. Their experiments determined that values below .5 were always better than those without
- Sampler parameters are finely adjusted and optimized by the developers
- Implemented a hard resolution setting based on the optimal aspect ratios for image synthesis with SD XL
These cumulative features make for an extremely low level of coding knowledge to run the image generation after setup. Now that we have discussed what makes the platform so nice to use, let's walk through setting up the UI on Paperspace before comparing weighing its pros and cons.
Fooocus demo on Paperspace
Bring this project to life
Running the demo on Paperspace is relatively simple. To start, first start a Paperspace Notebook with a GPU of your choice, and clone the repo to it. We can use the link above or at the top of this article to quickly open the project up on Paperspace with the repo as our main workspace, /notebooks.
Setup
With that done, we can get started. First, open the notebook fooocus.ipynb. This notebook has all the code we need in the first cell. To run the demo, we first need to install conda however. Use the buttons on the left hand side of the window to find the "Terminals" window, open it, and start a new terminal.
In the terminal, we are going to begin pasting in everything needed to run the notebook. Once we are done, we can just click on the shared Gradio link to get started generating images.
First, paste in the following to the terminal:
wget https://repo.anaconda.com/miniconda/Miniconda3-latest-Linux-x86_64.sh
bash Miniconda3-latest-Linux-x86_64.sh
Follow the instructions in the terminal to complete the install by answering yes to each question when prompted. When that's complete, close the terminal using the trash bin icon in the terminal window on the left, and then open a new one. This will complete the Miniconda installation.
Afterwards, we need to paste in another set of installs to complete setup:
conda env create -f environment.yaml
conda activate fooocus
pip install -r requirements_versions.txt
These will install everything needed to run Fooocus in the Notebook. Additionally, it's worth mentioning that the application will download a Stable Diffusion XL model from HuggingFace for us to use on launch. When we paste in the final snippet, we will see that occur first before the application itself is launched. Be sure to use the public link, so that we are able to access the link from our local machine's browser. The process to complete the launch and install may take a couple minutes.
python entry_with_update.py --listen --shareUsing the Fooocus application
Now, we can begin actually synthesizing new images. This will share a lot of similarities with familiar Stable Diffusion and MidJourney pipelines, but has some obvious differences in implementation, some of which we covered above.
The first thing we want to do is show a quick test of the basic image generation using the base settings. To do this, all we need to do is enter in a prompt and hit 'Generate'. Fooocus will have automatically downloaded a merged model, namely "juggernautXL_version6Rundiffusion.safetensors", that is capable of handling a wide variety of both realistic and artistic medium outputs. Above, we can see an example generation using the Fooocus web ui's basic input. The default settings will generate two images at a resolution of 1152x896 (a 9:7 ratio), and we can watch the diffusion process occur in real-time.
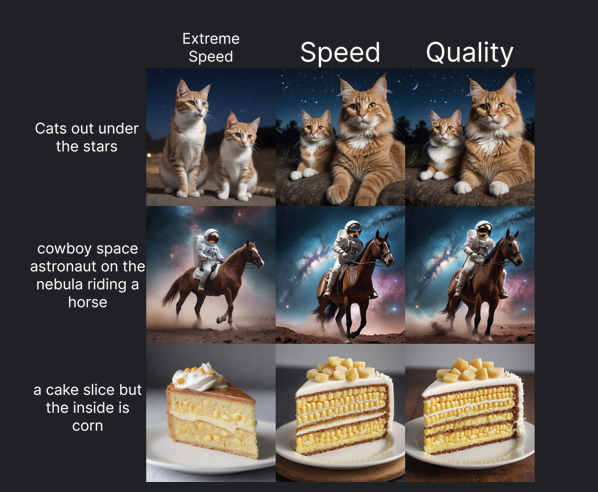
From here, we can begin to look at different advanced settings for the Fooocus by clicking the toggle at the bottom of the screen. The advanced settings will be displayed on the right, in convenient Gradio tabs. The first, and probably most important tab is the 'Setting'. Here, we can see one of the first things abstracted away from a typical pipeline: the Performance settings. These are pre-set and optimized to run a different number of diffusion steps to achieve different qualities of images at different speeds. Speed has 30 steps, Quality has 60, and Extreme Speed will run for 8. While the application seems to have the capability of using other K samplers, it seems to be hard defaulted to use "dpmpp_2m_sde_gpu" for all performances.
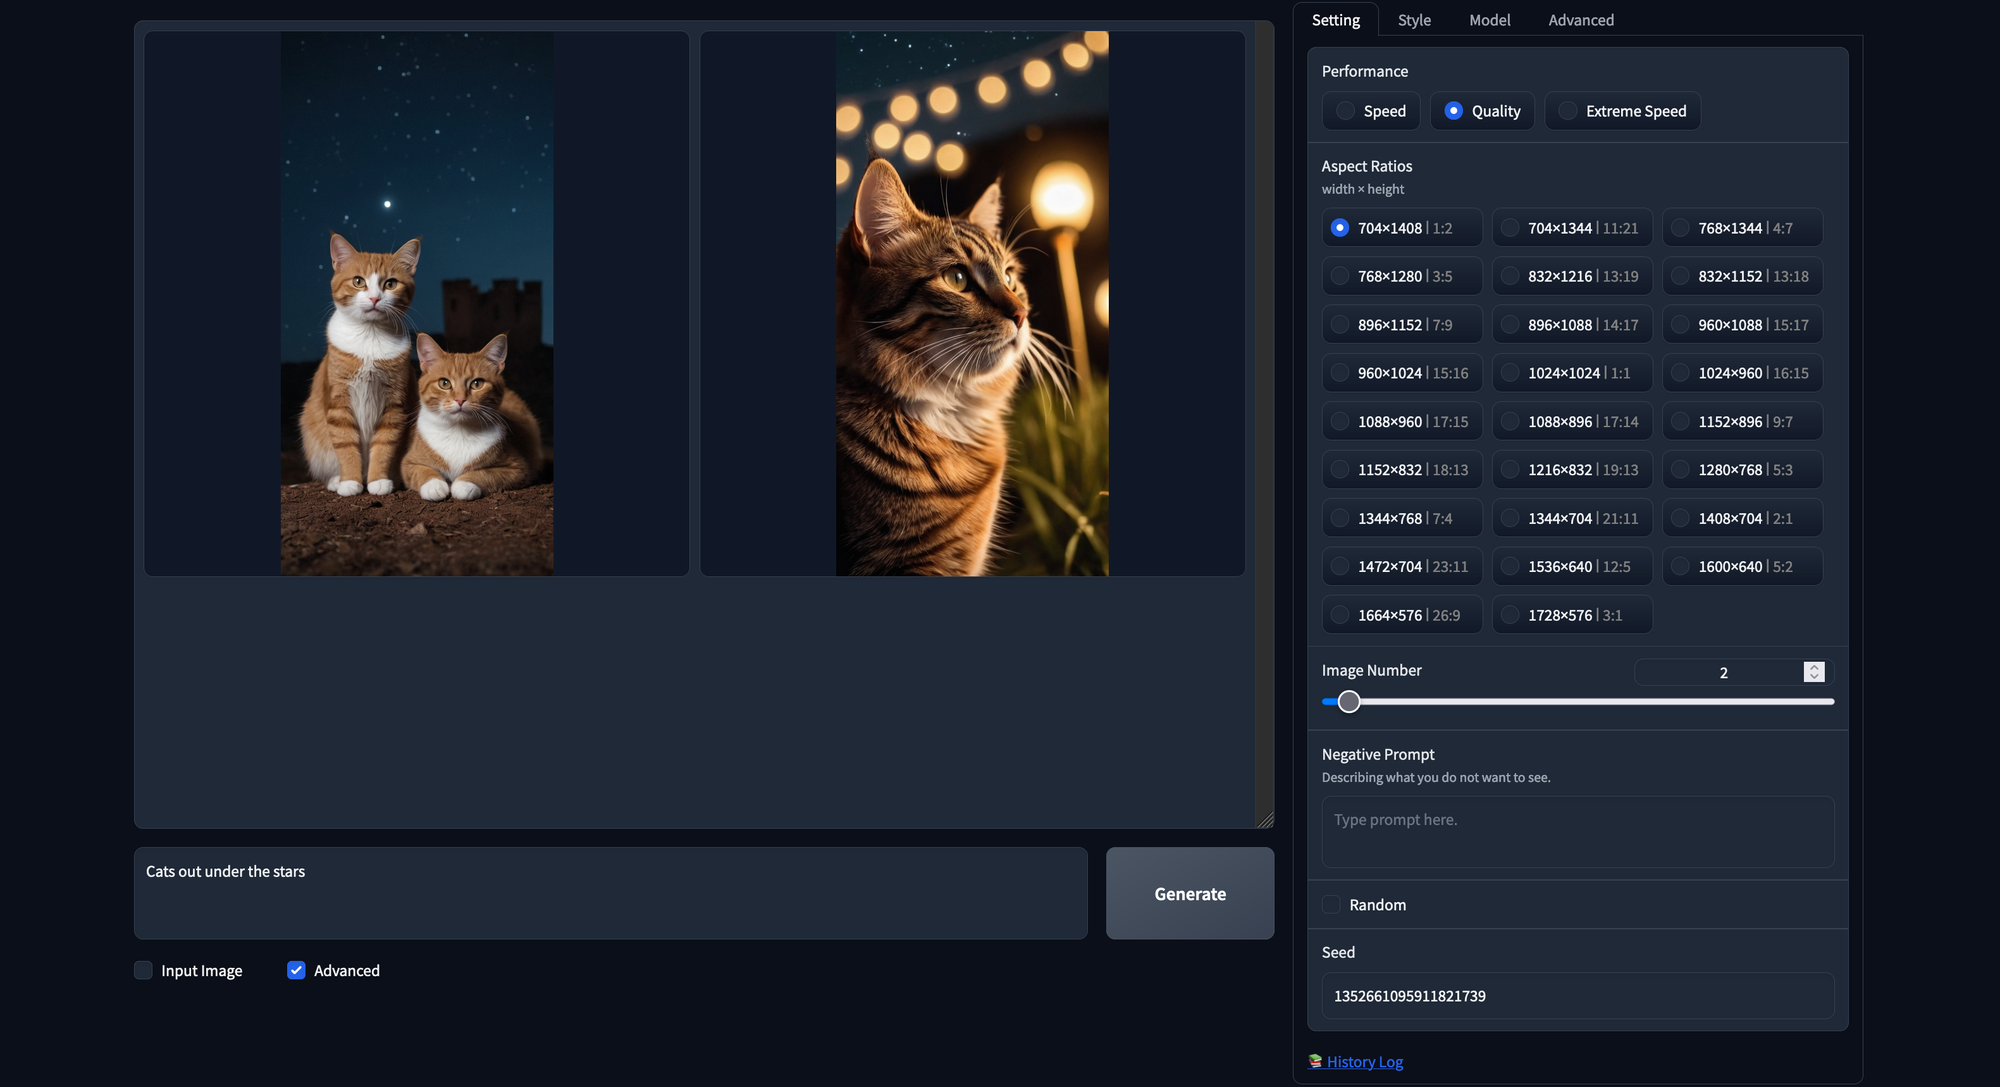
Next, we have the resolutions. These are all optimized resolutions to run Stable Diffusion XL models in particular. They included this hard restriction on image sizing to further optimize users outputs; images generated at suboptimal resolutions are far more likely to appear strange. Above is an example generated with a 704x1408 resolution.

Finally, we have the negative prompt. This functions as a sort of opposite to our regular prompt, and any tokens we include will be discounted as much as possible by the model. For example, we may use a negative prompt to remove unwanted traits from our generated images or try to mitigate some of the inborn problems Stable Diffusion has with certain objects. In the example above, we used the same seed as we had in the previous generation, but added in an additional negative prompt to try and alter our output a bit. You can assign the seed by filling the field left by un-toggling the Random box below the negative prompt field.
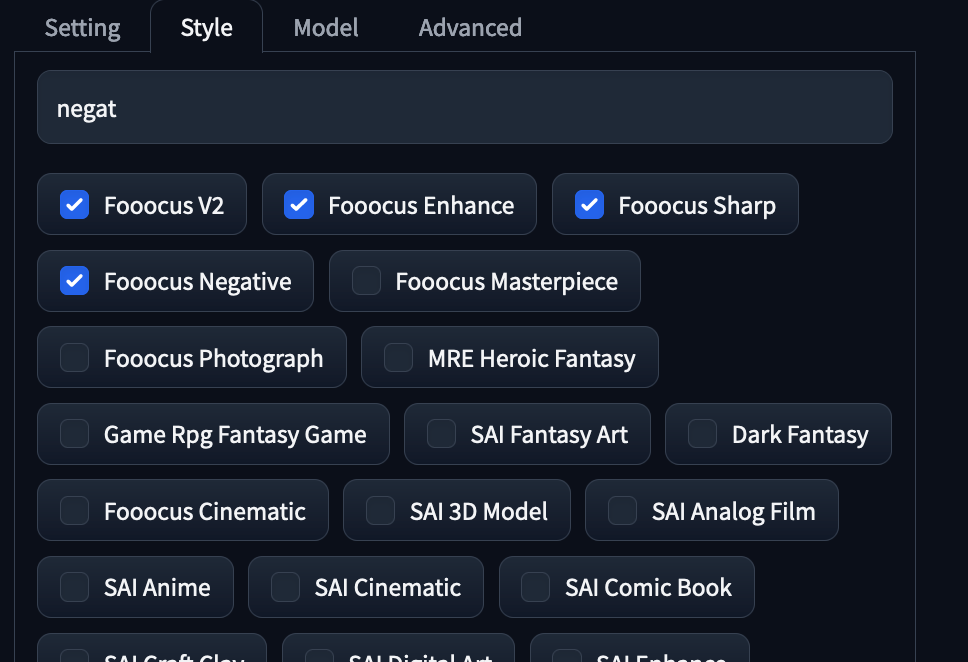
In the next tab in the advanced options, there is "Style". These are the GPT2 enhancements provided by the model to expand our prompts. Try out different styles to see what sort of effect they can have on the final outputs. We particularly recommend using the ones above for all generations.
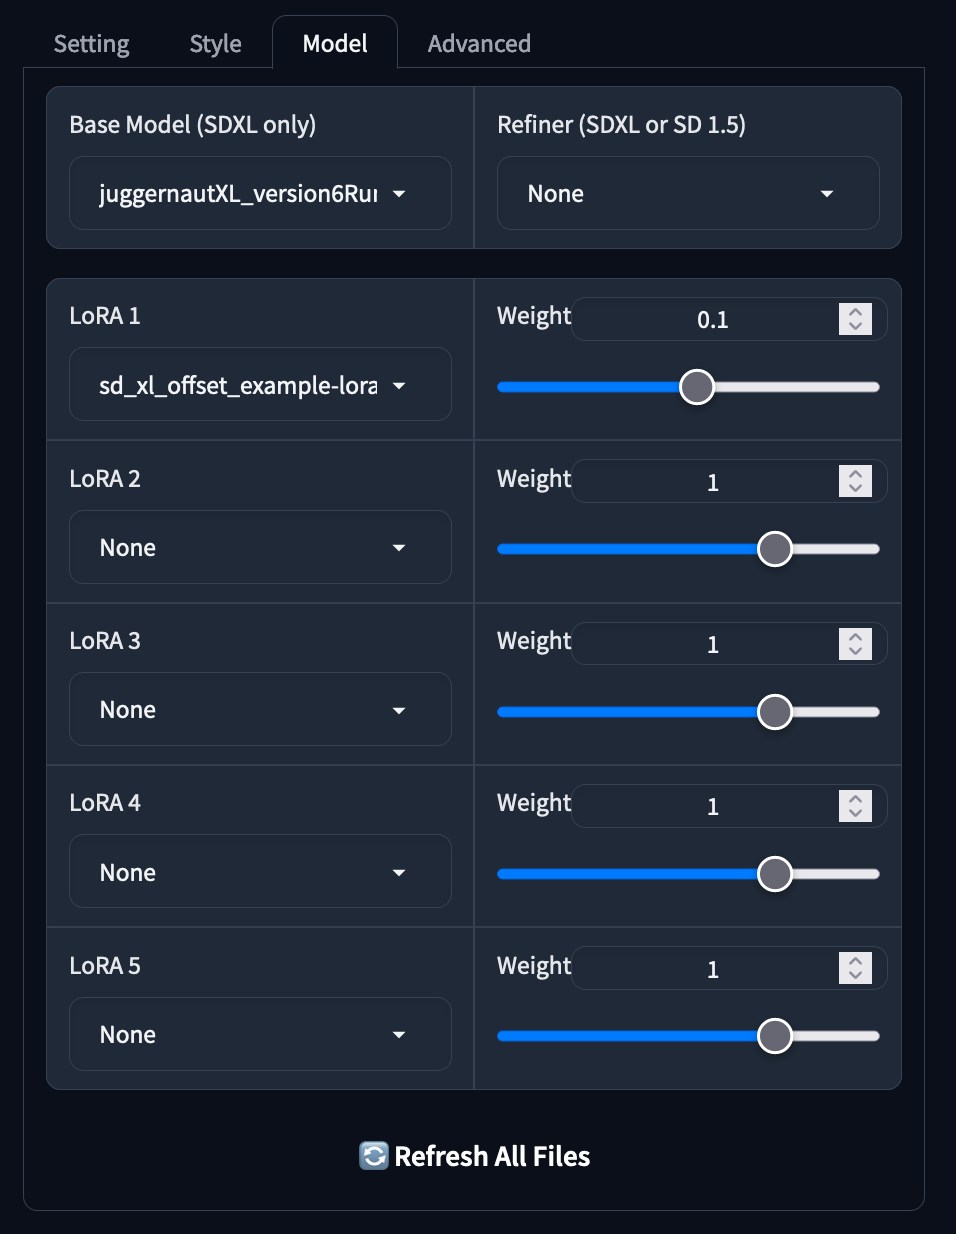
The next tab is the model tab, and it is probably the most important of them all because it let's us switch out main checkpoint and LoRAs. It has nice sliders that allow us to easily adjust the weights of any additional models, allowing for a more simplistic way to blend the traits of two LoRAs . The application will also automatically download and allocate a weight of on .1 to the 'sd_xl_offset_example-lora', which we can choose to remove if we so choose. If we download a model during a running session, the refresh all files button at the bottom will allow us to refresh the available model lists.
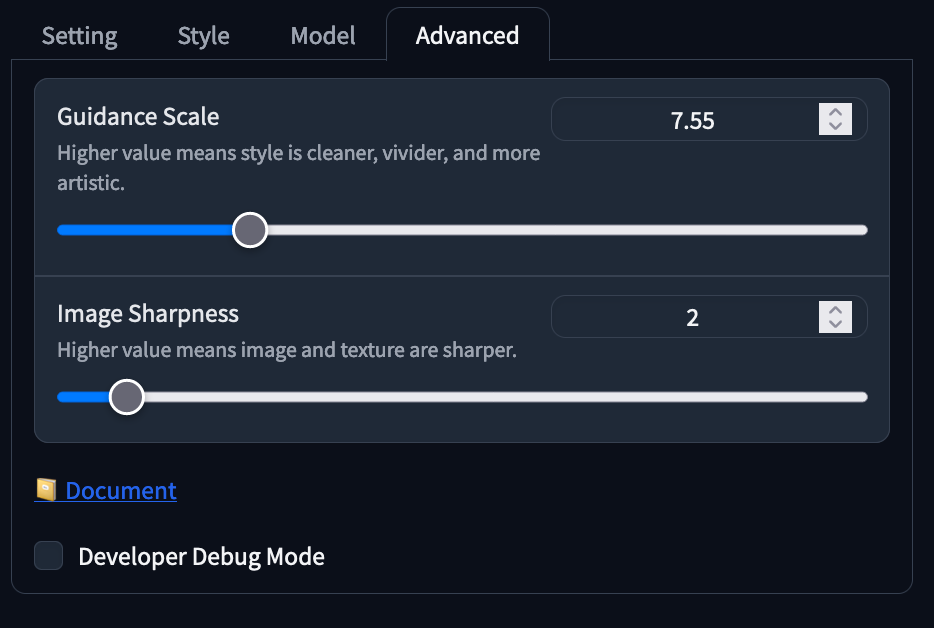
The final tab, advanced, has our Guidance Scale and Image Sharpness sliders. The guidance scale controls the impact the prompt has on our final input, and works best in a range of 4-10 in our experience. The image sharpness value will sharpen images, but increase the uncanny valley effect if raised too high. We suggest leaving it alone unless adjustment is particularly needed.

In addition to the advanced options toggle, there is also the input image toggle right beside it. This is how we can do Image-to-Image generation in Fooocus. Illyasviel, the creator of this project, was also the creator of the popular ControlNet's. They have combined Image-to-Image with a robust ControlNet system to automatically use ControlNet to guide inputted generations. It comes with three options - Upscale or Variation, Image Prompt, and Inpaint or Outpaint. Let's look at what manipulations we can make to the scene above using this prompt:

- Upscale or Variation: there are 5 settings: vary (subtle), vary (strong), upscale (1.5x), upscale (2x), and upscale (fast 2x). We can use the first two to introduce additional variation to our image with our prompts, as shown above with a subtle variation. The strong variation will make even more changes, and the upscale options will make our images higher resolutions
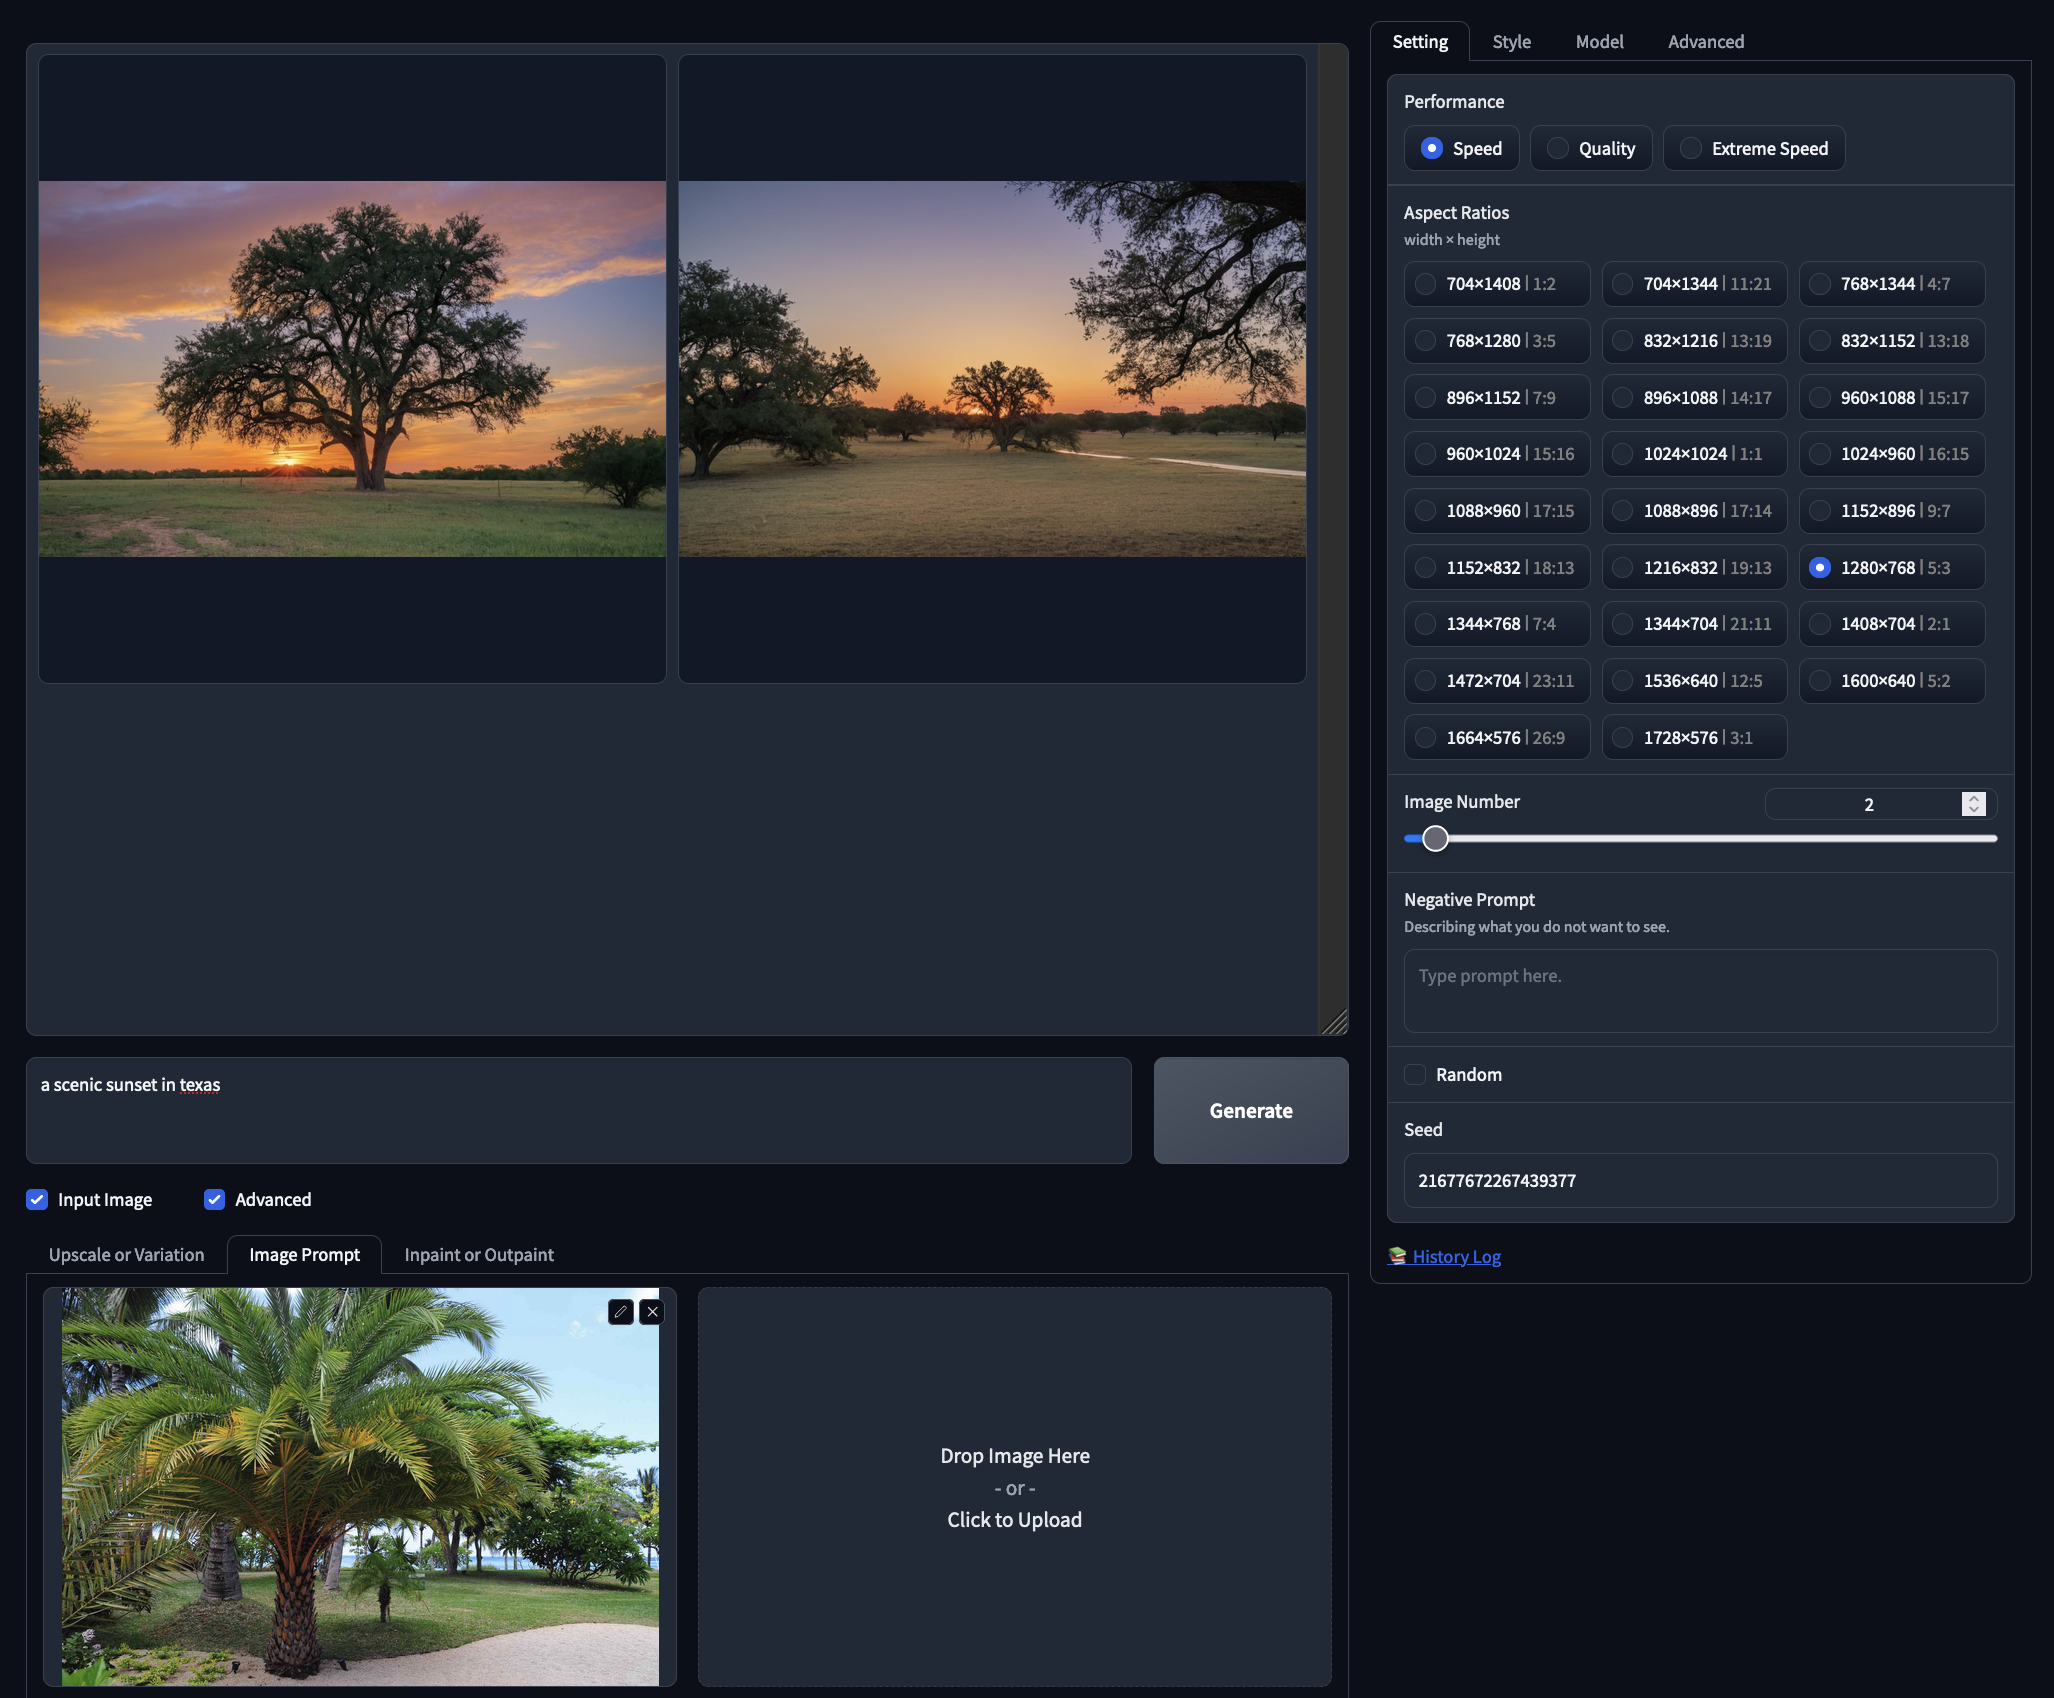
- Image Prompt: this is comparable to Image-to-Image modeling with Stable diffusion, but instead of a single image, we can input multiple images. This allows us to vary our outputs using the inputted prompt. Check out the example above where we added a tree to our output using a different tree as input to influence the final result.
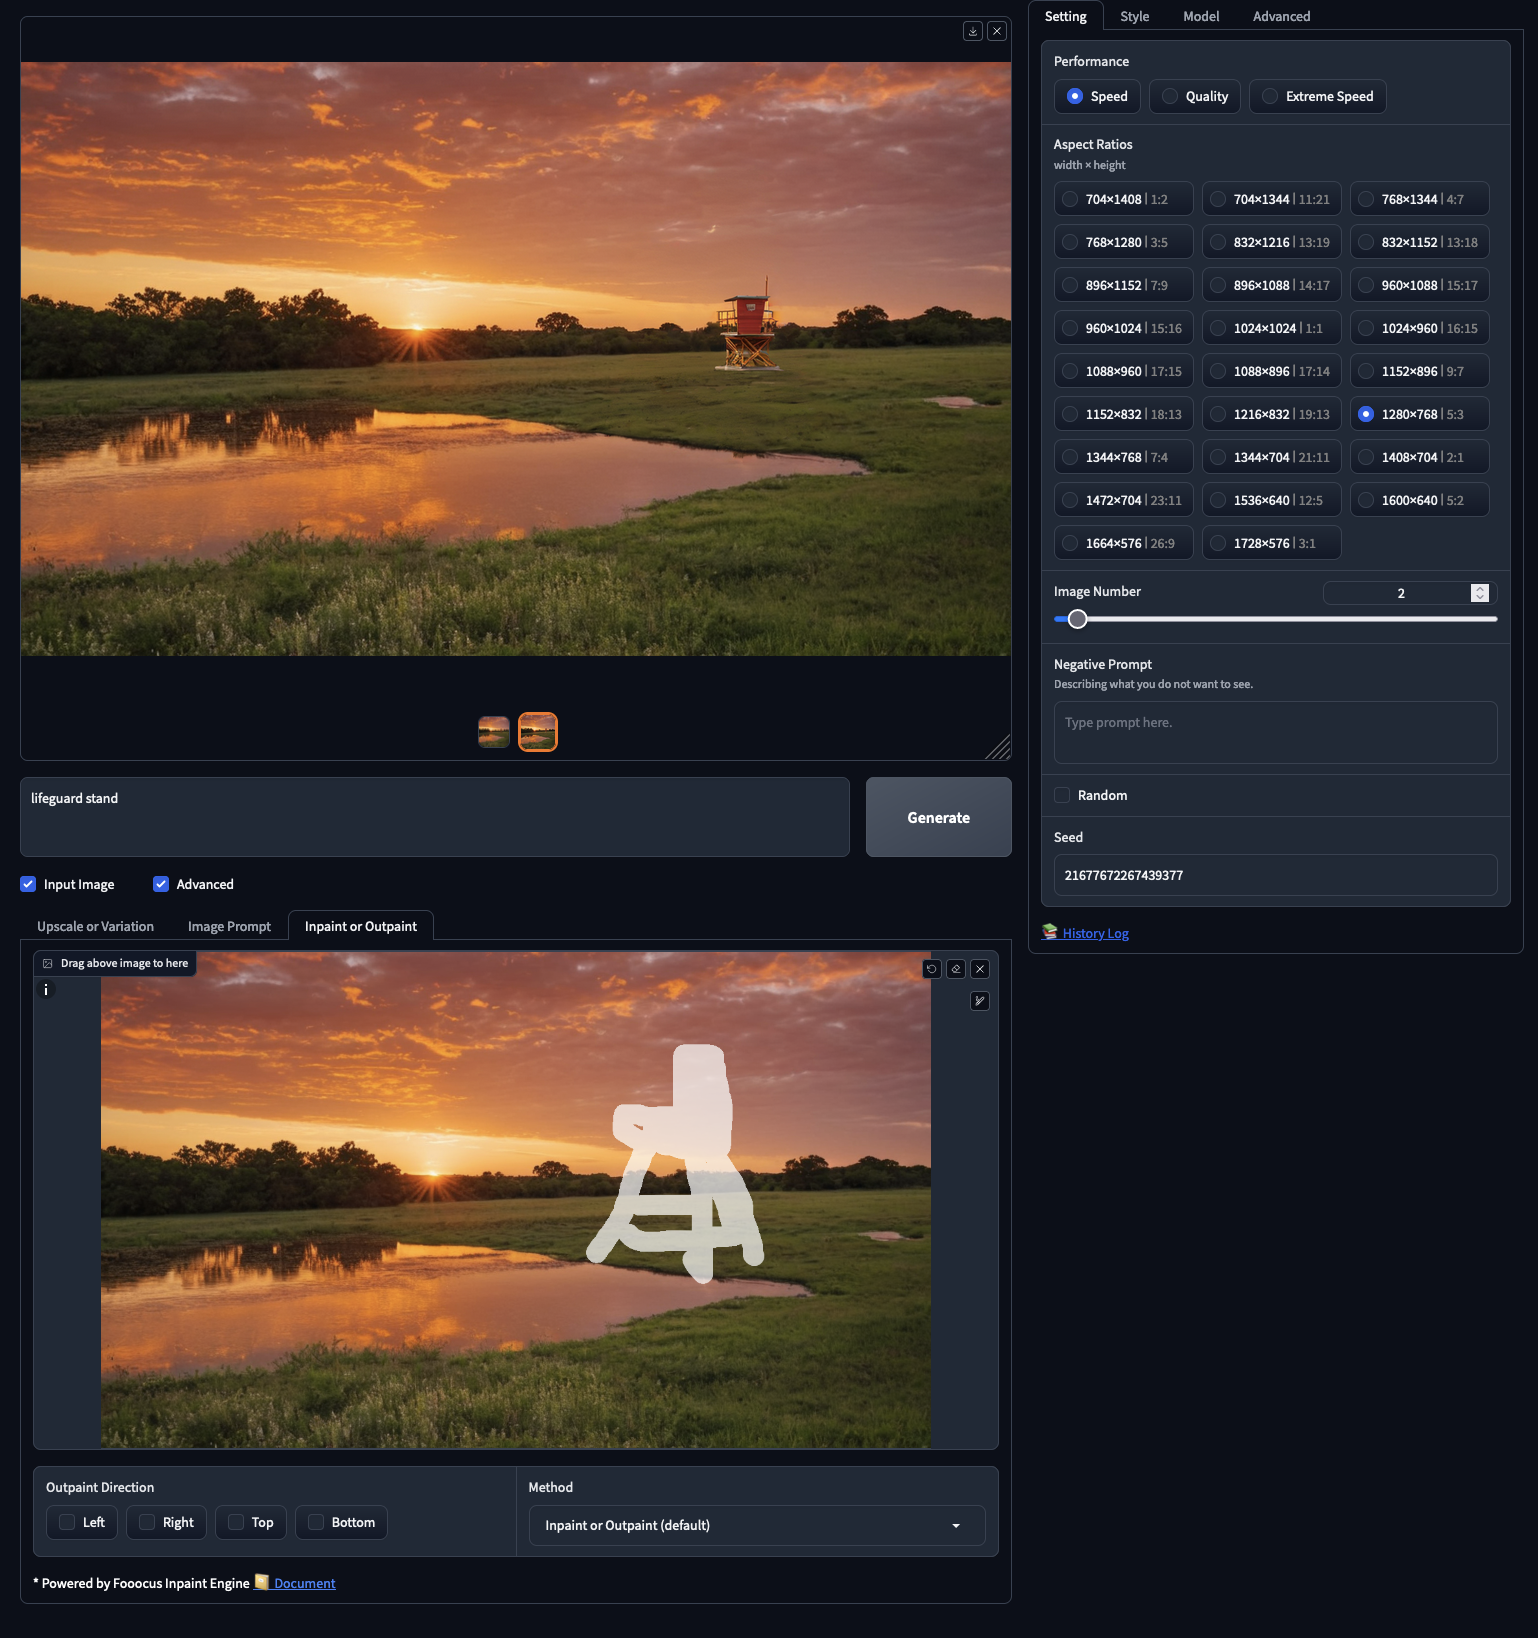
- Inpaint or Outpaint: inpainting allows us to add images to a masked region of the inputted image, and outpainting lets us functionally extend the edges of an image to predict what would be outside the "camera" aperture. We can use it to add new things to our images, like adding this lifeguard stand
We can even use all three together to great effect! Be sure to test out all of these to see how they fit into your workflow, as using existing images as bases or editing them to work can be much more efficient and effective than generating wholly new images.
Closing Thoughts
We have walked through everything that makes Fooocus such a great tool for Stable Diffusion, but how does it stack up against competition? There are many great tools out there for generating images, like the AUTOMATIC1111 Web UI, the ComfyUI, MidJourney, PixArt Alpha, Dalle 3, and more, so we think its important to focus on where Fooocus differs from previous iterations of the text-to-image web platform. Primarily, Fooocus is a great tool for low coders who do not want to dig into the intricacies of learning a complicated system like the A1111 Web UI or the Comfy UI, but it also offers higher levels of versatility and applicability than closed source applications like MidJourney. For these reasons, we recommend Fooocus to users new to coding and Stable Diffusion, while more experienced coders should stick to the Fast Stable Diffusion implementations of the Web UI and ComfyUI. Look out for the self attention improvements to hit those platforms in the near future, as well, because, while it cannot beat out the clever fixes in the A1111 resolutions fixer, it handles a lot of problems for the user that improve the quality of life to use it significantly.
Thanks for reading, and be sure to check out our other articles on Stable Diffusion and image generation!