A tutorial to build a Reinforcement Learning model
A 2013 publication by DeepMind titled ‘Playing Atari with Deep Reinforcement Learning’ introduced a new deep learning model for reinforcement learning, and demonstrated its ability to master difficult control policies for Atari 2600 computer games, using only raw pixels as input. In this tutorial, I will implement this paper using Keras. We'll start with the basics of Reinforcement Learning and then dive into the code for a hands-on understanding.
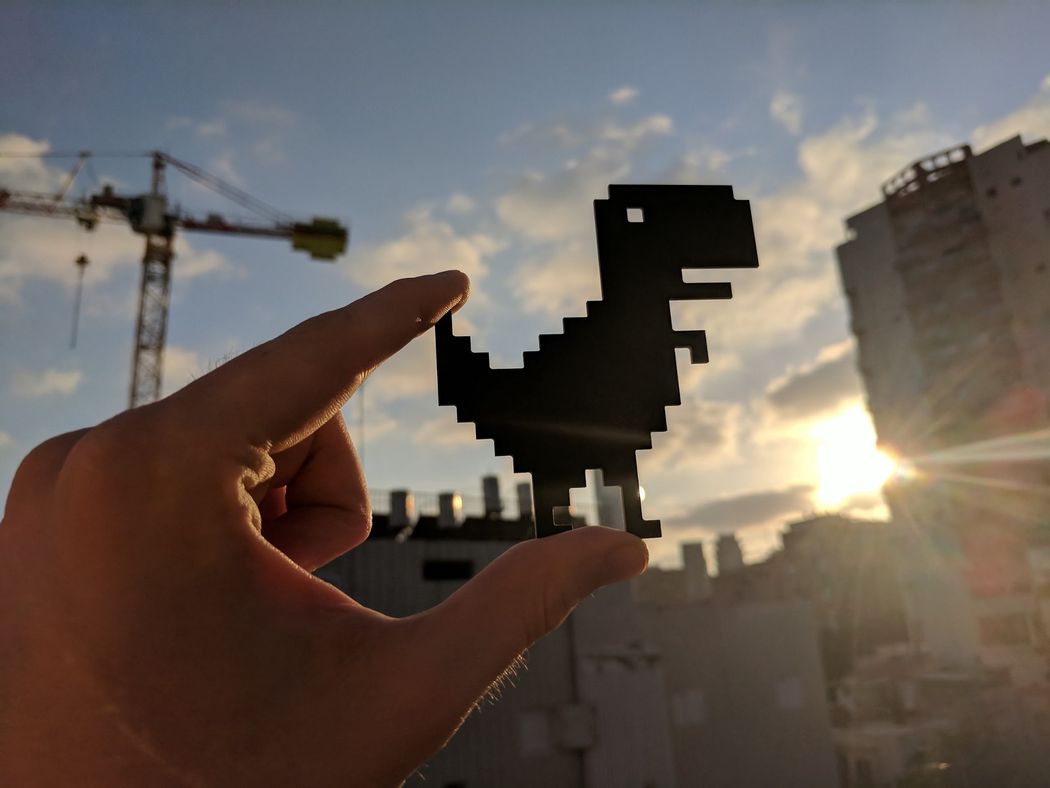
 |
|---|
| AI playing the game |
I started with this project in early March 2018 and got some good results. However, the CPU only system was the bottleneck for learning more features. A powerful GPU improved the performance tremendously.
There are many steps and concepts that we need to understand before we have a running model.
Steps:
- Build a two-way interface between Browser (JavaScript) and Model (Python)
- Capture and pre-process images
- Train model
- Evaluate
Source Code: https://github.com/Paperspace/DinoRunTutorial.git
Getting Started
To train and play the game as-is, clone the GitHub repository after you have set up the environment using
git clone https://github.com/Paperspace/DinoRunTutorial.git
and work on the jupyter notebook
Reinforcement Learning Dino Run.ipynb
Make sure you run init_cache() first time to initialize the file system structure.
Reinforcement Learning
A child learning to walk
This might be a new word for many but each and every one of us has learned to walk using the concept of Reinforcement Learning (RL) and this is how our brain still works. A reward system is a basis for any RL algorithm. If we go back to the analogy of child’s walk, a positive reward would be a clap from parents or ability to reach a candy and a negative reward would be no candy. The child then first learns to stand up before starting to walk. In terms of Artificial Intelligence, the main aim for an agent, in our case the Dino, is to maximize a certain numeric reward by performing a particular sequence of actions in the environment. The biggest challenge in RL is the absence of supervision (labeled data) to guide the agent. It must explore and learn on its own. The agent starts by randomly performing actions and observing the rewards each action brings and learns to predict the best possible action when faced with a similar state of the environment
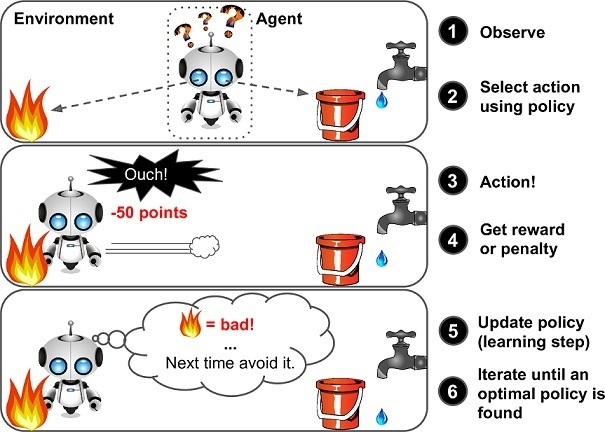 |
|---|
| A vanilla Reinforcement Learning framework |
Q-learning
We use Q-learning, a technique of RL, where we try to approximate a special function which drives the action-selection policy for any sequence of environment states. Q-learning is a model-less implementation of Reinforcement Learning where a table of Q values is maintained against each state, action taken and the resulting reward. A sample Q-table should give us the idea how the data is structured. In our case, the states are game screenshots and actions, do nothing and jump[0,1]
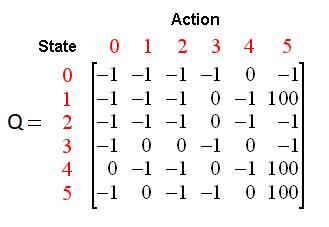 |
|---|
| A sample Q-table |
We take advantage of the Deep Neural Networks to solve this problem through regression and choose an action with highest predicted Q-value. For detailed understanding of Q-learning please refer this amazing blog post by Tambet Matiisen. You can also refer my previous post to get around all the hyper-parameters specific to Q-learning
Setup
Let's setup our environment to start the training process.
1. Select the VM: We need a complete desktop environment where we can capture and utilize the screenshots for training. I chose a Paperspace ML-in-a-box (MLIAB) Ubuntu image. The advantage of MLIAB is that it comes pre-installed with Anaconda and many other ML-libraries.
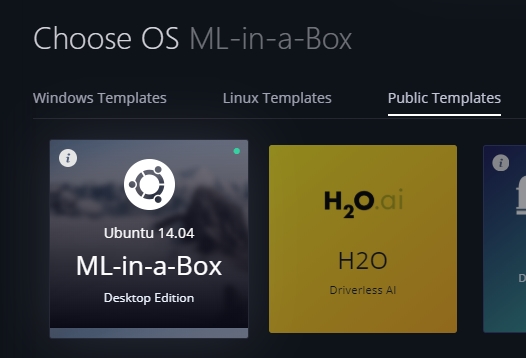 |
|---|
| Machine Learning in a box |
2. Configure and install Keras to use GPU:
We need to install keras and tensorflow's GPU verion
Paperspace's VMs have these pre-installed but if not install them
pip install keras
pip install tensorflow
Also, make sure the GPU is recognized by the setup. Execute the python code below and you should see available GPU devices
from keras import backend as K
K.tensorflow_backend._get_available_gpus()
3. Installing Dependencies
- Selenium
pip install selenium - OpenCV
pip install opencv-python - Download Chromedrive from http://chromedriver.chromium.org
Game Framework
You can launch the game by pointing your browser to chrome://dino or just by pulling the network plug. An alternate approach is to extract the game from the open source repository of chromium if we intend to modify the game code.
Our model is written in python and game is built in JavaScript, we need some interfacing tools for them to communicate with each other.
Selenium, a popular browser automation tool, is used to send actions to the browser and get different game parameters like current score.
Now that we have an interface to send actions to the game, we need a mechanism to capture the game screen
The Selenium and OpenCV gave best performance for screen capture and pre-processing of the images respectively, achieving a descent frame-rate of 6-7 fps.
We require just 4 frames per time frame, enough to learn the speed as a feature
Game Module
We implement the interfacing between Python and JavaScript using this module. The snippet below should give you a gist of what's happening in the module.
class Game:
    def __init__(self):
        self._driver = webdriver.Chrome(executable_path = chrome_driver_path)
        self._driver.set_window_position(x=-10,y=0)
        self._driver.get(game_url)
    def restart(self):
        self._driver.execute_script("Runner.instance_.restart()")
    def press_up(self):
        self._driver.find_element_by_tag_name("body").send_keys(Keys.ARROW_UP)
    def get_score(self):
        score_array = self._driver.execute_script("return Runner.instance_.distanceMeter.digits")
        score = ''.join(score_array).
        return int(score)
Agent Module
We wrap all the interfacing using Agent Module. We control the Dino using this module as well as get status of the agent in the environment.
class DinoAgent:
    def __init__(self,game): #takes game as input for taking actions
        self._game = game;
        self.jump(); #to start the game, we need to jump once
    def is_crashed(self):
        return self._game.get_crashed()
    def jump(self):
        self._game.press_up()
Game State Module
To send actions to the module and get a resultant state that the environment transitions into as a result of that action, we use the Game-State module. It simplifies the process by receiving & performing actions, decide the reward and return the experience tuple.
class Game_sate:
    def __init__(self,agent,game):
        self._agent = agent
        self._game = game
    def get_state(self,actions):
        score = self._game.get_score()
        reward = 0.1 #survival reward
        is_over = False #game over
        if actions[1] == 1: #else do nothing
            self._agent.jump()
        image = grab_screen(self._game._driver)

        if self._agent.is_crashed():
            self._game.restart()
            reward = -1
            is_over = True
        return image, reward, is_over #return the Experience tuple
Image pipeline
Image capture
There are multiple ways we can capture the game screen like using PIL and MSS python library to take a screenshot of entire screen and crop region of interest. However, the biggest disadvantage was the sensitivity to the screen resolution and window location. Luckily, the game uses an HTML Canvas. We can easily get a base64 formatted image using JavaScript. We run this script using selenium.
#javascript code to get the image data from canvas
var canvas = document.getElementsByClassName('runner-canvas')[0];
var img_data = canvas.toDataURL()
return img_data
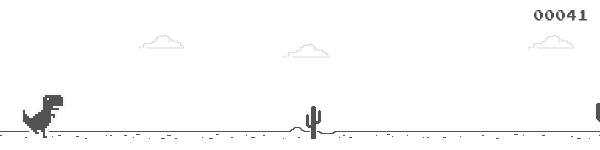 |
|---|
| Image extracted from canvas |
def grab_screen(_driver = None):
    image_b64 = _driver.execute_script(getbase64Script)
    screen = np.array(Image.open(BytesIO(base64.b64decode(image_b64))))
    image = process_img(screen)#processing image as required
    return image
Image processing
The raw image captured has a resolution of around 600x150 with 3 (RGB) channels. We intend to use 4 consecutive screenshot as a single input to the model. That makes our single input of dimensions 600x150x3x4. This is computationally expensive and not all the features are useful for playing the game. So we use the OpenCV library to resize, crop and process the image. The final processed input is of just 80x80 pixels and single channeled (grey scale).
def process_img(image):
    image = cv2.cvtColor(image, cv2.COLOR_BGR2GRAY)
    image = image[:300, :500]
    return image
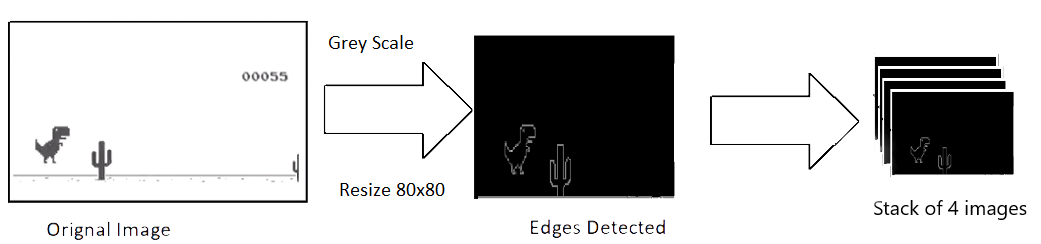 |
|---|
| Image Processing |
Model Architecture
So we got the input and a way to utilize the output of the model to play the game so lets look at the model architecture.
We use a series of three Convolution layers before flattening them to dense layers and output layer. The CPU only model did not include pooling layers because I had removed many features and adding pooling layers would've led to significant loss of already sparse features. But with power of a GPU, we can accommodate more features without any drop in frame rate.
Max Pooling layers significantly improves the processing of dense feature set.
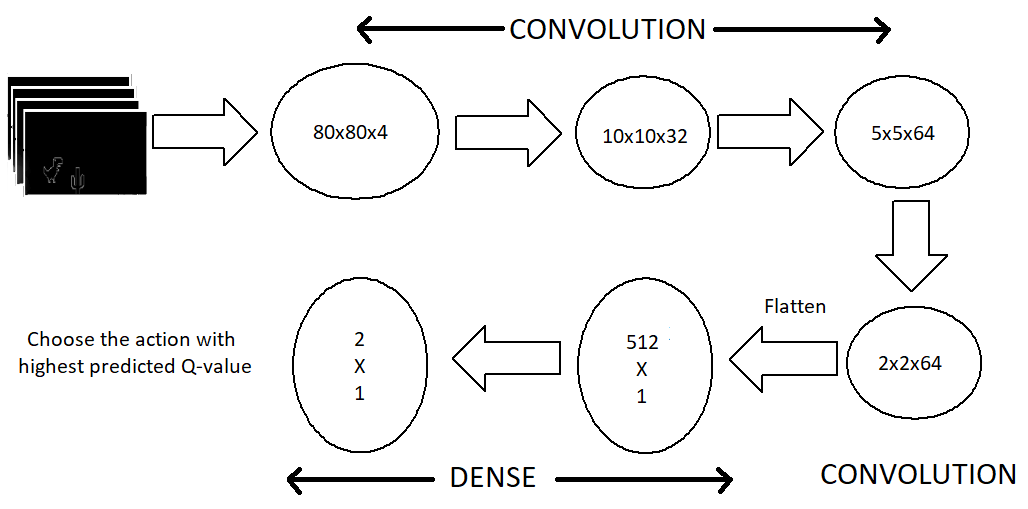 |
|---|
| Model Architecture |
| Our output layers consists of two neurons, each representing the maximum predicted reward for each action. We then choose the action with maximum reward (Q-value) |
def buildmodel():
    print("Now we build the model")
    model = Sequential()
    model.add(Conv2D(32, (8, 8), padding='same',strides=(4, 4),input_shape=(img_cols,img_rows,img_channels)))  #80*80*4
    model.add(MaxPooling2D(pool_size=(2,2)))
    model.add(Activation('relu'))
    model.add(Conv2D(64, (4, 4),strides=(2, 2),  padding='same'))
    model.add(MaxPooling2D(pool_size=(2,2)))
    model.add(Activation('relu'))
    model.add(Conv2D(64, (3, 3),strides=(1, 1),  padding='same'))
    model.add(MaxPooling2D(pool_size=(2,2)))
    model.add(Activation('relu'))
    model.add(Flatten())
    model.add(Dense(512))
    model.add(Activation('relu'))
    model.add(Dense(ACTIONS))
    adam = Adam(lr=LEARNING_RATE)
    model.compile(loss='mse',optimizer=adam)
    print("We finish building the model")
    return model
Training
These are the things happening in the training phase
- Start with no action and get initial state (s_t)
- Observe game-play for OBSERVATION number of steps
- Predict and perform an action
- Store experience in Replay Memory
- Choose a batch randomly from Replay Memory and train model on it
- Restart if game over
The code for this is little lengthy but fairly simple to understand
def trainNetwork(model,game_state):
    # store the previous observations in replay memory
    D = deque() #experience replay memory
    # get the first state by doing nothing
    do_nothing = np.zeros(ACTIONS)
    do_nothing[0] =1 #0 => do nothing,
                     #1=> jump

    x_t, r_0, terminal = game_state.get_state(do_nothing) # get next step after performing the action
    s_t = np.stack((x_t, x_t, x_t, x_t), axis=2).reshape(1,20,40,4) # stack 4 images to create placeholder input reshaped 1*20*40*4

    OBSERVE = OBSERVATION
    epsilon = INITIAL_EPSILON
    t = 0
    while (True): #endless running

        loss = 0
        Q_sa = 0
        action_index = 0
        r_t = 0 #reward at t
        a_t = np.zeros([ACTIONS]) # action at t

        q = model.predict(s_t)       #input a stack of 4 images, get the prediction
        max_Q = np.argmax(q)         # chosing index with maximum q value
        action_index = max_Q
        a_t[action_index] = 1        # o=> do nothing, 1=> jump

        #run the selected action and observed next state and reward
        x_t1, r_t, terminal = game_state.get_state(a_t)
        x_t1 = x_t1.reshape(1, x_t1.shape[0], x_t1.shape[1], 1) #1x20x40x1
        s_t1 = np.append(x_t1, s_t[:, :, :, :3], axis=3) # append the new image to input stack and remove the first one

        D.append((s_t, action_index, r_t, s_t1, terminal))# store the transition

        #only train if done observing; sample a minibatch to train on
        trainBatch(random.sample(D, BATCH)) if t > OBSERVE else 0
        s_t = s_t1
        t += 1
Notice that we are sampling 32 random experience replays from replay memory and using a batched approach of training. The reason for this is the unbalanced action distribution in the game structure as well as to avoid over-fitting.
def trainBatch(minibatch):
  for i in range(0, len(minibatch)):
                loss = 0
                inputs = np.zeros((BATCH, s_t.shape[1], s_t.shape[2], s_t.shape[3]))   #32, 20, 40, 4
                targets = np.zeros((inputs.shape[0], ACTIONS))                         #32, 2
                state_t = minibatch[i][0]    # 4D stack of images
                action_t = minibatch[i][1]   #This is action index
                reward_t = minibatch[i][2]   #reward at state_t due to action_t
                state_t1 = minibatch[i][3]   #next state
                terminal = minibatch[i][4]   #wheather the agent died or survided due the action
                inputs[i:i + 1] = state_t
                targets[i] = model.predict(state_t)  # predicted q values
                Q_sa = model.predict(state_t1)      #predict q values for next step

                if terminal:
                    targets[i, action_t] = reward_t # if terminated, only equals reward
                else:
                    targets[i, action_t] = reward_t + GAMMA * np.max(Q_sa)

            loss += model.train_on_batch(inputs, targets)
Results
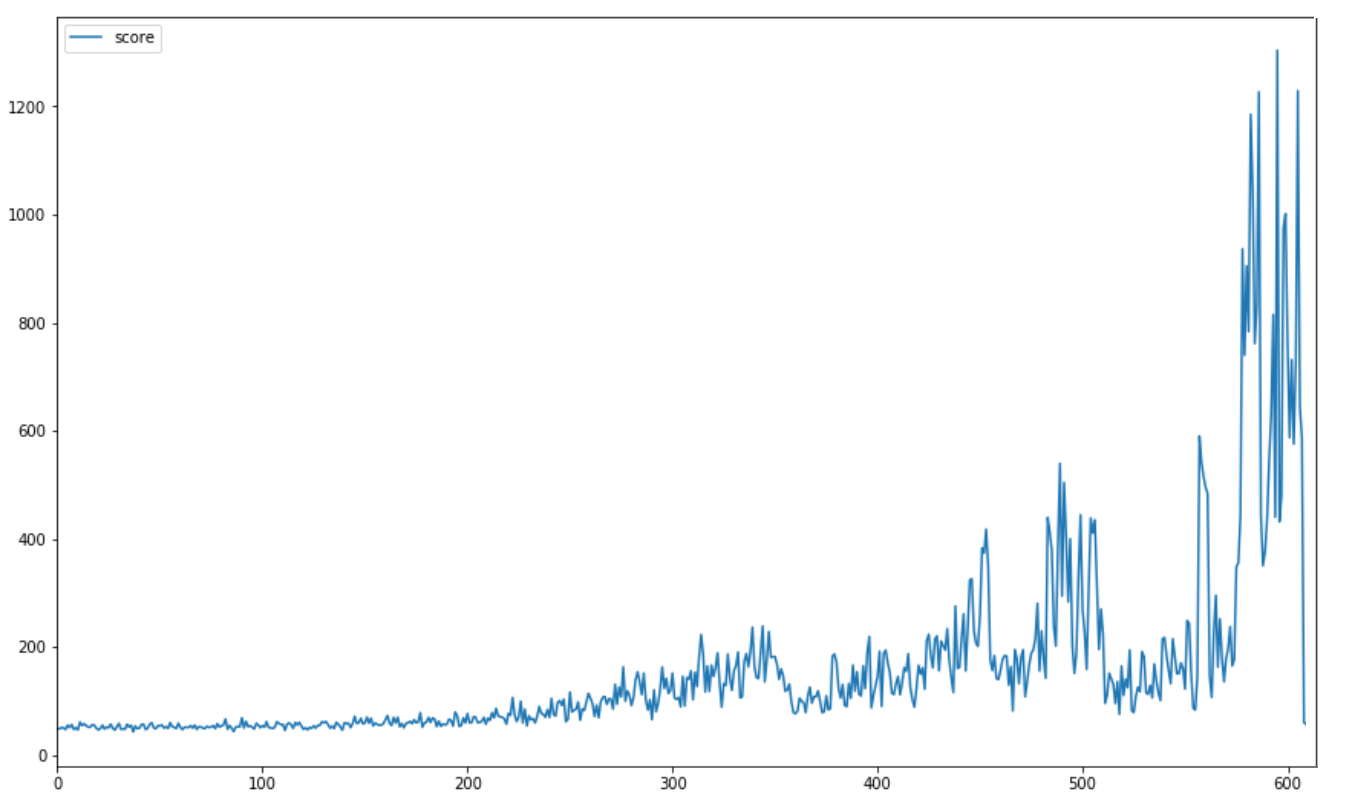
We should be able to get good results by using this architecture. The GPU has significantly improved the results which can be validated with the improvement in the average scores. The plot below shows the average scores from the start of the training. The average score per 10 games stays well above 1000 at the end of training session.
 |
|---|
| Average scores per 10 games |
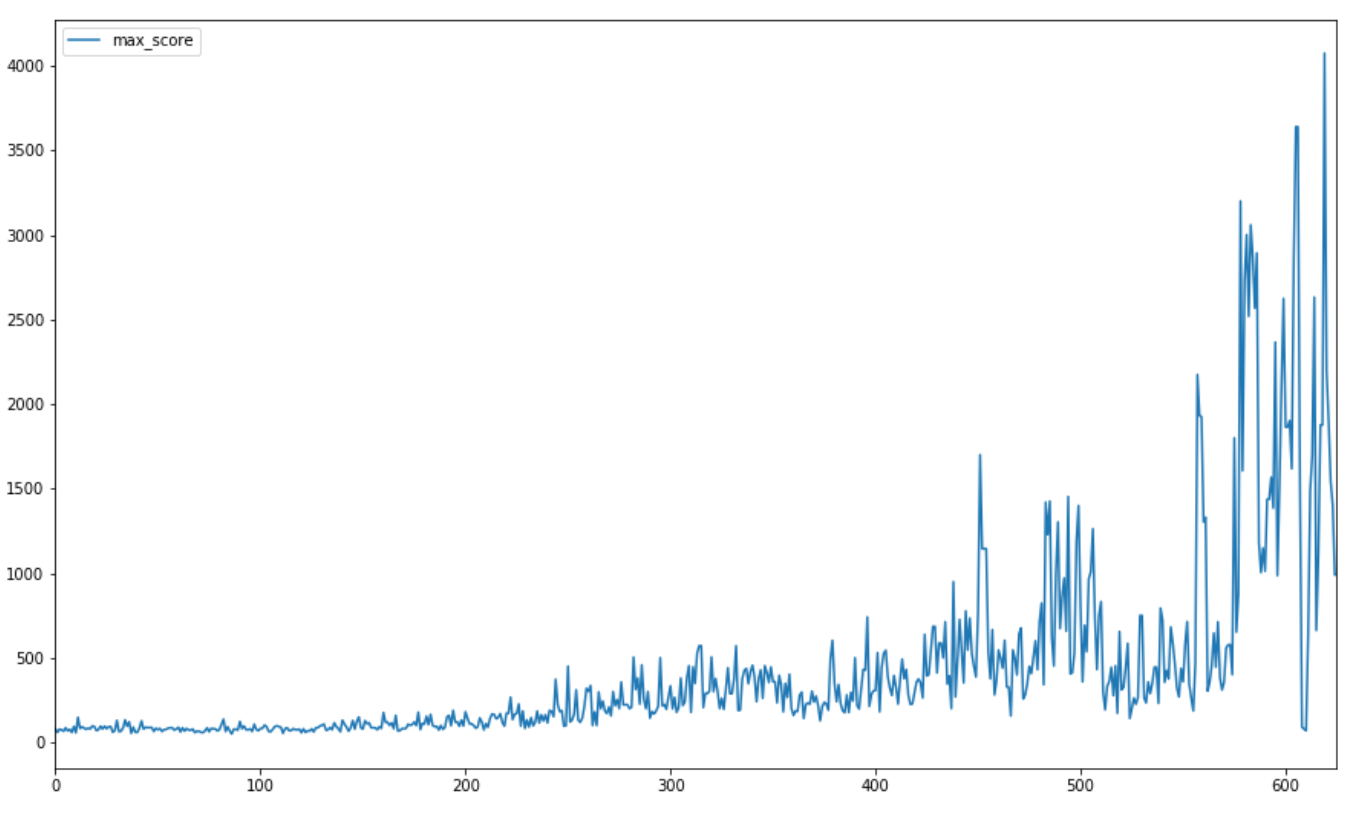
The highest score recorded was 4000+ which is way beyond the previous model of 250 (and way beyond what most humans can do!). The plot shows the progress of highest scores for the training period games (scale = 10).
 |
|---|
| Max scores per 10 games |
The speed of the Dino is proportional to the score, making it harder to detect and decide an action at higher speed. The entire game was hence trained on constant speed. The code snippets in this blog are just for reference. Please refer the GitHub repo for functional code with additional settings. Feel free to play around the code and contribute.
About Me: With some experience in software industry, I am exploring the field of ML and AI and their applications. Currently I am pursuing my master's from Northeastern University, Boston. I would love to connect, discuss and contribute to similar projects. Please feel free to connect on LinkedIn.