This post will go through the process of training a generative image model using Gradient° and then porting the model to ml5.js, so you can interact with it in the browser. For this, we will use Pix2Pix or Image-to-Image Translation with Conditional Adversarial Nets and train it on pairs of satellite images and map tiles. This is the third post on a series of blog posts dedicated to train machine learning models in Paperspace and then use them in ml5.js.
Introducing Pix2Pix
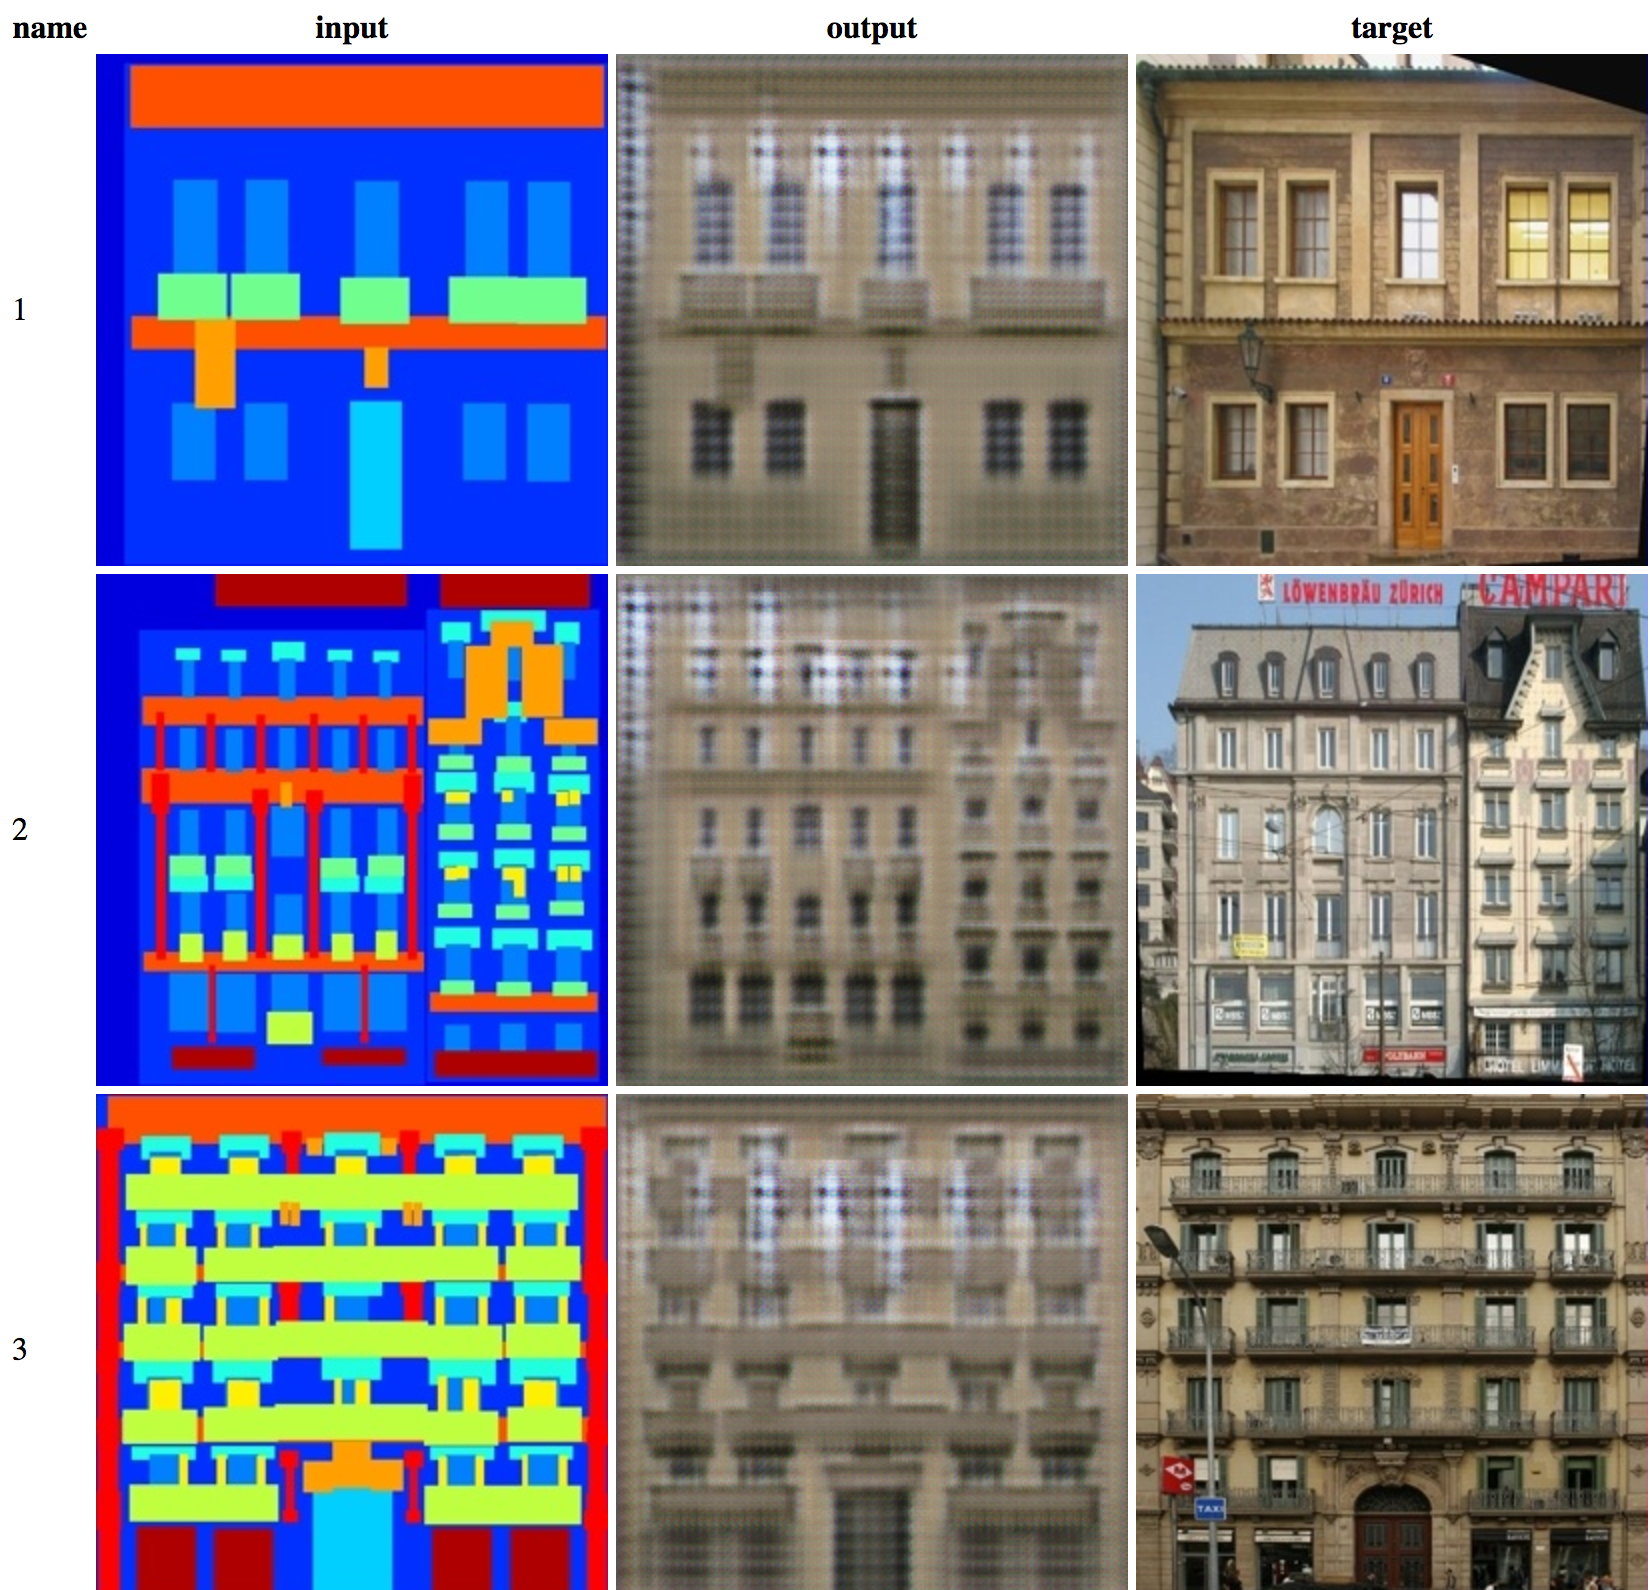
Pix2Pix, or Image-to-Image Translation, is a technique to train a machine learning model to learn a mapping between pairs of related images, from input to output images. This means, the model will learn how to convert images of one type or with one set of characteristics, into an new image with another set of characteristics. You can use this approach to synthesize new pixels given a similar input used when training the model. For this, Pix2Pix uses a special kind of generative algorithm called Conditional Adversarial Network (cGAN) where the generation process is "conditioned" on a input image. The original paper and code was publish by Phillip Isola et al, on November 2016 and since then, this technique has been widely used and explored by many people and researchers. But besides its interesting technical novelty, some of its creative results are fascinating.
This post will be focused on running and training your own model. A good resource if you are interested in a more detailed description of how Pix2Pix works is the Machine Learning for Artist (ml4a) Pix2Pix post. There, you can find in depth explanations of how the model learns to generalize, the technical details of the technique and the kind of creative applications people have been building. For instance, you can create real time interactive project like this one:
Experimenting with image-to-image translation for characters in @runwayml and @hellopaperspace.
— Cris Valenzuela (@c_valenzuelab) August 6, 2018
I guess I can call this "The Alternative Late Show with @StephenAtHome" pic.twitter.com/sm8rAWdgUb
What we will be building
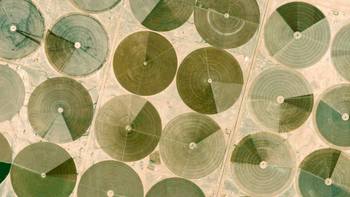
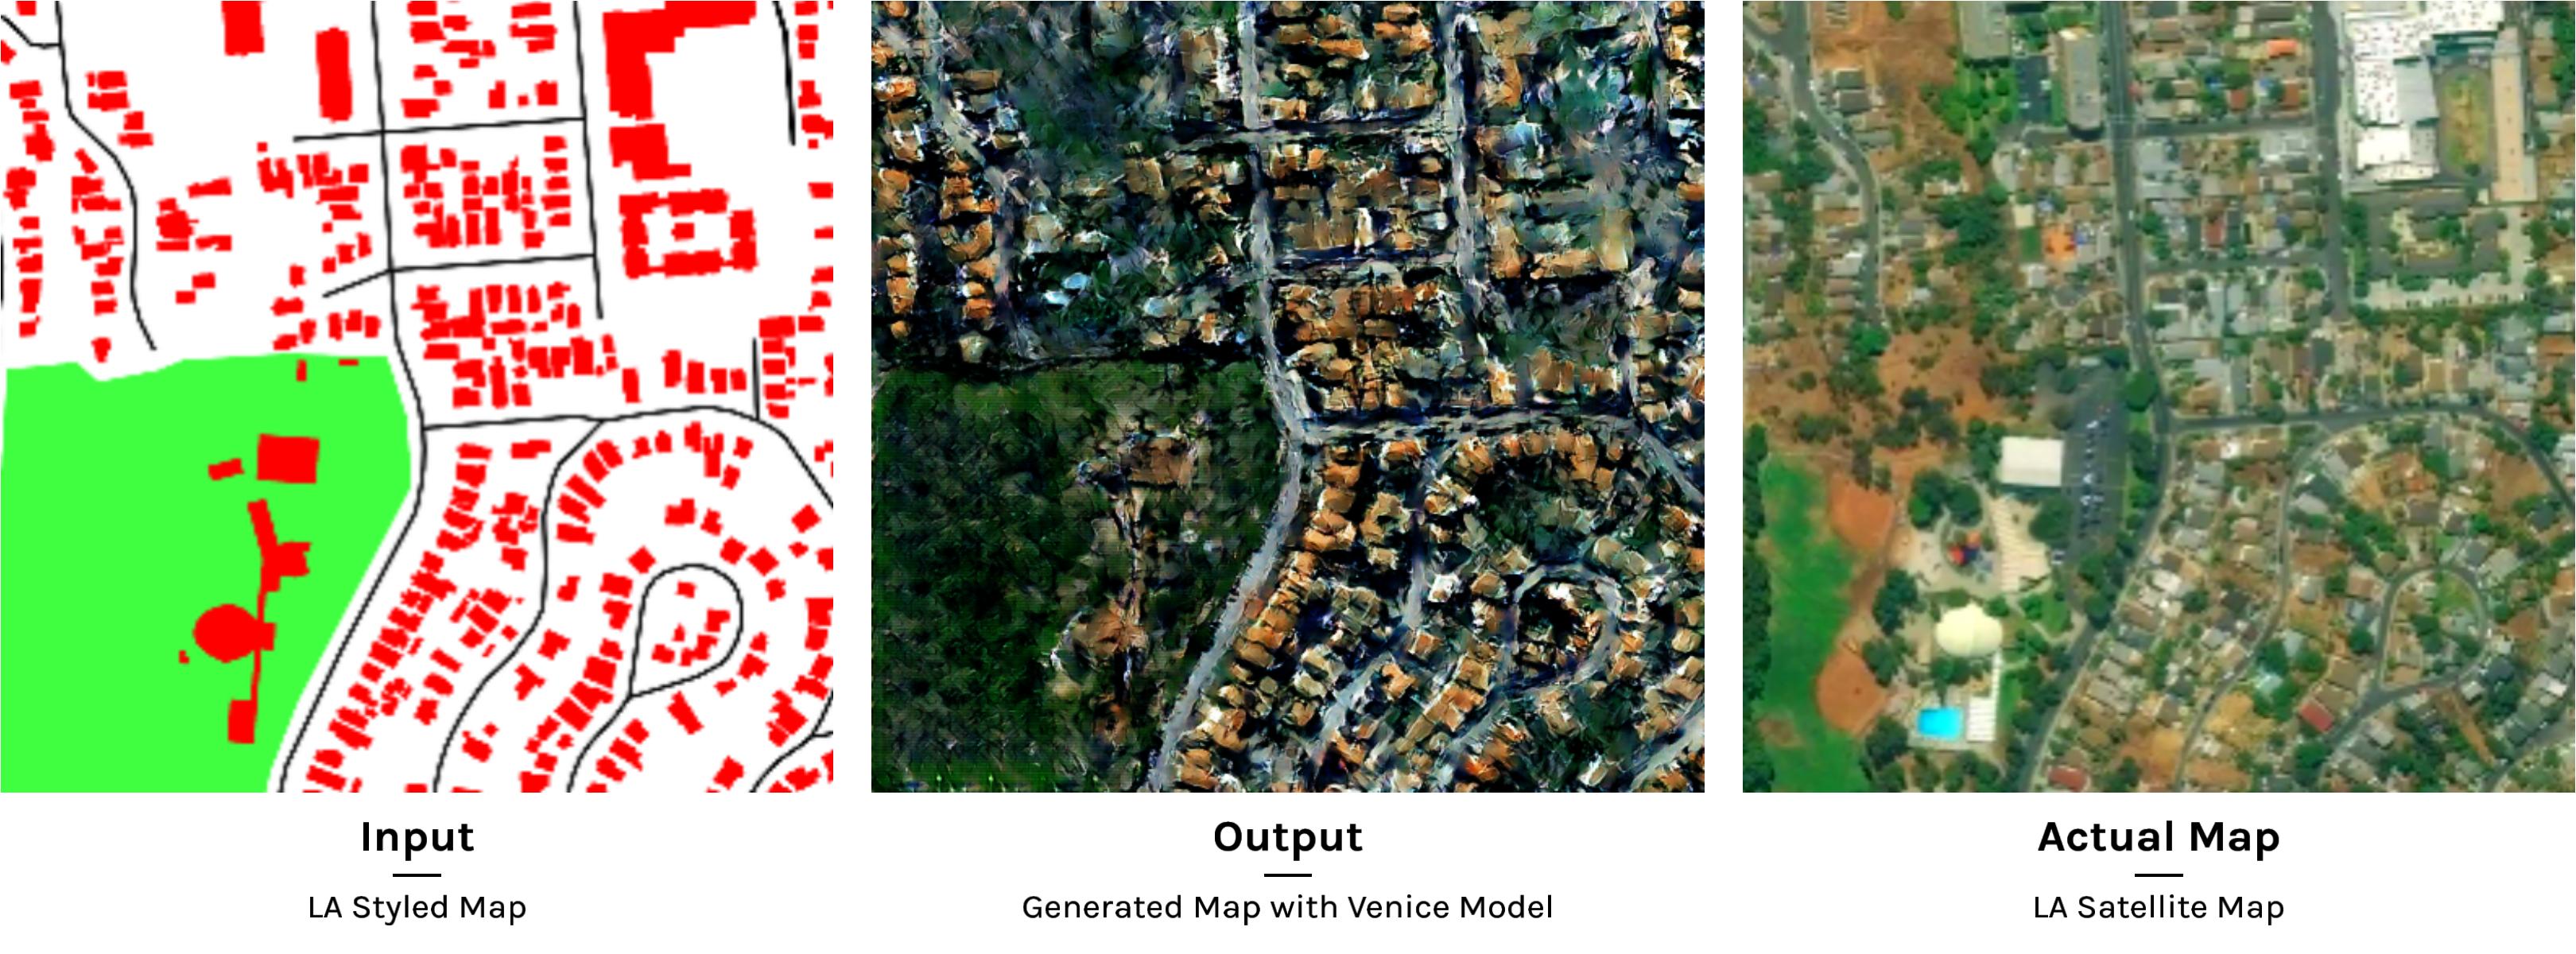
For this tutorial we will create an interactive satellite image generator. We will train a model on pairs of satellite and map tiles of any city you want and Pix2Pix will learn how to convert tile maps into satellite looking images. You can use the same approach to train a model in any kind of related pairs of images you like. Take a look a the demo:
This example is based on Gene Kogan's Invisible Cities project, where he created different models for different cities and then made a "city map style transfer".
We will be actually using some of the scripts used in Invisible Cities to get images from Mapbox. We will then use a Pix2Pix TensorFlow implementation made by Christopher Hesse and run it inside Gradient. Hesse made a single file implementation of the original paper and code, written in Torch, to TensorFlow. He also wrote a TensorFlow.js port that is able to run on the browser. The implementation ml5.js uses, is based on that code with some additional changes. Hesse also made a great introduction to the way Image-to-Image translation works, including a detailed explanation of how the encoding-decoding process works and what happens during training and validation phases. You can find his blog post here.
Setting up
Installing the Paperspace Node API
We will use the Paperspace Node API or the Python API. If you don't have it installed, you can easily install it with npm:
npm install -g paperspace-node
or with Python:
pip install paperspace
(you can also install binaries from the GitHub releases page if you prefer).
Once you have created a Paperspace account you will be able to login in with your credentials from your command line:
paperspace login
Add your Paperspace email and password when prompted.
If you don't have an account with Paperspace yet, you can use this link to get $5 for free! Link: https://www.paperspace.com/&R=VZTQGMT
1) Get the Code
Start by cloning or downloading the project repository:
git clone https://github.com/Paperspace/training-pix2pix.git
cd training-pix2pix
This will be the `root` of our project.
2) Get the Data
We will need to generate the data for our project. For this, we will use Mapbox to get the tiles of any city we want. You will need to sign up, if you don't already have an account, into Mapbox following this link. It's free and there's no need to use a credit card when signing in.
Once registered, visit your account dashboard and select the "Access Token" tab. There you will find the API code you we will need to get access to download the images. This token should look something like this:
Default public token
pk.eyJ1IjXXXXXXXXXXXXXXXXXXXXXXXX.P_0JJXYYYYYYYYYYY
We are now ready to download some map images!
We will use Python 2, from the root of the project type the following:
python scripts/map_tiles/get_tiles.py \
  --key YOUR_API_KEY \
  --width 256 \
  --height 256 \
  --zoom 17 \
  --num_images 400 \
  --output_dir images/ \
  --augment True \
  --lat_min -33.450000 \
  --lng_min -70.666670 \
  --lat_max -33.577847 \
  --lng_max -70.627689 \
  --style_map cvalenzuela/cjksl3i4f0f212ss77ezlnr6l
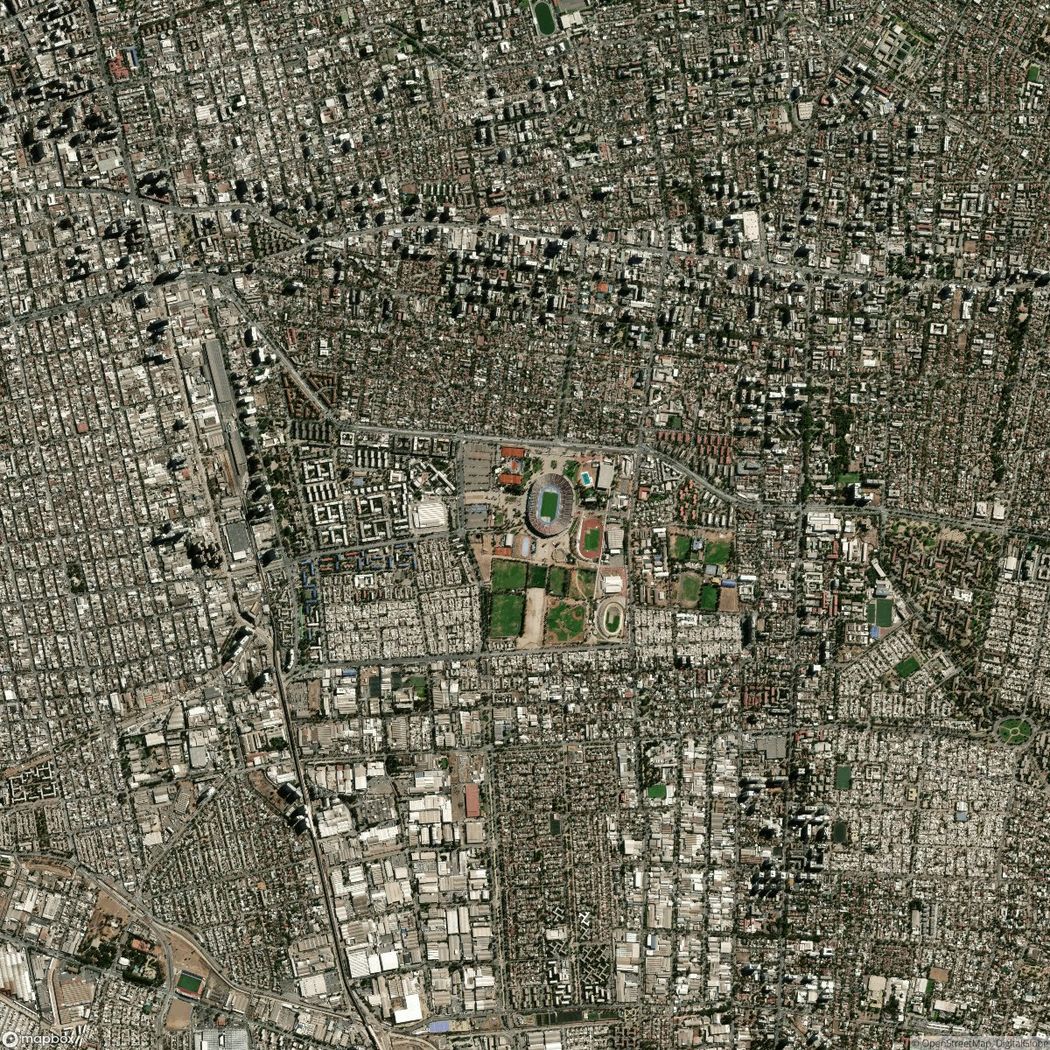
This means we want to download 400 images of size 256x256 with in the boundaries defined in "lat_min", "lat_max", "lng_min" and "lng_max" with a zoom of 17. In this particular case, we are defining the boundaries of a small part of Santiago, Chile. But feel free to change them to any other part of the world you like!
If you run that script, you should see the following:
Getting map image -33.5689957021, -70.656725262, 17. (0/400)
Getting map image -33.4771473938, -70.6470826513, 17. (1/400)
Getting map image -33.5321117294, -70.6448115163, 17. (2/400)
Getting map image -33.4787724092, -70.6390812014, 17. (3/400)
(...)
After this script finishes, two new folders will be created inside the "/images" folder. One will contain satellite images and the other tile maps.
We will then need to create one single image that holds these pairs of images. Run the following script:
python scripts/map_tiles/copy_tiles.py --in_path images/
This will create a new folder called "/combined" containing 400 images of size 512x256. Try opening the folder and explore the training set you will be using.
The final step before the training phase is to separate our data into training and validation sets. To do so, run the following:
python scripts/split.py --dir images/combined
That will split our data into training and validation sets folders inside "images/combined". You should now erase the "map" and "sat" folders so you don't upload them to the training process.
Training
Once our pairs of images have been collected, we need to train our model. In order to do so, we will need GPU accelerated computing. This process is actually really easy with Gradient°. From the root of our project run the following command:
paperspace jobs create --container tensorflow/tensorflow:1.4.1-gpu-py3 --machineType P5000 --command ./run.sh --project pix2pixtraining --ignoreFiles ml5js_example
Here, we are creating a new Gradient job using as a base Python 3 with TensorFlow 1.4.1 and GPU support. We are selecting a machine type P5000 and we are running the command "run.sh". The name of the project is "pix2pixtraining" and we are ignoring the files in the the "examples" folder
If you explore the file "run.sh" you will see that we are calling the pix2pix.py file with some default parameters:
python pix2pix.py \
  --mode train \
  --output_dir /artifacts \
  --max_epochs 200 \
  --input_dir images/combined/train \
  --which_direction BtoA \
  --save_freq 100 \
  --display_freq 150 \
Our final model will be inside the "/artifacts" folder. Once the job is sumbitted to the Paperspace cluster you should see the following:
Uploading pix2pix.zip [========================================] 11472599/bps 100% 0.0s
New jobId: js9zo5cloaysao
Cluster: PS Jobs
Job Pending
Waiting for job to run...
(...)
Training Pix2Pix
This script will train a model and export it to ml5.js
Based on https://github.com/affinelayer/pix2pix-tensorflow
Starting...

progress  epoch 25  step 2  image/sec 6.1  remaining 0m
discrim_loss 0.5001645
gen_loss_GAN 0.4661432
gen_loss_L1 0.11094902
recording summary
progress  epoch 50  step 2  image/sec 6.5  remaining 0m
discrim_loss 0.6439996
gen_loss_GAN 0.8439438
gen_loss_L1 0.14944236
saving model
(...)
This process will take around 4-6 hours to train. You can monitor the progress via the Gradient UI or by typing:
paperspace jobs logs --tail --jobId YOUR_JOB_ID
Downloading the model
Once the training process is finished, the script will create a model that's ready to use in ml5.js. By the end of the training process the log should say the following:
(...)
progress  epoch 200  step 2  image/sec 7.1  remaining 0m
discrim_loss 0.64996916
gen_loss_GAN 1.811908
gen_loss_L1 0.16352697
saving model

Training finished! Exporting the model...
Loading model from checkpoint
Exporting model
Export finished!
Porting the model to ml5.js...
Done! Your model is ready!
Read how to use it here: https://ml5js.org/docs/Pix2Pix
All set! You can now download the resulting model with the following command:
cd models/
paperspace jobs artifactsGet --jobId YOUR_JOB_ID
This will download all the files in "/artifacts". We actually just need the file called 'model.pict'. Copy that file to "ml5js_example/model".
Use the model
Open "ml5js_example/script.js" and change the path to point to your new model:
pix2pix = ml5.pix2pix('model/model.pict', modelLoaded);
We are almost ready to test the model. The only thing left is to start a server to view our files. If you are using Python 2:
python -m SimpleHTTPServerIf you are using Python 3:
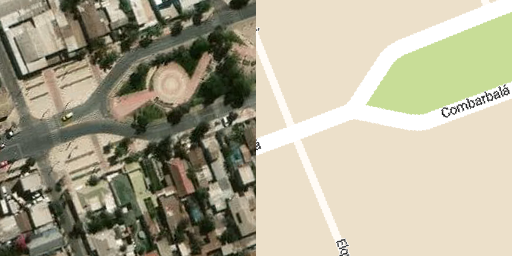
python -m http.serverVisit http://localhost:8000 and if everything went well you should see the demo:
This approach and code for training Pix2Pix should work with any well structure pairs of images you want to use. Examples of Pix2pix models include: edges-2-cats, edges-2-shoes, edges-2-handbags, edges-to-faces, labes-to-facedes, pose-2-body, etc.