ResNets, DenseNets and Inception networks are undoubtedly some of the most powerful models out there for performing image classification and object recognition. These models have shown some promising results in the ImageNet Large Scale Visual Recognition Challenge, ILSVRC and have gone to the extent of out-performing humans.
Pytorch, Facebook’s deep learning infrastructure for both research and production has a library called Torchvision mainly for computer vision tasks which provides us with all these incredible models trained on the ImageNet dataset.
We can leverage these existing canonical models to perform image classification and detection using a technique called transfer learning to suit our problem. Looking at the evaluation metrics of these models, we can find that these models, though powerful, are still some numbers away from a perfect accuracy. Computer vision researchers have really pushed the boundaries of building models that are as accurate as possible, even beyond the ResNets and DenseNets but we’ve not seen any updates in the model’s module of Torchvision. That’s the problem this article seeks to solve – getting access to models that have not yet been added to the Torchvision framework.
A big thanks to author of the GitHub repository, https://github.com/Cadene/pretrained-models.pytorch for his great work in implementing all these models which are not available in the torchvision framework in Pytorch. Below is a quick overview of this entire article.
- Installing the necessary libraries
- Obtaining our models.
- Using transfer learning to train one of the models on cifar-10 dataset
- Evaluation and comparison of our model with a similar torchvision model.
INSTALLATION
There are two ways to install the required module – downloading from the GitHub repository or using pip install. We are going to first install the module through pip install. It is much simpler than it may seem to you. Just fire up your terminal and enter the command:
pip install pretrainedmodels
and that’s it. Let see how to install the pretrainedmodels module by cloning into the repository. It’s also simple. Just fire up git cmd or any other terminal and clone into the GitHub repository with the implementation of these models using the command:
git clone https://github.com/Cadene/pretrained-models.pytorch
In the terminal, move into the cloned directory and enter the command:
python setup.py install
This should install the pretrainedmodels module. To verify that, open any python IDE or more preferably Jupyter notebook and import the pretrainedmodels module with the code:
import pretrainedmodels
Our module has been properly installed if we do not get any error. We should note that the module does not include the weights of the models. The weights will be downloaded automatically when we are obtaining the model.
OBTAINING OUR MODELS
Before we choose our preferred model for classification, let’s look at the endless list of models available in the pretrainedmodels module that we can choose from. Let’s look at the code to do that.
print(pretrainedmodels.model_names)
This should print a single list of all the available models in the pretrainedmodels module. We can also view the configurations of each model by the running a Jupyter notebook cell containing the code:
print(pretrainedmodels.pretrained_settings["name of the model"])
This prints out some information about the model in a dictionary form such as the URL path to the model’s weights, mean and standard deviation to be used to normalize the input images, the input image size and so on. In this post we are going to use the se_resnet50 model. If you would like to know more about the architecture and performances of some of these models, then you should check out this paper: https://arxiv.org/abs/1709.01507. Almost every machine learning model needs data to be trained upon. In this post, we are going to use the Cifar-10 dataset which is included in the torchvision framework. We are going to load our data from the torchvision framework with a simple pipeline but before that, we need to import some important libraries.
import torch
import torchvision
import torchvision.transforms as transforms
import torch.nn as nn
import torch.optim as optim
import copy
import time
After importing the required libraries, we can go ahead and create the pipeline to load our dataset.
transform = transforms.Compose(
    [transforms.ToTensor(),
     transforms.Normalize(mean = (0.5, 0.5, 0.5), std = (0.5, 0.5, 0.5))])

trainset = torchvision.datasets.CIFAR10(root='./data', train=True,
                                        download=True, transform=transform)
trainloader = torch.utils.data.DataLoader(trainset, batch_size=16,
                                          shuffle=True, num_workers=2)

testset = torchvision.datasets.CIFAR10(root='./data', train=False,
                                       download=True, transform=transform)
testloader = torch.utils.data.DataLoader(testset, batch_size=16,
                                         shuffle=False, num_workers=2)
dataset_sizes = {
  'train' : len(trainset),
  'val' : len(testset)
}
dataloaders = {
              'train': trainloader,
              'val' : testloader
In the steps to come, we are going to build and train our model. We are going to use object oriented programming style, a conventional way to build PyTorch models. Before you proceed to the part below, I recommend that you take this 60 minute blitz tutorial on the Pytorch official page: https://pytorch.org/tutorials/beginner/deep_learning_60min_blitz.html but if you still opt to proceed, don’t worry, I will do my very best to explain every bit of the code in the comments in the code. Let’s look at the code to do so.
class Model(nn.Module):
    def __init__(self):
        super(Model, self).__init__()

        # Obtain the desired model from the pretrainedmodels library

        self.model = pretrainedmodels.__dict__['se_resnet50']()

        # Build our classifier and since we are classifying the images into 10
        # classes, we return a 10-dimensional vector as the output.

        self.classifier = nn.Sequential(
        nn.Linear(self.model.last_linear.in_features,10),
        nn.LogSoftmax(dim=1))

        # Requires_grad = False denies the se_resnet50 base model the ability to
        # update its parameters hence make it unable to train.

        for params in self.model.parameters():
            params.requires_grad = False

            # We replace the fully connected layers of the base model (se_resnet model)
            # which served as the classifier with our custom trainable classifier.

        self.model.last_linear= self.classifier

# Every model which inherits from nn.Module requires that we override the  forward
# function which defines the forward pass computation performed at every call.

def forward(self, x):
    # x is our input data
    return self.model(x)
Our model is created every time our init function is called. Now that we have our model ready, we can go ahead and train it. In the Model class, we can define another function called fit which will basically call the forward function that we overrode on batches of images and then back-propagate our error back through the model for weights update. Let’s build the software pipeline to perform this forward propagation and backward propagation task.
def fit(self, dataloaders, num_epochs):

    # We check whether a gpu is enabled for our environment.

    train_on_gpu = torch.cuda.is_available()

    # We define our optimizer and pass in the model parameters (weights and biases)
    # into the constructor of the optimizer we want.
    # More info: https://pytorch.org/docs/stable/optim.html

    optimizer = optim.Adam(self.model.last_linear.parameters())

    # Essentially what scheduler does is to reduce our learning by a certain factor
    # when less progress is being made in our training.

    scheduler = optim.lr_scheduler.StepLR(optimizer, 4)

    # Criterion is the loss function of our model.
    # We use Negative Log-Likelihood loss because we used log-softmax as the last layer of our model.
    # We can remove the log-softmax layer and replace the nn.NLLLoss() with nn.CrossEntropyLoss()

    criterion = nn.NLLLoss()
    since = time.time()

    # model.state_dict() is a dictionary of our model's parameters. What we did here
    # is to deepcopy it and assign it to a variable

    best_model_wts = copy.deepcopy(self.model.state_dict())
    best_acc = 0.0

    # We check if a gpu is enabled for our environment and move our model to the gpu

    if train_on_gpu:
        self.model = self.model.cuda()
    for epoch in range(1,num_epochs+1):
        print('Epoch {}/{}'.format(epoch, num_epochs))
        print('-' * 10)

        # Each epoch has a training and validation phase.
        # We iterate through the training set and validation set in every epoch.

        for phase in ['train', 'val']:

            # we apply the scheduler to the learning rate in the training phase since
            # we don't train our model in the validation phase

            if phase == 'train':
                scheduler.step()
                self.model.train()  # Set model to training mode
            else:
                self.model.eval()   #Set model to evaluate mode to turn off features like dropout
            running_loss = 0.0
            running_corrects = 0

            # Iterate over batches of train and validation data.

            for inputs, labels in dataloaders[phase]:
                if train_on_gpu:
                    inputs = inputs.cuda()
                    labels = labels.cuda()

                # clear all gradients since gradients get accumulated after every
                iteration.
                optimizer.zero_grad()

                # track history if only in training phase

                with torch.set_grad_enabled(phase == 'train'):
                    outputs = self.model(inputs)
                    _, preds = torch.max(outputs, 1)

                # calculates the loss between the output of our model and ground-truth
                labels

                loss = criterion(outputs, labels)

                # perform backpropagation and optimization only if in training phase

                if phase == 'train':

                # backpropagate gradients from the loss node through all the
                parameters
                    loss.backward()

                    # Update parameters(Weighs and biases) of our model using the
                    gradients.

                    optimizer.step()
              # Statistics

                running_loss += loss.item() * inputs.size(0)
                running_corrects += torch.sum(preds == labels.data)
            epoch_loss = running_loss / dataset_sizes[phase]
            epoch_acc = running_corrects.double() / dataset_sizes[phase]
            print('{} Loss: {:.4f} Acc: {:.4f}'.format(
                phase, epoch_loss, epoch_acc))

            # Deep copy the model if we obtain a better validation accuracy than the previous one.

            if phase == 'val' and epoch_acc > best_acc:
                best_acc = epoch_acc
                best_model_wts = copy.deepcopy(self.model.state_dict())
    time_elapsed = time.time() - since
    print('Training complete in {:.0f}m {:.0f}s'.format(
        time_elapsed // 60, time_elapsed % 60))
    print('Best val Acc: {:4f}'.format(best_acc))

    # Load best model parameters and return it as the final trained model.

    self.model.load_state_dict(best_model_wts)
    return self.model

# We instantiate our model class
model = Model()
# Run 10 training epochs on our model
model_ft = model.fit(dataloaders, 10)
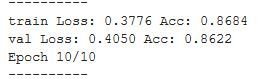
Training the se_resnet50 for 10 epochs, we hit a validation accuracy of 86.22%.
We also fit the resnet50 model provided by torchvision of which the se_resnet50 is a variant for 10 epochs on the cifar-10 dataset. At the end of the training, we obtain an accuracy of 34.90% which is very poor. Clearly, we can see that the resnet50 model is not suitable for the problem but a variant of it which has been implemented in the pretrainedmodels library performs incredibly well on the problem.
NEXT STEPS
As a next step, I encourage readers to try out all the models provided in the pretrainedmodels library on problems that they have already tackled with torchvision models and see if any of the pretrainedmodels can bring improvements in performance.
ABOUT THE AUTHOR
I am an undergraduate student currently studying Electrical and Electronic Engineering. I am also a deep learning enthusiast and writer. My work mostly focuses on application of computer vision to medical image analysis. I'm hoping to one day break into the field of autonomous vehicles.You can follow along on twitter(@henryansah083): https://twitter.com/henryansah083?s=09 LinkedIn: https://www.linkedin.com/in/henry-ansah-6a8b84167/