Run classic Stable Diffusion with Gradient Notebooks
Nov 30, 2022: This tutorial is now outdated: see the follow up article here for the latest versions of the Web UI deployment on Paperspace
The popularity of Stable Diffusion has continued to explode further and further as more people catch on to the craze. A powerful, pre-trained version of the Latent Diffusion model, Stable Diffusion is a a diffusion model released last month by the researchers at CompVis. The model was trained using subsets of the LAION 5B dataset, including the high resolution subset for initial training and the "aesthetics" subset for subsequent rounds.
In the end, they were left with an extremely robust model that is capable of simulating and recreating nearly any concept imaginable in visual form with no guidance needed beyond a text prompt input. Be sure to check out our full write up and tech talk on stable diffusion for more information about how this model came to be, the underlying architecture, and a fuller look at its capabilities at launch.
In this article, we will take a look at the AUTOMATIC111 fork of the Stable Diffusion web UI, and show how to spin the web UI up in less than a minute on any Paperspace GPU powered machine. This awesome application is powered by Gradio to bring a user immediate access to Stable Diffusion in a low code GUI.
The Stable Diffusion Web UI
As the technology has grown in popularity, so too have the different methods to use the awesome model. While the original diffusers package remains the most common methodology for accessing the Stable Diffusion checkpoints for any given synthesis task, numerous alternative forks of the original repo, variations and fusions with additional techniques like CrossAttentionControl or Guided Diffusion, and full on web applications have grown to serve the community from the original repository.
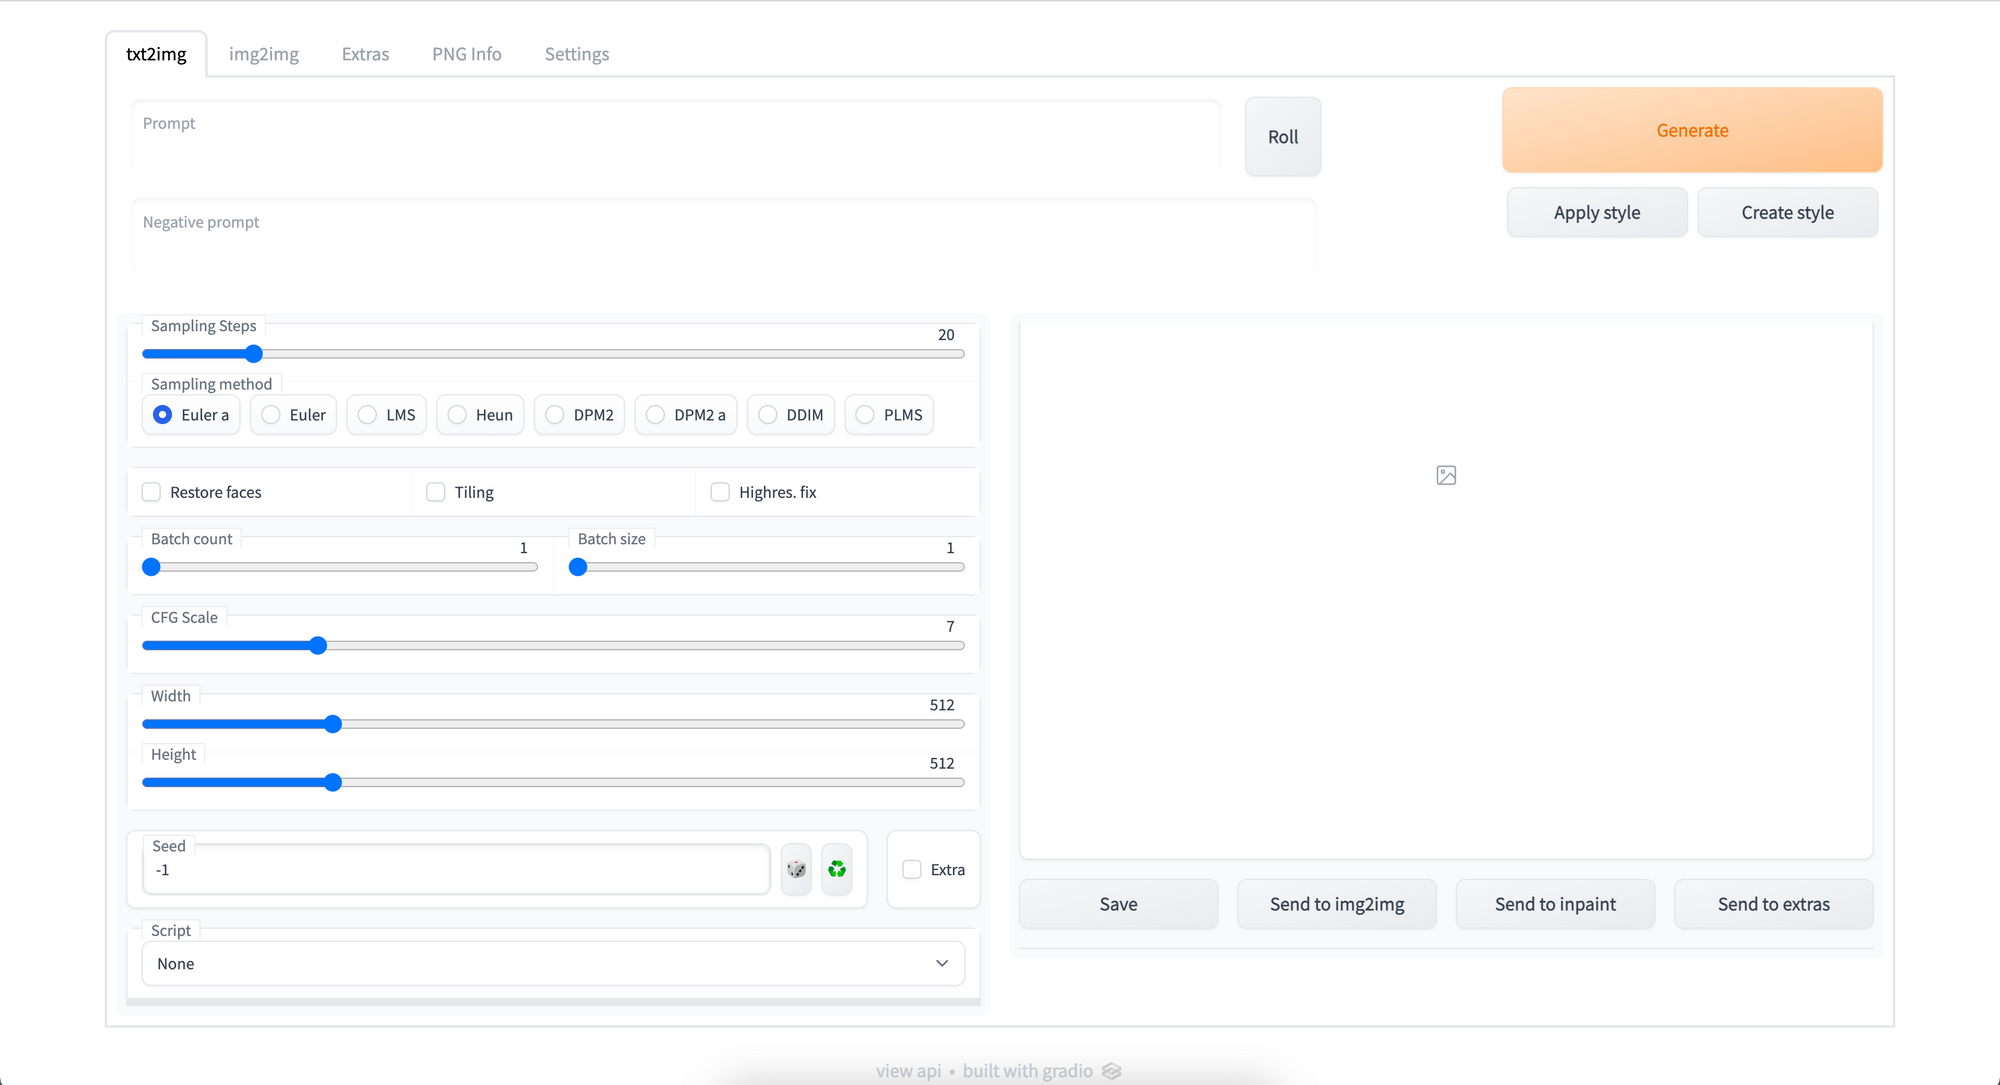
Arguably the most popular and frequently updated of these is AUTOMATIC111's fork of the Stable Diffusion web UI. In addition to the basic capabilities of Stable Diffusion like txt2img, img2img, inpainting, and upscaling, the web UI comes packaged with numerous improvements, quality of life fixes, additional and experimental scripts, and numerous additional upgrades - all accessible from an easy to use web application GUI. (For more information on the features of the web UI, go to the features section of this article)
User challenges for getting started with the Stable Diffusion web UI
While the web UI offers powerful upgrades to the standard diffusers package methodology for Stable Diffusion image synthesis, there are two challenges facing users who want to take advantage of these upgrades:
- Setup: while the web UI comes with built in setup scripts to assist new users, it is not yet quite plug and play - even within a Gradient Notebook. Users will either need to learn how to set the environment up on their own, or use a fork which does so for them
- Compute: finding enough compute to actually run Stable Diffusion processes in a timely manner can be difficult on a local machine, so remote instances are ideal.
With Gradient Deployments, we can remove much of the headache for both sourcing compute and completing the setup to run the web UI. We have created a docker container that comes pre installed with all of the necessary packages and models needed to execute the web UI in a deployment. This public container can be accessed via Docker Hub for use with any Gradient Notebook, Workflow, or Deployment.
Existing problems with the web UI
It is also worth noting that this is still very much in development, and subject to the growing pains common to such applications. If you experience an issue with the web UI, like an image not outputting after generation, these likely stem from quirks in the web UI interface. Despite these small hiccups, the web UI remains one of the best ways to use Stable Diffusion in a low code environment.
The Stable Diffusion model itself has its own limitations, like low resolution image generation. Be sure to keep these in mind when using the web UI, and consider restarting the deployment if things freeze.
Finally, if the deployment itself suddenly goes offline, this may be for a number of reasons. Check your spec in the overview of your Deployment to see if the number of replicas is above '0'. If not, change it to restart your Deployment.
How to use the Stable Diffusion web UI with Gradient Deployments
There are two ways to initiate a Gradient Deployment: through the Paperspace web console or the Gradient CLI. Let's first look at the web setup method:
Nov 30, 2022: This tutorial is now outdated: see the follow up article here for the latest versions of the Web UI deployment on Paperspace
Web setup
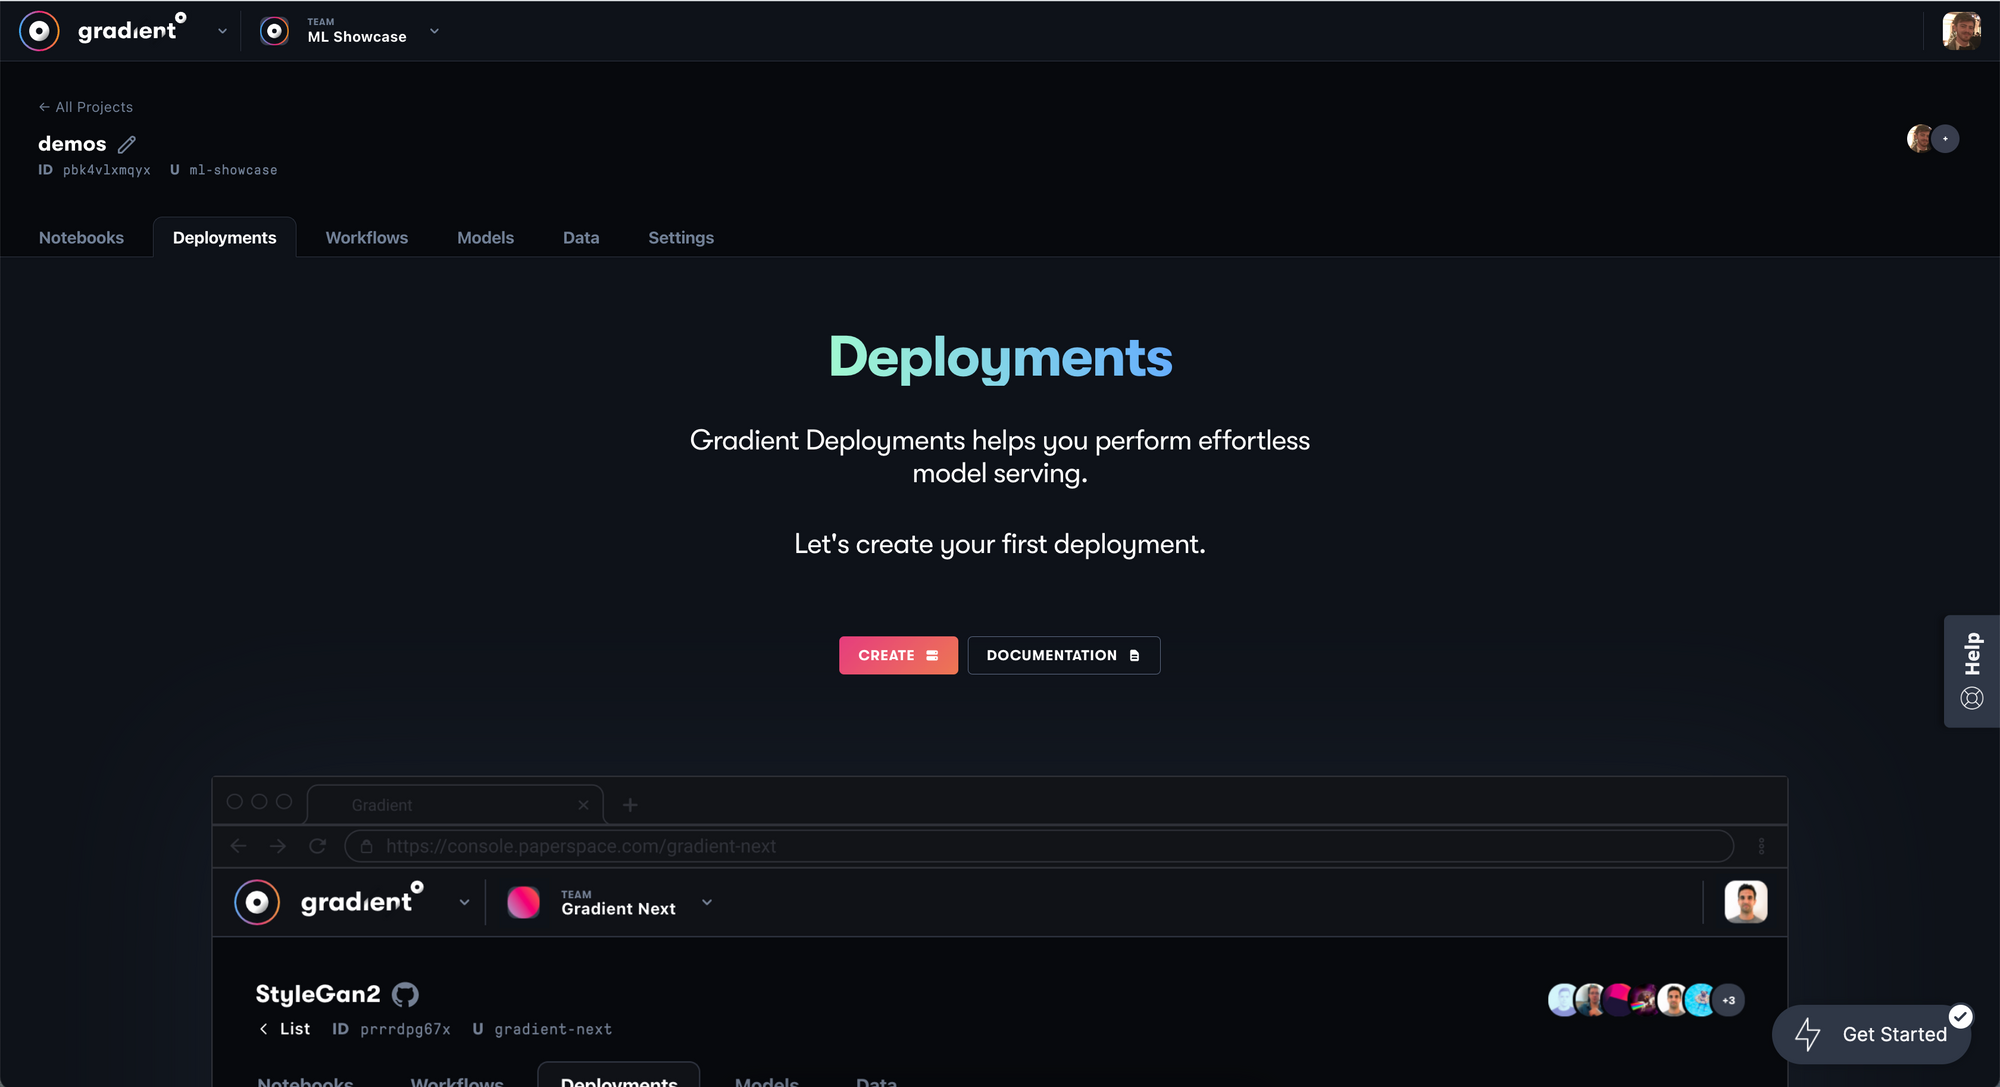
To run the Stable Diffusion web UI within a Gradient Deployment, first login to your Gradient account and navigate to a team and project of your choice. Then click on the Deployments tab, and hit create.
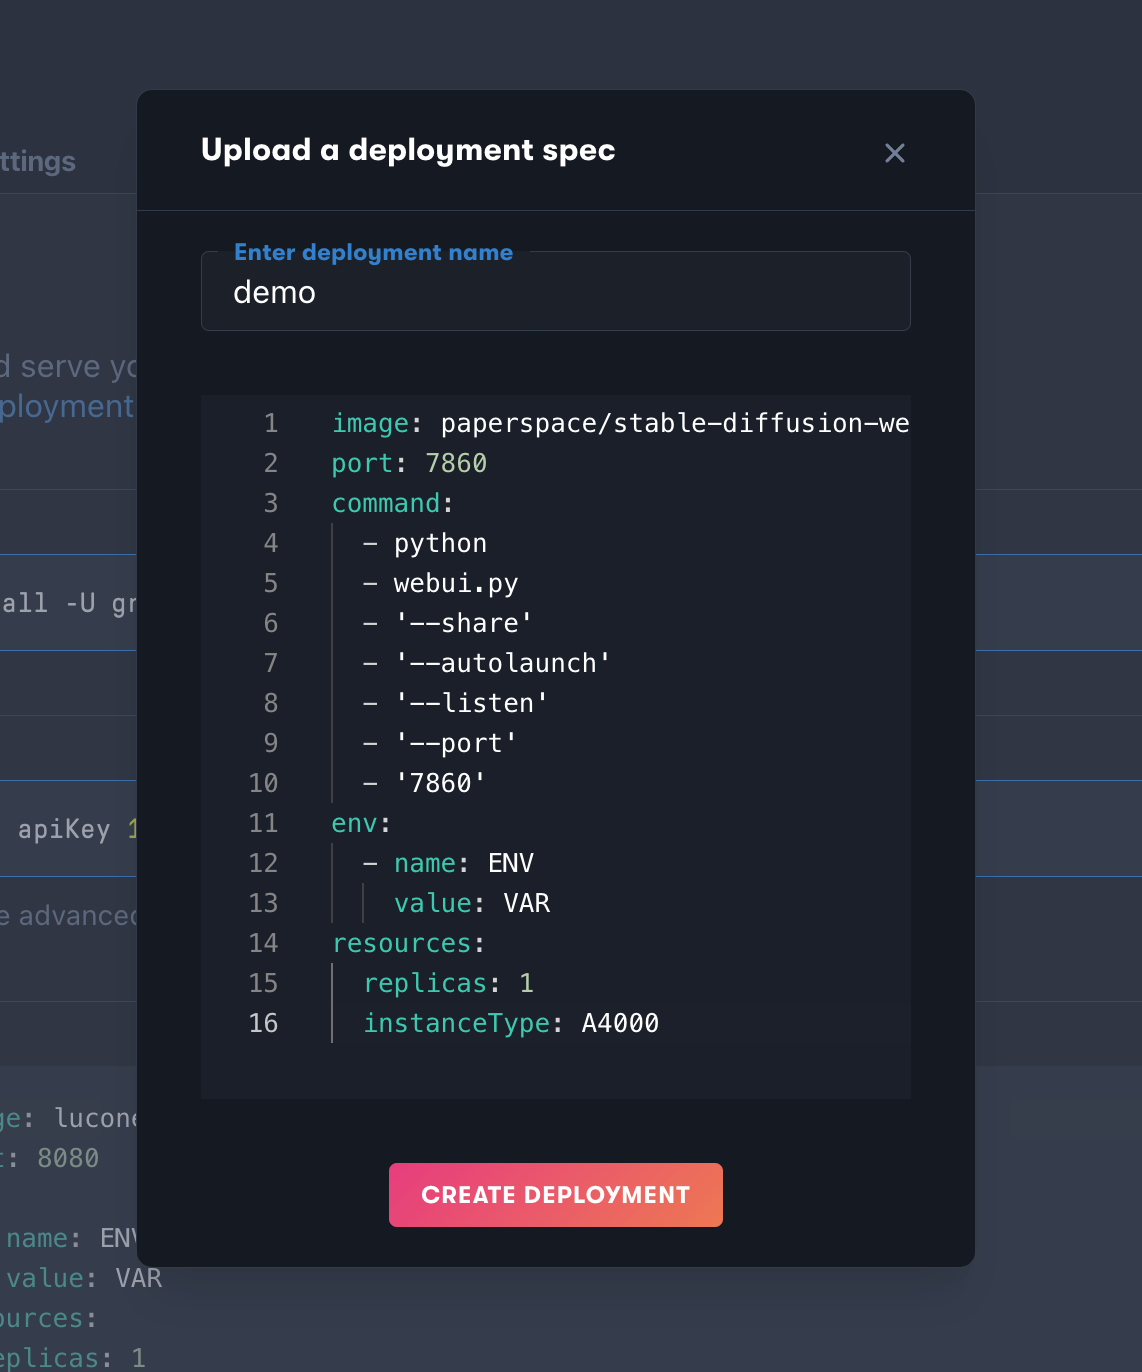
Once in the deployments page, click on the link 'upload a deployment spec.' under the 'Run deployment' section. Then, simply paste the following deployment YAML spec in to the pop up window and name your deployment appropriately.
image: paperspace/stable-diffusion-webui-deployment:v1
port: 7860
command:
  - python
  - webui.py
  - '--share'
  - '--autolaunch'
  - '--listen'
  - '--port'
  - '7860'
env:
  - name: ENV
    value: VAR
resources:
  replicas: 1
  instanceType: <Machine Type> <-- We suggest the A4000
Be sure to change where it says <Machine Type> at the bottom to whatever machine you would like to use. You can find a full list of available machines here, and be sure to consider the pricing. I recommend the A4000, but larger image generation projects will benefit in the long run using a more powerful GPU like the A100 from a cost benefit perspective.
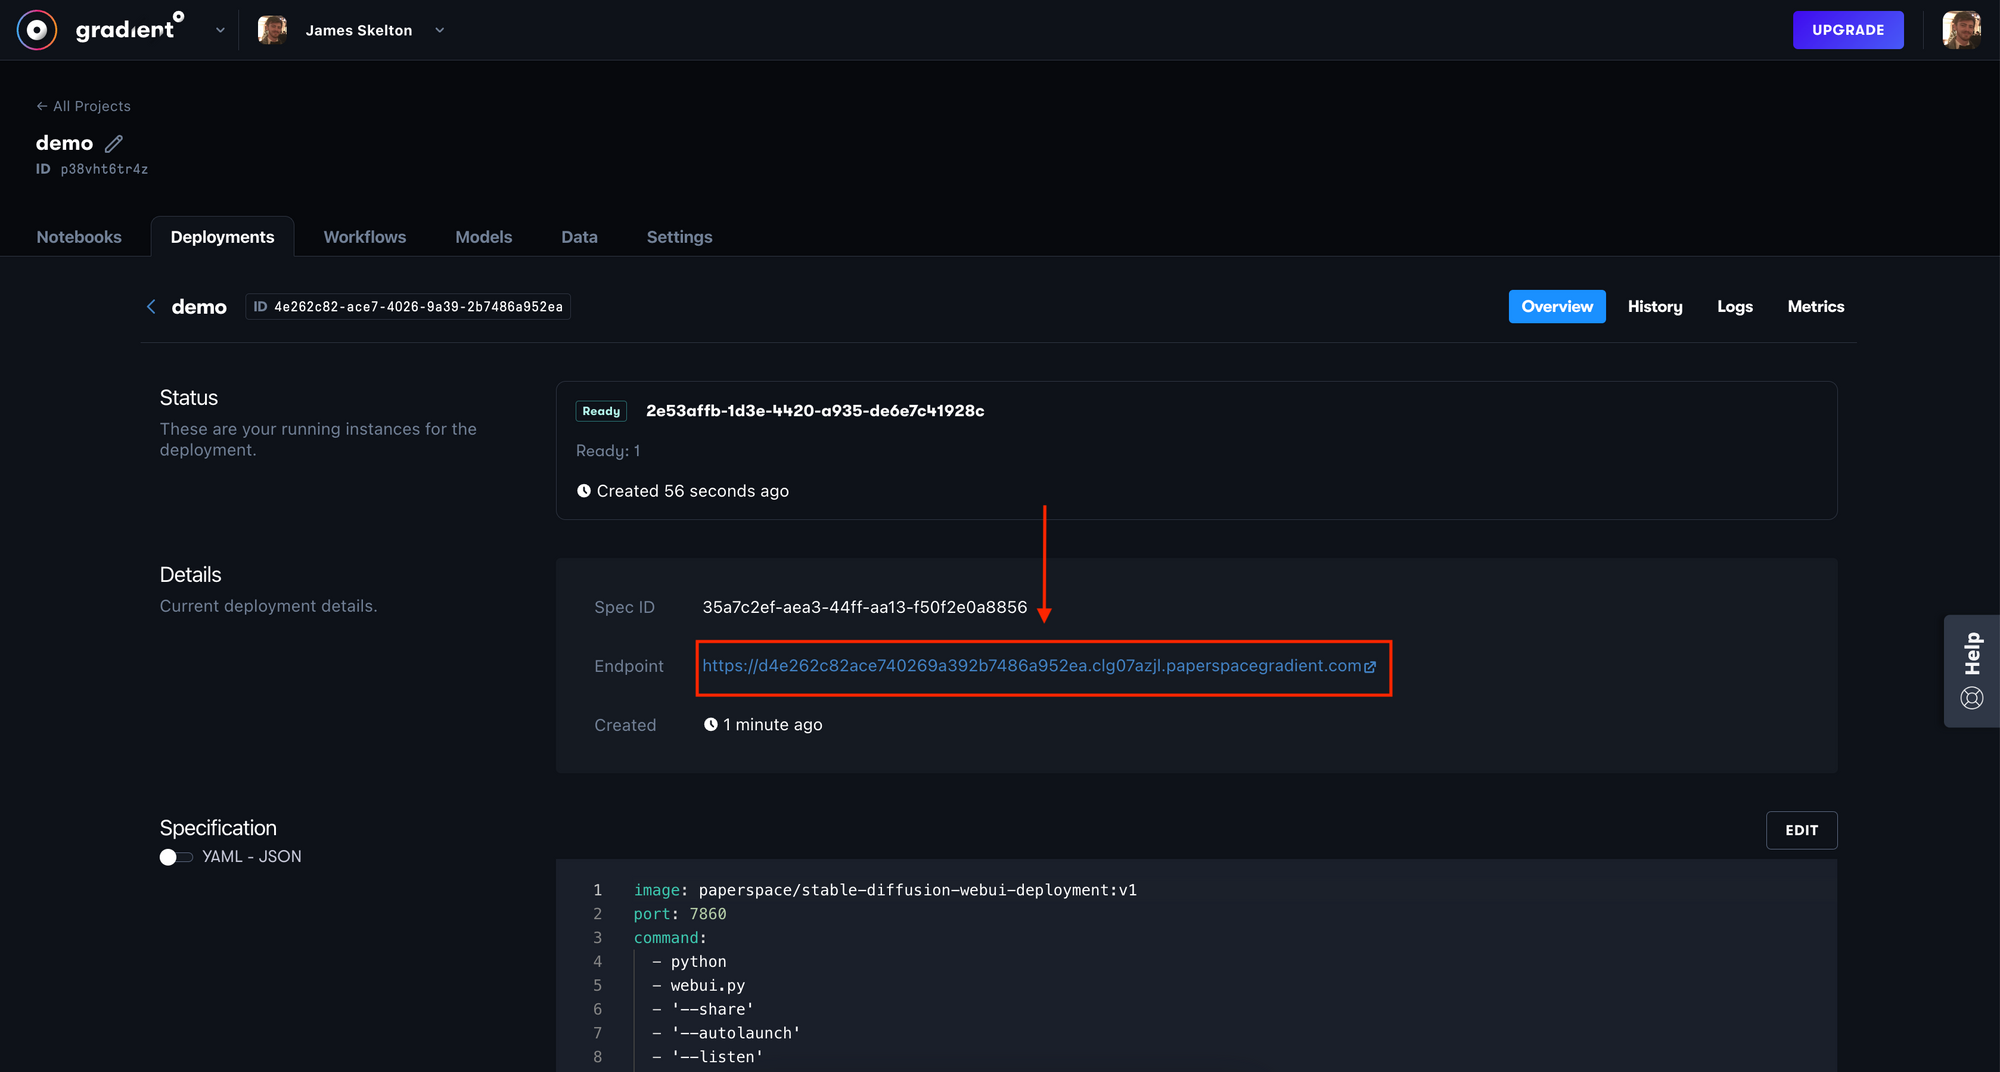
Once you have done so, hit 'Create Deployment' to spin up the machine. This should take about a minute to setup. Once that is done, click on the API endpoint link in your deployment details page to open the web UI.
When you are done using the Deployment you can either delete it or update the spec using the 'edit' button on the right of the overview page. In the spec, change the number of replicas from '1' to '0', and the machine will stop running.
Gradient CLI Setup
First, make sure that you have downloaded and logged into the Gradient CLI by following the steps listed in the docs. You will need to get your API key to login from the Paperspace console.
Once you have logged in with your API key, go into your terminal and create a new directory to hold our YAML file. Then create a new file "deploy-stable-diffusion.yaml" with touch deploy-stable-diffusion.yaml in the terminal. Open up that file in a text editor of your choice, and paste in the following
image: paperspace/stable-diffusion-webui-deployment:v1
port: 7860
command:
  - python
  - webui.py
  - '--share'
  - '--autolaunch'
  - '--listen'
  - '--port'
  - '7860'
env:
  - name: ENV
    value: VAR
resources:
  replicas: 1
  instanceType: <Machine Type> <-- We suggest the A4000
Be sure to change where it says <Machine Type> at the bottom to whatever machine you would like to use. You can find a full list of available machines here, and be sure to consider the pricing. Next, run gradient projects list and find the ID for the project you want to use for this deployment. If you have none, create one with gradient projects create.
Once that's done, you are ready to start up your deployment with one single terminal execution! Simply run the following to spin up your deployment:
gradient deployments create --name [Deployment name] --projectId [your Project ID] --spec [path to your deployment spec file i.e. deploy-stable-diffusion.yaml]From there, it should take about a minute to setup. Once that is done, you will need to click on the API endpoint link in your deployment details page to open the web UI. You can access that in the Gradient Deployment console in your browser, or by entering the following to your terminal with your new deployment ID:
gradient deployments get --id <your deployment id>
Then when you are done using the deployment, you can delete it by going back into your spec file and chaning it to have 0 replicas. This will stop the deployment from running without deleting it. Then update your deployment with the following terminal command:
gradient deployments update --id <your deployment id> --spec <path to updated spec>
Features of the Stable Diffusion web UI
Run classic Stable Diffusion with Gradient Notebooks
Now that we have created our deployment, we are ready to play around with the Stable Diffusion model's capabilities within the GUI. These capabilities are highly varied and extended from the original diffusers library, and include, but are not limited to:
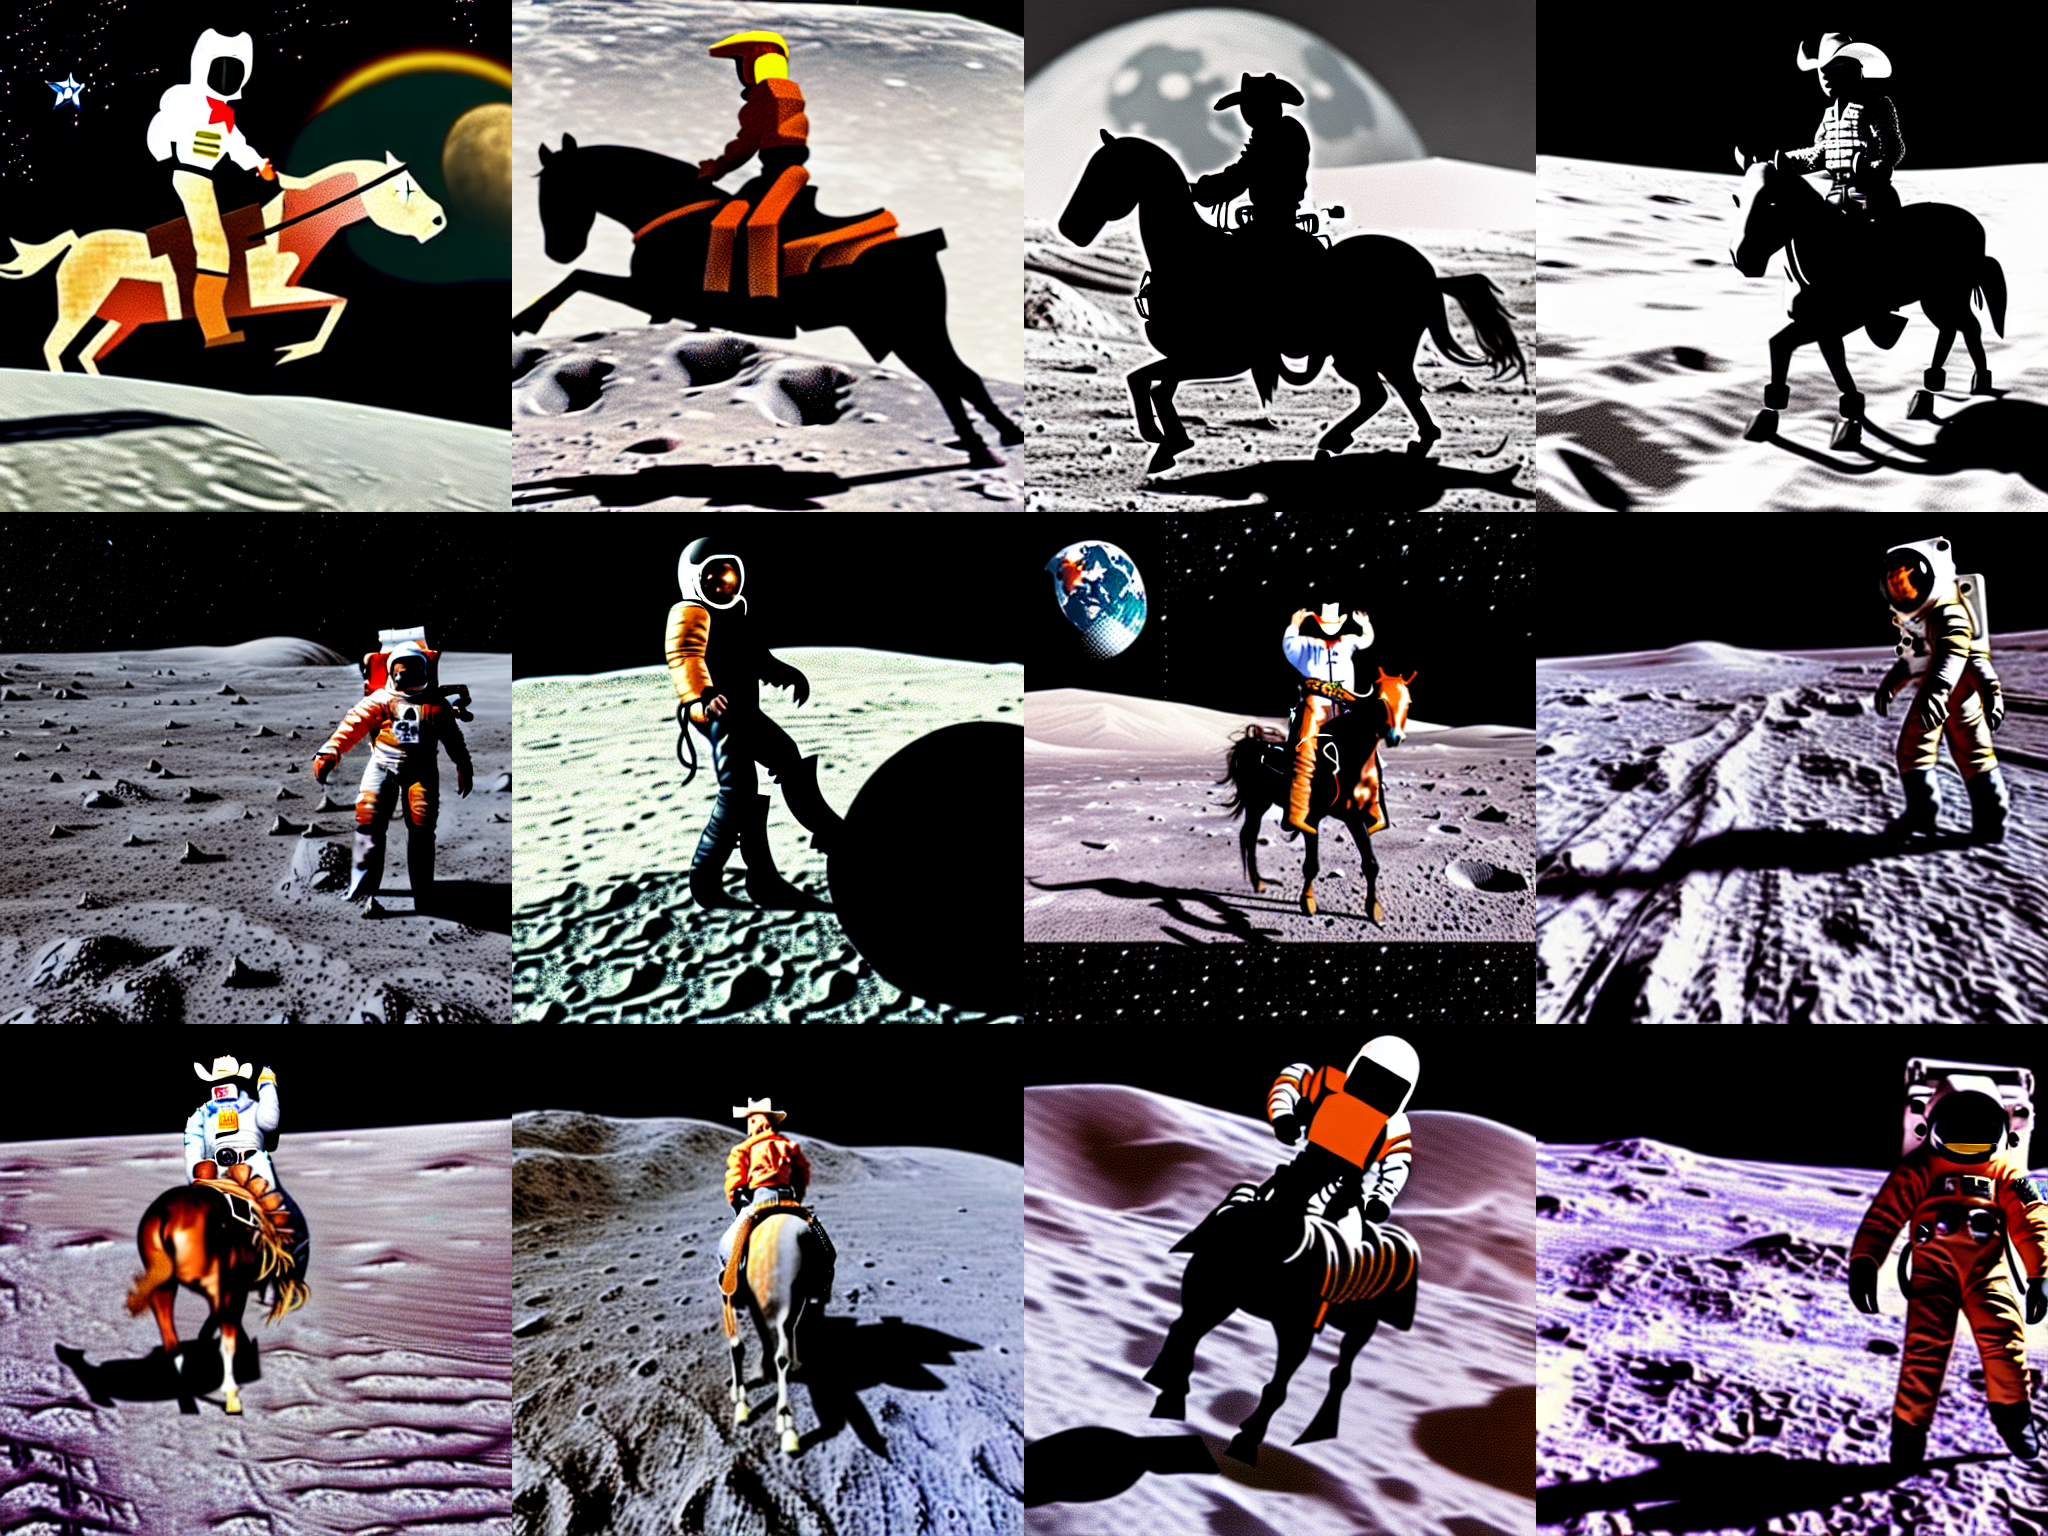
- Original txt2img and img2img modes: the original scripts for latent diffusion img2img and txt2img
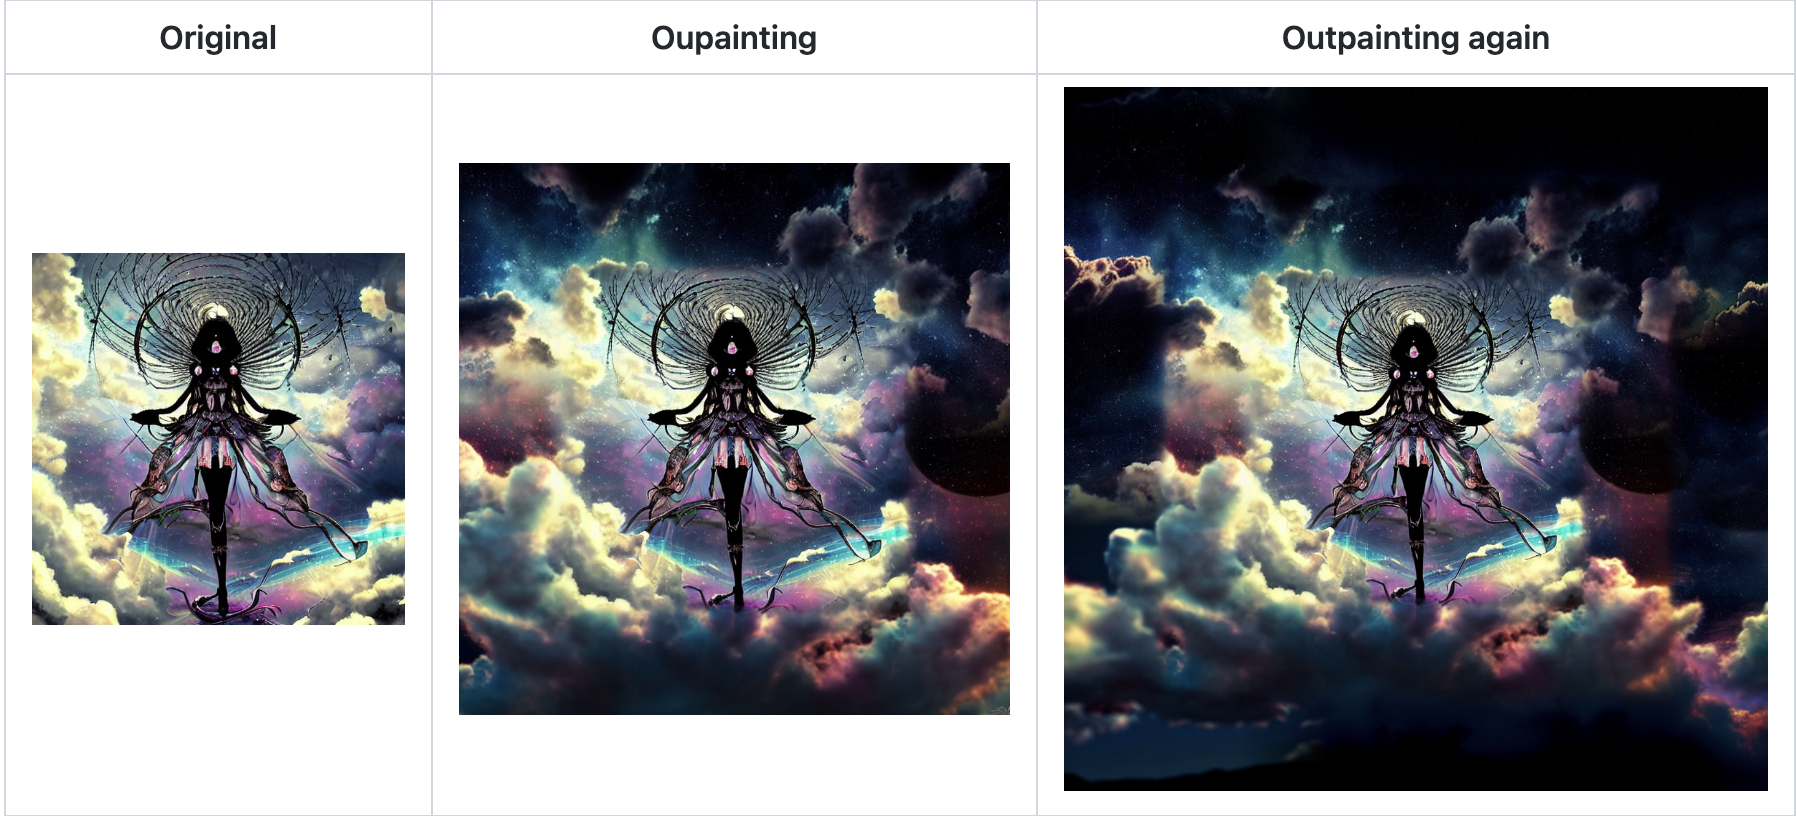
- Outpainting: use this to predict the visual context of an image beyond its boundary, i.e. filling in the missing information from outside the original bounds of the image to the new desired boundary.
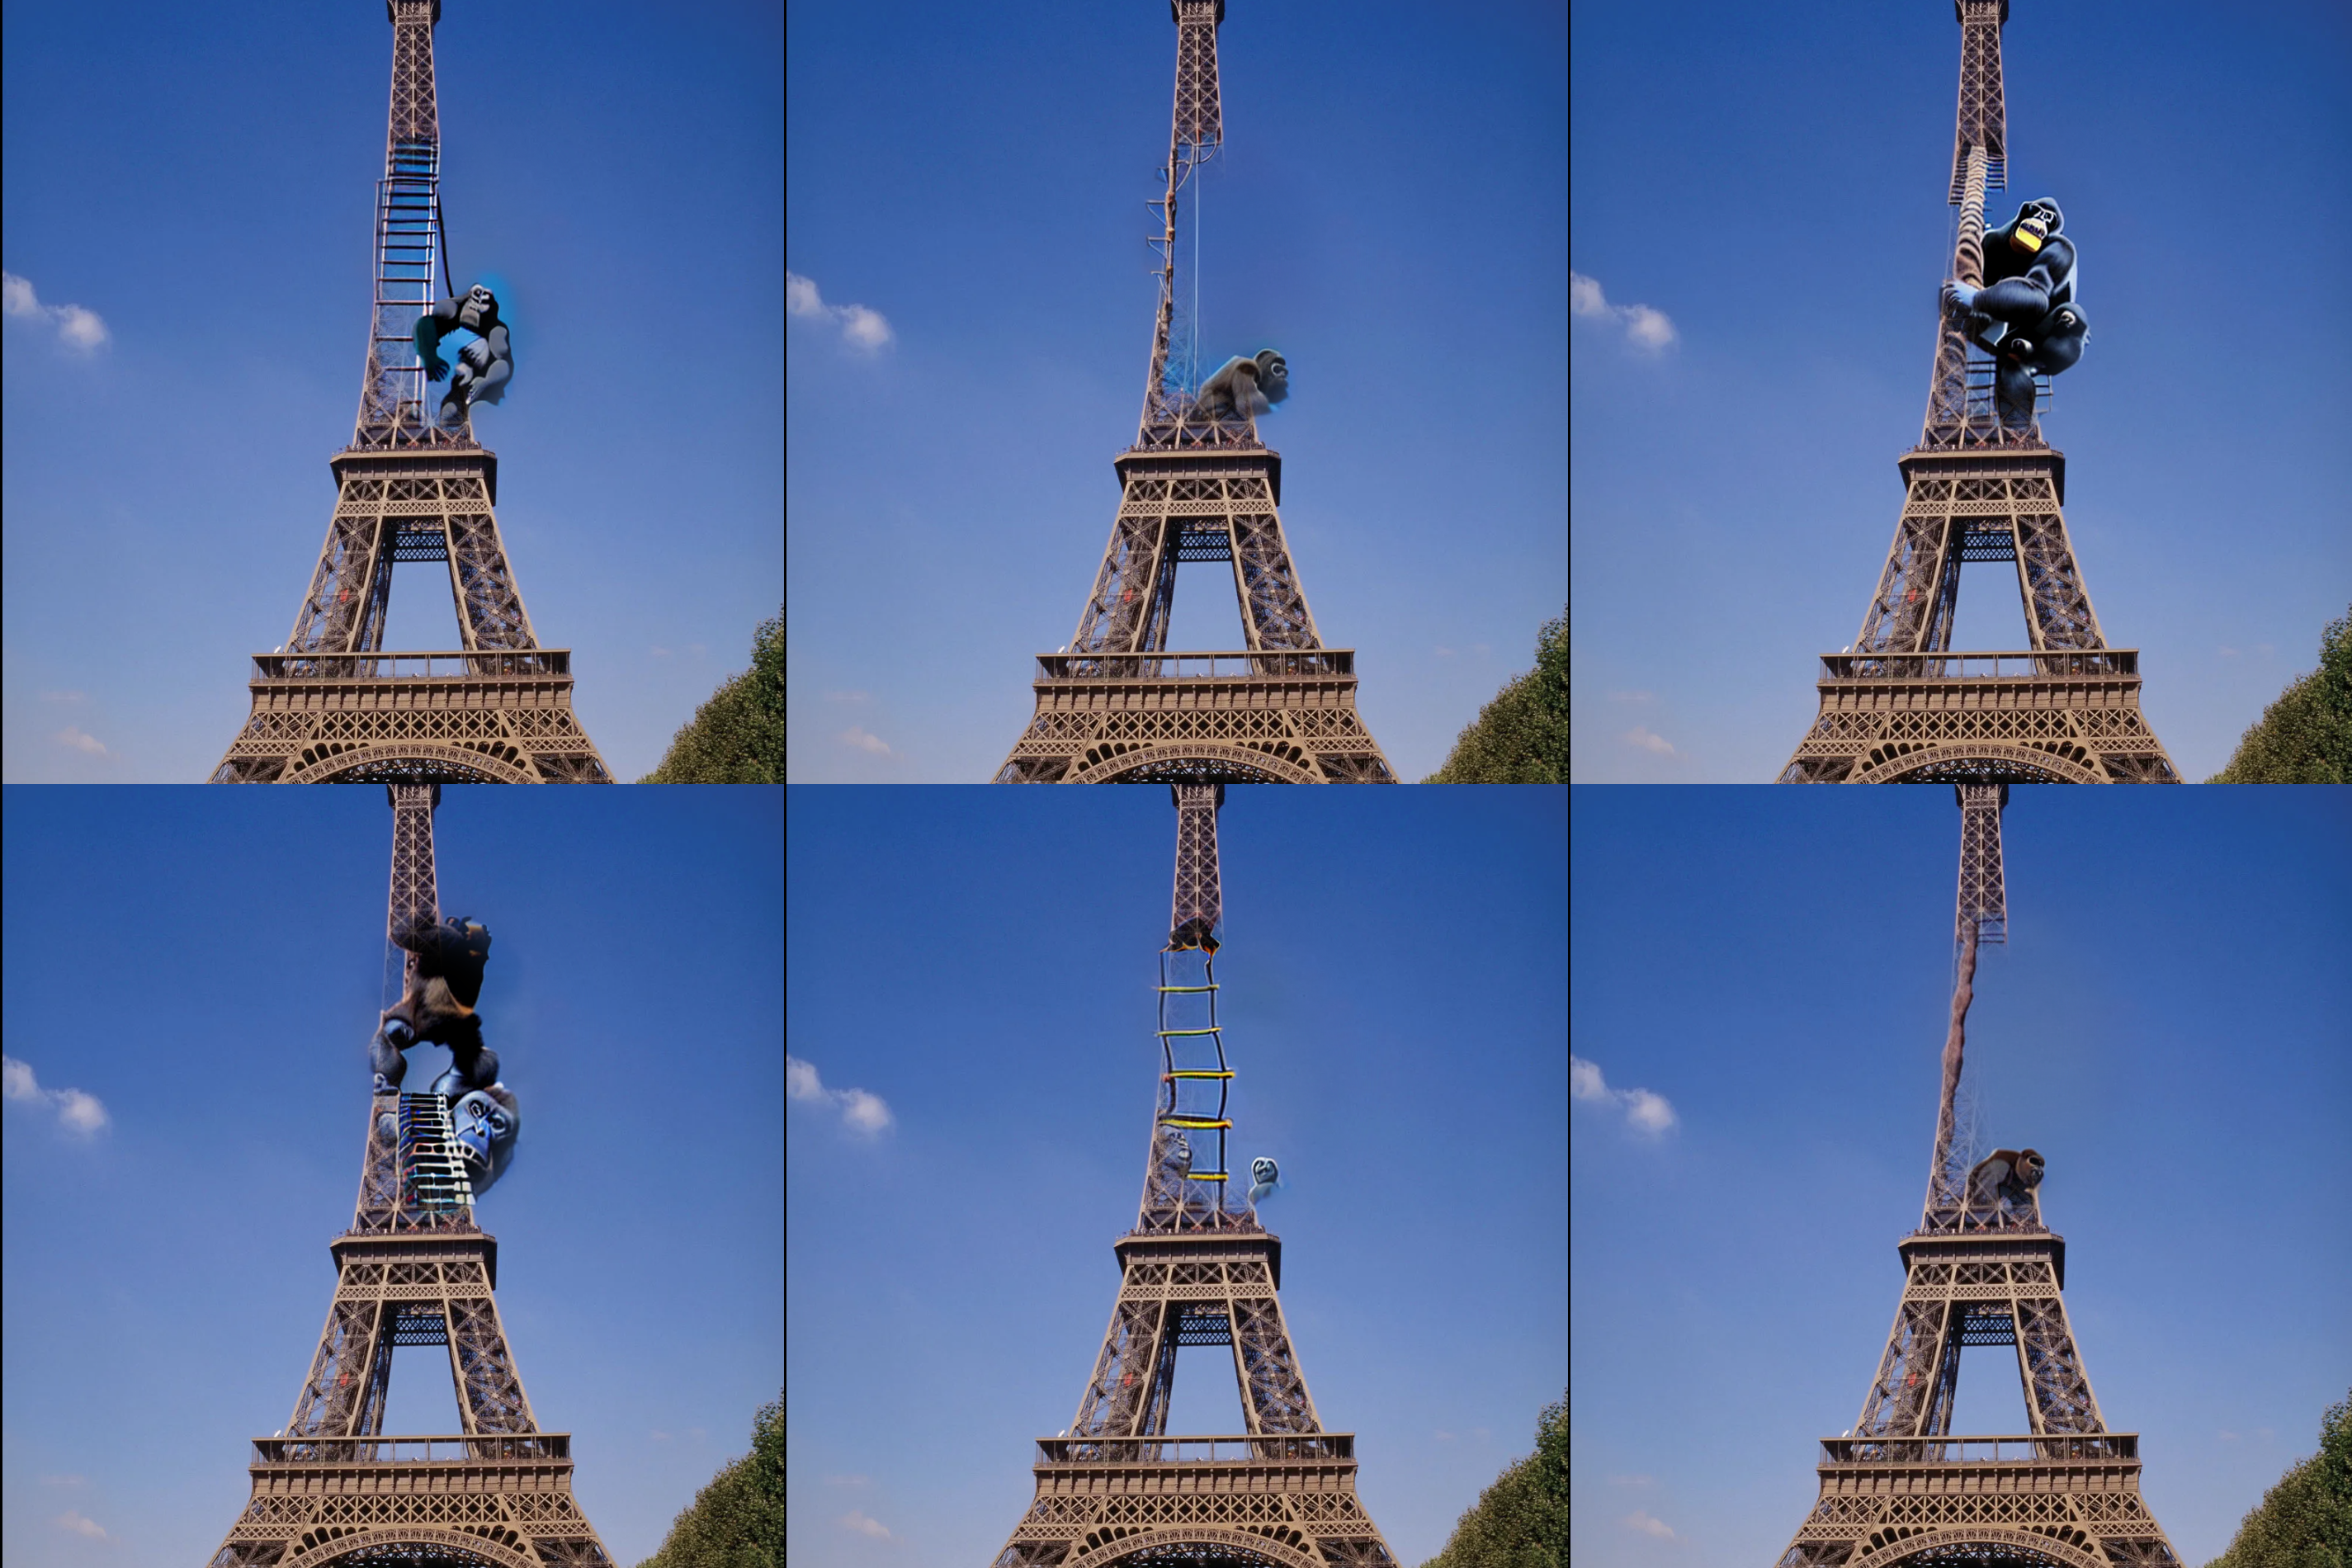
- Inpainting: previously, masked images could be uploaded for image inpainting. With the web UI, users can paint over the desired areas from within the GUI and inpaint specific target regions.
- Prompt matrix: Separate multiple prompts using the
|character, and the system will produce an image for every combination of them. - Stable Diffusion upscale: use stable diffusion to upscale your image generation parameters to higher resolutions without loss of visual acuity or subject matter
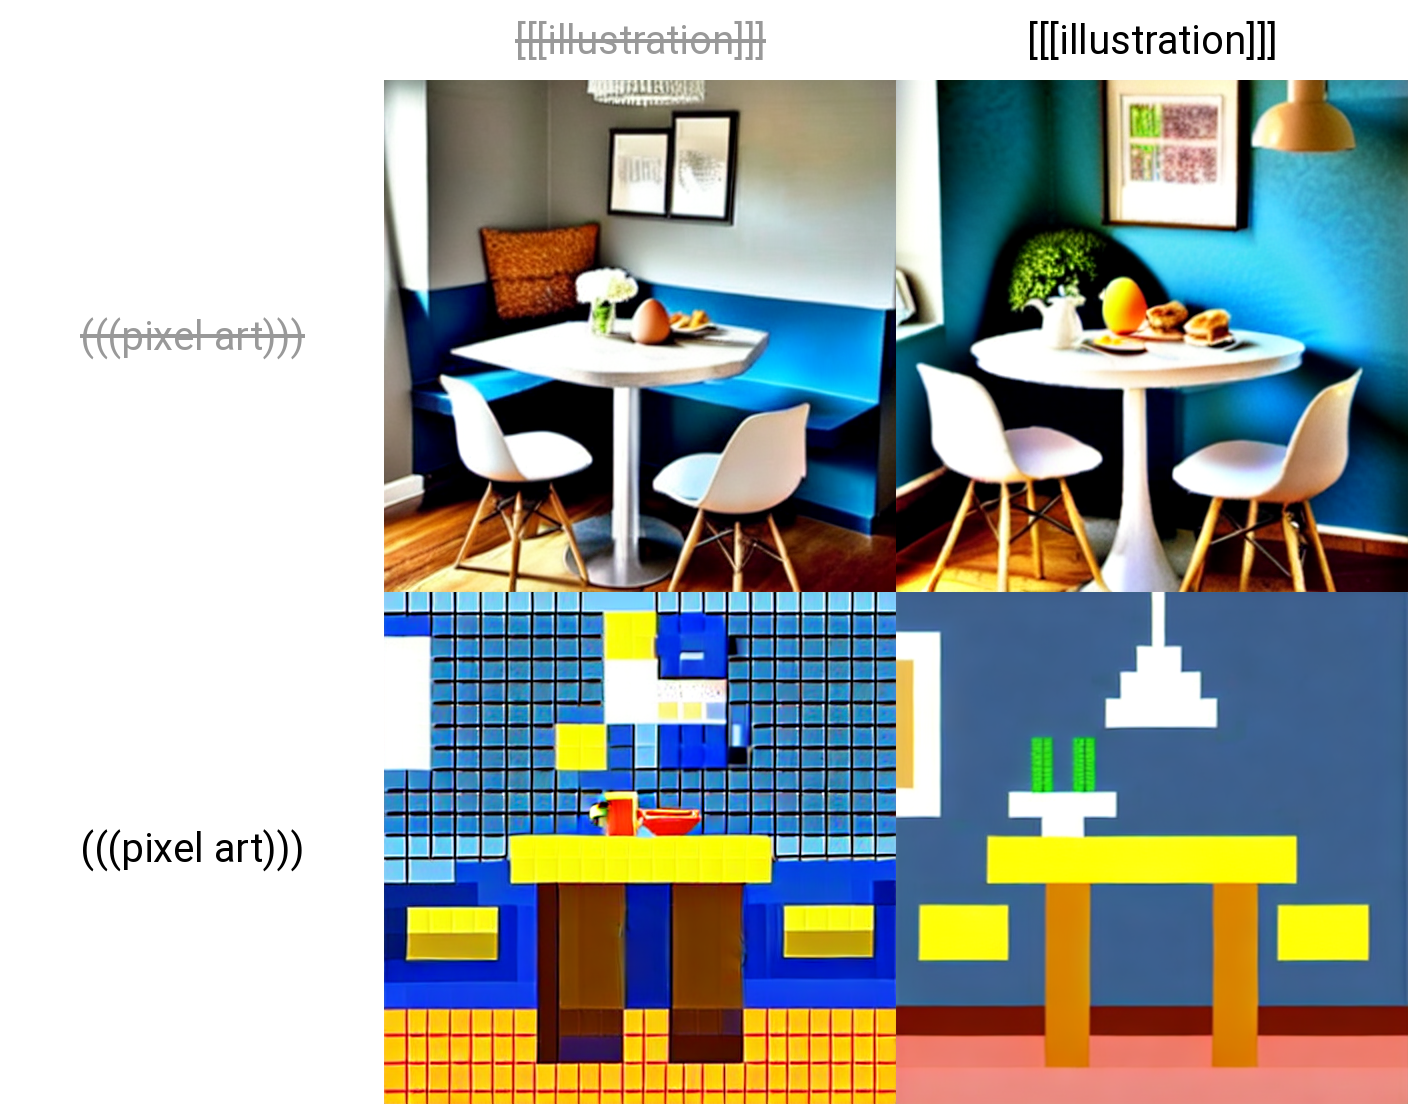
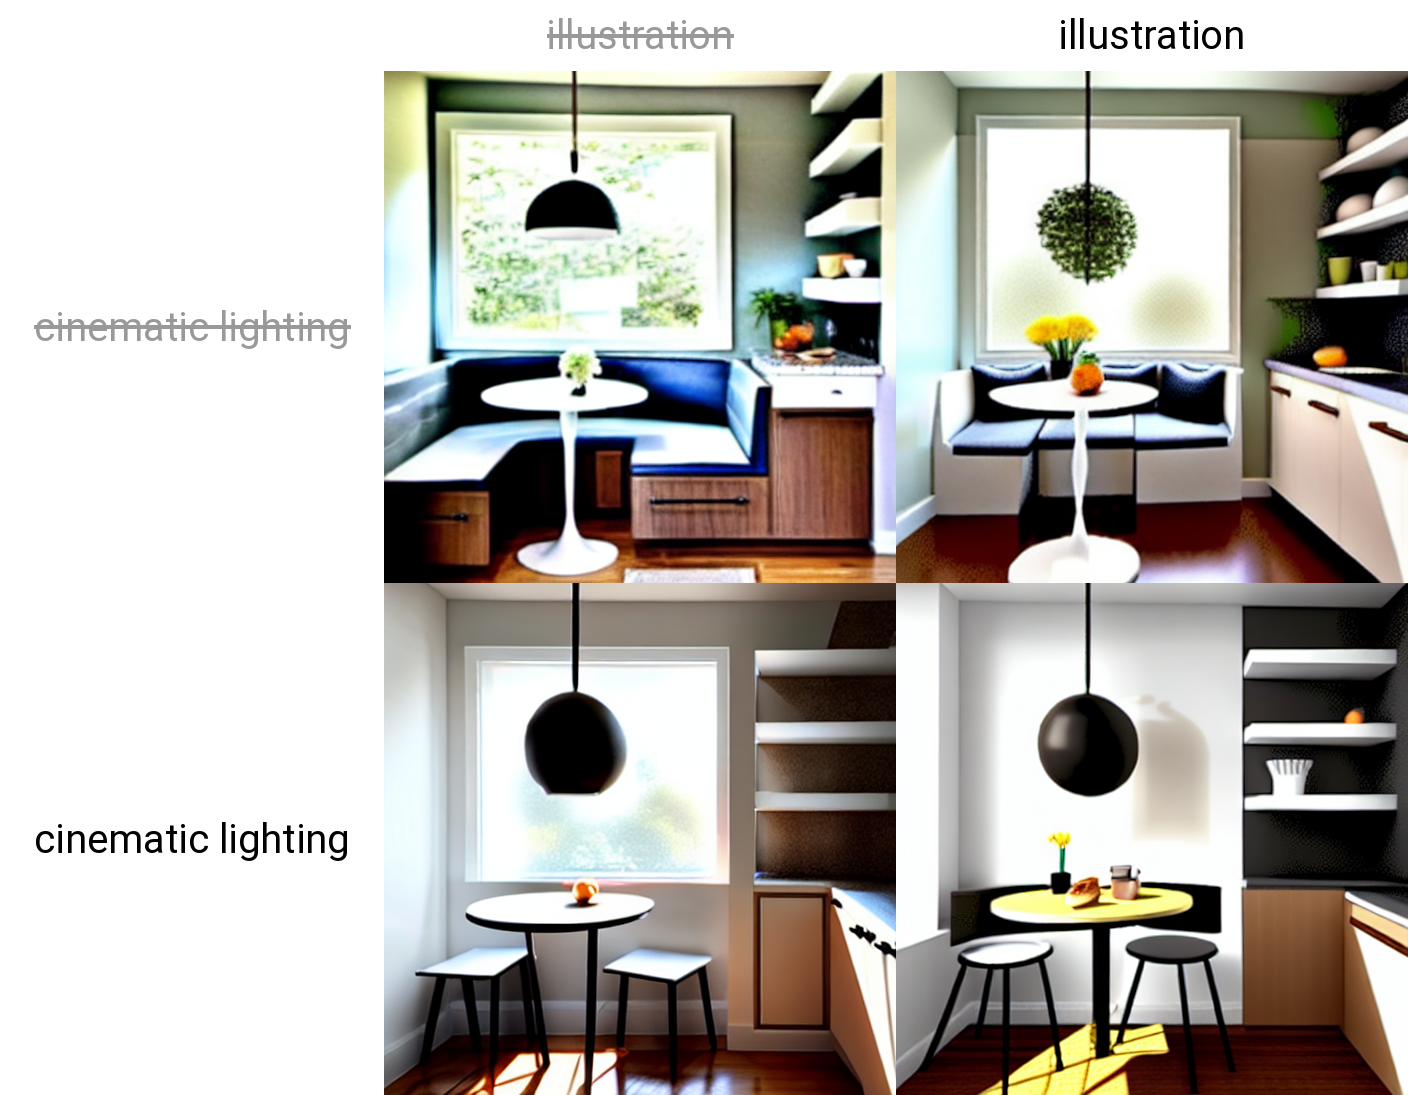
- Attention: use attention to control which parts of the prompts are weighted more or less importantly. Using
()in prompt increases model's attention to enclosed words, and[]decreases it. You can use multiple instances of the bracket and parentheses to add more or less weight.
Additional useful features of the web UI include:
- Sampling method selection: choose between a wide selection of different sampling methods including ddim, euler, and PLMS.
- Interrupt processing at any time: at any time, hit the interrupt button to disrupt the inference process and spit out the current version of the image.
- Prompt length validation: detects if your prompt is too long for Stable Diffusion to use as input.
- Settings page: the settings page allows you to customize various settings used for the different modeling processes.
- Running custom code from UI: by inputting the user flag
--allow-codein the deployment spec, you can use custom code functions with the web UI. - Random artist button: the random artist button will append a random artist's name (and therefore style) onto your prompt.
- Tiling support: UI checkbox to create images that can be tiled like textures. These tile sizes can be adjusted as needed.
- Progress bar and live image generation preview: view your progress in real time as the images generate.
- Negative prompt: specific keywords that a user does not want to be imparted to the final image.
- Styles: save prompts and negative prompts for later use.
- Seed resizing: conserve the 'randomness' of an image seed across different output resolutions.
- CLIP interrogator: use clip to determine the corresponding word prompt input to any image.
- Prompt Editing: Prompt editing allows you to start sampling one picture, but in the middle swap to something else. For example, [George Clooney:Brad Pitt:.5] will have the synthesis start with Clooney for the first half, before using Pitt as the input for the second half of the steps.
- Batch Processing: use batch processing to run inference on multiple samples at once for the same parameters.
- Img2img Alternative: Deconstructs an input image using a reverse of the Euler diffuser to create the noise pattern used to construct the input prompt.
There are also more models in the Extras tab:
- GFPGAN, neural network that fixes faces
- RealESRGAN, neural network upscaler
- ESRGAN, neural network with a lot of third party models
For more information about these features, be sure to visit the Stable Diffusion web UI features list page.
Closing thoughts
With this guide, we should now be ready to launch the Stable Diffusion web UI with Gradient Deployments. Check back to this page for updates to this deployment spec as we iterate with the web UI development team on this project in order to give you the best experience with Gradient Deployments.
Nov 30, 2022: This tutorial is now outdated: see the follow up article here for the latest versions of the Web UI deployment on Paperspace