Bring this project to life
Artificial intelligence has been receiving a lot of attention in recent months, first with Stable Diffusion and then with ChatGPT. It seems like now AI can do everything, from writing your work for you to making any image, video, music, or text that you want.
While there are legitimate concerns that AI's capabilities are racing ahead of what we are equipped to deal with, such as super-intelligence in narrow fields, unexpected emergent capabilities with scale, or the various effects that powerful AI tools will have on society, the current reality is often that when you use the tools, the results are less than perfect.
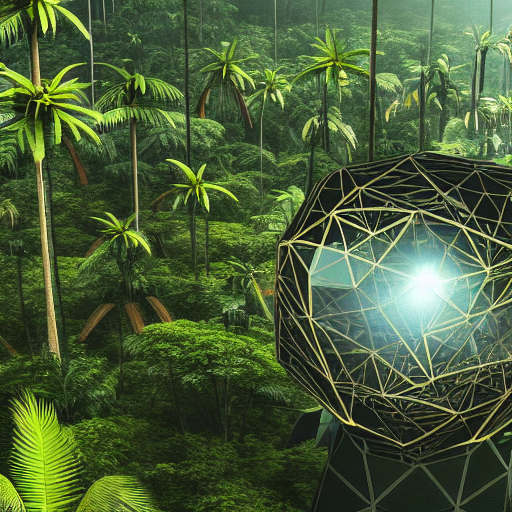
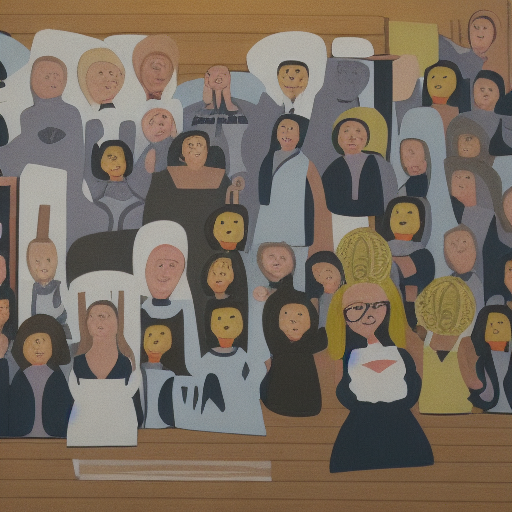
So while online content shows amazing images and text, when you try it yourself you find that ChatGPT can just make things up, and you don't know when, or with Stable Diffusion you get images that look like a mess:
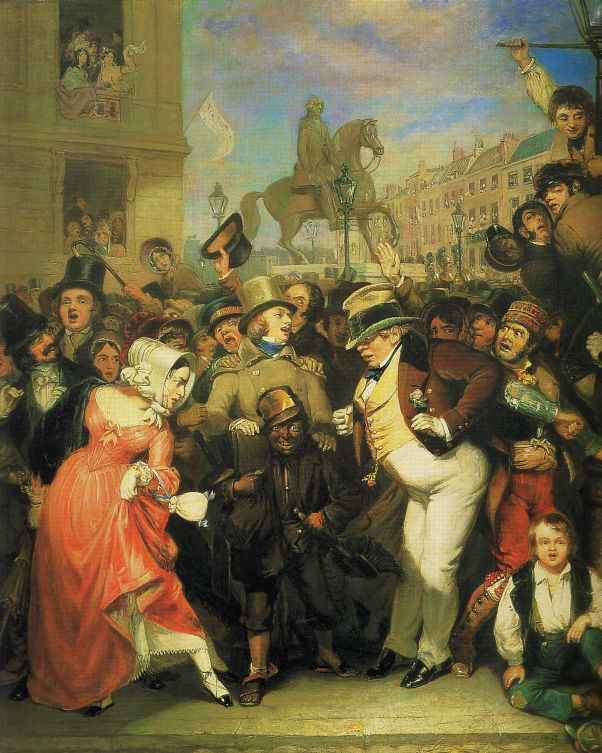
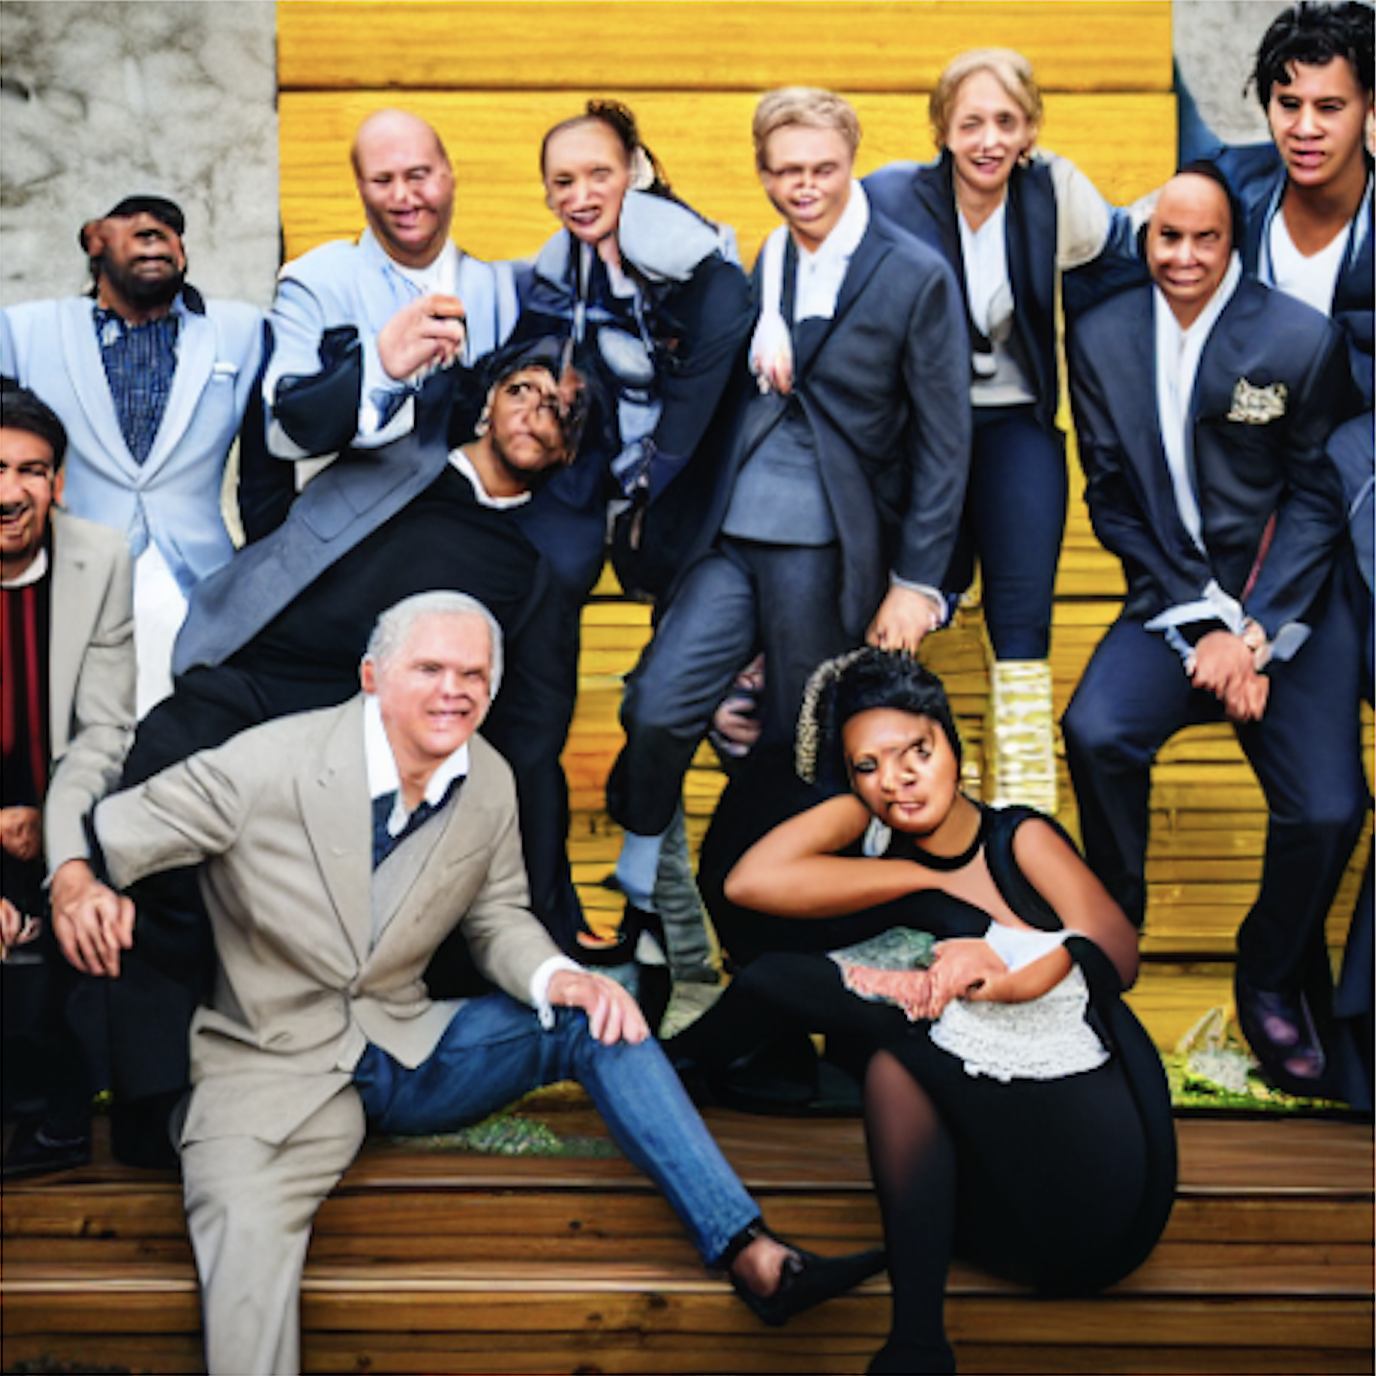
Worse still, many of the images can land in the "uncanny valley" between something over-simple and fully realistic, making them not just of limited use, but actively unappealing to look at.
While there are many ways to make your images better, from more time and computing power to the many excellent augmentation and control techniques previously detailed on our blog, a lot of them involve extra setup, steps and complexity that puts them back in the realm of the specialist.
One of the aims of Paperspace is to make it easy to get things done, by providing accelerated compute and removing setup barriers, letting you get straight to your work. The technique of self-attention guidance fits right into this, because it allows you to get better Stable Diffusion images with no extra work at all. You simply enter the same prompt in the same interface, and it generates superior images.
Let's take a look.
Outline
We'll talk about:
- How it works: Stable Diffusion and self-attention guidance (with some math in boxes)
- Examples of image improvement: That self-attention guidance can achieve
- Running it on Paperspace: A Gradient Notebook lets you run a Gradio app with the image GUI in the browser
- Discussion: Some observations and ways the images could be further improved
- Conclusions and next steps
How it works
Stable Diffusion and self-attention guidance are complex processes that are difficult to describe briefly while also saying what they are actually doing. Here we attempt a tradeoff between clarity and brevity.
Stable Diffusion
The original generative AI for images, generative adversarial networks (GANs), were improved upon by diffusion. This is a process which adds noise to an image until it approaches pure white noise, and then reverses the process while iterating with a model to generate the new desired image.
When viewing the process in a diagram, it can look like it is magically creating an image out of nothing:

In reality, when training with this process, the model is learning how to reverse the steps that added the noise, and recover the training images. The noise-adding is a Markov process, which means that each step only depends upon the previous one.
What allows it to produce new images, rather than just retrieving one of the original ones, is that the model has learned the data distribution. So the reversal goes to some new point in the distribution that does not correspond to any existing data point in the training set, thus producing a new image.
What Stable Diffusion then does is run diffusion on a lower dimensional version of the images by putting them first into latent space, then after the generation is done, converting back again to the pixel space. This is done using an encoder then a decoder network. Latent space is a projection of the real space onto fewer dimensions.
See Box 1 for some of the math that describes Stable Diffusion.
In mathematical terms, diffusion is the forward process of adding noise to an image:
$q(\mathbf{x}_{t+1} | \mathbf{x}_t) = \mathcal{N}(\mathbf{x}_{t+1}; \sqrt{1 - \beta_t} \mathbf{x_t}, \beta_t \mathbf{I})$
where $q$ is the real data distribution of images, $\mathbf{x}$ is the image (tensor), $t$ is the timestep (zero to some number), $\mathcal{N}$ is a Normal aka. Gaussian distribution (the limit of $\mathcal{N}(0, \mathbf{I})$ is pure noise), $\beta_t$ is a given schedule of variances, and $\mathbf{I}$ is the identity matrix, i.e., every dimension has the same variance.
For Stable Diffusion, the image is in the latent space, which is a projected and compressed version of the real space of pixels that still contains the image's information.
This is followed by the reverse process of iterative denoising:
$p_\theta (\mathbf{x}_{t-1} | \mathbf{x}_t) = \mathcal{N}(\mathbf{x}_{t-1}; \mu_\theta (\mathbf{x}_t, t); \Sigma_\theta (\mathbf{x}_t, t) \mathbf{I})$
where $p_\theta$ is the parameterized model, using neural networks (e.g., U-Net) with parameters $\theta$ to get the Gaussian's mean $\mu_\theta$ and variance $\Sigma_\theta$. We want the $\theta$ that describes the models that give the best estimate of the original image, $\hat{\mathbf{x}}_0$, after denoising, i.e., the best neural network model of the reverse process (since the exact reverse process can't be computed).
What allows the process to get that estimate is to compare this to a posterior $q(\mathbf{x}_{t-1}|\mathbf{x}_0,\mathbf{x}_t)$, and maximize the likelihood of the training data by optimizing a simplified loss, which can be derived.
The forward process is sped up by the reparameterization trick, which allows you to get any $\mathbf{x}_t$ straight from $\mathbf{x}_0$ without having to do the intermediate iterations.
The reverse process gives a sample from $q(\mathbf{x}_0)$, which is a new image $\hat{\mathbf{x}}_0$ at each timestep.
For a concise description including further formulae not shown here, such as the loss and $\hat{\mathbf{x}}_0$, see Sections 3-5 and Appendix A of Hong et al. (2022). Note that in both math boxes 1 and 2 we generally follow their notation for consistency.
For a high-quality longer description, see, e.g., this AI Summer article.
Self-attention guidance
The technique of self-attention guidance (SAG) was proposed in this paper by Hong et al. (2022), and builds on earlier techniques of adding guidance to image generation.
Guidance was a crucial step in making diffusion work well, and is what allows a model to make a picture of what you want it to make, as opposed to a random new image based on the data distribution. There can be some reduction in the variety of images generated, but it is worth the tradeoff.
In particular, classification guidance (CG) adds information from a conditional diffusion model that includes information such as class labels or an embedding from a text prompt to give a guided output.
Classifier-free guidance (CFG) can give an output of the same form as CG, but does not require a model. It does, however, still require a condition, which in the examples of this blogpost take the form of a text prompt.
SAG combines the ideas of guidance from above with that of self-attention. This is an advance on CG/CFG because it allows guidance to be done without the need for either an external classifier or labeled data (zero-shot), allowing just the original image to be used. This means that it can be applied as part of the image generation, and the user doesn't have to do anything — it just makes better images.
Attention is where a network allows the inputs going into layers within it to interact with each other, stronger interactions indicating parts of the model that should be paid more attention. Self-attention refers to the fact that the interactions can be between parts of the same input sequence. Applying it to an image results in a map of the image called a self-attention map.
Self-attention guidance uses the self-attention map to blur the parts of the image that have the most information, and guides the model to concentrate on improving those parts:
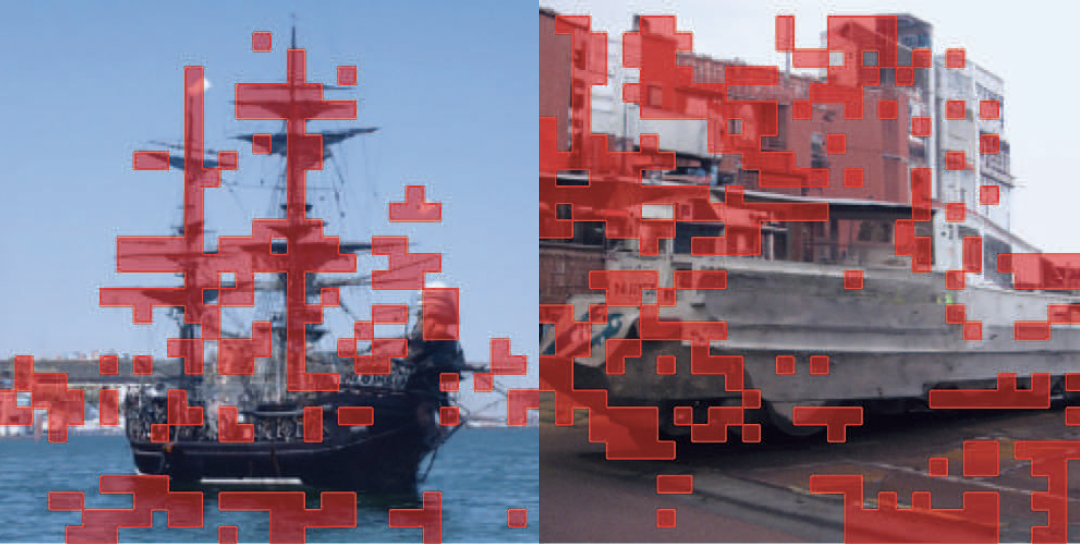
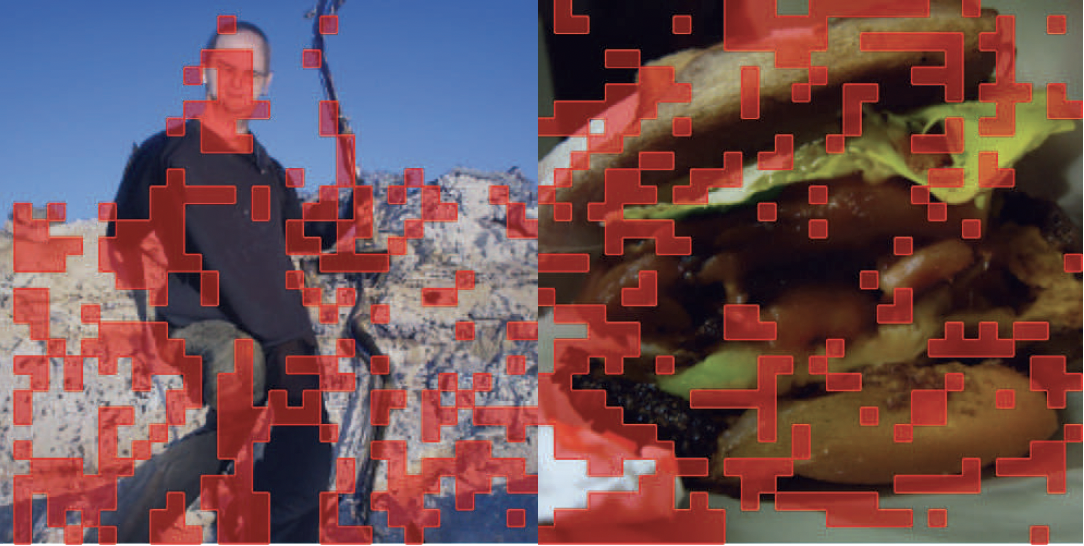
This makes the images better defined and more realistic because the parts of the image with the most information are where things are rapidly changing, which often corresponds to one object's boundary with another.
While SAG works on its own, Hong et al. find that the results are even better when combined with CFG, and this is therefore the process that is instantiated in the Gradio app GUI, described below. While not specific to a particular type of model, the application of SAG to Stable Diffusion models is what produced the best results.
Using CFG, as mentioned, requires the input of a text prompt, and this is why the GUI shows an optional text prompt, along with CFG and CFG+SAG image outputs, and options such as the number of steps and CFG & SAG guidance scales.
See Box 2 for some of the math that describes self-attention guidance.
Classifier guidance (CG) is the use of an additional condition, such as class labels or an embedding from a text prompt, to give a guided output:
$\tilde{\epsilon}(\mathbf{x}_t,c) = \epsilon_\theta(\mathbf{x}_t, c) - s\sigma_t\nabla_{\mathbf{x}_t} \mathrm{log}~p(c|\mathbf{x}_t)$
where $\epsilon_\theta$ is the conditional diffusion model, $c$ is the condition, and $s$ is the guidance scale.
Classifier-free guidance (CFG) can also give $\tilde{\epsilon}$ without needing a model, but it still needs the condition:
$\tilde{\epsilon}(\mathbf{x}_t,c) = \epsilon_\theta(\mathbf{x}_t, c) + s \times (\epsilon_\theta(\mathbf{x}_t,c) - \epsilon_\theta(\mathbf{x}_t))$
The guidance can be generalized to not need conditions by adding an imaginary regressor that can predict the information in the model from the sample $\mathbf{x}_t$ image and Bayes' rule to give
$\tilde{\epsilon}(\bar{\mathbf{x}}_t,\mathbf{h}_t) = \epsilon_\theta(\bar{\mathbf{x}}_t) + (1+s) \times (\epsilon_\theta(\bar{\mathbf{x}}_t,\mathbf{h}_t) - \epsilon_\theta(\bar{\mathbf{x}}_t))$
$\mathbf{h}_t$ is the information in the model, and $\bar{\mathbf{x}}_t$ is a sample without $\mathbf{h}_t$.
Self-attention is a multiplication of weights and feature map in one or more intermediate network layers, normalized by a softmax function (e.g., Hong et al. section 3, or here).
Self-attention guidance (SAG) combines guidance with self-attention by using for the guidance a mask derived from the self-attention map of the image, and not just the whole image. The mask $M_t$ is where the attention $A_t$ from the map is greater than some value $\psi$, set to the mean of $A_t$, giving an image $\hat{\mathbf{x}}_t$:
$\hat{\mathbf{x}}_t = (1-M_t) \odot \mathbf{x}_t + M_t \odot \tilde{\mathbf{x}}_t$
where $\odot$ is the element-wise (or Hadamard) product, and $\tilde{\mathbf{x}}_t$ is the blurred image.
The expression for SAG is
$\tilde{\epsilon}(\mathbf{x}_t) = \epsilon_\theta(\hat{\mathbf{x}}_t) + (1+s) \times (\epsilon_\theta(\mathbf{x}_t) - \epsilon_\theta(\hat{\mathbf{x}}_t))$
Lastly, the authors find that SAG can be combined with CFG for further improvement to the results. This gives a longer expression, which includes the CFG and SAG guidance scales, and the CFG text prompt.
These scales and the text prompt are inputs to the GUI as shown later.
As with diffusion, further formulae for the above are given in Hong et al., sections 3-5, and Appendix B. These include the self-attention details, regressor, Bayes' rule, CFG+SAG, and other intermediate steps.
From the math, various quantities are defined, and these are used in Hong et al. to give a schematic representation of what CFG and SAG are doing:
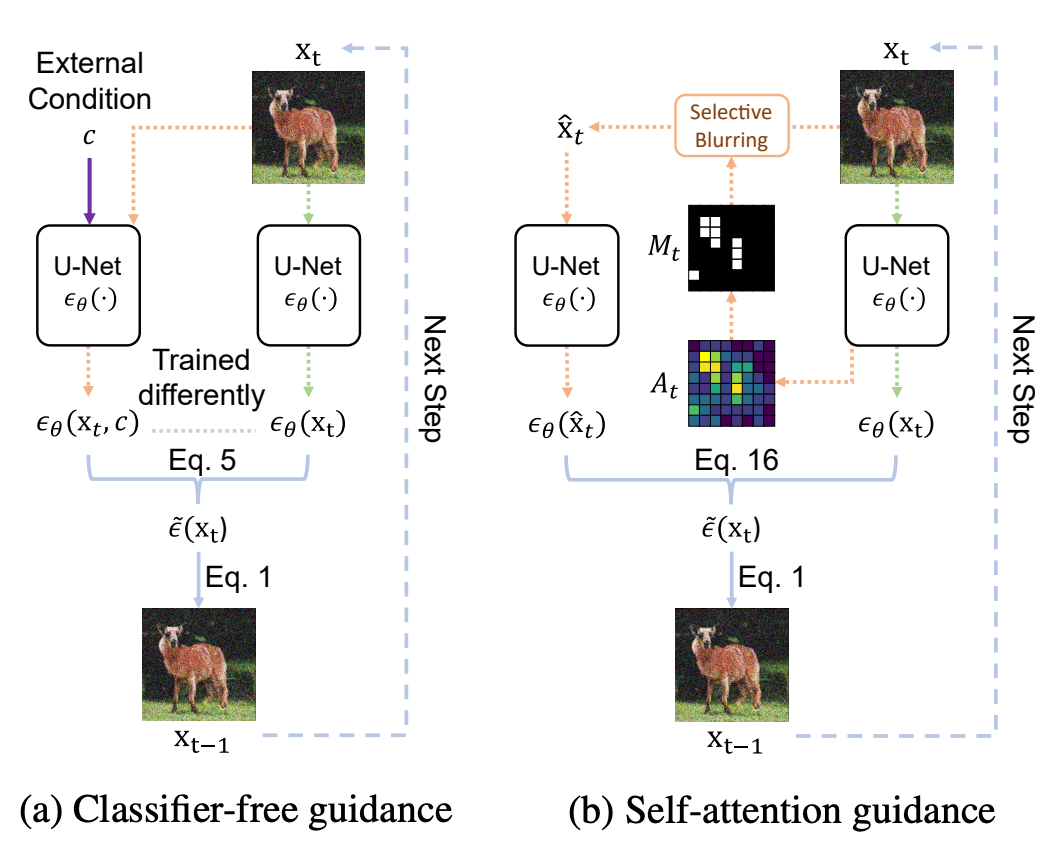
In the left-hand panel of the figure, $c$ is the text prompt, U-Net is the neural network used in the setup, $\epsilon_\theta$ is the network with parameters $\theta$, "Eq. 5" is their equation for CFG, equation 1 is their image generation from the denoising process, $\mathbf{x}$ are the images, and $t$ are the timesteps.
In the right-hand panel, we see that SAG does not require $c$, i.e., it is condition-free, $\hat{\mathbf{x}}_0$ is the image from the condition-free guidance, $A_t$ is the attention map of the image, and $M_t$ is the mask designating which parts of the image the SAG pays attention to, part of which is applying adversarial selective blurring. Equation 16 is their expression for SAG.
The Gradio GUI (see below) implements the combination of CFG+SAG, which was found by Hong et al. to give the best results out of CFG, SAG, or the combination of both.
Examples of image improvement
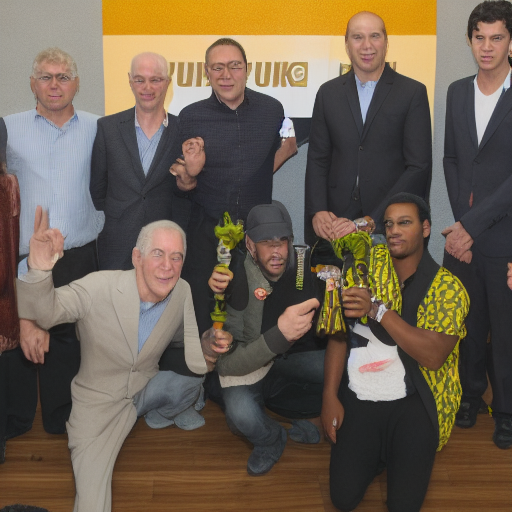
At first glance, an image from a generative AI might look great. Certainly, when first experienced, the novelty of typing in something like "a living room" and seeing a never-before-seen housing interior pop into existence is impressive. It's like opening a window into the multiverse, seeing other realities beyond our own.
When the novelty wears off a bit and you start to look more closely, however, it's not quite the magic it first appears to be. In short, a lot of the images are just weird.
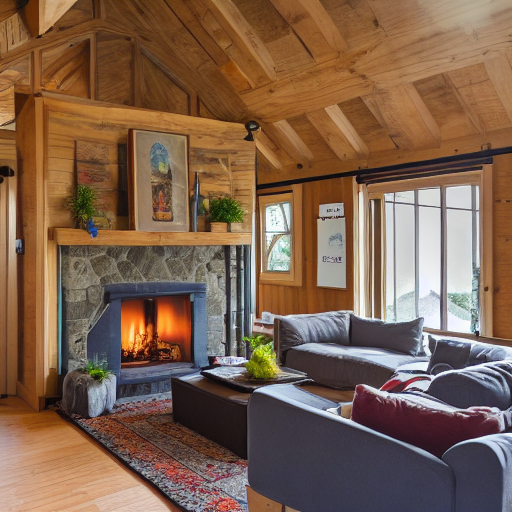
We saw one above, with the faces. Now consider this one, generated with purely Stable Diffusion:
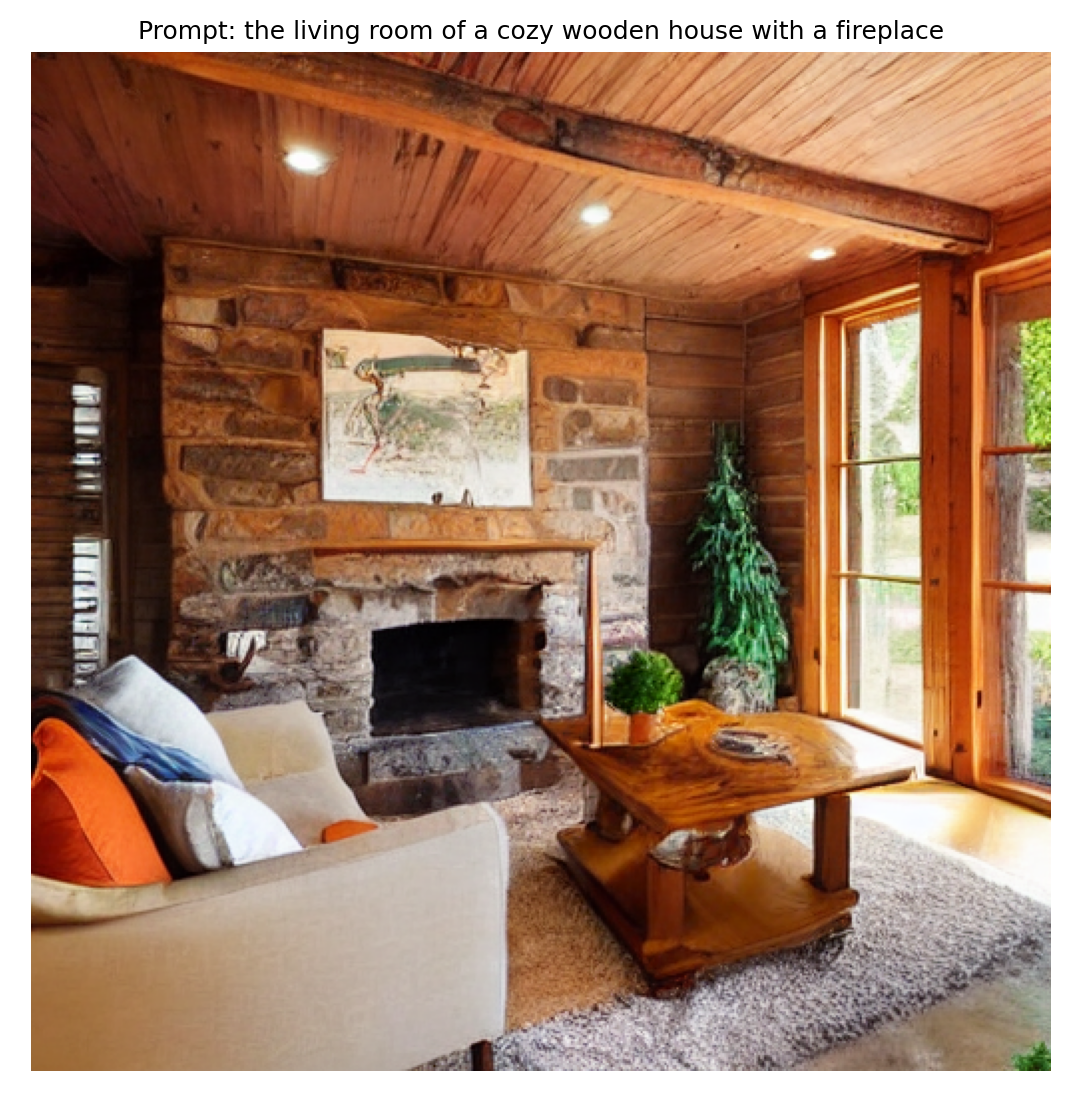
With just a quick look, it seems like a nice place to be. But check again, and we see that the DVDs on the rack are kind of merged together, the plant is ... an unknown species, the bowl under the table is embedded in the table leg, and the wood column on the right-hand side of the fireplace is coming down Escher-like in front of the tabletop:
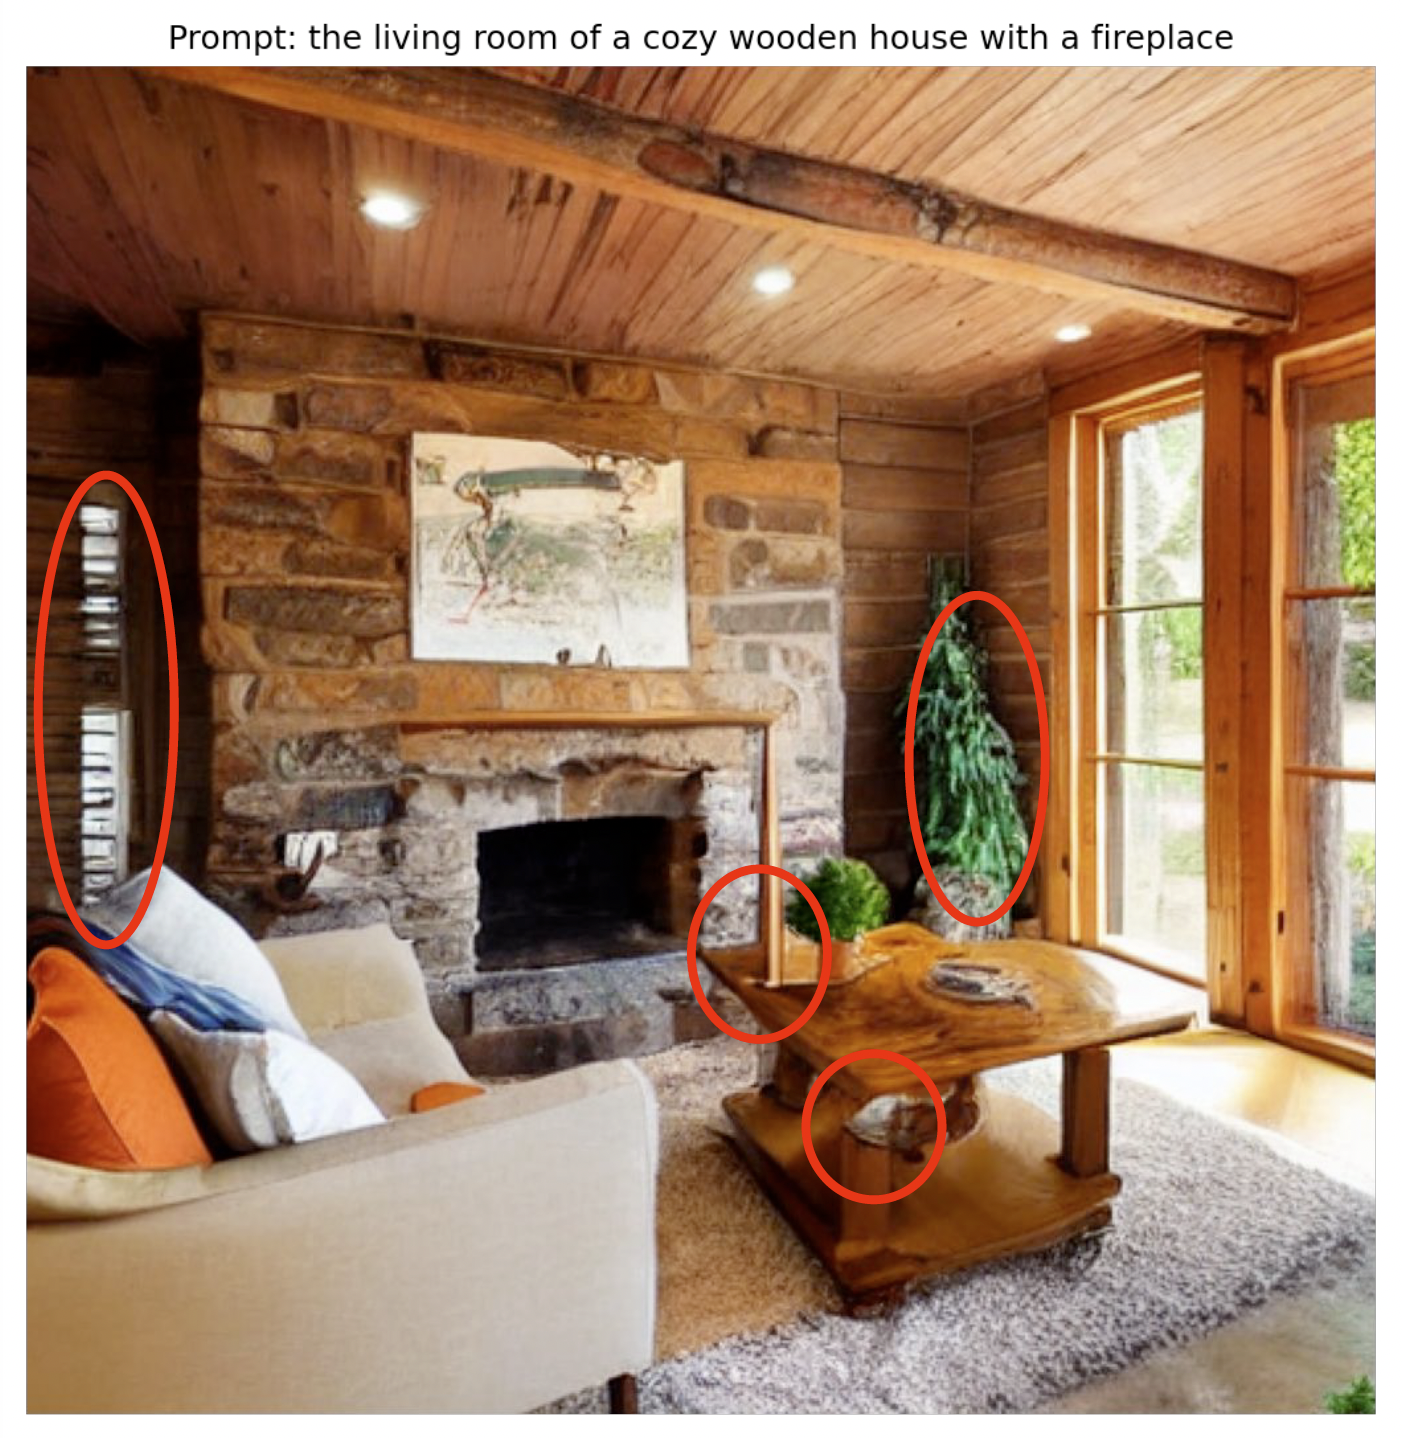
So it's close, but ... no.
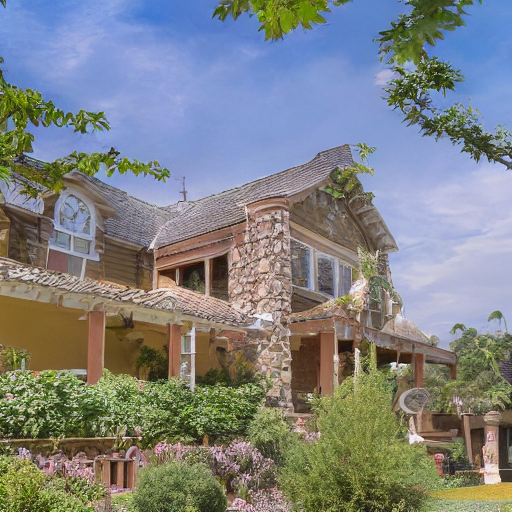
What happens when we try adding self-attention guidance to the same prompt? The immediate visual impression is simply that things just get a lot less weird.
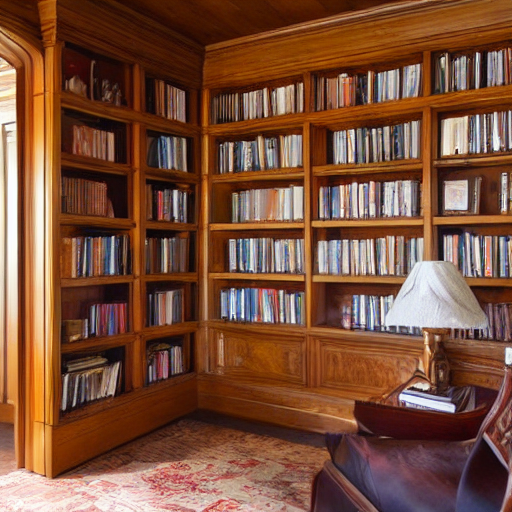
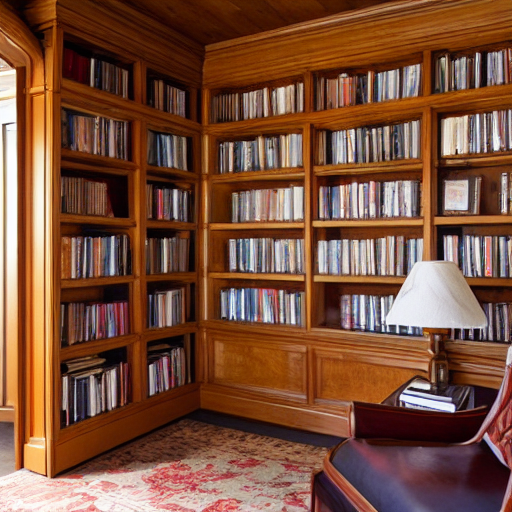
The image is different because we are not running the same model, but we go from something like the above to better with CFG, and a real room with CFG+SAG:
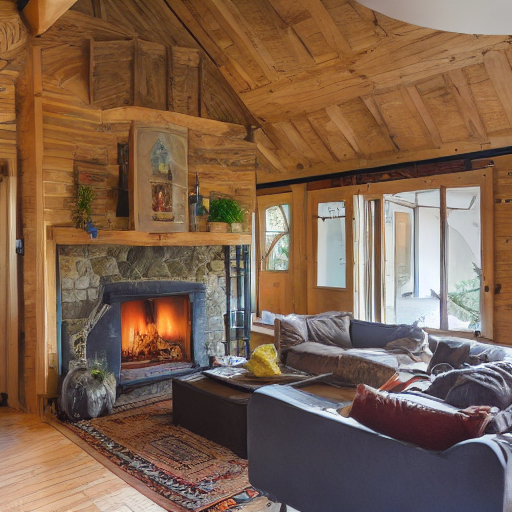
These images took less than a minute to generate on an A100 GPU. The CFG image has fewer oddities than the original Stable Diffusion image, but the CFG+SAG image is smoother, the objects are better defined, there is less clutter, and it just looks more real.
The SAG process is leveraging the natural tendency of attention to concentrate on parts of the image where things are changing to both make objects look more realistic, and arrange them in actually-possible ways.
Outside of imagining interior designs, the idea is the same for other situations.
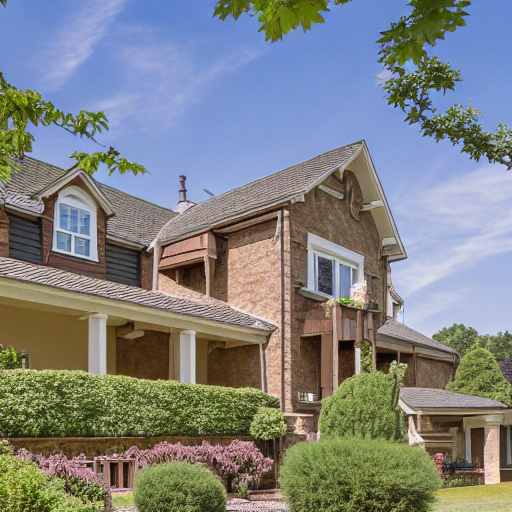
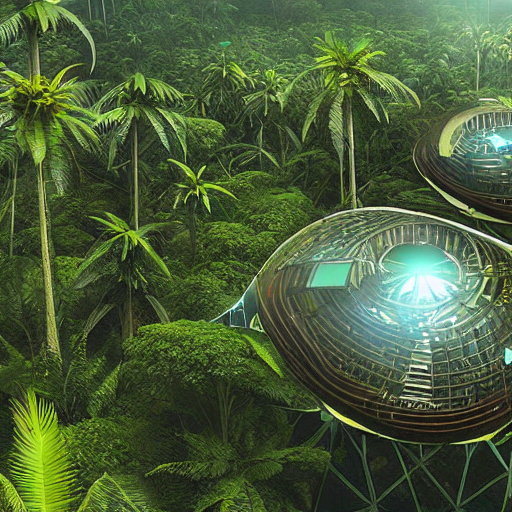
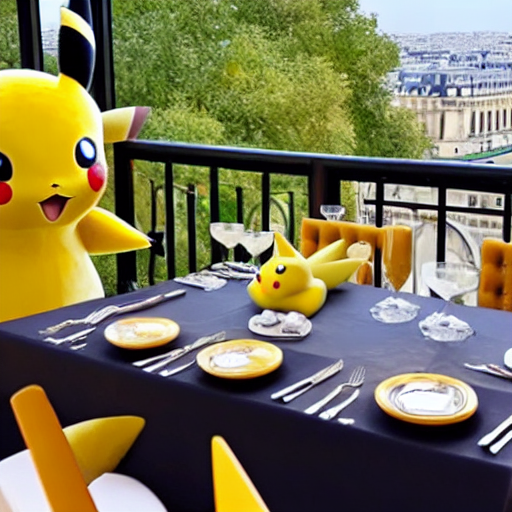
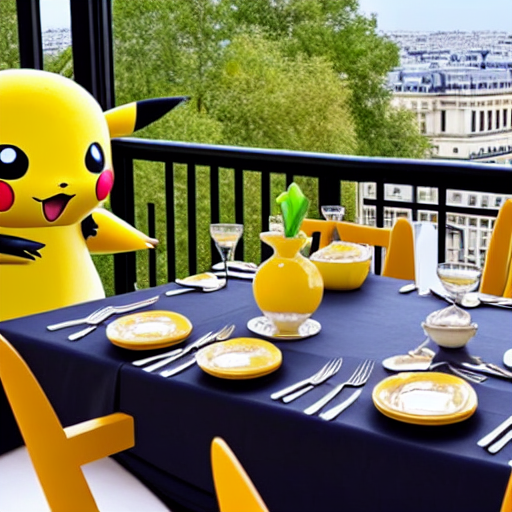
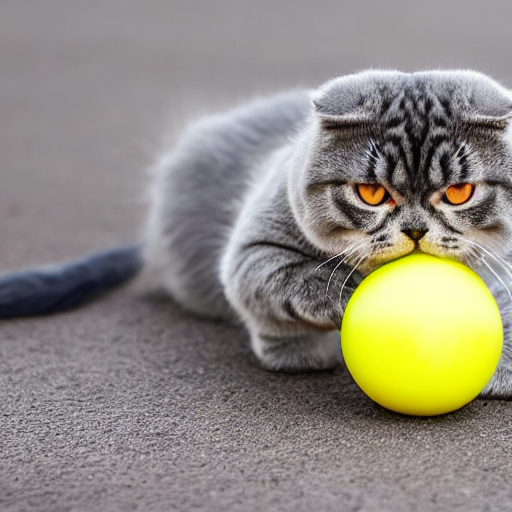
Below, each image pair is generated with 200 steps, and the guidance scales are set to their maximum values of 10 and 1 respectively (see Run on Paperspace below). The images are chosen to show ones where CFG+SAG did well, but the relative improvement is present in most examples, regardless of user curation.
CFG images are on the left, CFG+SAG are on the right.
In Hong et al., the authors had outside people view SAG and non-SAG images, and they also rated the SAG ones as being better 84% of the time:

Running it on Paperspace
Bring this project to life
Here we describe how to run your own image generation using Stable Diffusion with self-attention guidance on Paperspace.
The setup is easy, because we can use the same Run on Gradient that was used previously in this blogpost.
$\rightarrow$ Click the link to launch the Notebook
Once, open, navigate to the notebook technique-review-2.ipynb, and run the 3 cells under the "Self Attention Guidance" heading.
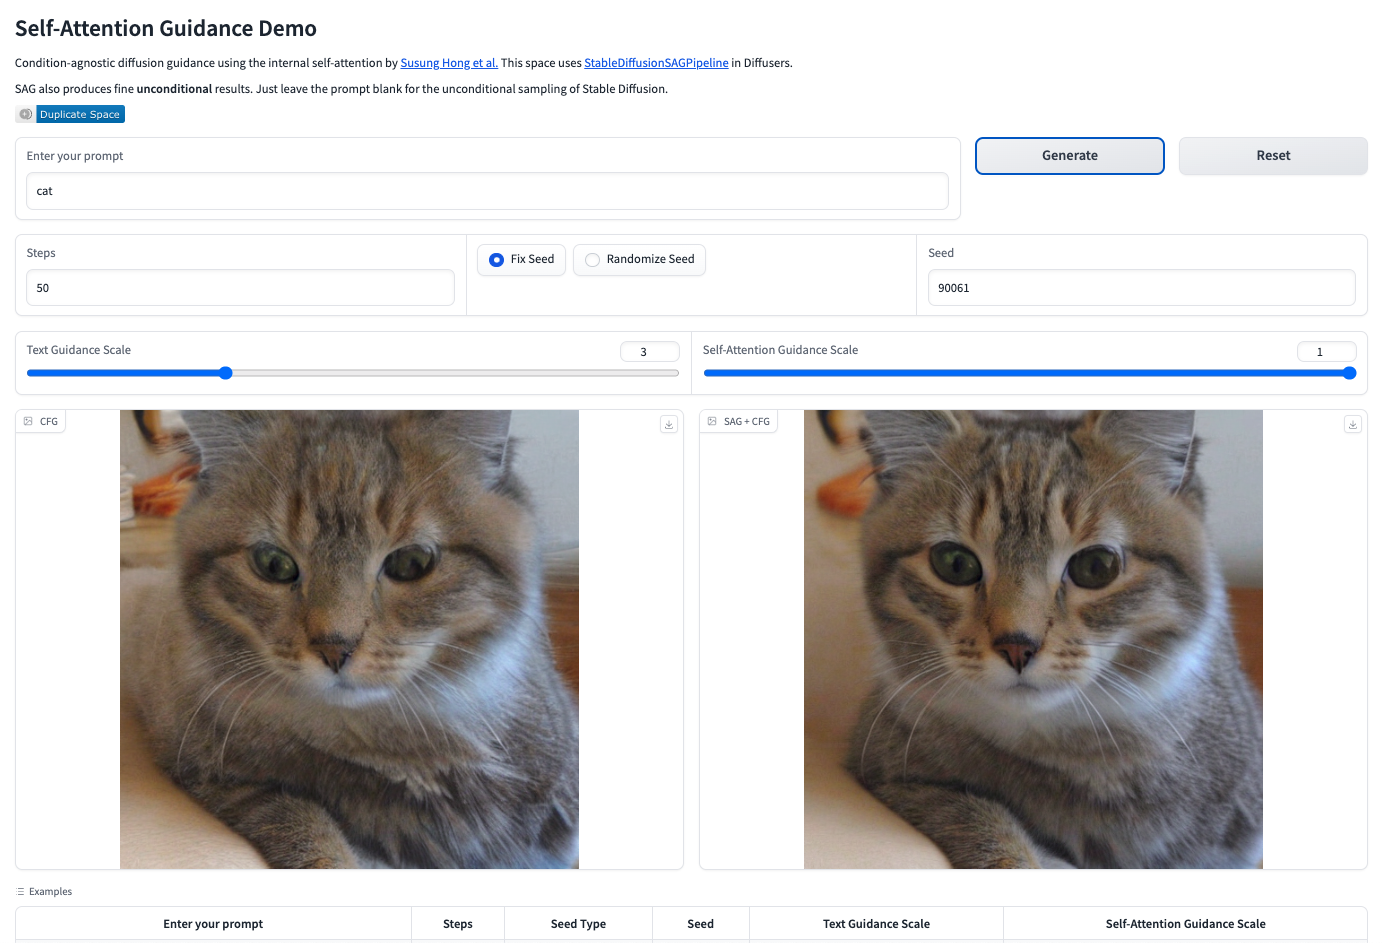
This will generate a Gradio public URL that you can click on, which in turn will open a browser tab with a GUI interface that looks like this:
Generating images
At a basic level, the GUI is largely self-explanatory, with a box to enter your text prompt, a generate button, and various settings. This gives you images which can then be downloaded.
Because Stable Diffusion + SAG can work unconditionally, you can in fact click generate without typing a prompt, and it will produce an image according to the random seed present.
For most usage, you will want to type in something as a prompt (the table below the image area has a few examples), and see the result.
The remainder of the functionality consists of adjusting various settings if needed:
- Prompt: In principle this could be any set of characters, but likely works best in English with the ASCII character set. The suitability, or not, of the output is relatively unrestricted, so it is up to the user what sorts of images they are comfortable with generating. The prompt is not case-sensitive.
- Seed: For a given seed, prompt, steps, and guidance scales, the model will output the same image, which allows the same image to be reproduced if you note the settings used. Any change to the seed will produce a completely different image.
- Reset: This returns the GUI to the initial values of all settings, except for the seed value, which will be toggled to randomized. You can return it to fixed if needed. If an image generation is taking too long, doing a hard refresh on the page will work better than clicking reset.
- Steps: This is the number of timesteps used to create the image. More steps take longer but are better, up to a point where the image gets over-smoothed and begins to lose objects, often after a few hundred steps. There is also an upper limit to the number of steps of 999, and it can sometimes error out below that value on less powerful GPUs.
- Text guidance scale: The GUI is running the variant of SAG usage where classifier-free guidance (CFG) is also added. So the left-hand image is pure CFG, and the right is CFG+SAG. Pure CFG allows guidance as well, and the scale specifies how large an area of the image to apply it to. The default is 3 and larger values make the image more coherent and less cluttered, similar to the SAG scale. If CFG is set to 0 the prompt is ignored for both CFG and CFG+SAG. (By turning up the CFG scale from 0, you can see the guided image "appear" out of the unguided one that Stable Diffusion generates for your given seed.)
- Self-attention guidance scale: The SAG scale is the value for $s$ in its formulation, and can be various small real-number values. In the paper, $s=0.1$ gave the best results, while $s=-0.1$ (it can be negative) and $s \ge 0.4$ gave worse results. The GUI, however, defaults to $s=1$, and this value seems to produce better images for SAG+CFG than smaller values, which become more like CFG-only, and identical when $s=0$. At non-zero $s$, SAG+CFG are consistently better than CFG-only.
- GPU type: Finally, while not in the GUI directly, Paperspace lets you change the GPU that your Notebook is running from, so you have access to the usual range from, at the time of writing, Free-GPU through to A100-80G. Faster ones will be better, so the Ampere series (A4000-A6000 and A100) work well.
Typing a prompt and generating an image in the GUI will look something like this:
The generated images can be downloaded using the arrows to the upper right of each image.
To terminate the GUI when done, close its browser tab, click the "Stop" button on the running cell in the Notebook, and "Stop Machine" in the usual way if you are also ready to shut down the Notebook.
As a guide to what settings are best, running maximum values for both scales (CFG 10, SAG 1) for about 200 steps on an A100 GPU, and using the CFG+SAG image, often works well. The image generation takes about a minute. If the image you get is not good, try another seed or change the prompt. Some particular image types, such as natural as opposed to artificial scenes, may work better with lower guidance scale values.
Discussion
A few brief observations and thoughts from running Stable Diffusion + SAG.
It's not perfect yet
As mentioned above, while SAG makes the images much better, it is not perfect.
If using the results for content that is to be put into production, it is likely the case that you will still need to produce several instances of images, and manually curate what is best. Techniques such as prompt engineering may also be valuable. But it should take fewer attempts and therefore less time to achieve what it wanted compared to using Stable Diffusion alone.
Faces are still a weakness. While running for more timesteps makes them better, they are not exactly the photo-realistic outputs that some other models can produce:
Running more timesteps at a large guidance scale results in smoother images, with fewer objects in them, but with too many steps sometimes they can become over-smoothed and less realistic, with a matte appearance. This is the same generator as above, but for 750 steps vs. 500:
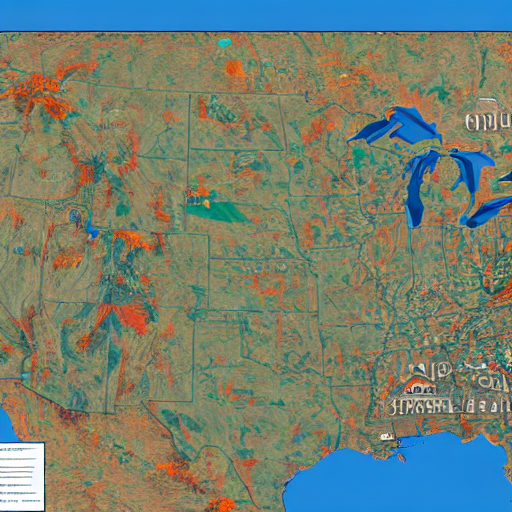
The generator also will likely not do well for specialized requests, e.g., this is one of its maps of the USA:
The "text" in the images is often seen as an artifact, making images with text in them also less useful.
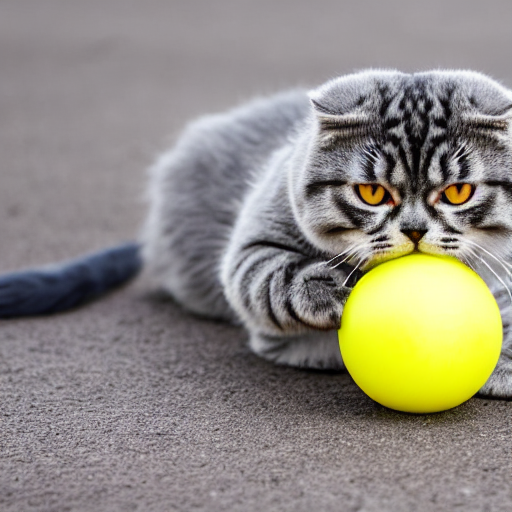
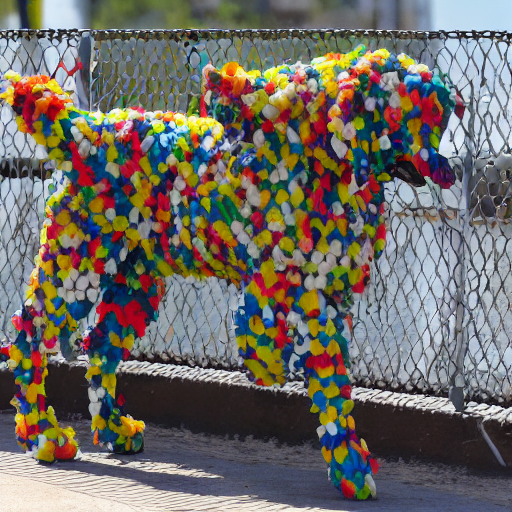
And sometimes it can still just be outright strange, such as the prompt "dog" with seed 90061, which appears to be a dog wearing a carpet:
Longer prompts may do better, which leads to the new field of prompt engineering.
Moving closer to the maximum values of both guidance scales and a number of timesteps around 200 can do better than settings that are far from this.
For particular use cases such as guiding the structure of an image, poses of people, the style, and so on, the many other augmentations described in other Paperspace blog entries will give you more results and control than the whole-image-from-just-a-prompt basic setup shown here.
But overall, adding self-attention guidance is a big step forward in allowing a non-specialist user to quickly and easily produce Stable Diffusion images useful for serious purposes.
Won't the original Stable Diffusion just get better?
AI tools are rapidly improving and so it is reasonable to ask won't the original un-augmented Stable Diffusion just get better?
Likely it will, so explicit enhancements such as SAG may eventually either be not needed, be incorporated into the base model, or added to standard interfaces to it. You can just wait, and the tools will improve.
A good example of this is GPT-4 vs. ChatGPT, which has gone from mostly low percentiles on 20+ exams that it was tested on, to 80th+ percentile on a large fraction of them. ChatGPT was already revolutionary, and GPT-4 is another huge step forward.
But for now, because SAG can simply be added to Stable Diffusion image generation with no extra work for the user, it makes sense to use it. This applies as well to other enhancement techniques not shown here, if the results justify the user's time.
Conclusions and next steps
We have shown how generation of images from a simple text prompt (or no prompt) can be improved for Stable Diffusion by the addition of other techniques. In this case, we focus on self-attention guidance.
In particular, self-attention guidance allows the non-specialist user to more quickly and easily produce better Stable Diffusion images than before, with no extra setup or steps required.
The main improvement is that the images look more realistic, with better defined objects and arrangements, for the same user prompt.
Stable Diffusion with self-attention guidance, along with many other techniques, is available to run on Paperspace with no user setup or specialist knowledge required. You have access to our usual array of powerful GPUs, compute, and ready-to-go coding interfaces to bring your projects to life.
Links
Paperspace
- Other stable diffusion articles on the Paperspace blog
Self-attention guidance
- SAG website: https://ku-cvlab.github.io/Self-Attention-Guidance/
- SAG paper: https://arxiv.org/abs/2210.00939
Diffusion and other topics
- Diffusion models math, including Stable Diffusion: https://theaisummer.com/diffusion-models/
- Self-attention: https://towardsdatascience.com/illustrated-self-attention-2d627e33b20a
Image Credits
Expectation vs. reality left-hand panel: By Robert William Buss - http://kykolnik.dreamwidth.org, Public Domain, https://commons.wikimedia.org/w/index.php?curid=15729476
Generating a Stable Diffusion image: By Benlisquare - Own work, CC BY-SA 4.0, https://commons.wikimedia.org/w/index.php?curid=124800742
Self-attention: figure 4 of Hong et al. 2022
SAG schematic: figure 2 of Hong et al. 2022
Cozy wooden house living room: Paperspace's Graphcore IPU Stable Diffusion content
SAG better 84% of time: figure 5 of Hong et al. 2022