After reading this post, you will be able to set up, train, test, and use the latest StyleGAN2 implementation with PyTorch.
This article has the following structure. Skip ahead to Part 4 if you just want to get started running StyleGAN2-ADA.
- What is StyleGAN2?
- What are the requirements for training StyleGAN2?
- The latest StyleGAN2 (ADA-PyTorch) vs. previous implementations
- Set up on Paperspace
1. Create a new notebook
2. Configure notebook
3. Wait for notebook to start
4. Create notebook file
5. Install dependent packages
6. Generate seeds
7. Start training - Further reading
Bring this project to life
1. What is StyleGAN2?
StyleGAN2 by NVIDIA is based on a generative adversarial network (GAN). GANs were designed and introduced by Ian Goodfellow and his colleagues in 2014.
In a vanilla GAN, one neural network (the generator) generates data and another neural network (the discriminator) tries to distinguish the generated data from the original data (training data).
In other words – one network tries to fool the other one, while the other one tries to find out if it has been fooled. With this mechanism, GANs are able to produce state-of-the-art results.
There are a lot of GAN applications, from data augmentation to text-to-image translation. One of the strengths of GANs is image generation. As of this writing, the StyleGAN2-ADA is the most advanced GAN implementation for image generation (FID score of 2.42).
2. What are the requirements for training StyleGAN2?
Training a GAN for image generation requires a lot of computing power.
It is recommended to use at least one NVIDIA V100 with 16GB (more RAM and/or more GPUs are better).
Worse GPUs might lead to the same results but take a lot of time, even for low resolutions. From experience, an NVIDIA Tesla P100 with 16GB RAM takes almost 4 times longer than the V100!
| Resolution | GPUs | 1000 kimg | 25000 kimg | sec/kimg | GPU mem | CPU mem |
|---|---|---|---|---|---|---|
| 128x128 | 1 | 4h 05m | 4d 06h | 12.8–13.7 | 7.2 GB | 3.9 GB |
| 128x128 | 2 | 2h 06m | 2d 04h | 6.5–6.8 | 7.4 GB | 7.9 GB |
| 128x128 | 4 | 1h 20m | 1d 09h | 4.1–4.6 | 4.2 GB | 16.3 GB |
| 128x128 | 8 | 1h 13m | 1d 06h | 3.9–4.9 | 2.6 GB | 31.9 GB |
| 256x256 | 1 | 6h 36m | 6d 21h | 21.6–24.2 | 5.0 GB | 4.5 GB |
| 256x256 | 2 | 3h 27m | 3d 14h | 11.2–11.8 | 5.2 GB | 9.0 GB |
| 256x256 | 4 | 1h 45m | 1d 20h | 5.6–5.9 | 5.2 GB | 17.8 GB |
| 256x256 | 8 | 1h 24m | 1d 11h | 4.4–5.5 | 3.2 GB | 34.7 GB |
| 512x512 | 1 | 21h 03m | 21d 22h | 72.5–74.9 | 7.6 GB | 5.0 GB |
| 512x512 | 2 | 10h 59m | 11d 10h | 37.7–40.0 | 7.8 GB | 9.8 GB |
| 512x512 | 4 | 5h 29m | 5d 17h | 18.7–19.1 | 7.9 GB | 17.7 GB |
| 512x512 | 8 | 2h 48m | 2d 22h | 9.5–9.7 | 7.8 GB | 38.2 GB |
| 1024x1024 | 1 | 1d 20h | 46d 03h | 154.3–161.6 | 8.1 GB | 5.3 GB |
| 1024x1024 | 2 | 23h 09m | 24d 02h | 80.6–86.2 | 8.6 GB | 11.9 GB |
| 1024x1024 | 4 | 11h 36m | 12d 02h | 40.1–40.8 | 8.4 GB | 21.9 GB |
| 1024x1024 | 8 | 5h 54m | 6d 03h | 20.2–20.6 | 8.3 GB | 44.7 GB |
Expected training time on NVIDIA Tesla V100.
Source: https://github.com/NVlabs/stylegan2-ada-pytorch/blob/main/README.md
Typically, to reach convergence (the optimal state of the model), 25000 kimg are needed (where 1 kimg = 1,000 images) to be shown to the discriminator.
Reasonable results can be expected around 5000 kimg.
Be aware that in the tutorial that follows, the train.py file specifies quite a lengthy base configuration!
cfg_specs = {
      'auto':      dict(ref_gpus=-1, kimg=25000,  mb=-1, mbstd=-1, fmaps=-1,  lrate=-1,     gamma=-1,   ema=-1,  ramp=0.05, map=2),
      'stylegan2': dict(ref_gpus=8,  kimg=25000,  mb=32, mbstd=4,  fmaps=1,   lrate=0.002,  gamma=10,   ema=10,  ramp=None, map=8),
      'paper256':  dict(ref_gpus=8,  kimg=25000,  mb=64, mbstd=8,  fmaps=0.5, lrate=0.0025, gamma=1,    ema=20,  ramp=None, map=8),
      'paper512':  dict(ref_gpus=8,  kimg=25000,  mb=64, mbstd=8,  fmaps=1,   lrate=0.0025, gamma=0.5,  ema=20,  ramp=None, map=8),
      'paper1024': dict(ref_gpus=8,  kimg=25000,  mb=32, mbstd=4,  fmaps=1,   lrate=0.002,  gamma=2,    ema=10,  ramp=None, map=8),
      'cifar':     dict(ref_gpus=2,  kimg=100000, mb=64, mbstd=32, fmaps=1,   lrate=0.0025, gamma=0.01, ema=500, ramp=0.05, map=2),
  }
If computing power is limited, it is a good strategy to train your model up to 5000 kimg, evaluate it, tune it, and then train it again. Once you are content with your results, you can try to train it up to 25000 kimg.
Furthermore, to train the model with your own dataset, you will need images.
While the official paper states that one can achieve good results with only a few thousand images, you will get more diverse and more accurate results from more images.
For this tutorial, we will be using the Met Faces dataset of images. Note that there is already a pretrained model for metfaces available via NVIDIA – so we train from the metfaces repo just to provide a demonstration!
3. The latest StyleGAN2 (ADA-PyTorch) vs. previous implementations
The StyleGAN2-ADA Pytorch implementation code that we will use in this tutorial is the latest implementation of the algorithm.
The first implementation was introduced in 2017 as Progressive GAN. In 2018, StyleGAN followed as a new version. StyleGAN2 was released in 2019 and StyleGAN2-ADA followed in 2020.
StyleGAN2-ADA was first implemented using TensorFlow. In 2021, this version was replaced by the version that we will be using here – the PyTorch implementation.
You can find the full list of all versions here. One of the most important advantages of the PyTorch version over the TensorFlow version is that training is 5%-30% faster.
4. Set up on Paperspace
The easiest way to operate the StyleGAN2 code is to use a notebook. Therefore, we will be using the Paperspace Gradient notebooks environment.
If you're unfamiliar, Gradient Notebooks from Paperspace are simply Jupyter notebooks hosted on Paperspace CPU and GPU instances.
Today we'll use Paperspace V100 instances but it's possible to use any GPU instance, including Paperspace's Free GPU Instances – just be aware that StyleGAN2 is very compute-intensive and may take an extremely long time to train with lesser GPUs.
Let's get started!
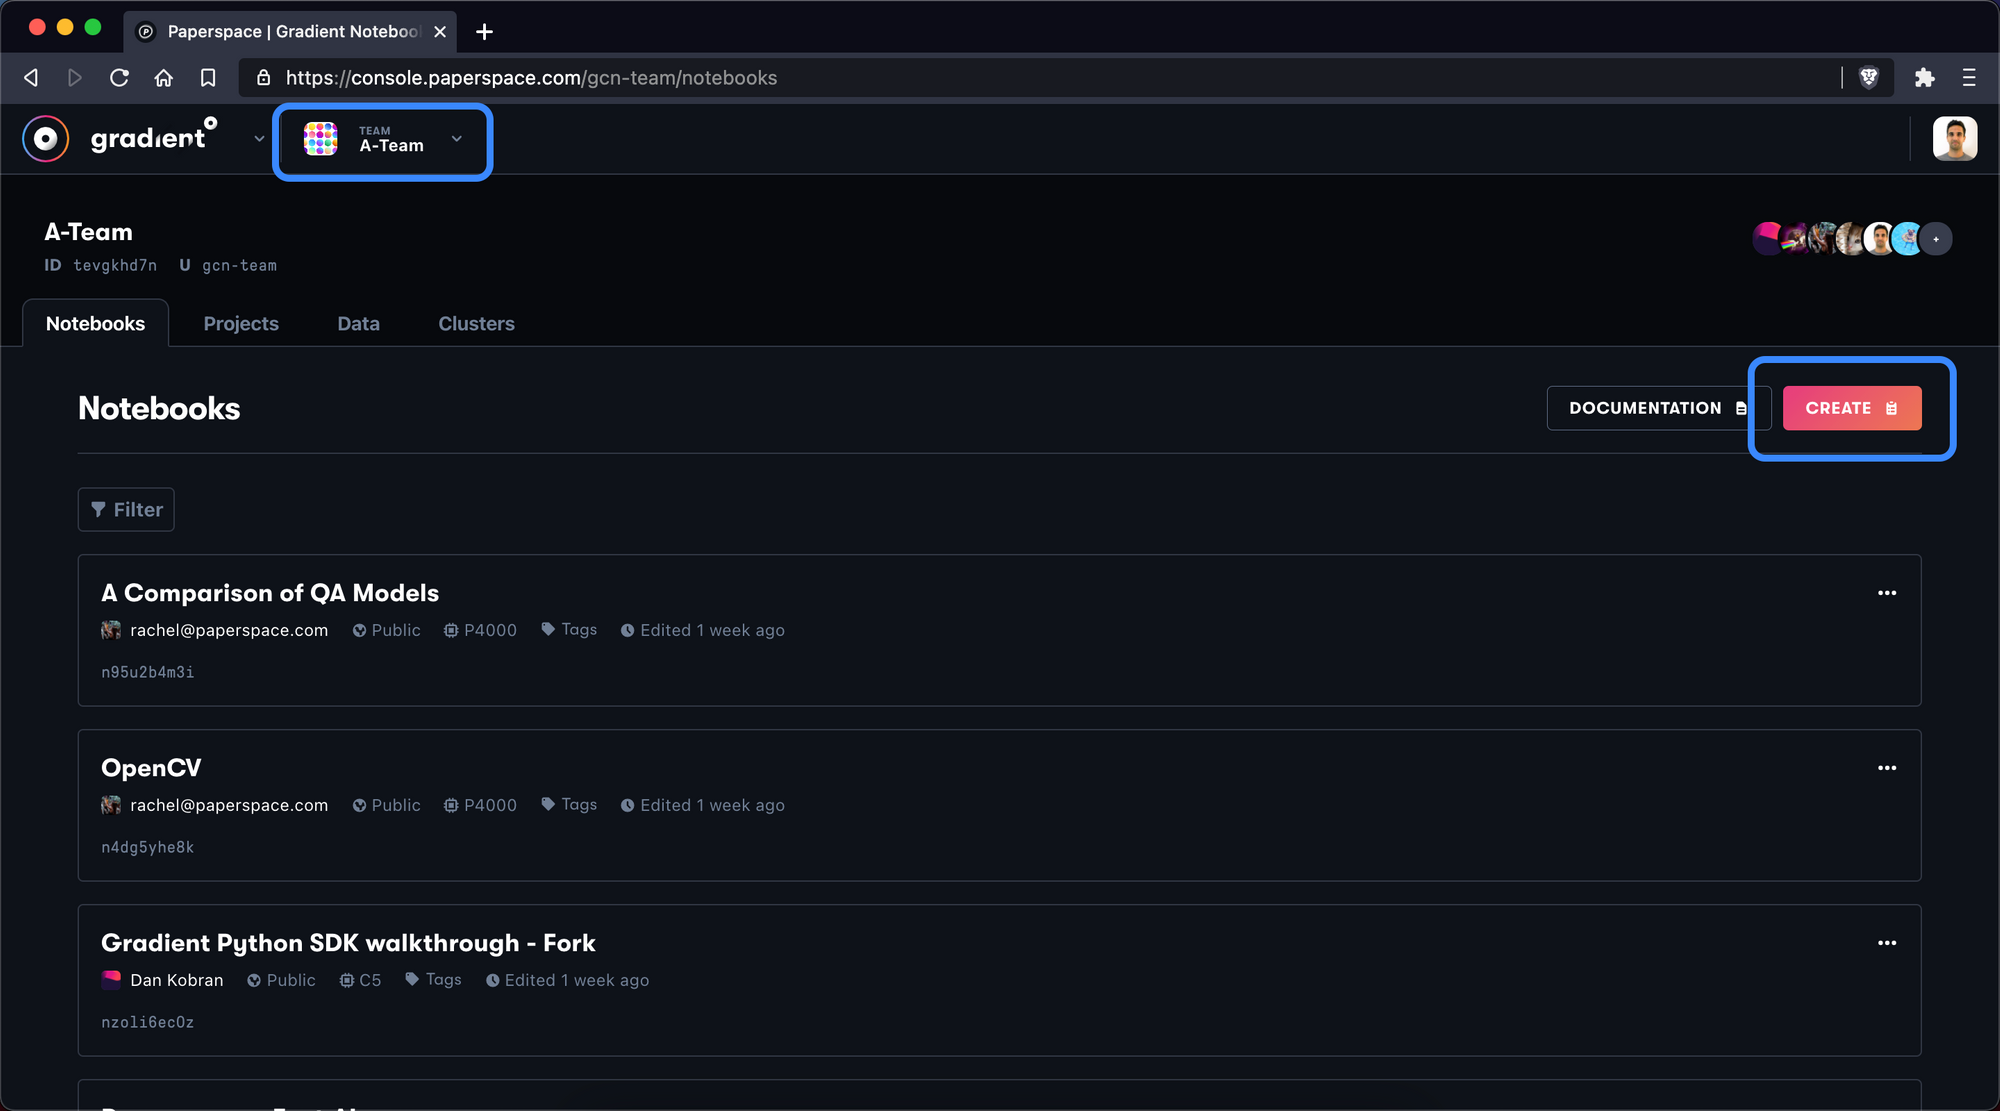
1. Create a new notebook
To get started, you'll first need to create a new notebook within Gradient.
Here we are using our Team workspace rather than our Personal workspace. We'll create a notebook by navigating to the Notebooks tab and selecting Create.
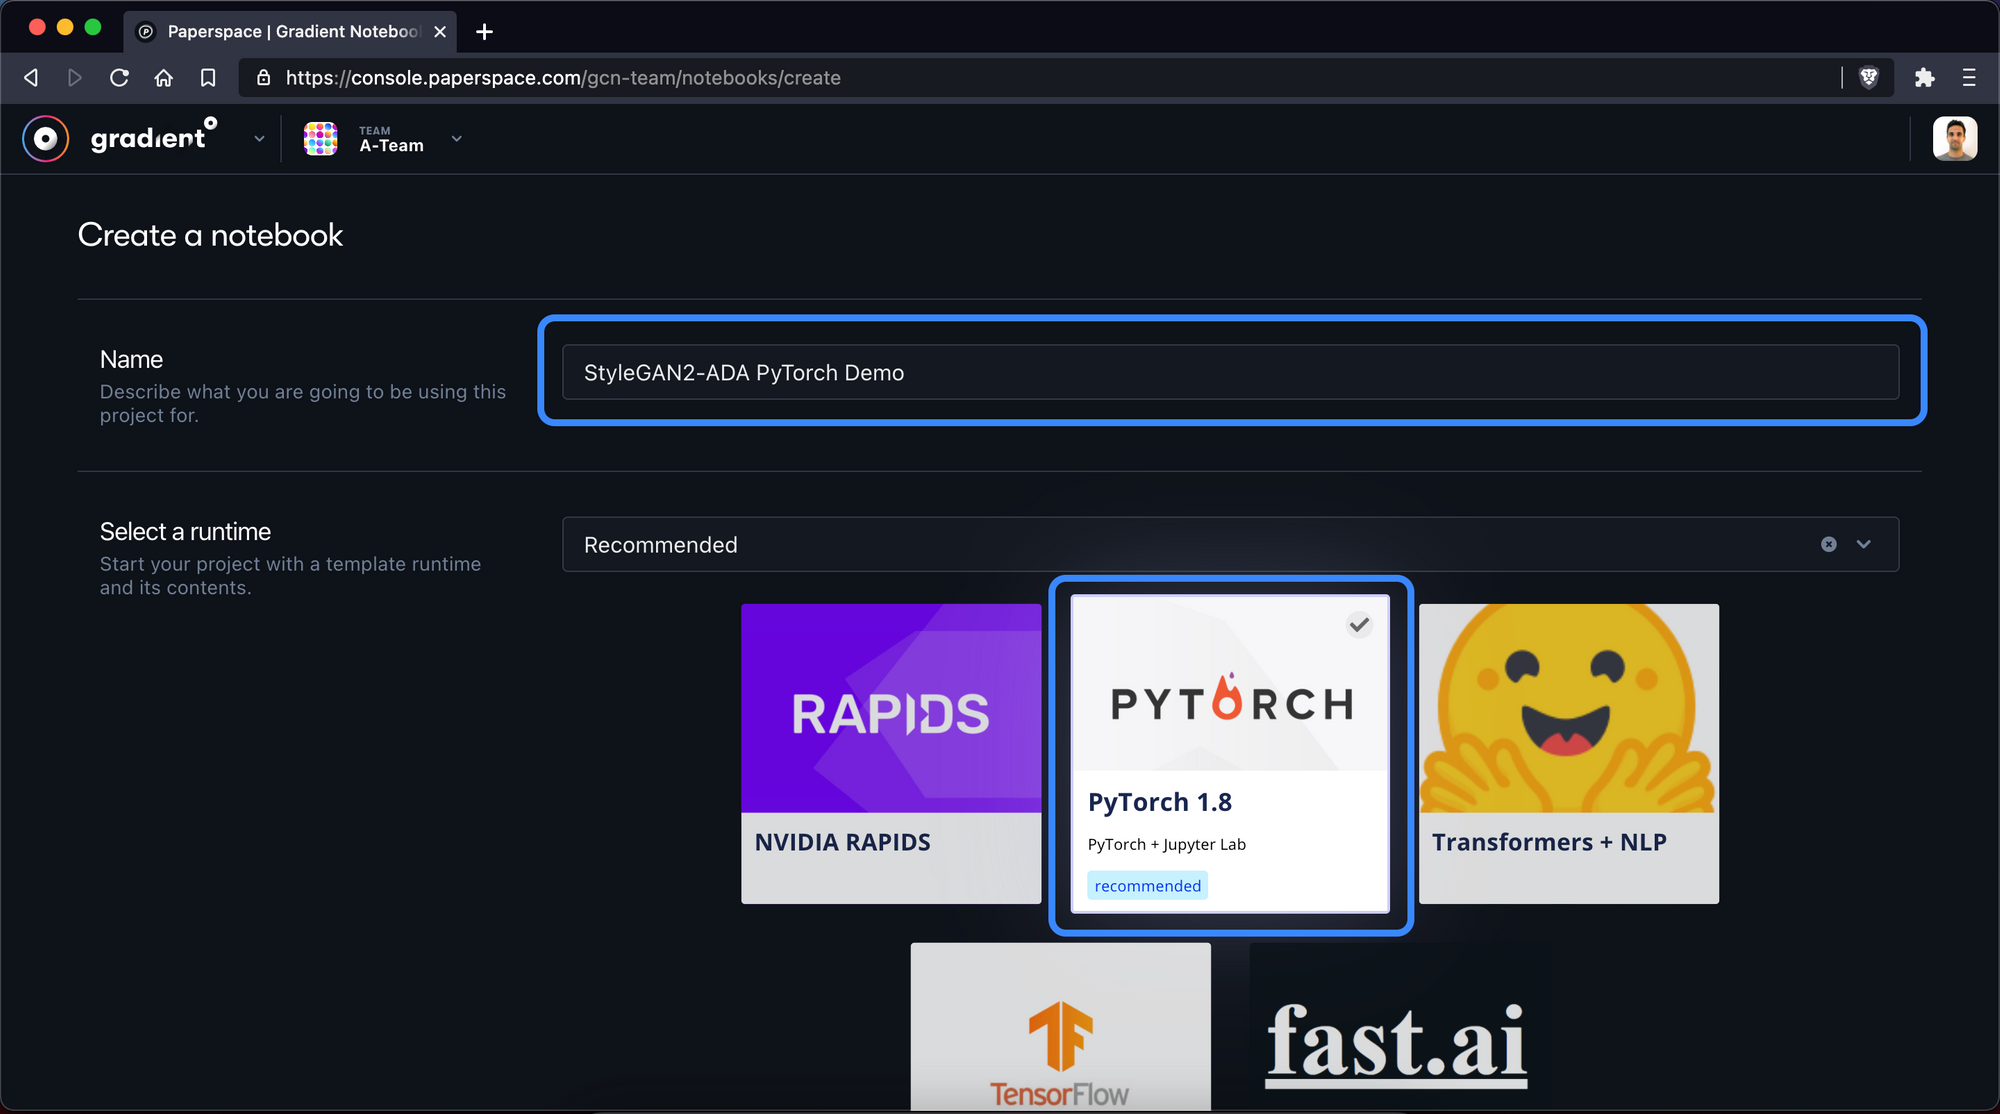
2. Configure notebook
Next, we'll give the notebook a name and select the PyTorch 1.8 runtime, which will come pre-installed with a number of PyTorch helpers. We will also be specifying the PyTorch versions we want to use manually in a bit.
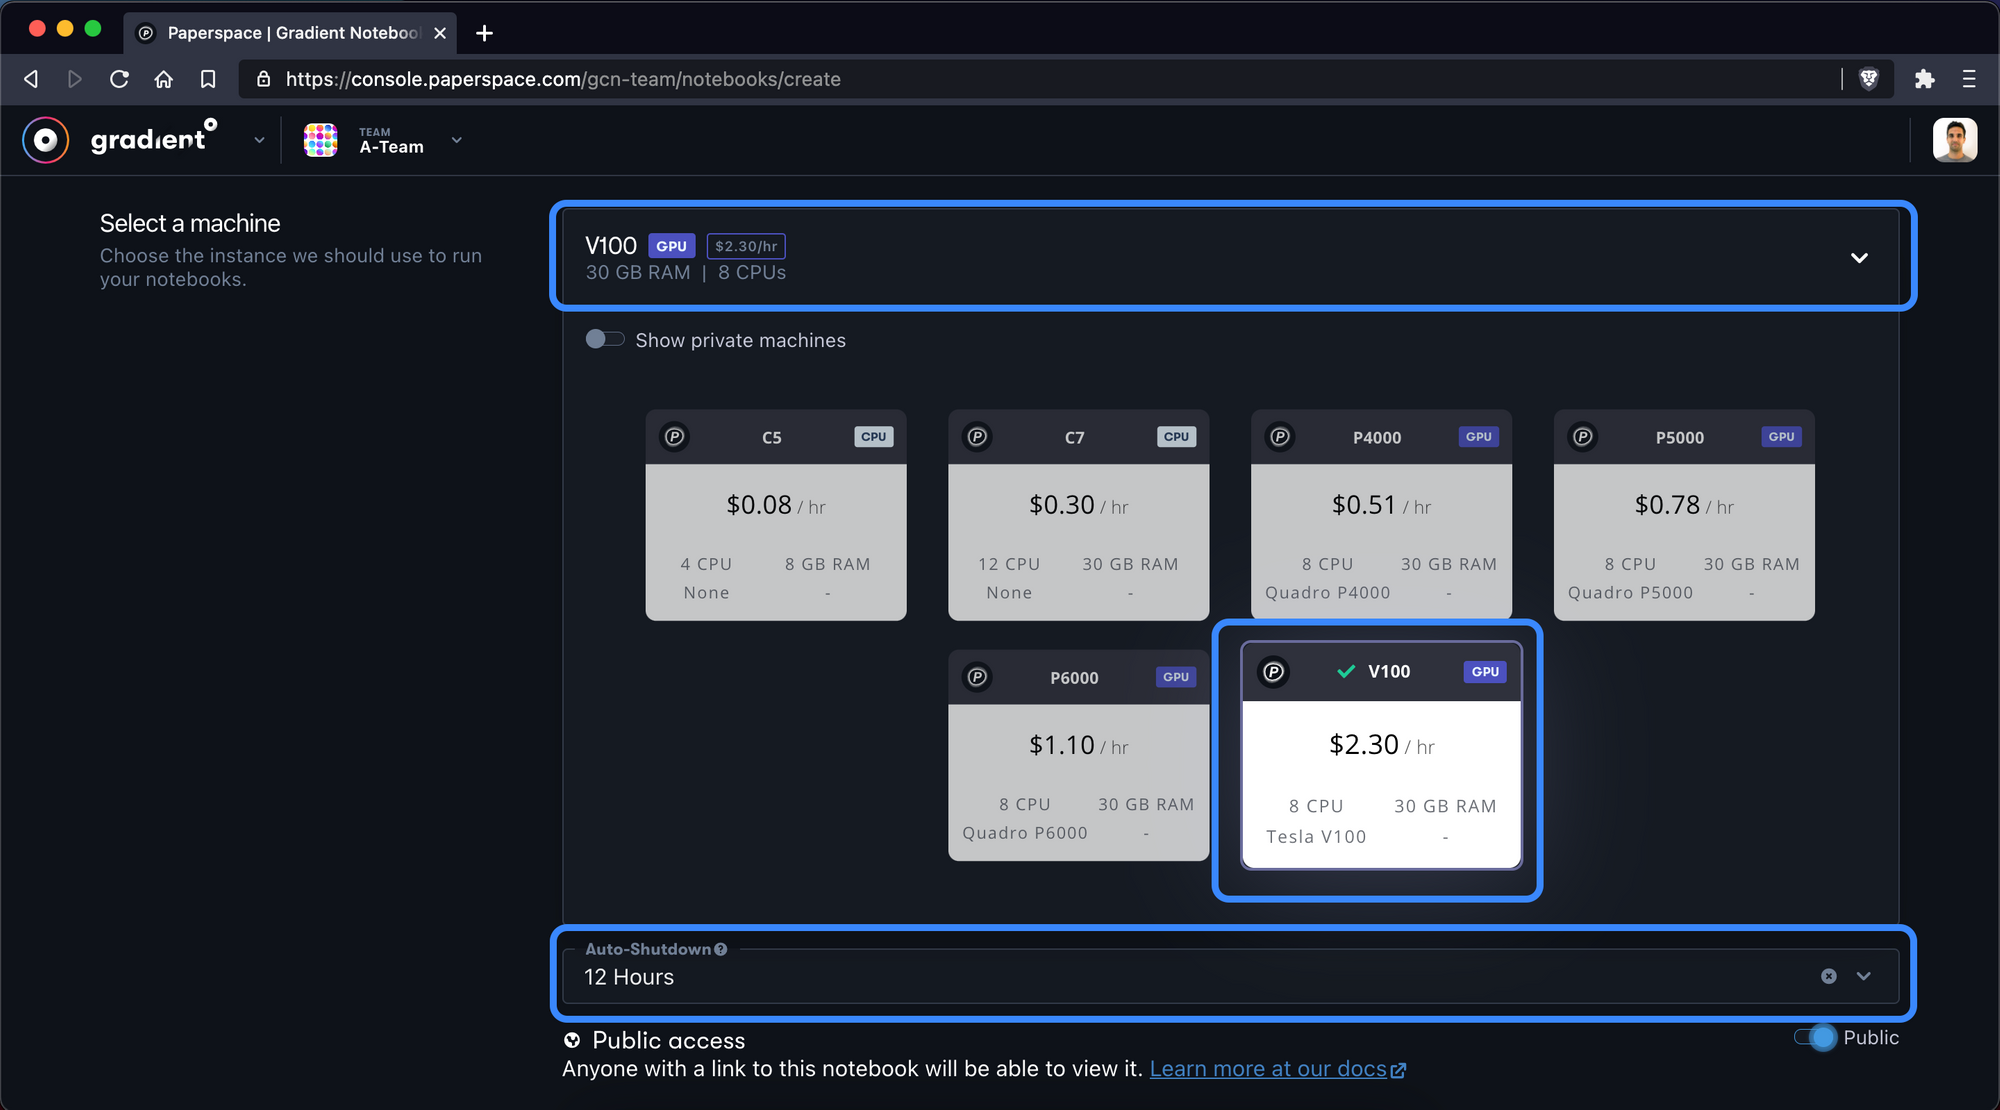
We then should choose the V100 GPU and configure an auto-shutdown period of at least 12 hours. If you want to train your network from scratch, consider at least 12-24 hours.
Note that the auto-shutdown interval will save and stop your notebook once it is reached – regardless of whether or not you are still working in the notebook.
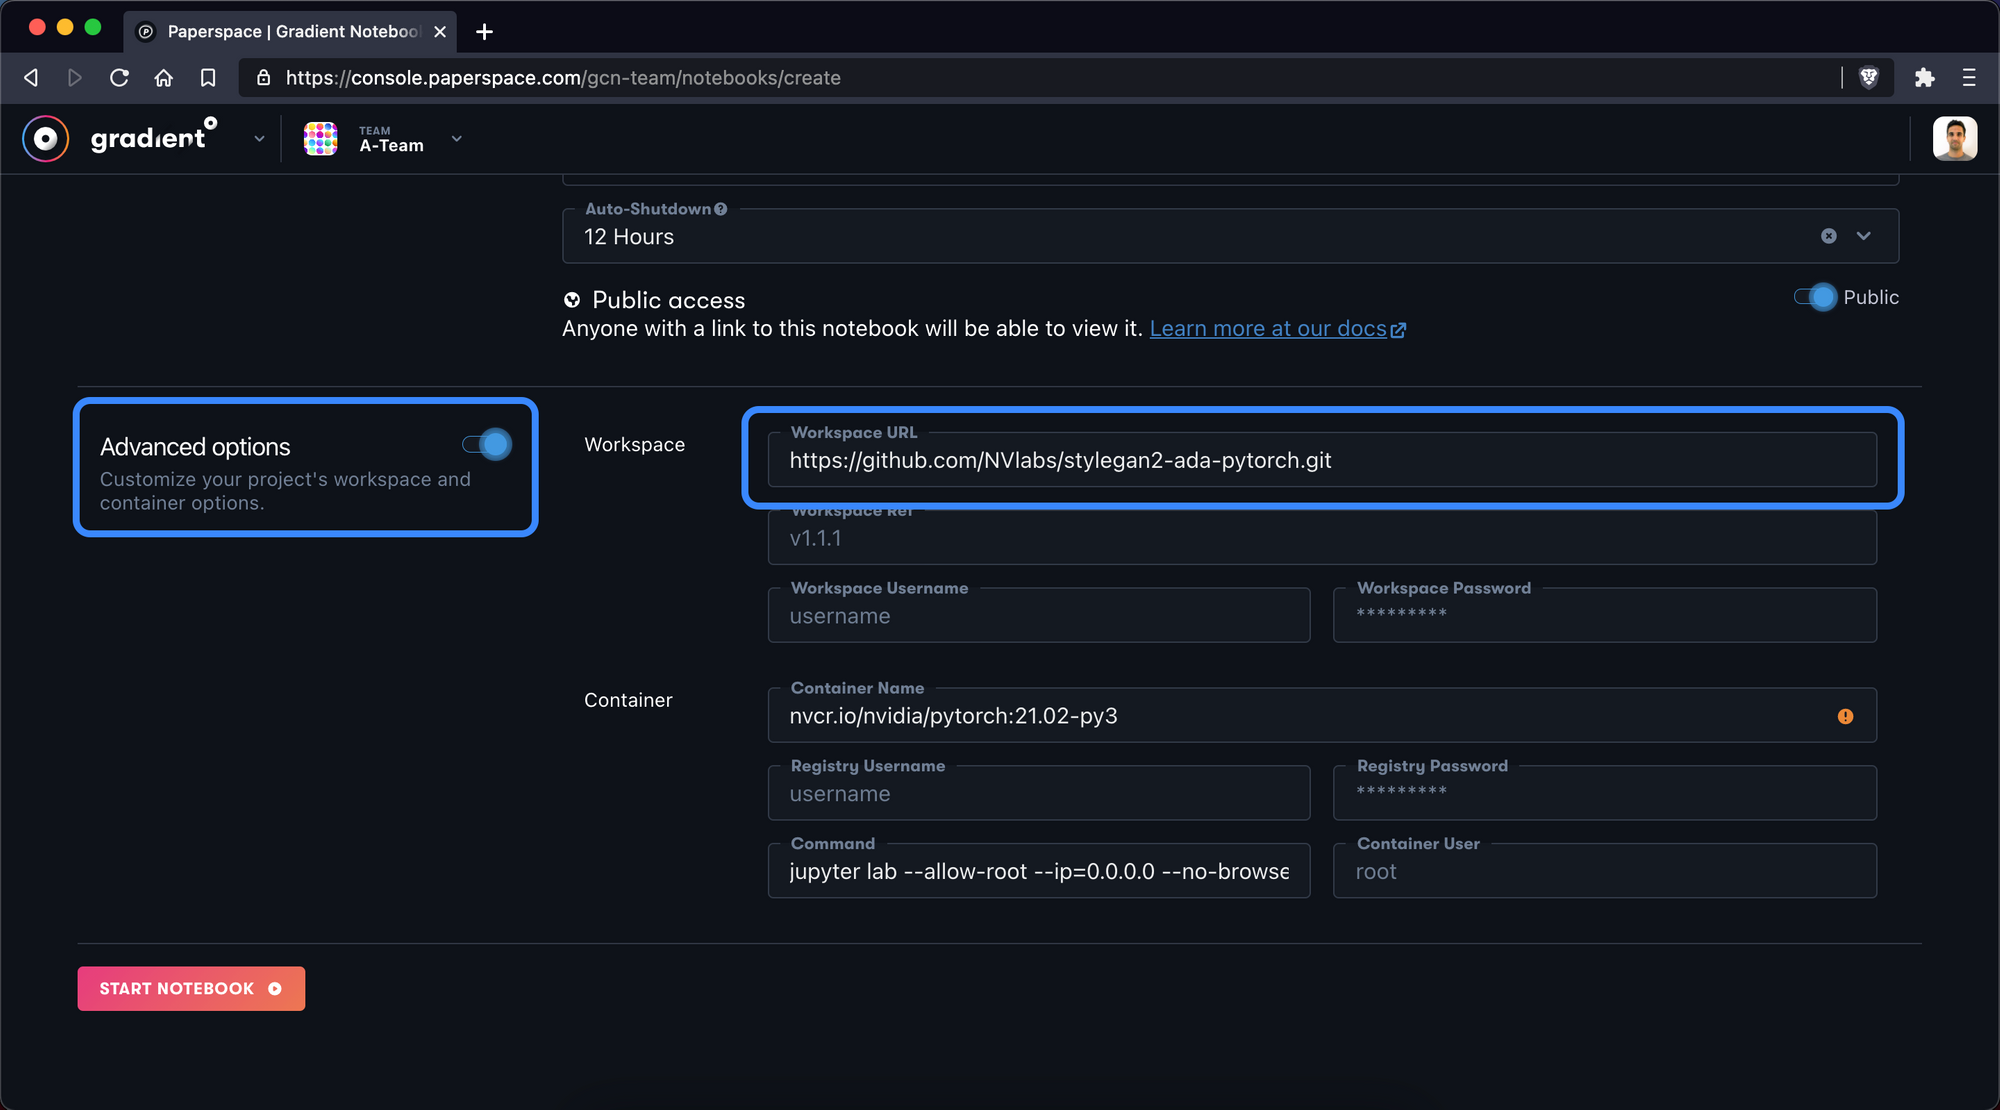
Next we will toggle ON advanced options so we can insert a custom Workspace URL. This will tell Paperspace to pull all of the contents of the GitHub repo into the new notebook.
Here we will enter:
https://github.com/NVlabs/stylegan2-ada-pytorch.git
The Gradient Notebook will now automatically download the entire repo into our new notebook!
3. Wait for notebook to start
Next, it will take a few minutes for Paperspace to copy over the GitHub repository and initiate the PyTorch 1.8 container. Be patient!
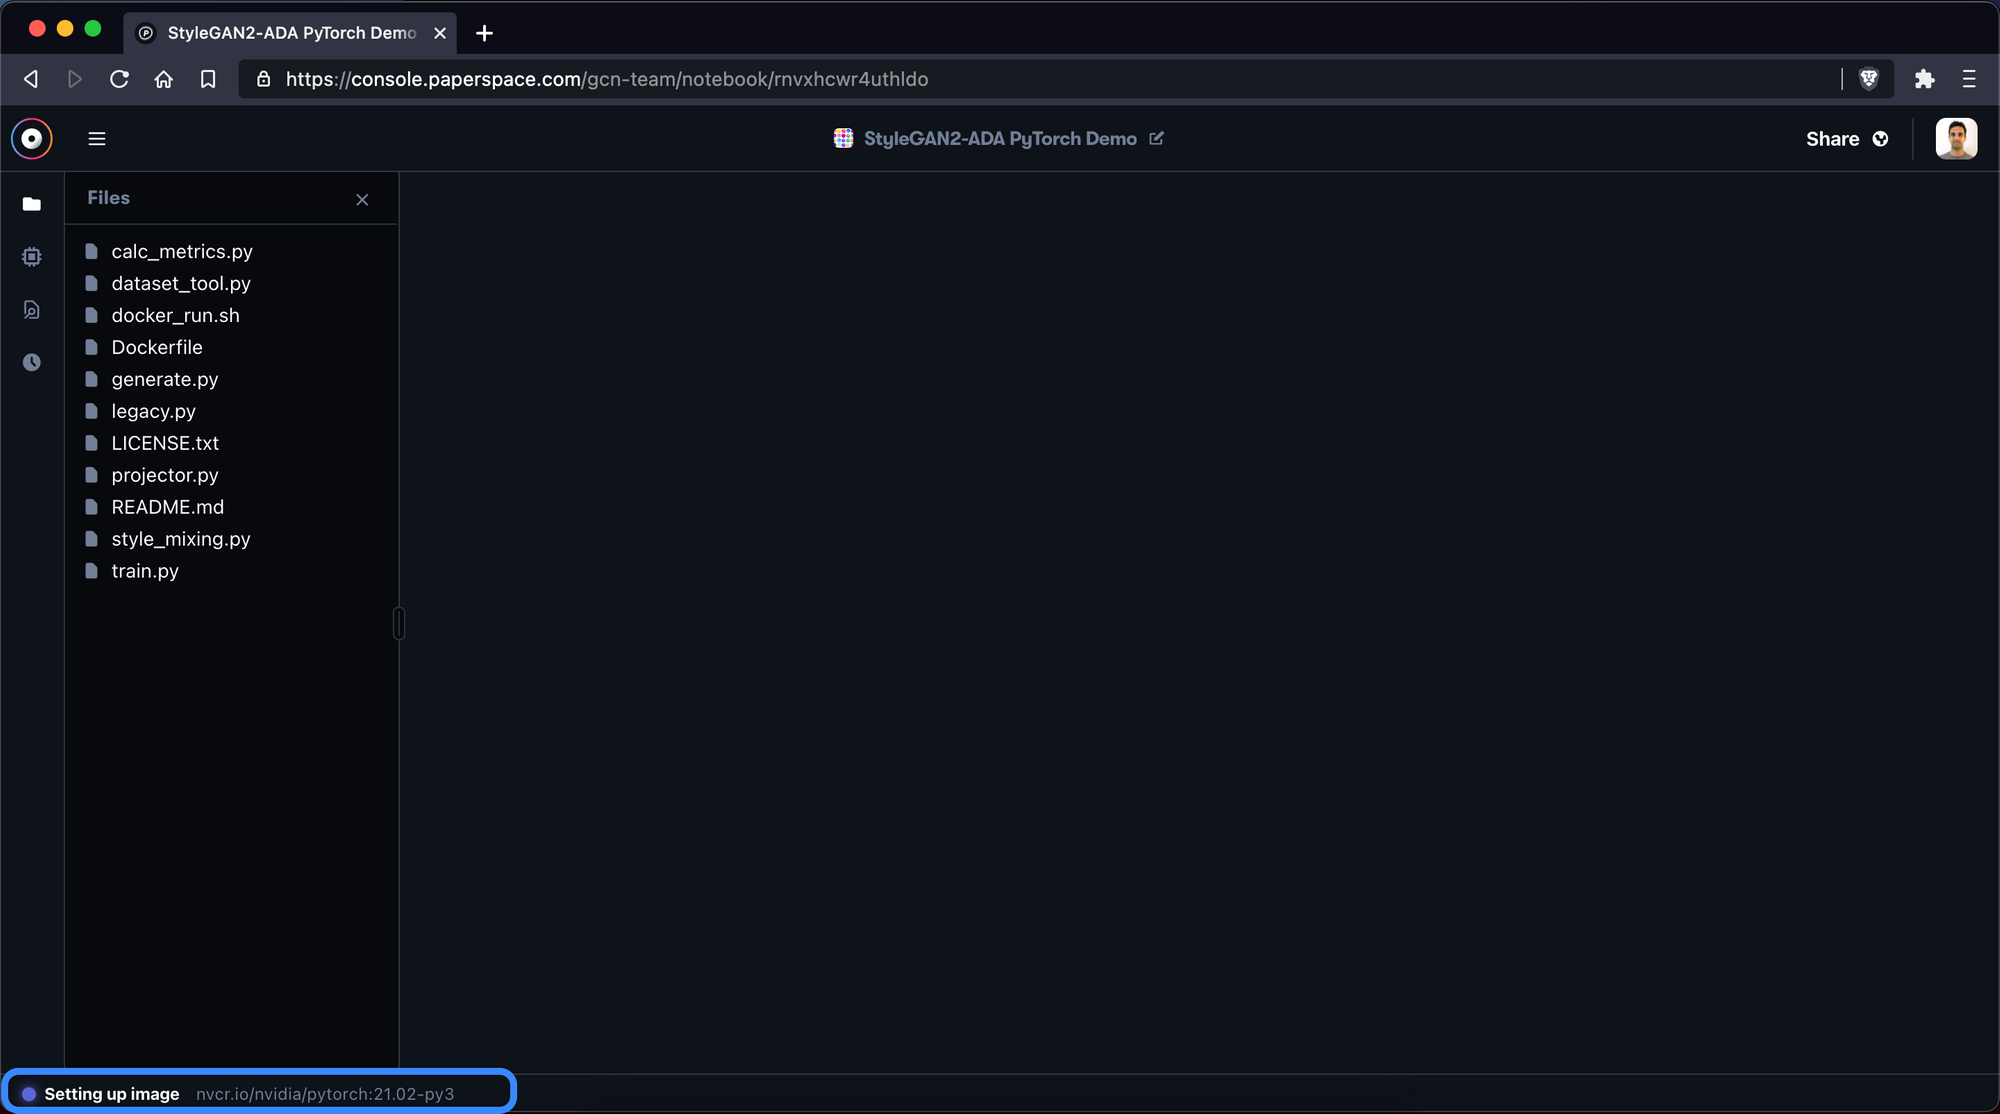
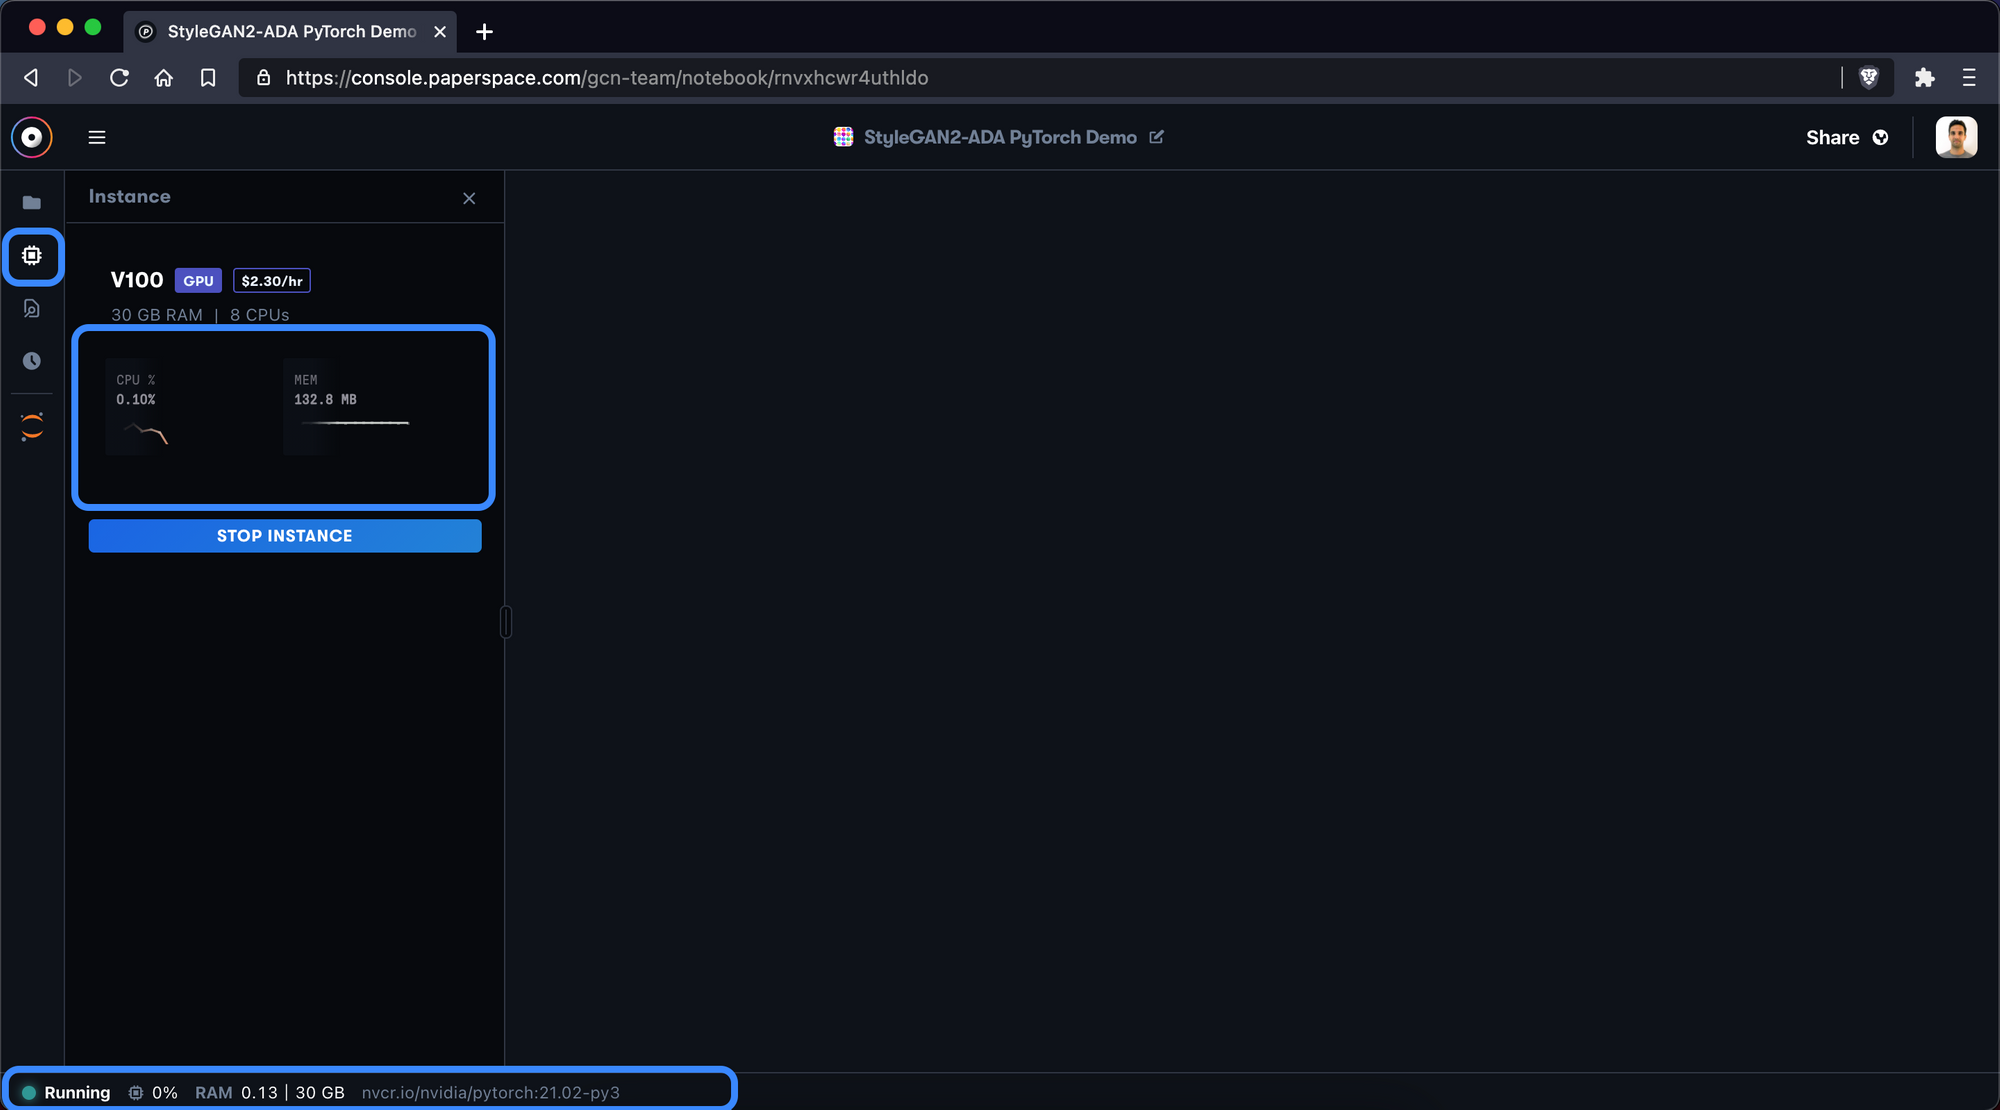
Now that the container is running, we can swap over to the Instance Selector and view our CPU and RAM usage. This information is also available on the bottom status bar.
4. Create notebook file
Next we will create a new .ipynb file to perform our work. Make sure to create a file that ends in .ipynb.
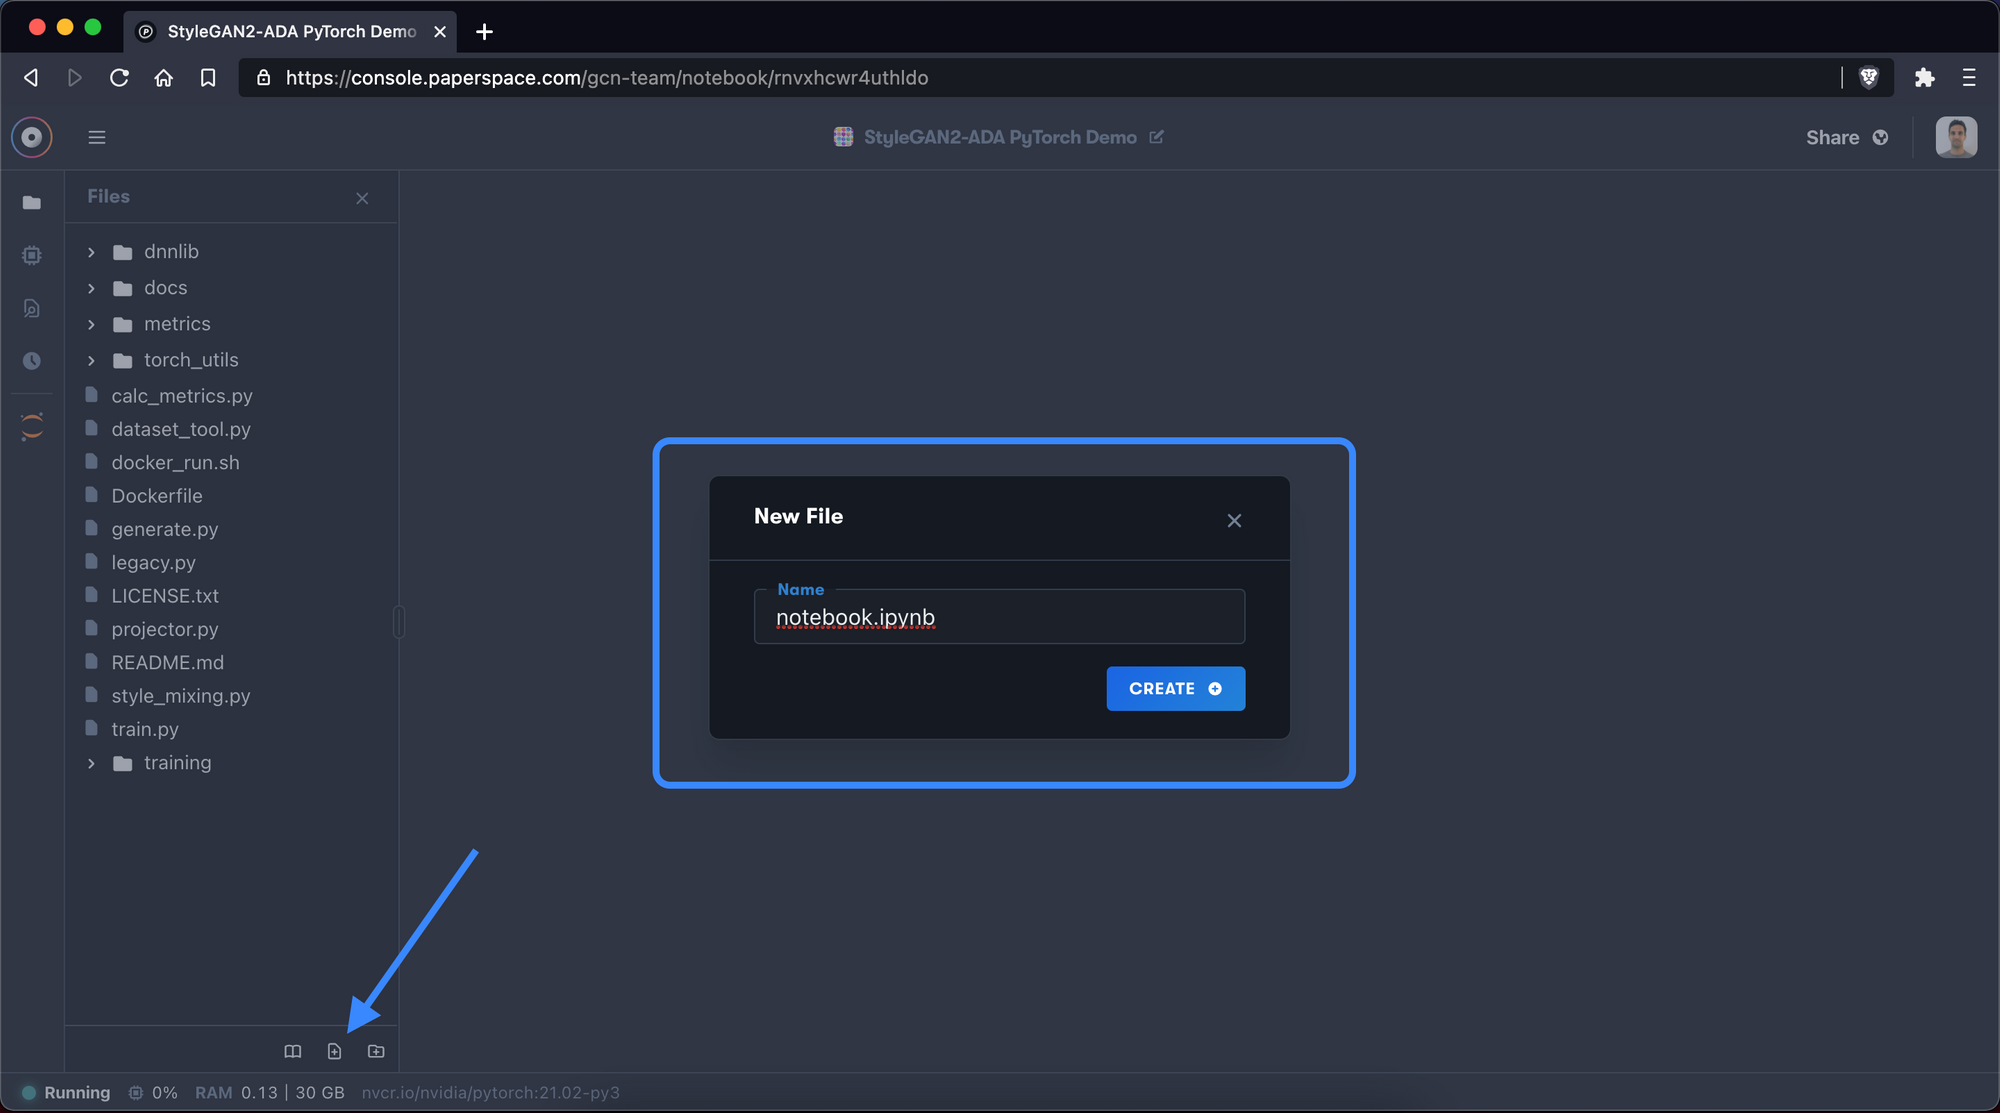
New File button in the file manager in the sidebar and give your new file a name5. Install dependent packages
At the time of this writing, the repository’s latest commit uses the following dependencies:
- 64-bit Python 3.7 and PyTorch 1.7.1
- Packages: click requests tqdm pyspng ninja imageio-ffmpeg==0.4.3
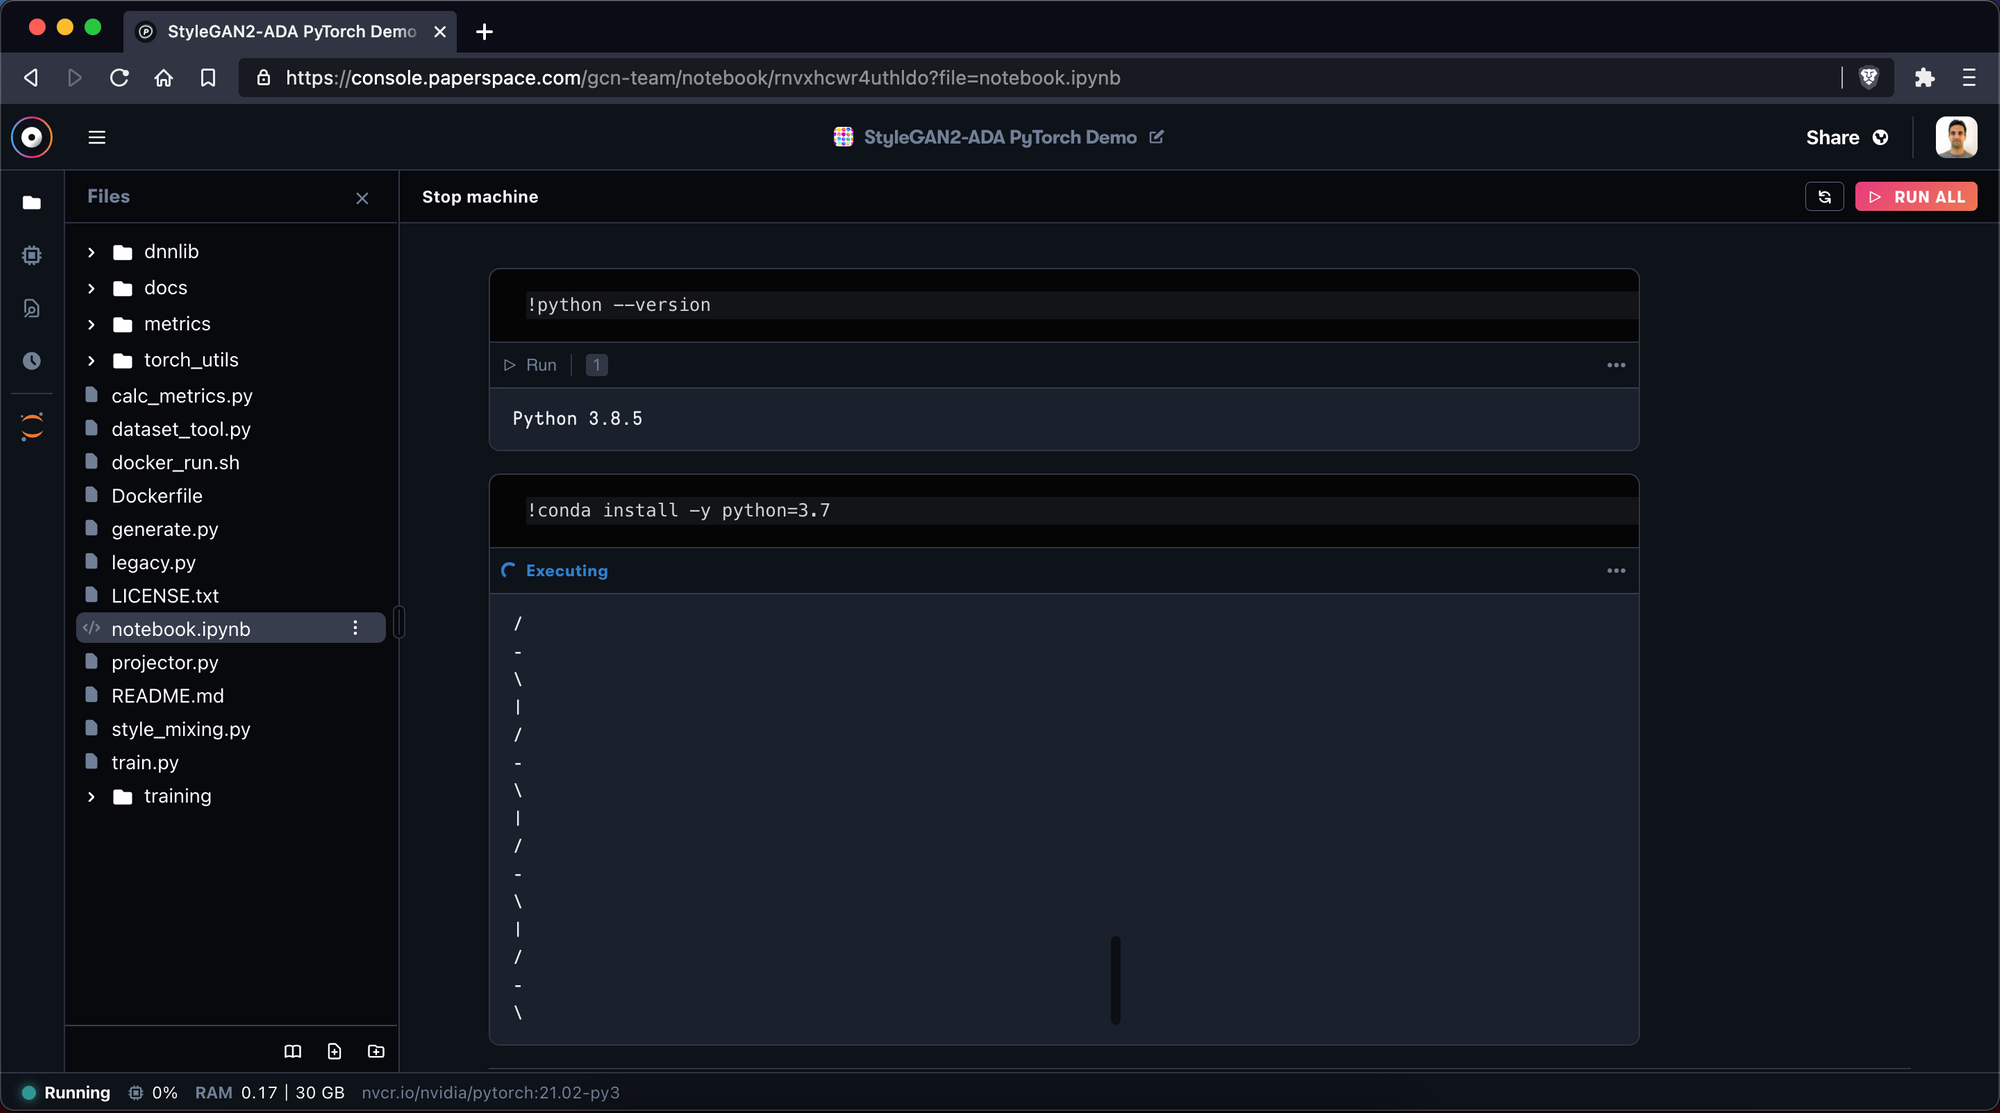
Paperspace notebooks come with Python 3.8 and Anaconda. Let's confirm this fact:
!python --version
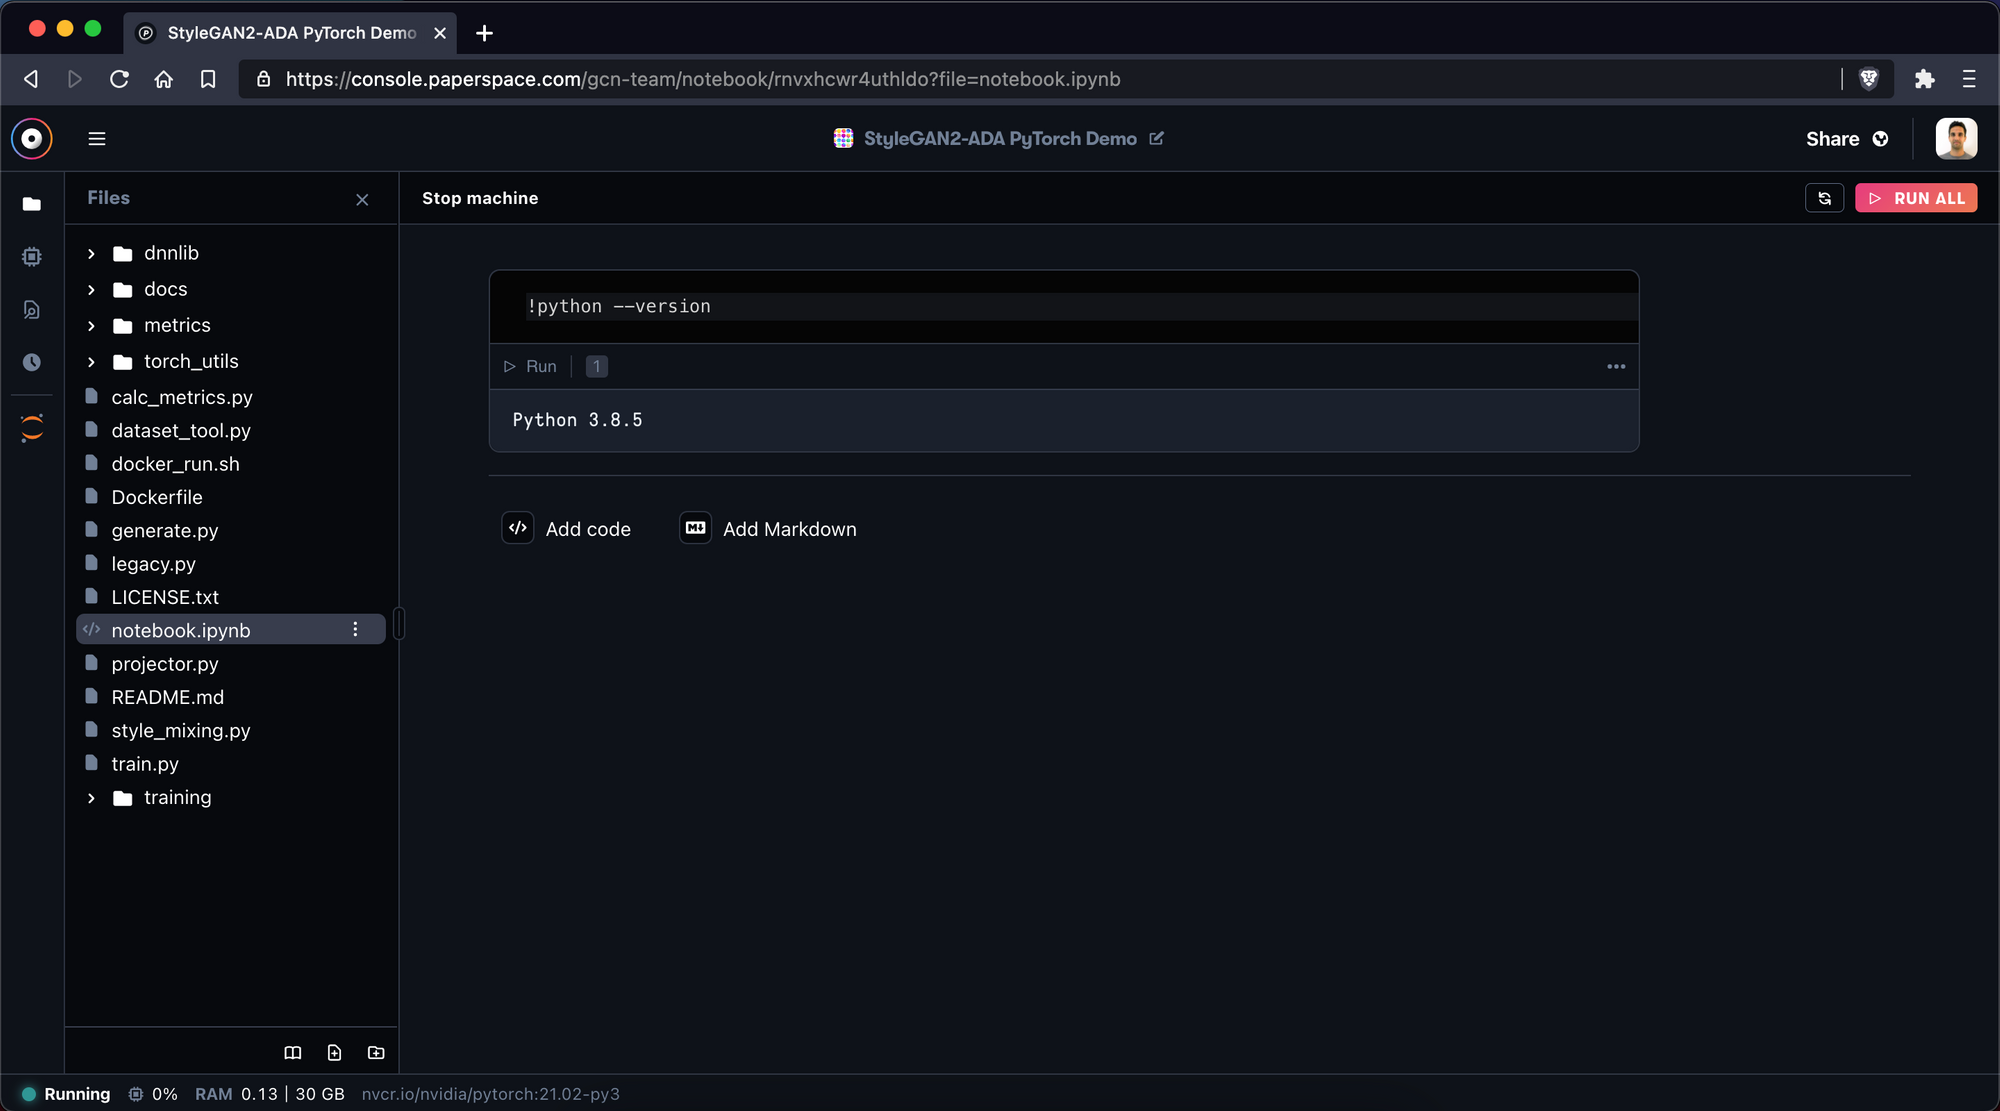
Ok great. Looks like we have Python 3.8.5 on this instance so we should downgrade to Python 3.7 to avoid any conflicts.
!conda install -y python=3.7
Here we include the -y tag to make sure we confirm the install options ahead of time. We do this because we're running this command from a notebook rather than from a terminal.
Now we check again to make sure Python is properly installed
!python --version
This should return a Python 3.7.x version. If not, try the commands above again or recreate the notebook.
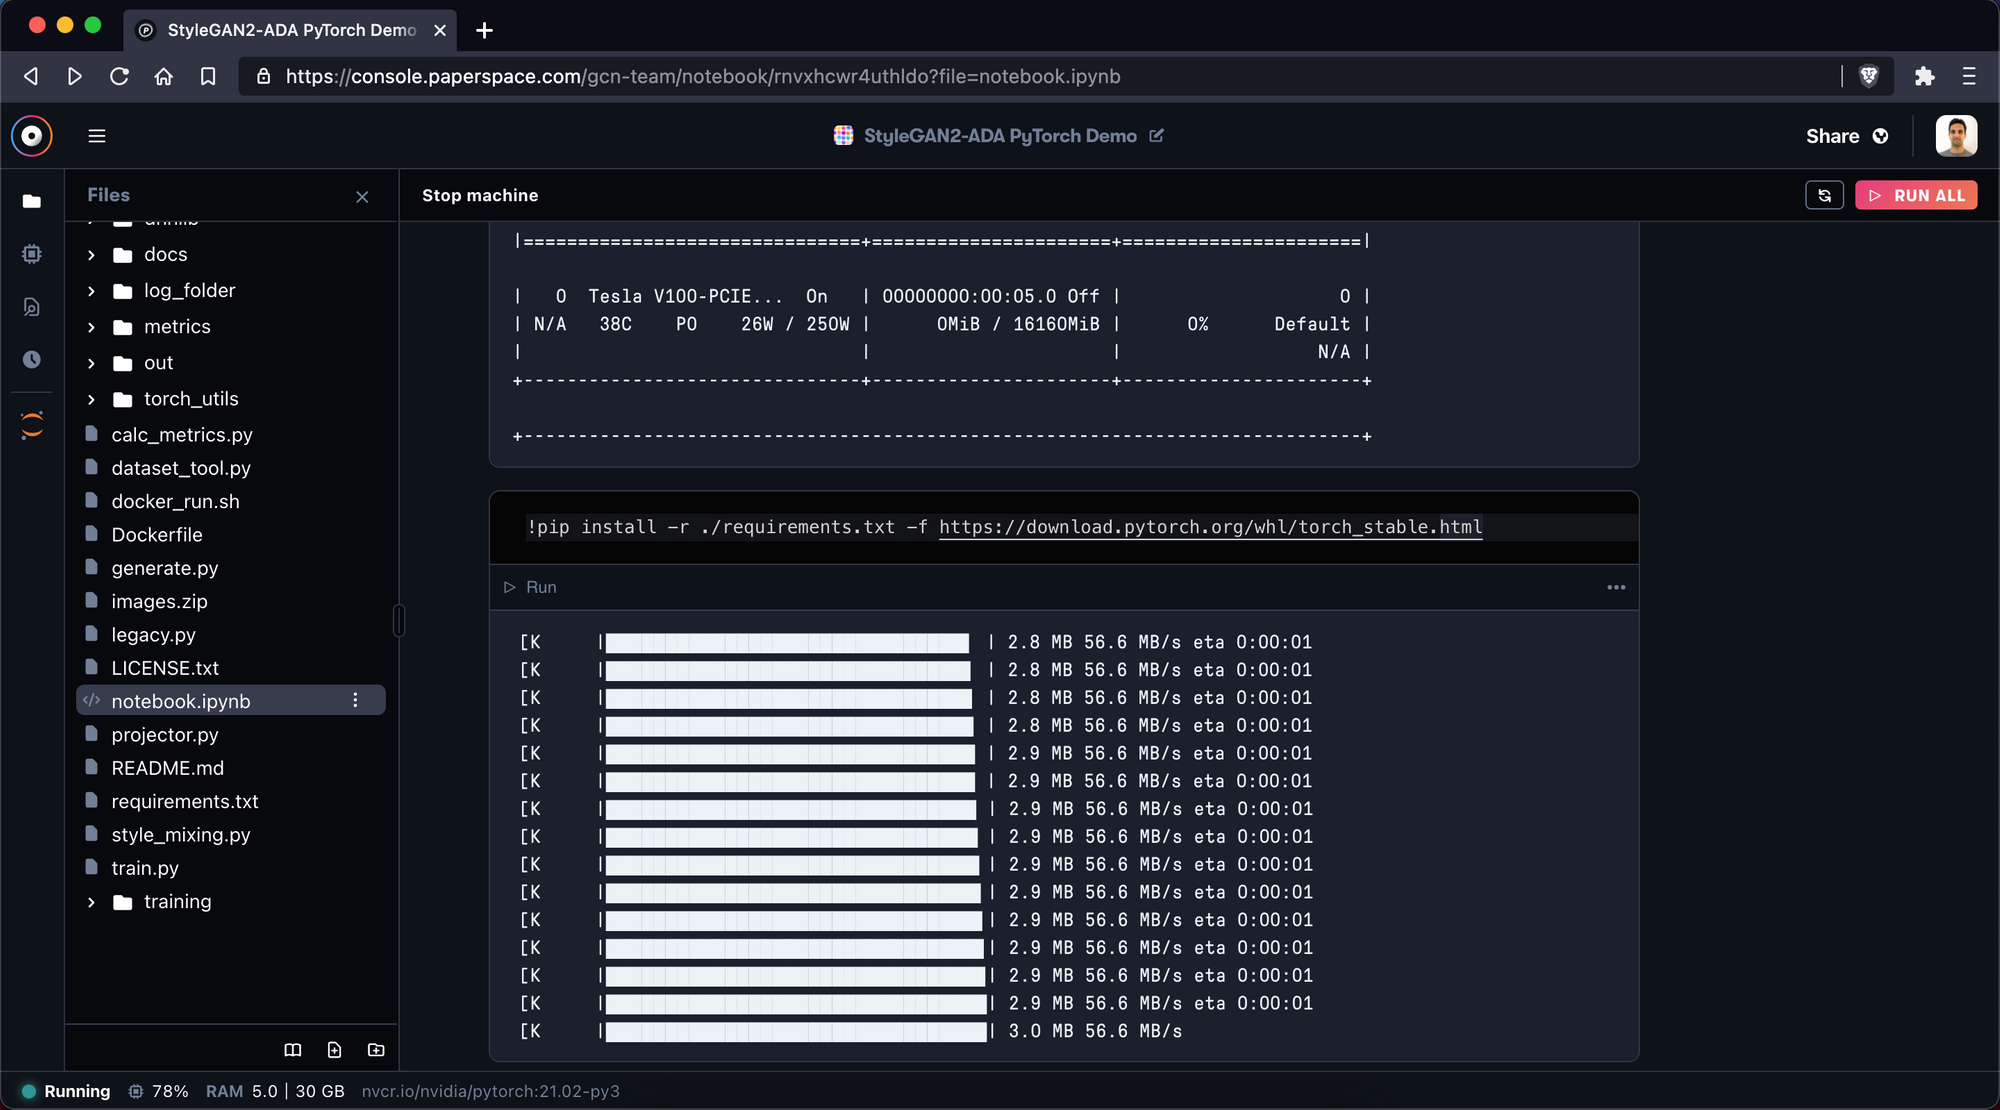
We can also check our GPU to see that our GPU setup was successful. To do that, execute the command:
!nvidia-smi
Your output should look like this:
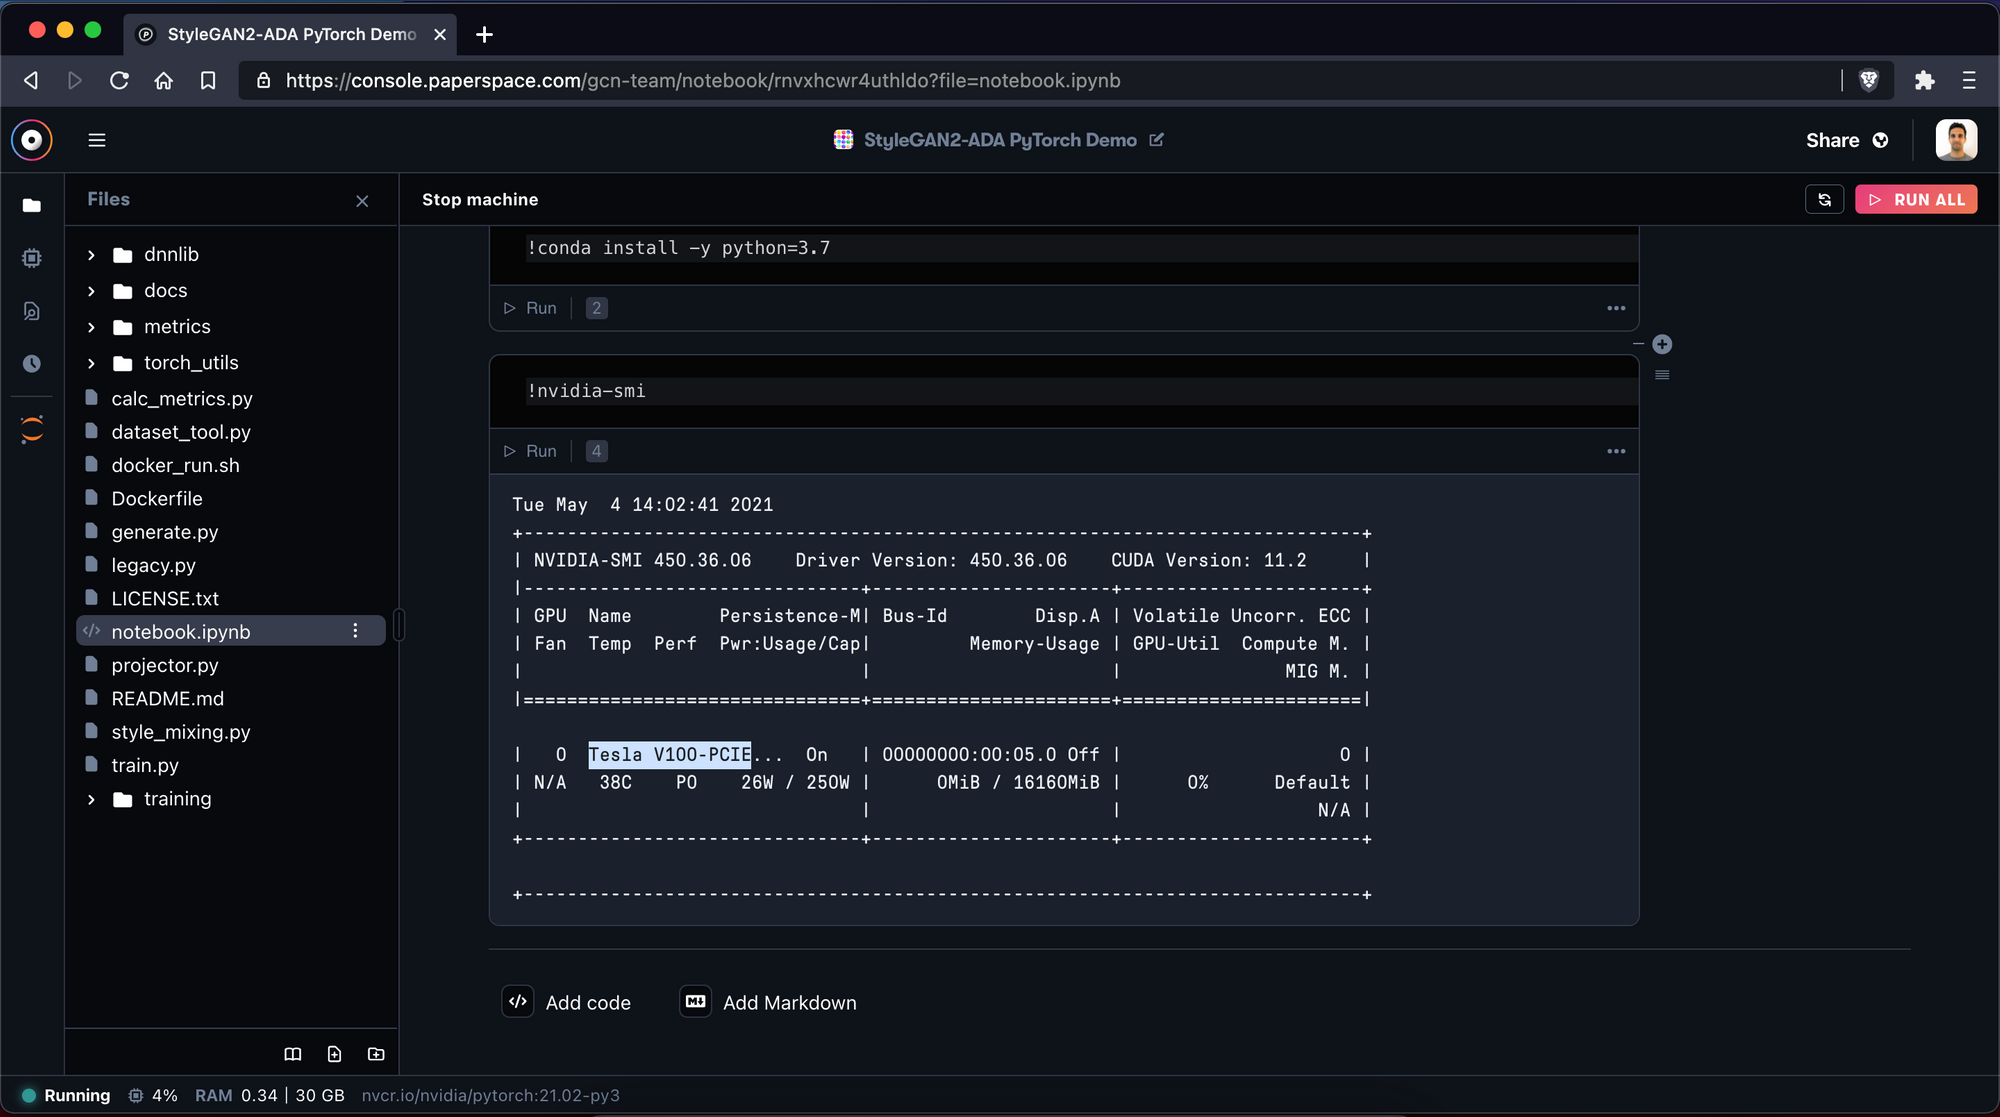
You should see the GPU name “Tesla V100-PCIE”. If you do not see this GPU (or the one you chose), recreate your notebook and make sure that you selected a GPU.
Next we are going to create a file called requirements.txt to manage our dependencies in one place.
Use the New File button again and name your file:
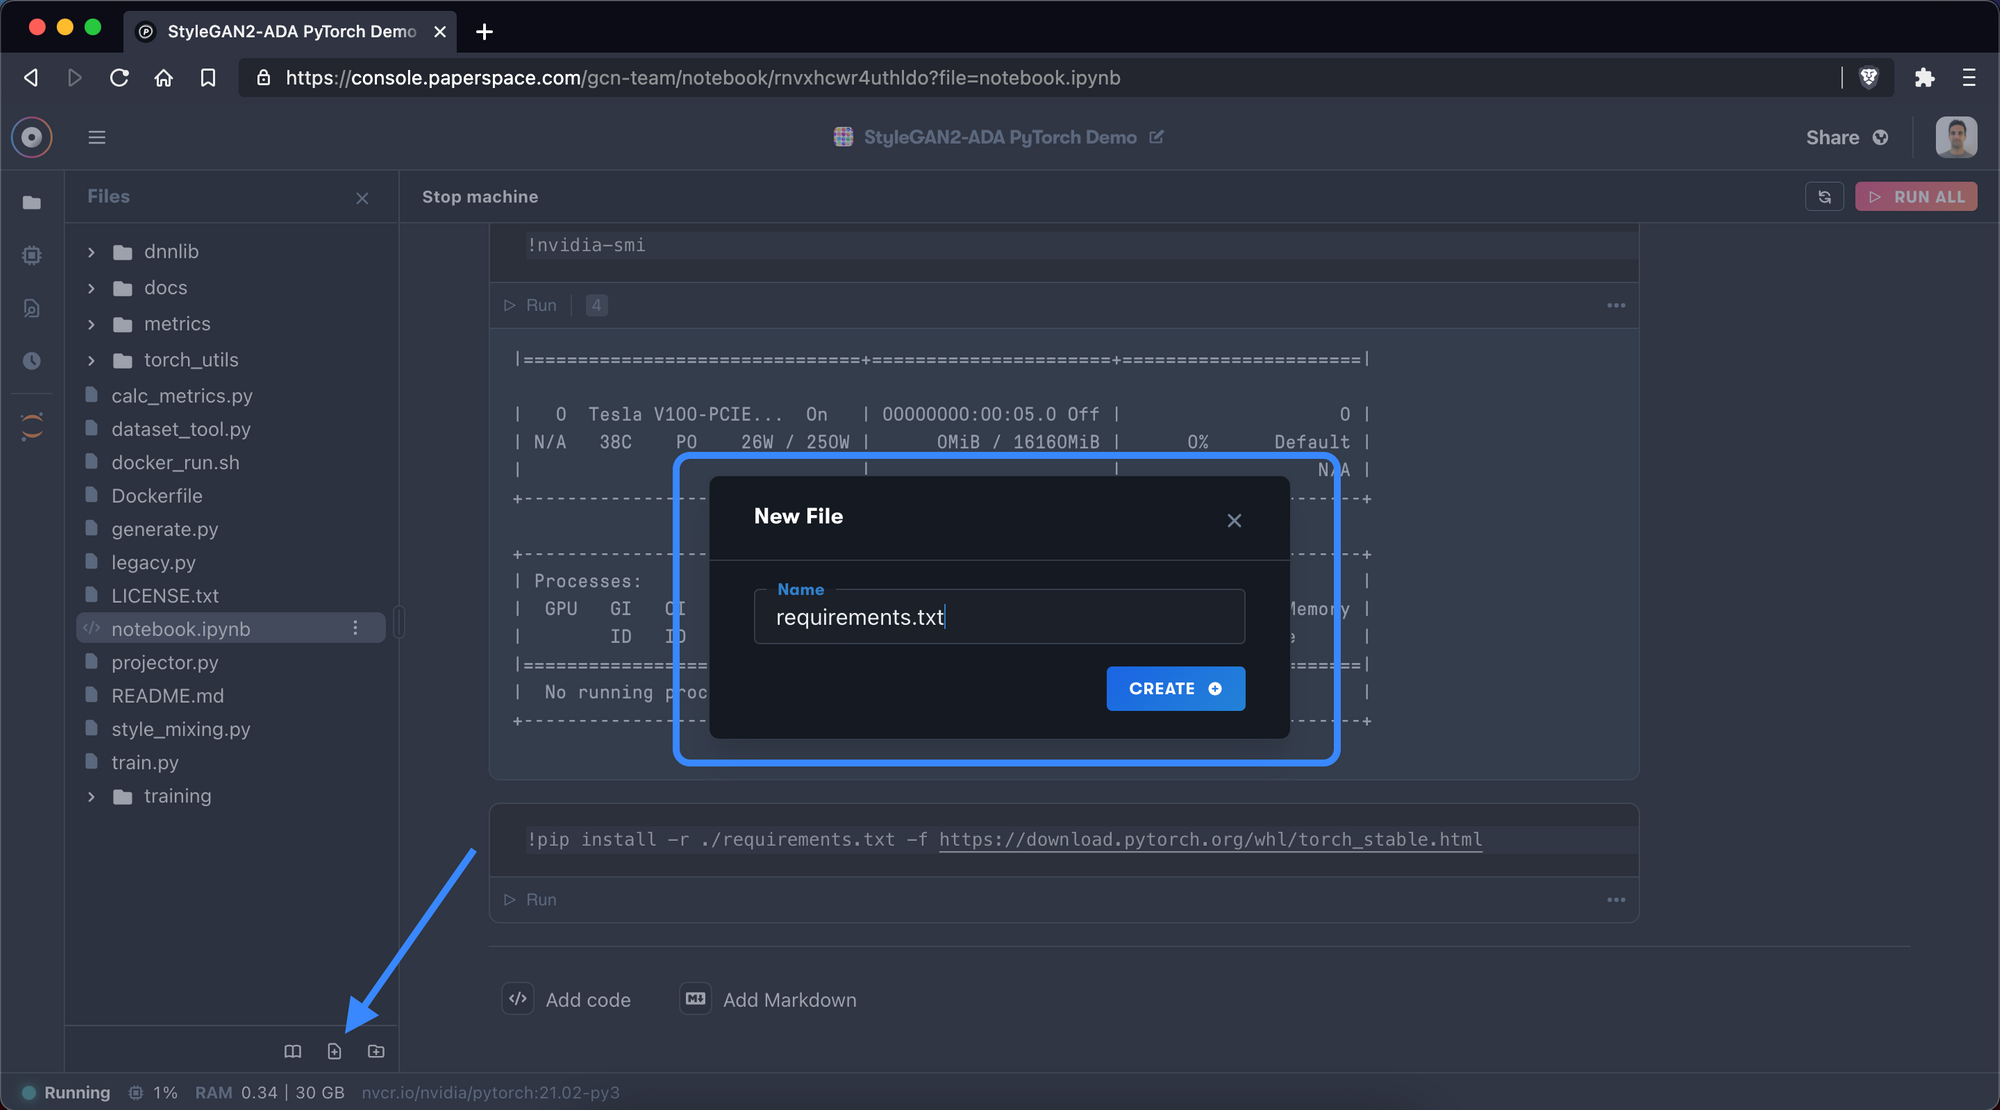
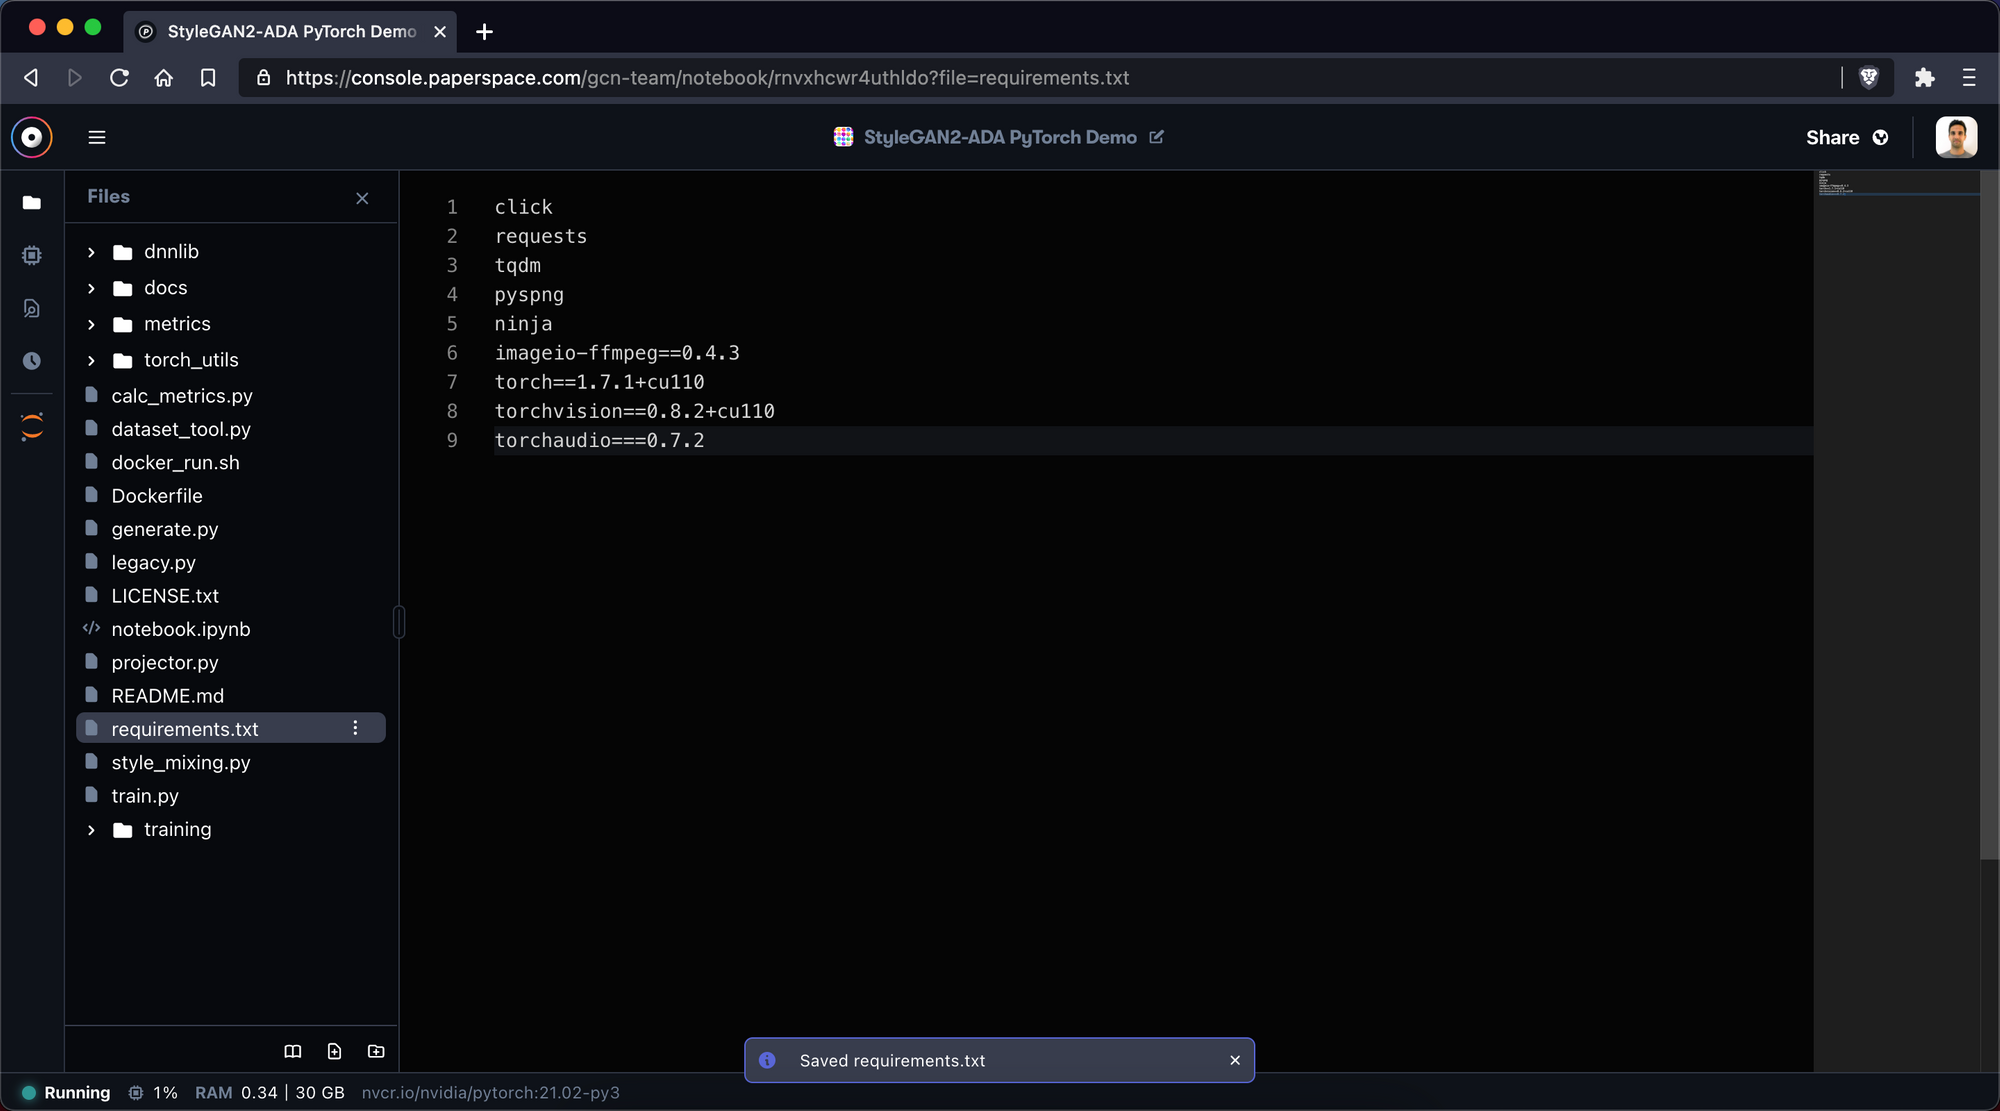
Next we swap over to the file we just created and we add our dependencies:
install
click
requests
tqdm
pyspng
ninja
imageio-ffmpeg==0.4.3
torch==1.7.1+cu110
torchvision==0.8.2+cu110
torchaudio===0.7.2
Make sure to save the file using CMD + S!
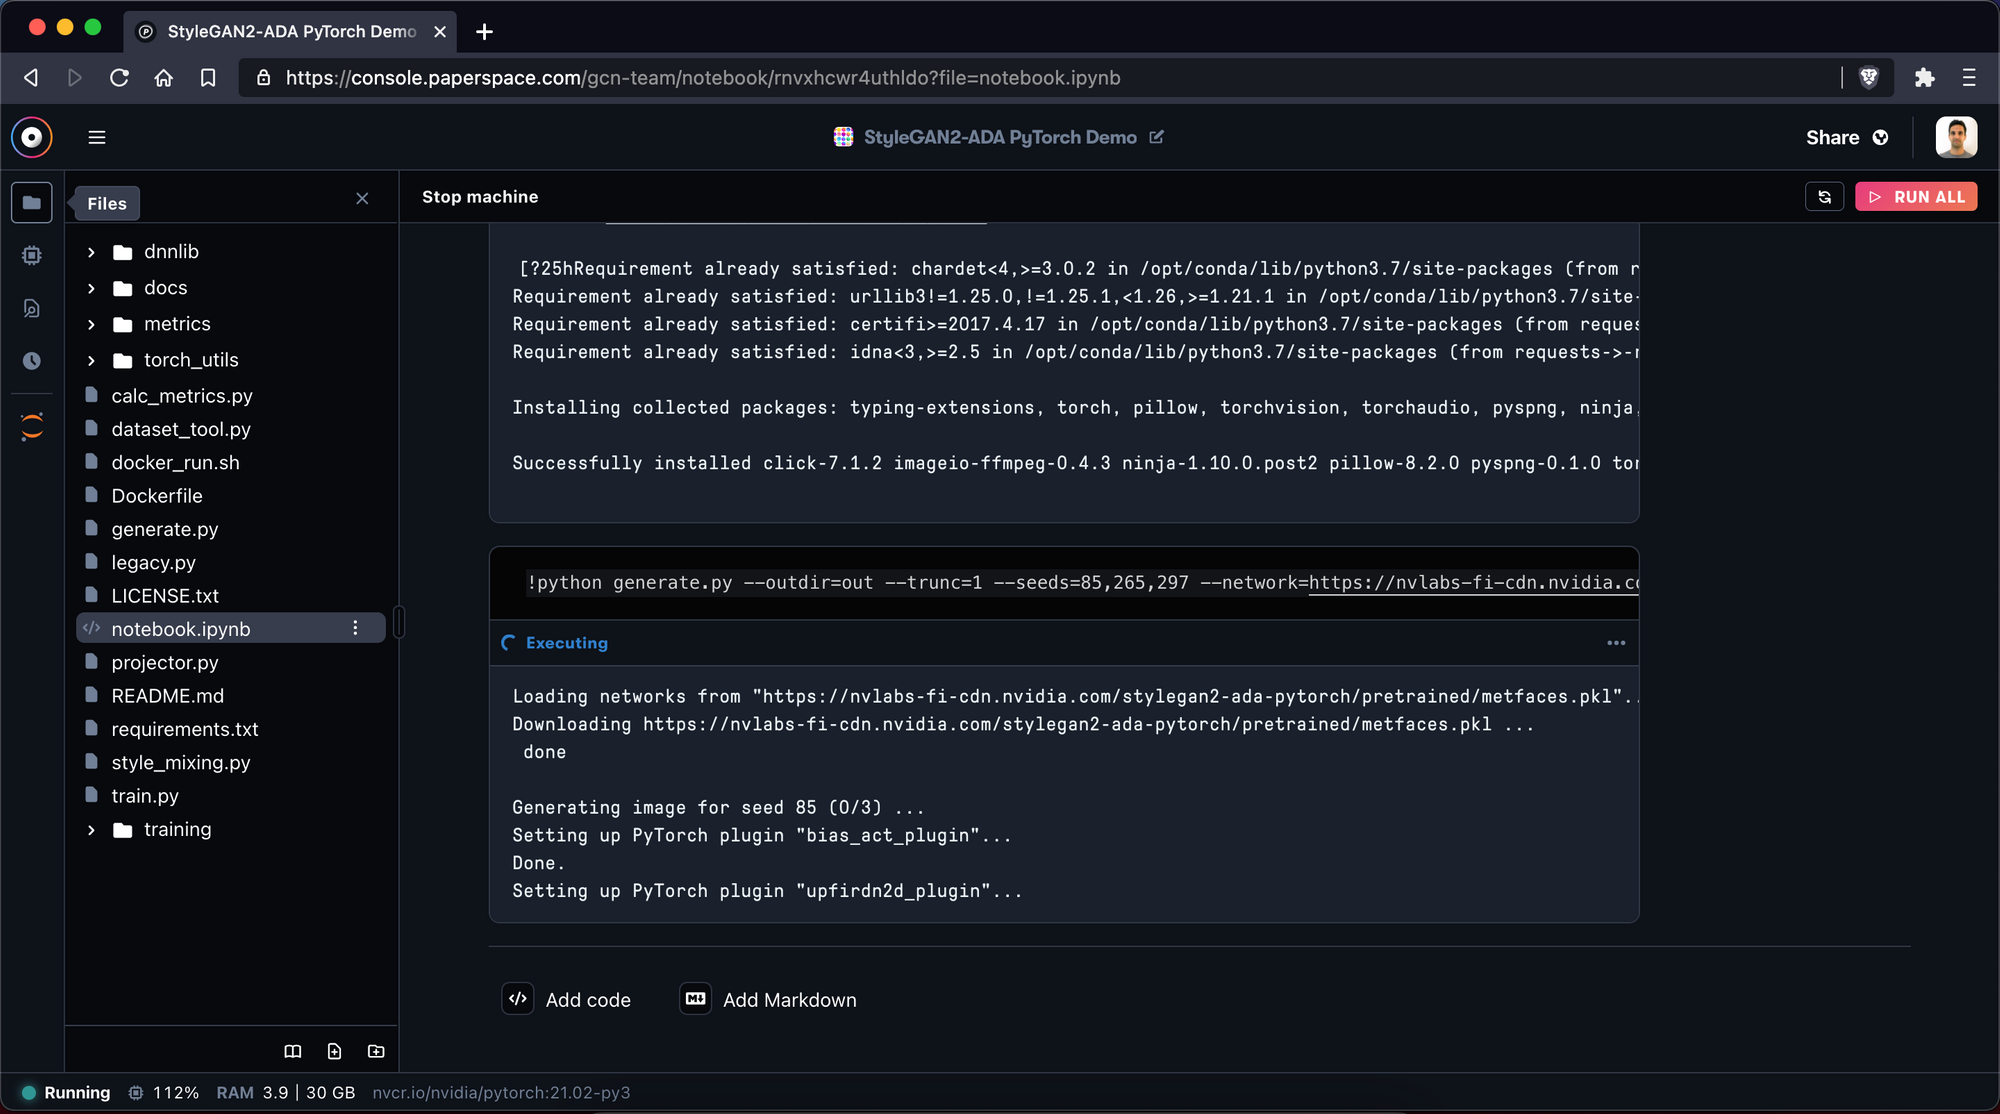
Once we have saved requirements.txt we run the command:
!pip install -r ./requirements.txt -f https://download.pytorch.org/whl/torch_stable.html
This tells the notebook to install the list of dependencies.
Great!
6. Generate seeds
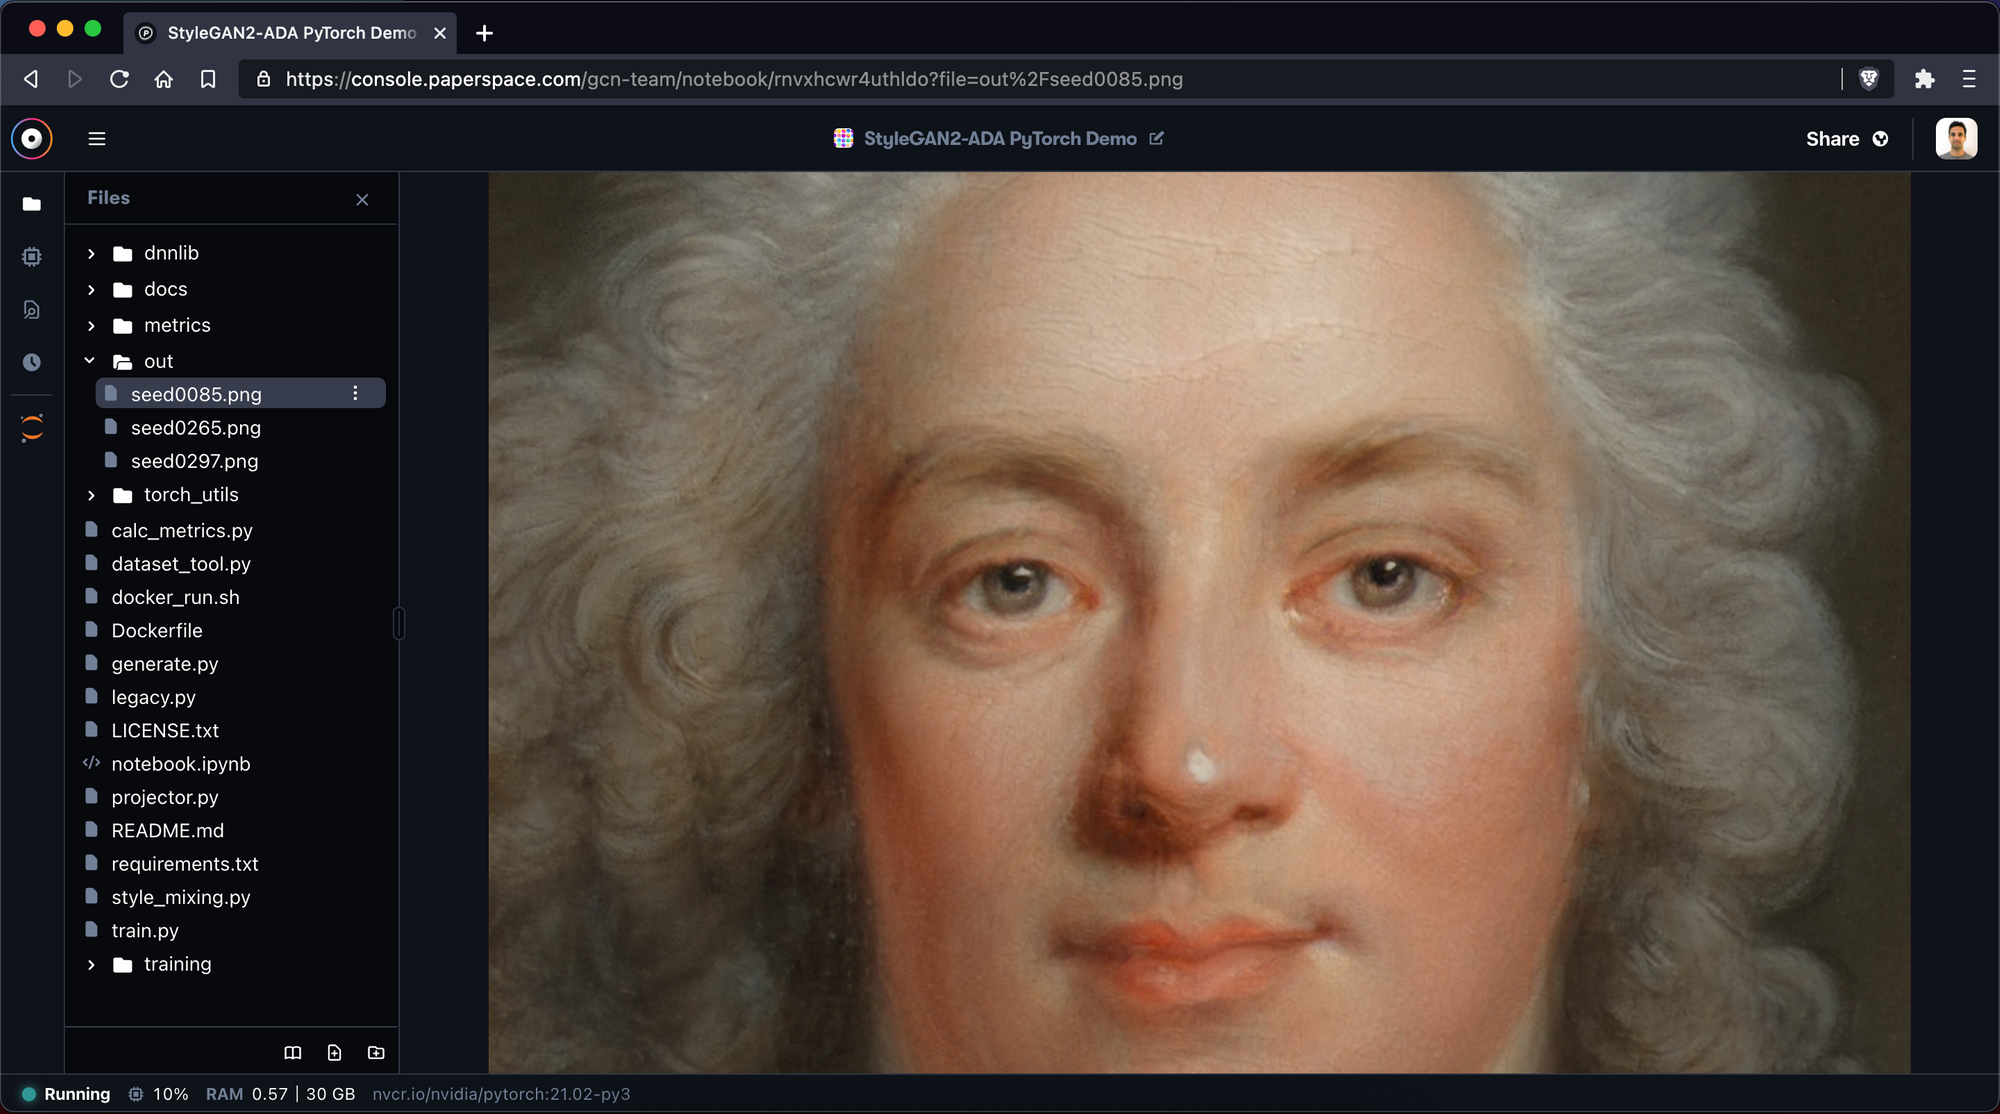
To check that everything works, let's use the pre-trained metfaces model and create a few samples:
!python generate.py --outdir=out --trunc=1 --seeds=85,265,297 --network=https://nvlabs-fi-cdn.nvidia.com/stylegan2-ada-pytorch/pretrained/metfaces.pkl
Inside the newly created folder out/, you can find your samples! Fantastic!
7. Start training
To start training on our own, we should first upload your dataset.
As mentioned before, for the purposes of this tutorial we will be using the Metfaces dataset – but please keep in mind that there is already a pretrained model that uses metfaces so training on this dataset will not necessarily be fruitful.
For convenience, we have uploaded a zip of the metfaces data here and we will use this endpoint to upload the image set into our notebook.
First, we upload the zipped dataset from the link:
!wget https://s3.amazonaws.com/ps.public.resources/ml-showcase/stylegan2-ada-pytorch/n02106166-Border_collie.zip
After uploading the zip file, we will use three variables:
raw_dataset_path = /notebooks/images.zip  # change name of images.zip
dataset_path = /notebooks/dataset_ready
log_path = /notebooks/log_folder
We then can convert our images to the right format.
The official repository offers a tool for that since the width and height should be an x² value. If your initial images are not square, this can lead to weird images.
There are different solutions for different images sizes (please read the official documentation).
For now, we will create images with a width and height of 64px:
!python dataset_tool.py --source {raw_dataset_path} --dest {dataset_path} --width=64 --height=64
This can take quite some time for higher resolutions.
After finishing, it's now time to train our network from scratch!
When we ran this tutorial on a V100, it took a couple hours to reach kimg = 1000.
So be aware that this model may take some time to train – especially if you're using something less powerful than a V100.
That said, we can now train a network from scratch by running:
!python train.py --outdir={log_path} --data={dataset_path} --gpus=1
Inside the “log_folder” folder, we can find different files. The most interesting one is the fakesxxxxxx.png file. This file shows us different samples that are created by our newly trained model.
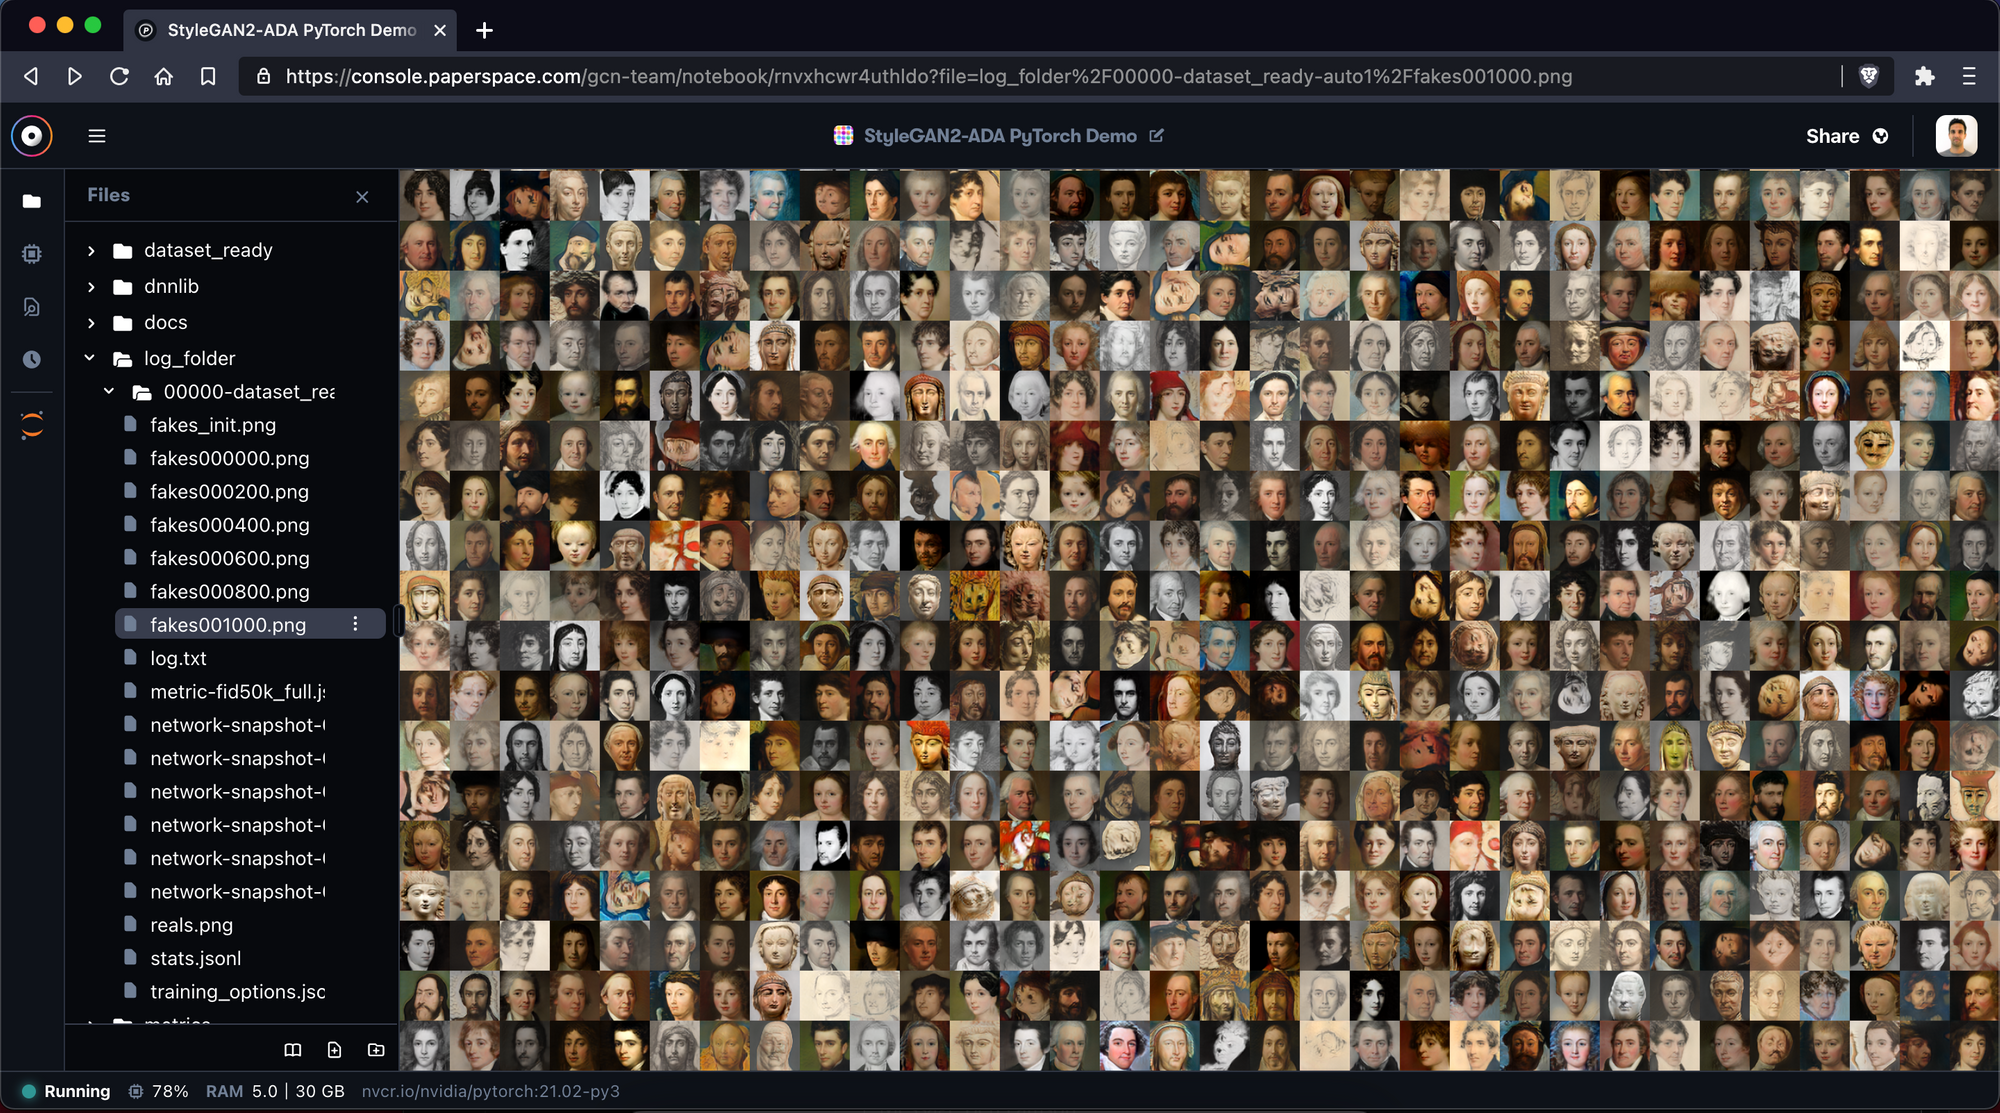
As you train the model more and more, you will see that those images get better and better.
The default is that for every 200 kimg one sample and checkpoint are created. This also means that you do not have to worry about losing your progress. You can always continue the training by using the --resume={insert_path_to_pkl} flag (find more info here).
To get the most out of your model, you should read the official documentation of the StyleGAN repository. They have very detailed explanations of the different features and how to apply them.
5. Further reading
Thank you for reading!
Besides the official repository, I highly recommend you check out the YouTube channel Artificial Images. He has a lot of good tutorials and explanations.
For a more technical understanding, I recommend reading the official research paper.