One of the great challenges with working with any advanced technology is repeatability. A machine is going to inherently fly against its own usefulness without having such a trait. As such, in the context of computing with GPUs and AI research, it is imperative for researchers to ensure that their setups are achieving peak performance; otherwise, why even bother acquiring something as powerful as an H100? Regardless of the circumstances, be they training new models or running existing AI, users must ensure the machines are optimal when choosing a new machine for business tasks.
At Paperspace, we are dedicated to providing our customers with the best machines operating at the best possible level. To do this, we need to compare how our machines perform on standardized tests or benchmarks. In today’s article, we will take a look at the MLPerf Inference Benchmark 3.0 to test the machines on Paperspace against Nvidia’s own reported performance metrics.
To follow along, we will discuss how users can recreate these tests using Paperspace Core Machines. These will all be run on a ML-in-a-Box template, which comes pre-installed with many of the packages required for this demo on a Linux machine. Be sure to visit the original repository to view methodologies and code behind the performance scores attained by Nvidia and MLCommons.
We found that the Paperspace GPUs performed comparably to the machines used by the authors of the original MLPerf tests. We were able to trial BERT, RNNT, and 3D-UNet, in both offline and server conditions and with/without Triton. Though our scores were slightly lower on some of the tests, this is still sufficient to conclude that the Paperspace GPUs perform optimally for ML inference tasks.
Jump to results.
Using MLPerf for assessing Cloud GPU performance
The MLPerf Inference Benchmark paper was first published in 2020 by Reddi et al. This set of different ML and DL performance based tests has since become the go-to resource for Nvidia GPU benchmarking. It covers an extensive variety of AI subdomains - from NLP to computer vision to audio speech recognition - which in turn allows users to get a robust idea of how their setup is performing.
The tests we will be running today are from the 3.0 release of the benchmarks. To see the full results we compare ours with, please be sure to view the original results.
Running the benchmarks
Machine setup
For this benchmark, we are going to use a 8 x H100 machine setup. This is a bare metal setup we have made to test the efficacy of the new machines, so it is worth mentioning that certain optimizations like NVLink are not enabled on this setup. If you are interested in running these tests on a 8 x A100 setup, simply follow these same instructions with that machine type selected during creation.
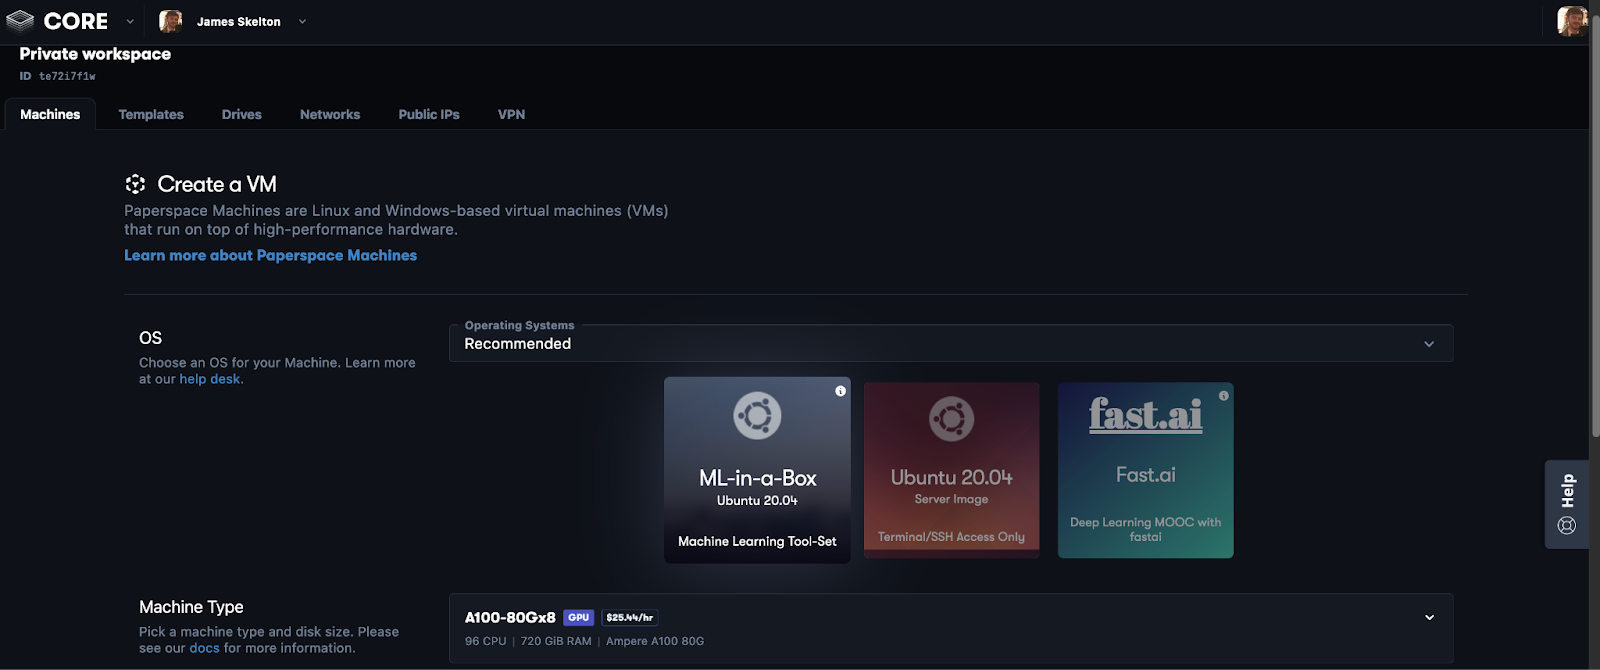
Here is a printout of the settings we used to run the benchmarks:
OS = ML-in-a-Box Ubuntu 20.04
Machine Type = H100x8
Enable NVLink = False                  (default)
Disk size = 2000GB
Region = East Coast (NY2)              (default)

Authentication = SSH key               (default)

Advanced Options

Machine Name = MLPerf 3.0 H100
Assign Machine Access = <my email>    (default)
Choose Network = Default Network      (default)
Public IP = Dynamic                   (default)
Start Immediately = True              (default)
Auto-Shutdown = False                 (default)
Take a snapshot every = day           (default)
Save the last = 1                     (default)
Cost Enable Monthly Billing = False   (default)
Note that we recommend adjusting the storage volume to reflect the amount required for the task. If you do not intend to run the full set of benchmarks, or only a subset like we are, then it will be frugal to lower the storage volume.
The 8 x H100 machines are currently only available to our Enterprise customers. Click the link below to get in contact with a representative about getting access to H100’s on Paperspace for your own projects!
Setup
Let’s walk through the steps we will need to take to initiate setup. Once we have launched our Machine from Paperspace Core, we can either use SSH to interact with the machine using our own local computer, or we can use the Desktop Beta to view the entire cloud OS in a browser window. Since we are using the bare metal installation, we are going to opt to use SSH.
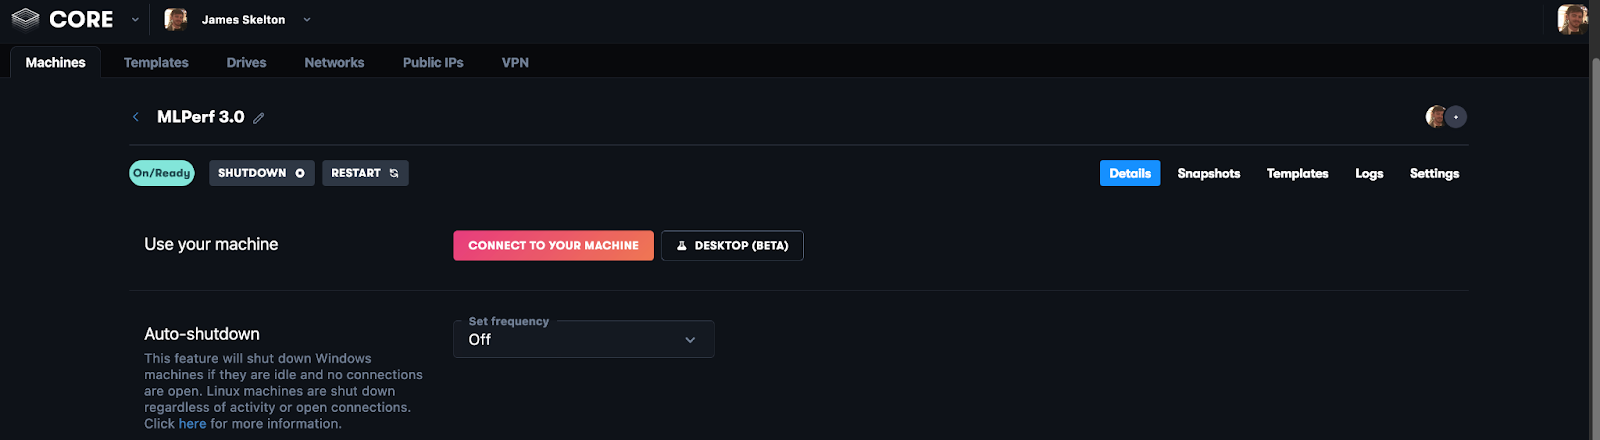
Click the red “Connect to your machine” button to receive the SSH token. From there, open up your terminal application on your local machine, and paste the values within. For more help on setting up SSH with Paperspace, visit our docs page for more information.
SSH from your local machine
Now, within our local machine we can get started with that terminal pasting.
ssh paperspace@<dynamic IP>Using the Paperspace Core Virtual Machine
Now, we will be in our VM’s terminal space. The first thing we want to do here is run `tmux` to enable multiple terminal sessions in a single window. Next, since we are a non-root user of this cloud machine, we will need to set the docker group to include the accounts username, and we change this to docker. Afterwards, we will clone the inference results repo onto the VM.
Using tmux
Enter the following code blocks into your SSH terminal to begin setup:
tmux -cc
sudo usermod -aG docker $USER
newgrp docker
git clone https://github.com/mlcommons/inference_results_v3.0
Following along with the instructions outlined in detail here, we are next going to perform necessary organization and path setup for the tests to run later. This will culminate in a docker build command that will create an image like the one found here. This step may take a few minutes.
mkdir mlperf_inference_data
export MLPERF_SCRATCH_PATH=/home/paperspace/mlperf_inference_data
mkdir $MLPERF_SCRATCH_PATH/data $MLPERF_SCRATCH_PATH/models $MLPERF_SCRATCH_PATH/preprocessed_data
cd inference_results_v3.0/closed/NVIDIA
make prebuild
Once that is done, we can begin examining the container we will be running our benchmarks on.
Container
Within the container, we will perform some simple clean up to ensure that the container is setup correctly for us to use.
echo $MLPERF_SCRATCH_PATH
ls -al $MLPERF_SCRATCH_PATH
make clean
make link_dirs
ls -al build/
Next, we will make a series of logs subdirectories to cover the selection of inference scenarios for this demo.
mkdir -p logs/download/datasets
mkdir -p logs/download/models
mkdir -p logs/preprocess
mkdir -p logs/benchmarks/offline/regular
mkdir -p logs/benchmarks/offline/triton
mkdir -p logs/benchmarks/server/regular
mkdir -p logs/benchmarks/server/triton
mkdir -p logs/accuracy/offline/regular
mkdir -p logs/accuracy/offline/triton
mkdir -p logs/accuracy/server/regular
mkdir -p logs/accuracy/server/triton
Nvidia allows us to check that the system we are on is one of those recognized by its MLPerf repository:
python3 -m scripts.custom_systems.add_custom_systemIn our case, the internal setup necessitated adding the system H100_SXM_80GBx8 to the configuration, but in general an H100 setup on an ML-in-a-Box machine should be recognized.
Download dataset
Now, the data for the full set of tests is likely prohibitively big for recreation. We suggest choosing a single dataset/model to benchmark in a domain related to the tests that will be run later, if anyone intends to recreate any of these. The `3d-unet` set in particular is massive, so we recommend just running the `bert` tests if storage is a concern. If you left your storage setting at the value we suggested at the top of this walkthrough, it should be sufficient.
The following scripts will download first the datasets and then the pre-trained models used for the benchmarks. This process should take a couple of hours to complete.
make download_data BENCHMARKS="bert"     2>&1 | tee logs/download/datasets/make_download_data_bert.log
make download_data BENCHMARKS="rnnt"     2>&1 | tee logs/download/datasets/make_download_data_rnnt.log
make download_data BENCHMARKS="3d-unet"  2>&1 | tee logs/download/datasets/make_download_data_3d-unet.log
Next, we will download the models.
make download_model BENCHMARKS="bert"     2>&1 | tee logs/download/models/make_download_model_bert.log
make download_model BENCHMARKS="rnnt"     2>&1 | tee logs/download/models/make_download_model_rnnt.log
make download_model BENCHMARKS="3d-unet"  2>&1 | tee logs/download/models/make_download_model_3d-unet.log
Preprocess data
Before we can begin the actual benchmarks themselves, we need to do some final data pre-processing. This is specifically to ensure that the testing conditions are conserved between our’s and Nvidia’s own. Namely, these processing steps can be boiled down as:
- Converting the data to INT8 or FP16 byte formats
- Restructuring the data channels (i.e. converting images from NHWC to NCHW)
- Saving the data as a different filetype, usually serialized NumPy arrays
Together, these ensure the optimal inference run conditions that mimic those used by the MLPerf official reporters.
make preprocess_data BENCHMARKS="bert"     2>&1 | tee logs/preprocess/make_preprocess_data_bert.log
make preprocess_data BENCHMARKS="rnnt"     2>&1 | tee logs/preprocess/make_preprocess_data_rnnt.log
make preprocess_data BENCHMARKS="3d-unet"  2>&1 | tee logs/preprocess/make_preprocess_data_3d-unet.log
Compile the benchmarking code
Finally, we need to compile our benchmarking code. This may take some time to complete, so please be patient as the set up runs.
make buildRunning the MLPerf 3.0 performance benchmarks
Using the code snippets below, which we will just paste into our cloud VM’s terminal, we can now finally run the benchmarking tests!
Before we continue, it is worth noting that we found that not all of the tests were able to successfully be completed for a variety of reasons we will cover below. That being said, we found the results from the working tests, namely for BERT, 3D-UNet, and RNN-T tests. Additionally, where possible, we attempted to compare speeds when the tests are run “Offline” in a closed ecosystem on the VM or in a server scenario, mimicking a more typical user experience with the model in a consumer or business setting. Finally, we compared and contrasted the speeds with an without Triton.
It is also worth mentioning that each of these tests will take around 10 minutes to run on the machine set up we are using. For 8xA100 setup, this should be a fair bit longer.
Executing the demo
To run the benchmarks, paste the following snippets into your terminal one at a time. The results will be saved to the logs folder. Run the following code cells to get the full output results.
make run RUN_ARGS="--benchmarks=bert     --scenarios=offline" 2>&1 | tee logs/benchmarks/offline/regular/make_run_bert.log
make run RUN_ARGS="--benchmarks=rnnt     --scenarios=offline" 2>&1 | tee logs/benchmarks/offline/regular/make_run_rnnt.log
make run RUN_ARGS="--benchmarks=3d-unet  --scenarios=offline" 2>&1 | tee logs/benchmarks/offline/regular/make_run_3d-unet.log
make run_harness RUN_ARGS="--benchmarks=bert --scenarios=offline --test_mode=AccuracyOnly" 2>&1 | tee logs/accuracy/offline/regular/make_run_harness_bert.log
make run_harness RUN_ARGS="--benchmarks=rnnt --scenarios=offline --test_mode=AccuracyOnly" 2>&1 | tee logs/accuracy/offline/regular/make_run_harness_rnnt.log
make run_harness RUN_ARGS="--benchmarks=3d-unet --scenarios=offline --test_mode=AccuracyOnly" 2>&1 | tee logs/accuracy/offline/regular/make_run_harness_3d-unet.logOptional: Server scenario - rather than offline, how does the testing perform through server client interactions.
make run RUN_ARGS="--benchmarks=bert     --scenarios=server" 2>&1 | tee logs/benchmarks/server/regular/make_run_bert.log
make run RUN_ARGS="--benchmarks=rnnt     --scenarios=server" 2>&1 | tee logs/benchmarks/server/regular/make_run_rnnt.log
make run RUN_ARGS="--benchmarks=3d-unet  --scenarios=server" 2>&1 | tee logs/benchmarks/server/regular/make_run_3d-unet.log
make run_harness RUN_ARGS="--benchmarks=bert --scenarios=server --test_mode=AccuracyOnly" 2>&1 | tee logs/accuracy/server/regular/make_run_harness_bert.log
make run_harness RUN_ARGS="--benchmarks=rnnt --scenarios=server --test_mode=AccuracyOnly" 2>&1 | tee logs/accuracy/server/regular/make_run_harness_rnnt.log
make run_harness RUN_ARGS="--benchmarks=3d-unet --scenarios=server --test_mode=AccuracyOnly" 2>&1 | tee logs/accuracy/server/regular/make_run_harness_3d-unet.logOptional: Offline scenario with Triton
make run RUN_ARGS="--benchmarks=bert     --scenarios=offline --config_ver=triton" 2>&1 | tee logs/benchmarks/offline/triton/make_run_bert.log
make run RUN_ARGS="--benchmarks=rnnt     --scenarios=offline --config_ver=triton" 2>&1 | tee logs/benchmarks/offline/triton/make_run_rnnt.log
make run RUN_ARGS="--benchmarks=3d-unet  --scenarios=offline --config_ver=triton" 2>&1 | tee logs/benchmarks/offline/triton/make_run_3d-unet.log
make run_harness RUN_ARGS="--benchmarks=bert --scenarios=offline --config_ver=triton --test_mode=AccuracyOnly" 2>&1 | tee logs/accuracy/offline/triton/make_run_harness_bert.log
make run_harness RUN_ARGS="--benchmarks=rnnt --scenarios=offline --config_ver=triton --test_mode=AccuracyOnly" 2>&1 | tee logs/accuracy/offline/triton/make_run_harness_rnnt.log
make run_harness RUN_ARGS="--benchmarks=3d-unet --scenarios=offline --config_ver=triton --test_mode=AccuracyOnly" 2>&1 | tee logs/accuracy/offline/triton/make_run_harness_3d-unet.logOptional: Server scenario with Triton
make run RUN_ARGS="--benchmarks=bert     --scenarios=server --config_ver=triton" 2>&1 | tee logs/benchmarks/server/triton/make_run_bert.log
make run RUN_ARGS="--benchmarks=rnnt     --scenarios=server --config_ver=triton" 2>&1 | tee logs/benchmarks/server/triton/make_run_rnnt.log
make run RUN_ARGS="--benchmarks=3d-unet  --scenarios=server --config_ver=triton" 2>&1 | tee logs/benchmarks/server/triton/make_run_3d-unet.log
make run_harness RUN_ARGS="--benchmarks=bert --scenarios=server --config_ver=triton --test_mode=AccuracyOnly" 2>&1 | tee logs/accuracy/server/triton/make_run_harness_bert.log
make run_harness RUN_ARGS="--benchmarks=rnnt --scenarios=server --config_ver=triton --test_mode=AccuracyOnly" 2>&1 | tee logs/accuracy/server/triton/make_run_harness_rnnt.log
make run_harness RUN_ARGS="--benchmarks=3d-unet --scenarios=server --config_ver=triton --test_mode=AccuracyOnly" 2>&1 | tee logs/accuracy/server/triton/make_run_harness_3d-unet.logResults
As we discussed before, a variety of these tests did not run. In certain cases, this was expected, and in others it was not. Use the table below to see which tests succeeded, and which failed, along with some short notes about why we suspect a failure to run to have occurred.
| Offline / Server | Regular / Triton | Model | Ran? | Notes |
|---|---|---|---|---|
| Offline | Regular | BERT | Yes | |
| Offline | Regular | RNN-T | No | configs ... contains unsupported Field 'start_from_device' |
| Offline | Regular | 3D-UNet | Yes | |
| Offline | Regular | ResNet50 | No | Data requires manual download |
| Server | Regular | BERT | Yes | |
| Server | Regular | RNN-T | Yes | |
| Server | Regular | 3D-UNet | No | Not supported |
| Server | Regular | ResNet50 | No | Data requires manual download |
| Offline | Triton | BERT | No | No registered config |
| Offline | Triton | RNN-T | No | configs ... contains unsupported Field 'start_from_device’ |
| Offline | Triton | 3D-UNet | No | No registered config |
| Offline | Triton | ResNet50 | No | Data requires manual download |
| Server | Triton | BERT | No | No registered config |
| Server | Triton | RNN-T | No | No registered config |
| Server | Triton | 3D-UNet | No | Not supported |
| Server | Triton | ResNet50 | No | Data requires manual download |
For the ones that did run, we are pleased to report that our speeds are similar to Nvidia’s, though perhaps a non-significant, few percentage points slower in some cases. Use the table below to compare and contrast our results with those from Nvidia’s MLPerf 3.0 Inference with Datacenter GPUs.
| Scenario | Model | Nvidia’s MLPerf 3.0 speed (inferences/s) | Our speed (inferences/s) | L atencies (ns): min, mean, max | Model accuracy (%) | Results “valid”? | Notes |
|---|---|---|---|---|---|---|---|
| Offline, regular | BERT | SQuAD v1.1 | 73,108 | N/A | 90.350 (passed) | Yes | Latencies in the offline scenario seem to be not useful, so just quoted the ones for the server scenario |
| Offline, regular | 3D-UNet | KiTS19 | 55 | N/A | 86.242 (passed) | Yes | |
| Server, regular | BERT | SQuAD v1.1 | 59,598 | 2,540,078 = 2.5ms 14,434,064,647 = 14s 29,097,308,344 = 29s | 90.350 (passed) | No | Probably because completed samples/s below scheduled samples/s, maybe due to some high latency values |
| Server, regular | RNN-T | LibriSpeech | 144,006 | 20,172,027 = 20ms 179,497,787 = 179ms 409,962,859 = 410ms | 92.566 (passed) | Yes | But these latencies are OK |
Results with NVLink
We also tested the results with NVLink activated. The speedup provided by NVLink is model- and problem-dependent, and in this case the speeds seen were similar. The printouts below show nvidia-smi with NVLink off and then on.
(mlperf) paperspace@mlperf-inference-paperspace-x86_64:/work$ nvidia-smi topo -m

      GPU0	GPU1	GPU2	GPU3	GPU4	GPU5	GPU6	GPU7	NIC0	NIC1	NIC2	NIC3	CPU Affinity	NUMA Affinity	GPU NUMA ID
GPU0	 X 	  NODE	NODE	NODE	SYS	  SYS	  SYS	  SYS	  NODE	NODE	PIX	  PIX	  0-47,96-143	  0		          N/A
GPU1	NODE	 X 	  NODE	NODE	SYS	  SYS	  SYS	  SYS	  NODE	NODE	NODE	NODE	0-47,96-143	  0		          N/A
GPU2	NODE	NODE	 X 	  NODE	SYS	  SYS	  SYS	  SYS	  NODE	NODE	NODE	NODE	0-47,96-143	  0		          N/A
GPU3	NODE	NODE	NODE	 X 	  SYS	  SYS	  SYS	  SYS	  PIX	  PIX	  NODE	NODE	0-47,96-143	  0		          N/A
GPU4	SYS	  SYS	  SYS	  SYS	   X 	  NODE	NODE	NODE	SYS	  SYS	  SYS	  SYS	  48-95,144-191	1		          N/A
GPU5	SYS	  SYS	  SYS	  SYS	  NODE	 X 	  NODE	NODE	SYS	  SYS	  SYS	  SYS	  48-95,144-191	1		          N/A
GPU6	SYS	  SYS	  SYS	  SYS	  NODE	NODE	 X 	  NODE	SYS	  SYS	  SYS	  SYS	  48-95,144-191	1		          N/A
GPU7	SYS	  SYS	  SYS	  SYS	  NODE	NODE	NODE	 X 	  SYS	  SYS	  SYS	  SYS	  48-95,144-191	1		          N/A
NIC0	NODE	NODE	NODE	PIX	  SYS	  SYS	  SYS	  SYS	   X 	  PIX	  NODE	NODE
NIC1	NODE	NODE	NODE	PIX	  SYS	  SYS	  SYS	  SYS	  PIX	   X 	  NODE	NODE
NIC2	PIX	  NODE	NODE	NODE	SYS	  SYS	  SYS	  SYS	  NODE	NODE	 X 	  PIX
NIC3	PIX	  NODE	NODE	NODE	SYS	  SYS	  SYS	  SYS	  NODE	NODE	PIX	   X

Legend:

X    = Self
SYS  = Connection traversing PCIe as well as the SMP interconnect between NUMA nodes (e.g., QPI/UPI)
NODE = Connection traversing PCIe as well as the interconnect between PCIe Host Bridges within a NUMA node
PHB  = Connection traversing PCIe as well as a PCIe Host Bridge (typically the CPU)
PXB  = Connection traversing multiple PCIe bridges (without traversing the PCIe Host Bridge)
PIX  = Connection traversing at most a single PCIe bridge
NV#  = Connection traversing a bonded set of # NVLinks

NIC Legend:

NIC0: mlx5_0
NIC1: mlx5_1
NIC2: mlx5_2
NIC3: mlx5_3
On:
(mlperf) paperspace@mlperf-inference-paperspace-x86_64:/work$ nvidia-smi topo -m

      GPU0	GPU1	GPU2	GPU3	GPU4	GPU5	GPU6	GPU7	NIC0	NIC1	NIC2	NIC3	CPU Affinity	NUMA Affinity	GPU NUMA ID
GPU0	 X 	  NV18	NV18	NV18	NV18	NV18	NV18	NV18	NODE	NODE	PIX	  PIX	  0-47,96-143	  0		          N/A
GPU1	NV18	 X 	  NV18	NV18	NV18	NV18	NV18	NV18	NODE	NODE	NODE	NODE	0-47,96-143	  0		          N/A
GPU2	NV18	NV18	 X 	  NV18	NV18	NV18	NV18	NV18	NODE	NODE	NODE	NODE	0-47,96-143	  0		          N/A
GPU3	NV18	NV18	NV18	 X 	  NV18	NV18	NV18	NV18	PIX	  PIX	  NODE	NODE	0-47,96-143	  0		          N/A
GPU4	NV18	NV18	NV18	NV18	 X 	  NV18	NV18	NV18	SYS	  SYS	  SYS	  SYS	  48-95,144-191	1		          N/A
GPU5	NV18	NV18	NV18	NV18	NV18	 X 	  NV18	NV18	SYS	  SYS	  SYS	  SYS	  48-95,144-191	1		          N/A
GPU6	NV18	NV18	NV18	NV18	NV18	NV18	 X 	  NV18	SYS	  SYS	  SYS	  SYS	  48-95,144-191	1		          N/A
GPU7	NV18	NV18	NV18	NV18	NV18	NV18	NV18	 X 	  SYS	  SYS	  SYS	  SYS	  48-95,144-191	1		          N/A
NIC0	NODE	NODE	NODE	PIX	  SYS	  SYS	  SYS	  SYS	   X 	  PIX	  NODE	NODE
NIC1	NODE	NODE	NODE	PIX	  SYS	  SYS	  SYS	  SYS	  PIX	   X 	  NODE	NODE
NIC2	PIX	  NODE	NODE	NODE	SYS	  SYS	  SYS	  SYS	  NODE	NODE	 X 	  PIX
NIC3	PIX	  NODE	NODE	NODE	SYS	  SYS	  SYS	  SYS	  NODE	NODE	PIX	   X
Closing Thoughts
With that, we have now walked through all the steps we took to benchmark our 8 x H100 bare metal GPU setup on Paperspace using the ML Perf 3.0 Inference benchmarks. Following these instructions, users should be able to relatively quickly perform their own benchmarking tests. We recommend doing this with all cloud GPU services to ensure that users are achieving the best possible performance with their Machines. Look out for a follow up in the near future on the ML Perf 3.1 results, released just last week!